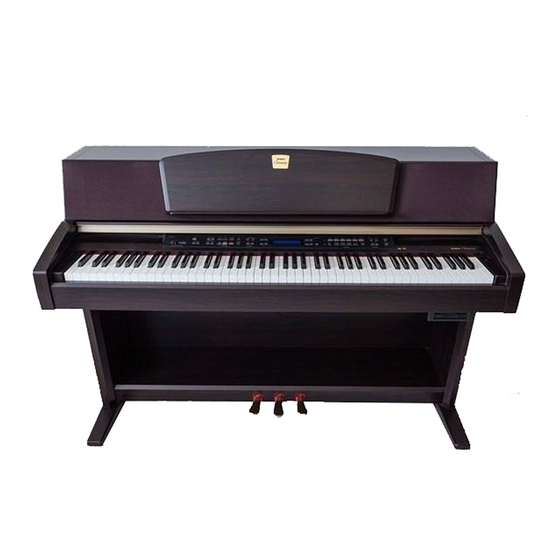
Yamaha Clavinova CLP-970 Owner's Manual
Yamaha musical instrument owner's manual clp-970, clp-970m, clp-970c
Hide thumbs
Also See for Clavinova CLP-970:
- Owner's manual (24 pages) ,
- Reference booklet (37 pages) ,
- Service manual (72 pages)
Table of Contents
Advertisement
Quick Links
IMPORTANT
Check your power supply
Make sure that your local AC mains voltage
matches the voltage specified on the name
plate on the bottom panel. In some areas a
voltage selector may be provided on the bottom
panel of the main keyboard unit near the power
cord. Make sure that the voltage selector is set
for the voltage in your area. The voltage
selector is set at 240V when the unit is initially
shipped. To change the setting use a "minus"
screwdriver to rotate the selector dial so that
the correct voltage appears next to the pointer
on the panel.
CLP-970
CLP-970M
CLP-970C
Owner's manual
Advertisement
Table of Contents

Related Manuals for Yamaha Clavinova CLP-970


Summary of Contents for Yamaha Clavinova CLP-970
- Page 1 240V when the unit is initially shipped. To change the setting use a “minus” screwdriver to rotate the selector dial so that the correct voltage appears next to the pointer on the panel. CLP-970 CLP-970M CLP-970C Owner’s manual...
-
Page 2: Special Message Section
SPECIFICATIONS SUBJECT TO CHANGE: information contained in this manual is believed to be correct at the time of printing. However, Yamaha reserves the right to change or modify any of the specifications without notice or obligation to update existing units. -
Page 3: Precautions
If it should appear to be malfunctioning, discontinue use immediately and have it inspected by qualified Yamaha service personnel. • Do not expose the instrument to rain, use it near water or in damp or wet conditions, or place containers on it containing liquids which might spill into any openings. - Page 4 If this happens, immediately turn off the power and remove the electric plug from the outlet and have the instrument inspected by qualified Yamaha service personnel. • Do not place the instrument against a wall (allow at least 3 cm/one-inch from the wall), since this can cause inadequate air circulation, and possibly result in the instrument overheating.
- Page 5 SAVING USER DATA • Always save data to a floppy disk or an external device such as the Yamaha MIDI Data Filer MDF3 fre- quently, in order to help prevent the loss of important data due to a malfunction or user operating error.
-
Page 6: Introduction
XG Voice List, MIDI Data Format, etc. * The models CLP-970M and CLP-970C will be referred to as the CLP-970 in this Owner’s Manual. • The illustrations and LCD screens as shown in this Owner’s Manual are for instructional purposes only, and may appear somewhat different from those on your instrument. -
Page 7: Table Of Contents
Re-recording TRACK 1... 43 Re-recording TRACK 1 partially... 44 Recording to [TRACK2]... 45 Recording to the third or more tracks [EXTRA TRACKS] ... 46 Other recording techniques... 46 Adding data to or recording over an existing song ... 46 CLP-970... - Page 8 Setting the volume level [Volume]*... 78 Setting the position of right and left channels [Pan]* ... 79 Fine tuning the pitch (only in Dual mode) [Detune] ... 79 Selecting the reverb type [ReverbType] ... 79 Setting the reverb depth [ReverbSend]* ... 79 CLP-970...
- Page 9 Selecting items saved at shutdown [MemoryBackUp] ... 91 Restoring the normal (default) settings [FactorySet] ... 91 Other method for restoring the normal settings ... 91 Message List ... 92 Questions about Operations and Functions ... 97 Table of contents CLP-970...
- Page 10 Table of contents Appendix ... 99 Troubleshooting... 100 Data Compatibility ... 101 Preset Voice List ... 103 Voice Combination Examples (Dual and Split) ... 105 CLP-970/970M/970C: Keyboard Stand Assembly ... 106 Index... 109 CLP-970...
-
Page 11: Application Index
Saving recorded songs to floppy disks or memory ...“Saving Recorded Songs and Handling the Files...[FILE]” on page 50 “Playing the 50 piano preset songs” on page 26 “Playing back a song” on page 57 “Turning track playback on and off ” on page 59 CLP-970... - Page 12 Connecting a computer... “Connecting a personal computer” on page 63 Assembling Assembling and disassembling the Clavinova ... “CLP-970/970M/970C: Keyboard Stand Assembly” on page 106 Quick solution What the Clavinova offers... “Application Index” on page 11 Returning to the main screen...“[EXIT] button” on page 23 Resetting the Clavinova to the default setting ...“Restoring the normal (default) settings [FactorySet]”...
-
Page 13: Handling The Floppy Disk Drive(Fdd) And Floppy Disk
Yamaha recommends that you use a commercially-avail- able dry-type head cleaning disk to clean the head about once a month. Ask your Yamaha dealer about the avail- ability of proper head-cleaning disks. • Never insert anything but floppy disks into the disk drive. -
Page 14: Maintenance
(protect position) • Data backup • For maximum data security Yamaha recommends that you keep two copies of important data on separate floppy disks. This gives you a backup if one disk is lost or dam- aged. To make a backup disk use the Copy Disk function... -
Page 15: Included Accessories
Included Accessories “50 greats for the Clavinova” Score Collection Owner’s Manual Reference Booklet Recording disk Save your recorded performance to this disk. (page 53) Bench (included or optional depending on locale) CLP-970... -
Page 16: Features
“Key- off Samples” that add the subtle sound produced when the keys are released. The CLP-970 comes much closer to the sound of a true acoustic piano. - Page 17 Save recorded songs and manage song files. (page 50) [METRONOME] [DEMO] Use the Demonstration playback metronome is available for each functions. voice. (page 24) (page 40) EXTRA CLP-970 DEMO SONG SELECT TRACK TRACK FILE TRACKS NEW SONG TRANSPOSE SONG BALANCE STOP START/...
-
Page 18: Before Using The Clavinova
To remove the music stand: Lift the music stand slightly, then pull it toward you to remove it. CLP-970 Be careful to avoid catching your fingers when opening or closing the cover. -
Page 19: Turning The Power On
WARNING! Make sure your CLP-970 is rated for the AC voltage supplied in the area in which it is to be used (voltage rating appears on the name plate on the bottom panel). In some areas, a voltage selector may be provided on the bottom panel of the main keyboard unit near the power cord. -
Page 20: Adjusting The Display Contrast
TERMINOLOGY MASTER VOLUME: The volume level of the entire keyboard sound You can also adjust the [PHONES] output level and the AUX IN input level using the [MASTER VOLUME] slider. bottom surface Optional headphones HPE-160 Yamaha head- phones. -
Page 21: Basic Operation
Basic Operation CLP-970 CLP-970... -
Page 22: Part Names
Part Names CLP-970 DEMO TRANSPOSE MASTER VOLUME C0 D0 E0 F0 G0 A0 B0 C1 D1 E1 F1 G1 A1 B1 C2 D2 E2 F2 G2 A2 B2 C3 D3 E3 F3 G3 A3 B3 C4 D4 E4 F4 G4 A4 B4 C5 D5 E5 F5 G5 A5 B5 C6 D6 E6 F6 G6 A6 B6 C7 Top panel [POWER]...P19... - Page 23 GM-compatible tone generator or synthesizer from any manufacturer. XG Format XG is a new Yamaha MIDI specification which sig- nificantly expands and improves on the “GM Sys- tem Level 1” standard with greater voice handling capacity, expressive control, and effect capability while retaining full compatibility with GM.
-
Page 24: Listening To The Demonstration Tunes
Refer to the table below for voice names and corresponding demo songs. Demonstration tunes Voice group PIANO E.PIANO/BASS HARPSICHORD MALLET ORGAN STRINGS/CHOIR CLP-970 DEMO SONG SELECT NEW SONG TRANSPOSE SONG BALANCE MASTER VOLUME Procedure Engage the demo mode. Press the [DEMO] button to engage the demo mode. - Page 25 Stop the playback. Press the button of the voice group being played or the [STOP] button. Exit from demo mode. Press the [DEMO] or [EXIT] button to exit from demo mode. Listening to the Demonstration Tunes CLP-970...
-
Page 26: Listening To 50 Piano Preset Songs
(page 28). You can also refer to the included “50 greats for the Clavinova” that contains the scores for 50 piano preset songs. Playing the 50 piano preset songs DEMO SONG SELECT CLP-970 NEW SONG TRANSPOSE SONG BALANCE MASTER VOLUME Procedure Select a song. -
Page 27: Adjusting The Tempo
Whenever you select a new preset song, the tempo is automatically reset to the song’s original value. TERMINOLOGY Default screen: The default screen is a voice select screen (page 30) that appears when you turn on the power to the Clavinova. CLP-970... -
Page 28: Practicing A One-Hand Part Using 50 Preset Songs
(the part that is turned off) on the keyboard. The right-hand part is played by [TRACK 1] and the left-hand part is played by [TRACK 2]. DEMO SONG SELECT CLP-970 NEW SONG TRANSPOSE SONG BALANCE... - Page 29 You can also assign a phrase in a song to repeatedly practice that part. Refer to the [FromToRepeat] option in the “SONG SETTING” menu on page 75. Listening to 50 Piano Preset Songs Resetting the part play- back Both parts are automatically turned ON whenever you select a new song. CLP-970...
-
Page 30: Selecting And Playing Voices
Selecting and Playing Voices Selecting Voices CLP-970 DEMO SONG SELECT NEW SONG TRANSPOSE SONG BALANCE MASTER VOLUME Procedure Select a voice group. Press one of the MAIN voice group buttons (upper row). Select a voice. Use the A [–]/[+] buttons to select a voice. -
Page 31: Using The Pedals
Pedal”, “M Pedal”, and “L Pedal” parameters in the “VOICE SETTING” menu. (See page 81, 82.) The center and left pedals can also be assigned to song start/stop operation (START/PAUSE function) via the “PedalStart/Pause” parameter in the “OTHER SETTING” menu (on page 89). CLP-970... -
Page 32: Adding Variation To The Sound [Brilliance]/[Reverb]/[Chorus]
Selecting and Playing Voices Adding variation to the sound [BRILLIANCE]/[REVERB]/[CHORUS] The Effect function enables you to add expression to the sound. The Clavinova effects include Brilliance, Reverb, and Chorus. CLP-970 DEMO SONG SELECT NEW SONG TRANSPOSE SONG BALANCE MASTER VOLUME [BRILLIANCE] You can use this control to adjust the brilliance of the tone and change the tonality to suit your preference. - Page 33 Reverb Send parameter. You can also turn chorus on or off via the Chorus On Off parameter. (See page 80.) Normal Setting The normal chorus on/off setting is different for each voice. CLP-970...
-
Page 34: Transposition
“5,” playing key C produces pitch F. In this way, you can play the song as if it were in C major, and the Clavi- nova will transpose it to the key of F. You can also change the key signature of playback songs, in addition to your own performance. CLP-970 DEMO SONG SELECT... -
Page 35: Combining Two Voices (Dual Mode)
Refer to “Voice Combination Exam- ples (Dual and Split)” on page 105 for examples of effective voice combinations. The numbers on the upper row indicate the steps in Dual mode using voices from different groups. CLP-970 DEMO SONG SELECT TRACK... - Page 36 To use the identical voices, press the B [–]/[+] buttons once. To use different voices within the same voice group, press the B [–]/[+] but- tons repeatedly. Exit Dual mode and return to normal play mode. Press any MAIN voice group button. CLP-970...
-
Page 37: Splitting The Keyboard Range And Playing Two Different Voices (Split Mode)
For example, you can play a bass part using the Wood Bass or Electric Bass voice with the left hand, and a melody with the right hand. Refer to “Voice Combination Examples (Dual and Split)” on page 105 for examples of effective voice combinations. CLP-970 DEMO SONG SELECT... - Page 38 BASS HARPSICHORD HARPSICHORD/MALLET MALLET ORGAN ORGAN/STRINGS STRINGS/CHOIR Specify the split point (the border between the right- and left-hand range). The normal setting of the split point is “F 2.” CLP-970 Voice name LEFT GrandPiano1 GrandPiano2 E.Piano1 E.Piano2 SynthPiano WoodBass ElectricBass Bass&Cymbal...
- Page 39 Exit Split mode and return to normal play mode. Press the voice group button that you pressed for the left- hand range. In Split mode, you can use Dual mode (see page 35) for the MAIN and LEFT ranges respectively. Selecting and Playing Voices CLP-970...
-
Page 40: Using The Metronome
Selecting and Playing Voices Using the metronome The Clavinova is built-in metronome (a device that keeps an accurate tempo) is a convenient feature for practice. DEMO SONG SELECT CLP-970 NEW SONG TRANSPOSE SONG BALANCE MASTER VOLUME Procedure Start the metronome. -
Page 41: Recording Your Performance
Refer to the “Message List” on page 92 for an explanation of each message, appropriate actions to take, and troubleshooting information. Recording a New Song Recording to [TRACK 1] DEMO SONG SELECT TRACK TRACK CLP-970 NEW SONG SONG BALANCE TRANSPOSE STOP START/ PAUSE SYNCHRO START... - Page 42 To stop recording, press the [STOP] button. The Clavinova locates the top of the song. The [TRACK 1] indicator lights up in green. (Record mode is auto- matically cancelled.) CLP-970 ] buttons once to ] buttons once. Measure number in recording NOTE Set the tempo in Step 3.
-
Page 43: Re-Recording Track 1
Follow the procedure from Step 3 on page 42 to re-record. The original performance data will be overwritten by new performance data. Recording Your Performance NOTE To erase recorded data from a track, use the Channel Clear parameter in the “SONG SETTING” menu. (See page 75.) CLP-970... -
Page 44: Re-Recording Track 1 Partially
Norm (Normal) — The existing data will be erased after re-recording starts. Key On — Data that exists prior to the point where you start playing a note will not be erased. CLP-970 If the playback screen is not displayed, press one of the SONG SELECT buttons once. -
Page 45: Recording To [Track2]
(To stop recording, press the [REC] button again or press the [STOP] button.) Follow the procedure beginning with Step 4 on page 42. Recording to [TRACK2] This section explains how to record another part on the second track. CLP-970 DEMO SONG SELECT TRACK TRACK... -
Page 46: Recording To The Third Or More Tracks [Extra Tracks]
41. To select a song from commercial music data sold in stores or from already-recorded data, see Steps 1 and 2 on page 57. To continue recording, follow the procedure described in “Recording a New Song” from page 41 to 46. CLP-970 select a recording track (3-16) NOTE... -
Page 47: Changing A Voice Or Tempo After Recording
Change the tempo in Step 4. CAUTION The edited settings (except for the tempo setting) will be saved in memory and you will not be able to restore the previous settings. Proceed with caution. CLP-970... -
Page 48: Adjusting The Volume Balance Between Playback And Your Performance [Song Balance]
Setting range: 127:127 – 1:127 (Lowering the volume of the playback sound) 127:127 – 127:1 (Lowering the volume of the performance sound) Normal setting: 127:127 CLP-970 Commercially-available song data contains a large amount of data. If you are using such songs, be sure to adjust the song balance. -
Page 49: Recording In Dual Or Split Mode
Switching between Dual and Split mode in a song is not recorded. Dual Split EXTRA EXTRA TRACK1 TRACK2 TRACKn TRACKn TRACKn TRACK1 TRACKn TRACK2 TRACKn+1 TRACKn – – Recording Your Performance Split+Dual EXTRA TRACK1 TRACK2 TRACKn TRACK1 TRACKn TRACK2 TRACKn +1 TRACK3 TRACKn +2 TRACK4 TRACKn +3 CLP-970... -
Page 50: Saving Recorded Songs And Handling The Files
In this manual, a song located in a song recorded in Current memory, is referred to as a “Current song,” a song in Storage memory is a “Memory song,” and a song on a floppy disk is a “Disk song.” Clavinova Preset song memory CLP-970 Parameter name SaveToMemory SaveToDisk DeleteSong... -
Page 51: Basic File Operation
A message (information or confirmation dialog) sometimes appears on the screen to facilitate operation. Refer to the “Message List” on page 92 for an explanation of each message, appropriate actions to take, and troubleshooting information. [FILE] CLP-970 DEMO SONG SELECT TRACK... -
Page 52: Saving Recorded Or Other Songs To Clavinova Storage Memory
“Memory” and “xx” is a number. If Storage memory contains one or more songs, and you save a new song, the Clavi- nova automatically sorts the songs alphabetically and renumbers them. CLP-970 • You can change the type of characters on the screen using the Char- acterCode parameter. -
Page 53: Saving Recorded Or Other Songs To Floppy Disk
“Song Changed Save?”. This means “A song has been edited. Do you wish to save the change?” Press the B [– (NO)] button. The Current song is deleted and a blank “NewSong” is selected. CLP-970... -
Page 54: Renaming A Song
See page 51 for basic operation information. The following is a detailed pro- cedure for Step 4. Name the song as described in the [SaveToMemory] section (page 52). CLP-970 If you select a Memory song or Disk song, deleting the song does not erase song data from Current memory. -
Page 55: Copying Data From One Floppy Disk To Another
(2DD or 2HD) for the desti- nation disk as the source disk. TERMINOLOGY Insrt Target Disk: Insert the destination (tar- get) disk. CAUTION Do not turn off the power or eject the floppy disk while the screen displays “Execut- ing.” CLP-970... -
Page 56: Formatting A Floppy Disk
You can change the type of characters that appear on screen. The default setting is “International.” To input katakana, change this setting to “Japanese.” Options: International, Japanese Character list [International] [Japanese] CLP-970 Do not turn off the power or eject the floppy disk while the screen displays “Execut- ing.” CAUTION... -
Page 57: Playing Back Recorded Songs And Commercially-Available Music Data
You can also play the keyboard along with the playback. Playing back a song To play back a song from a floppy disk, insert the disk into the disk drive. CLP-970 DEMO SONG SELECT TRACK TRACK... - Page 58 To stop playback in the middle of a song, press the [STOP] button. You can also pause playback by pressing the [START/PAUSE] button. Playback stops when you press the button. CLP-970 The bar number in playback ] buttons to return to the song...
-
Page 59: Turning Track Playback On And Off
3.5-inch 2HD disks in the MS-DOS 1.44MB format Sequence format SMF (Standard MIDI File) formats 0 and 1 ESEQ Performance data recorded on the CLP-970 is saved in the SMF for- mat 0 in a floppy disk. When the Clavinova plays back commercially-avail-... - Page 60 Song data recorded on other instruments When you play on the CLP-970 song data recorded on the Clavinova CVP- 109, 107, 105, 103, 98, 96, 94, 92, or CLP-870, you may notice a slight differ- ence in volume balance, although the voices sound almost identical. You can also play back song data from the Yamaha Disklavier player piano.
-
Page 61: Connections
Use audio cables and adapter plugs with no resis- tance. The Clavinova’s [MASTER VOLUME] slider setting does not affect the signal output from the AUX OUT jacks. CLP-970... - Page 62 HOST SELECT switch This switch should be set according to the type of connected MIDI device or personal computer. (Refer to “Connecting a personal computer” on page 63 for more information.) CLP-970 Plug shape depends on the divece. AUX OUT (OUTPUT)
-
Page 63: Connecting A Personal Computer
English) at the following Internet address: Clavinova Web site: http://www.yamaha.co.jp/english/product/cl/ Yamaha Manual Library (Electronic Musical Instruments): http://www2.yamaha.co.jp/manual/english/ (You need to register first. Check the Clavinova web page.) There are the three methods by which to connect the Clavinova to a personal computer: 1. - Page 64 To transfer data via the computer’s serial port and the Clavinova’s TO HOST jack, you need to install a specified MIDI driver (Yamaha CBX driver for Windows 95/98). You can download this driver from the following XG Library on the Yamaha Web site: http://www.yamaha-xg.com...
- Page 65 According to the type of computer you connect, use one of the following serial cables. • Windows (with a serial port of D-sub 9-pin) 8-pin mini DIN plug D-sub 9-pin plug (Yamaha CCJ-PC2 or equivalent) mini DIN 8 (CTS) D-sub...
- Page 66 Use a MIDI interface device to connect a computer to the Clavinova using special MIDI cables. MIDI PC-1 PC-2 HOST SELECT MIDI MIDI MIDI interface Windows Clavinova HOST SELECT switch setting Set the Clavinova HOST SELECT switch to “MIDI.” CLP-970 Clavinova MIDI THRU MIDI MIDI MIDI MIDI MIDI interface Macintosh...
- Page 67 UX256) on the computer, and connect the UX256 to the Clavinova using a serial cable or MIDI cables. For more information, refer to the instruction manual for the UX256. UX256 Yamaha USB-MIDI interface. Connecting the UX256 to the Clavinova using a serial cable USB cable...
- Page 68 CLP-970...
-
Page 69: Detailed Settings
Detailed Settings CLP-970 CLP-970... -
Page 70: Detailed Settings
Position of right and left channels* Fine pitch adjustment (only in Dual mode) Reverb type Reverb depth* Chorus type Chorus depth* Chorus on/off Variation effect type Variation effect depth* Touch sensitivity* CLP-970 Parameter name Reference page Quantize QuickPlay ChannelListen ChannelClear FromToRepeat PhraseMark SongRepeat... - Page 71 Detailed Settings RPedal MPedal LPedal AuxPedal Parameter name Reference page MidiOutChannel MidiInAChannel MidiInBChannel LocalControl MidiOutSelect ReceiveParameter TransmitParameter SongBulkDump InitialSetup VoiceBulkDump Parameter name Reference page TouchResponse Tune PianoTuningCurve Scale StringResonanceDepth SustainSamplingDepth VivraphoneRotorSpeed VibraphonePedalMode PedalStart/Pause AuxPedalType HalfPedalPoint PitchBendRange XGAlternative MemoryBackUp FactorySet CLP-970...
-
Page 72: Making Detailed Settings
Detailed Settings Making detailed settings METRONOME [SETTING] DEMO SONG SELECT CLP-970 NEW SONG TRANSPOSE SONG BALANCE MASTER VOLUME [SONG SETTING] Procedure Access a setting menu. Press the desired setting button ([SONG SETTING], MET- RONOME [SETTING], [VOICE SETTING], [MIDI SETTING], or [OTHER SETTING]) to access the corresponding setting menu. - Page 73 Press the B [+(YES)] button to execute the setting. The Clavinova dis- plays “Executing” and saves the data. When the operation is complete, it displays “Completed” for three seconds, then returns to the previ- ous screen. Close the setting menu. Press the [EXIT] button. Detailed Settings CLP-970...
-
Page 74: Detailed Settings For Recording And Playback [Song Setting]
You can make detailed settings for the selected song. First, select the desired song from preset songs (“PresetSong”), memory songs (“MemorySong”), or disk songs (“DiskSong”) (see page 57). Procedure Select the desired song and press the [SONG SETTING] button to access the “Song Setting” menu. CLP-970 DEMO SONG SELECT TRACK... -
Page 75: Specifying Whether Playback Starts Immediately Along With The First Voicing [Quickplay]
When you select another song, the specified range is auto- matically cancelled and the Repeat function is turned off. Press this button to delete data. Use these buttons to select “Repeat On.” Use these buttons to specify the end point of the repeated range. CLP-970... -
Page 76: Playing Back The Phrase Specified By The Phrase Number [Phrasemark]
If you select any song other than those from the “Disk Orchestra Collection” or one of the “XG for Piano” disks, you can select only “Off.” CLP-970 Playing back a song repeatedly [SongRepeat] You can repeatedly play back all songs or a single song selected from the 50 preset songs or from the floppy... -
Page 77: Detailed Settings For The Metronome Metronome [Setting]
METRONOME [SETTING] You can set the time signature, volume level, and voice of the Clavinova metronome. Procedure Press the [METRONOME SETTING] button to access the Metro- nome Setting menu. METRONOME [SETTING] CLP-970 DEMO SONG SELECT TRACK TRACK EXTRA TRACKS... -
Page 78: Detailed Settings For The Voices [Voice Setting]
Procedure Select a voice and press the [VOICE SETTING] button to access the “Voice Setting” menu. DEMO SONG SELECT TRACK TRACK CLP-970 NEW SONG TRANSPOSE SONG BALANCE START/ STOP PAUSE SYNCHRO START MASTER VOLUME SONG Press the A [–]/[+] buttons to select the part for which you wish to... -
Page 79: Setting The Position Of Right And Left Channels [Pan]
Stage Reverberation suitable for a solo instrument sound. Plate Reverberation from the vibration of a metal plate. Setting the reverb depth [ReverbSend]* The reverb effect is not applied if the ReverbSend parameter is set to “0.” See the procedure on page 72. CLP-970... -
Page 80: Selecting The Chorus Type [Chorus Type]
Adds swell effects of an ascending or descending jet plane. Setting the chorus depth [Cho- rusSend]* See the procedure on page 72. CLP-970 In Dual mode: Voice for editing (Voice 1 or Voice 2) Setting range: 0 - 127 Setting the chorus on/off... -
Page 81: Setting The Variation Effect Depth [Variationsend]
[RPedal] See the procedure on page 72. Setting range: SustainCont Damper function that sustains the sound longer as you press the pedal deeper. Sustain On/Off switch type damper function. PitchBend Changes the pitch continuously. No function. Normal setting: SustainCount CLP-970... -
Page 82: Setting The Center Pedal Function [Mpedal]
No function. Normal setting: Expression Optional pedals • Yamaha FC7 foot controller This foot controller is suitable for controlling Expression, SustainCont, and PitchBend. • Yamaha FC4 foot controller Yamaha FC5 foot controller These foot switches are suitable for controlling Sustain,... -
Page 83: Midi [Midi Setting]
The Clavi- nova’s MIDI Implementation Chart is listed on pages 31 and 32 in the “Reference Booklet” for the CLP-970. When you are using the MIDI connectors, set the [HOST SELECT] switch to “MIDI.” (See page 63.) -
Page 84: Setting The Midi Transmit Channel [Midioutchannel]
SETTING TEMPO The received data is played back using the XG voices (page 6 in the “Reference Booklet” for the CLP-970). You can also assign the Clavinova’s preset voices to part of the data. (See “XG Alternative” on page 90.) See the procedure on page 72. -
Page 85: Setting The Midi Receive Channel (Port B) [Midiinachannel]
See the procedure on page 72. Select a type of data. Type of data: Note, Control, Program, Pitch Bend, SysEx (System Exclusive) Setting range: On/Off Normal setting: On for all types of data MIDI [MIDI SETTING] (song playback data) Select On or Off. CLP-970... -
Page 86: Selecting A Type Of Data Transmitted Via Midi [Transmitparameter]
You can interrupt song data bulk dump transmission by pressing the B [– (NO)] button. See the procedure on page 72. CLP-970 Transmitting the initial settings on the panel [InitialSetup] You can transmit the panel data, such as voice selec- tion, to a connected sequencer. -
Page 87: Other Settings
Other settings You can make detailed settings for touch, tuning, scale, etc. Procedure Press the [OTHER SETTING] button to enter Other Setting mode. DEMO SONG SELECT TRACK TRACK EXTRA CLP-970 TRACKS NEW SONG TRANSPOSE SONG BALANCE START/ STOP PAUSE SYNCHRO START... -
Page 88: Selecting A Scale [Scale]
Normal setting: Equal CLP-970 If you select a scale other than Equal, you need to spec- ify the root note using the B [–]/[+] buttons. Setting range: C, C , D, E , E, F, F , G, A , A, B , B... -
Page 89: Setting The Speed Of Vibraphone's Vibrato Effect [Vibraphonerotorspeed]
For example, some pedals turn on the effects and others turn them off when you press them. Use this parameter to reverse this mechanism. See the procedure on page 72. Setting range: Make, Break Other settings Set to On or Off. CLP-970... -
Page 90: Setting The Point At Which The Damper Pedal Starts To Affect The Sound [Halfpedalpoint]
CLP-970 Replacing the XG voices with pre- set voices [XGAlternative] The CLP-970 provides the XG tone generator for the purpose of playing GM, XG, or DOC music data (page 60). You can replace some XG voices with the preset voices on the panel for playback. This parameter enables you to select “Native”... -
Page 91: Selecting Items Saved At Shutdown [Memorybackup]
(C7) and black key (B 6) and press the [POWER] switch to turn on the power to the Clavinova. Other settings Reset the Clavinova. Select a value for memory songs. Memory songs are kept. Memory songs are erased. [POWER] CLP-970... -
Page 92: Message List
If you see this message while using a brand new disk, it is more likely that the disk drive is malfunctioning. Ask your Yamaha dealer for repair. The floppy disk space is full and can no longer record data. Use a new disk (page 53) or delete unnecessary files from the disk (page 53) to make room... - Page 93 Clavinova (page 91). The Clavinova’s flash memory (storage memory) has expired. Consult your Yamaha dealer. If this message appears, the Clavinova will not back up the songs and settings in memory. Press the [EXIT] button to return to the pre- vious screen.
- Page 94 Message List Message CLP-970 Meaning This message appears following the message “LastPowerOffIllegalMemo- rySongChecking,” indicating that the Clavinova could not recover data in the storage memory and that all memory songs were deleted. There is not enough memory space left and you cannot save any more songs.
- Page 95 The size of the selected song is larger than the Current memory (page 97). The CLP-970 cannot read the song. Select another song. This message prompts you to start the operation. To start, press the B [+ (YES)] button. Press the [EXIT] button to cancel the operation.
- Page 96 CLP-970 and the computer, then check the cable connections and the [HOST SELECT] switch setting. Then, turn on the power to the computer and the CLP-970 in this order and check to see if the driver and MIDI appli- cation on the computer work properly.
-
Page 97: Questions About Operations And Functions
You can change all data except for note data after record- ing. You can change the time signature at the beginning of the song, or at a position in the song to which you move, by using the B [–]/[+] buttons while the song is stopped. CLP-970... - Page 98 Use the “AuxPedalType” parameter (page 89) in the “OTHER SETTING” menu to change the external pedal setting. CLP-970 The song title is not correct. The “CharacterCode” setting may be different than that used when you named the song. Also, if the song was recorded on another instrument, the title might be displayed incorrectly.
-
Page 99: Appendix
Appendix CLP-970 CLP-970... -
Page 100: Troubleshooting
The pitch and/or tone of the piano voices in certain ranges do not sound right. Mechanical noise is heard during performance. CLP-970 Cause The Clavinova has not been plugged in properly. Electrical current is being applied to the instrument. -
Page 101: Data Compatibility
This section covers basic information on data compatibility: whether or not other MIDI devices can playback the data recorded by CLP-970, and whether or not the CLP-970 can playback commercially available song data or song data created for other instruments or on a computer. - Page 102 • Many MIDI devices are compatible with GM Sys- tem Level 1, as is most commercially available software. • The CLP-970 is compatible with GM System Level 1. XG is a major enhancement of the GM System Level 1 format, and was developed by Yamaha specifically...
-
Page 103: Preset Voice List
An actual vibraphone has a rotor inside the resonance tube, which rotates via the motor to create the vibrato effect. Pressing the left pedal applies this effect; pressing the pedal again turns the effect off. Voice description CLP-970... - Page 104 Marimba Celesta PipeOrganPrincipal PipeOrganFlute1 PipeOrganFlute2 PipeOrganTutti JazzOrgan Strings SynthStrings SlowStrings Choir SlowChoir Scat CLP-970 Touch Dynamic Key-off String Sense sampling samples resonance Voice description This voice simulates a concert-type marimba sound. Stereo sampling helps reproduce a real acoustic spread. A celesta is a percussive instrument. When you play the keyboard, the hammer hits a metallic board to produce the sound.
-
Page 105: Voice Combination Examples (Dual And Split)
This sound is suitable for fusion. Deeper reverb and chorus (pages 79 and 80) will improve the groove. The damper pedal is effective on the voice assigned to the right-hand range. This combination makes a very brilliant sound. CLP-970... -
Page 106: Clp-970/970M/970C: Keyboard Stand Assembly
CLP-970/970M/970C: Keyboard Stand Assembly CAUTION • Be careful not to confuse parts, and be sure to install all parts in the correct direction. Please assemble in accor- dance with the sequence given below. • Assembly should be carried out by at least two persons. -
Page 107: Connect The Pedal Cord
* Use the rear hole on the front brackets to attach the screws. CLP-970/970M/970C: Keyboard Stand Assembly Connect the pedal cord. Secure the pedal cord. (2) Use a vinyl tie to take up any slack in the pedal cord. - Page 108 CLP-970/970M/970C: Keyboard Stand Assembly Set the adjuster. Rotate the adjuster until it comes in firm contact with the floor surface. After completing the assembly, please check the following. • Are there any parts left over? • Review the assembly procedure and correct any errors.
-
Page 109: Index
Message List 92 Metronome 40 Detailed settings 77 METRONOME SETTING 77 MIDI 83 Detailed settings 83 MIDI cables 66 MIDI connectors 63, 66 MIDI driver 64 MIDI SETTING 83 Music Data 57 Music stand 18 New Song 41 Normal setting* 32 CLP-970... - Page 110 Recording in Split 49 Recording Your Performance 41 Re-recording 43 REVERB 33 Rewind 27, 58 Right pedal 31 Right pedal function 81 CLP-970 Scale 88 Screen 23 Select 50 piano preset songs 26 Demo Songs 24 Recorded Songs and Music Data 57...
-
Page 111: Important Safety Instructions
Do NOT connect this type of product to any power supply or adapter other than one described in the owners manual, on the name plate, or specifically recommended by Yamaha. WARNING: Do not place this product or any other... - Page 112 * This applies only to products distributed by YAMAHA CORPORATION OF AMERICA. IMPORTANT NOTICE FOR THE UNITED KINGDOM Connecting the Plug and Cord IMPORTANT.
- Page 113 For details of products, please contact your nearest Yamaha or the authorized distributor listed below. Pour plus de détails sur les produits, veuillez-vous adresser à Yamaha ou au distributeur le plus proche de vous figurant dans la liste suivante. NORTH AMERICA CANADA Yamaha Canada Music Ltd.
- Page 114 M.D.G., PA DMI Division, Yamaha Corporation • © 2000 Yamaha Corporation V?????? ???AP?????.?-??B0 Printed in Indonesia Clavinova Web Site (English only) http://www.yamaha.co.jp/english/product/cl/ Yamaha Manual Library (English versions only) http://www2.yamaha.co.jp/manual/english/...
Need help?
Do you have a question about the Clavinova CLP-970 and is the answer not in the manual?
Questions and answers