Table of Contents

Related Manuals for DeLonghi DEGHBG90


Summary of Contents for DeLonghi DEGHBG90
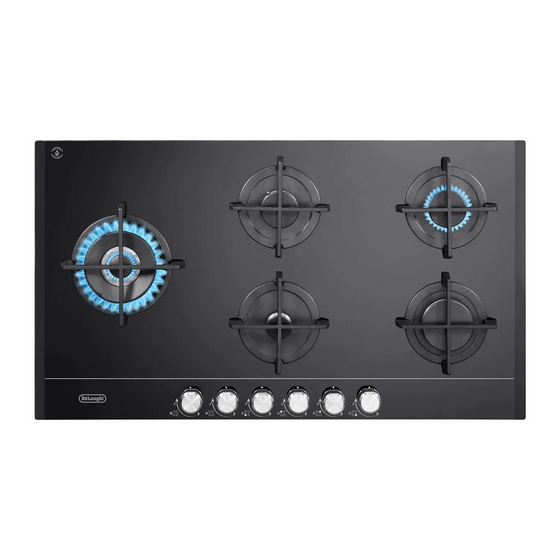
- Page 1 DE ’ L O N G H I C OO KING INSTALLATION and SERVICE INSTRUCTIONS USE and CARE INSTRUCTIONS D EG HBG60 D EG HBG70 D EG HBG90 BUILT-IN GAS ON GLASS COOKING HOBS distributed by ELBA Appliances Australia (a Division of Fisher&Paykel Australia)
-
Page 2: Product Label
Dear Customer, Thank you for having purchased and given your preference to our product. The safety precautions and recommendations reported below are for your own safety and that of others. They will also provide a means by which to make full use of the features offered by your appliance. -
Page 3: Important Safety Precautions And Recommendations
IMPORTANT SAFETY PRECAUTIONS AND RECOMMENDATIONS IMPORTANT: This appliance is designed and manufactured solely for the cooking of domestic (household) food and is not suitable for any non domestic application and therefore should not be used in a commercial environment. The appliance guarantee will be void if the appliance is used within a non domestic environment i.e. - Page 4 • CAUTION: this appIiance must only be installed in a permanently ventilated room in compliance with the applicable regulations. • Do not carry out cleaning or maintenance operations on the appliance without having previously disconnected it from the electric power supply. •...
- Page 5 To avoid burns and scalds, young children should be kept away. – • Make sure that electrical cables connecting other appliances in the proximity of the cooktop cannot come into contact with the hob. • WARNING: Unattended cooking on a hob with fat or oil can be dangerous and may result in fire.
-
Page 6: Installation
INSTALLATION CAUTION: ■ Important: The use of suitable protective clothing/gloves is recommended when handling or cleaning of this appliance. ■ This appliance must be installed in accordance with these installation instructions, local gas fitting regulations, municipal building codes, water supply regulations, electrical wiring regulations, - Gas Installations and ony other relevant statutory regulations. - Page 7 3. The wire which is coloured brown must be connected to the terminal marked “L” (Live) or “A” (Active) or coloured Red. ■ A suitable isolating switch providing full disconnection from the mains power supply (under overvoltage category III conditions) shall be incorporated in the permanent wiring, mounted and positioned to comply with the local wiring rules and regulations.
- Page 8 Clearance protection barrier Door Space for Figure 2b Figure 2c connections Measures (mm) Description (minimum) (minimum) Model DEGHBG60 54 (*) 60 (**) 200 (***) Model DEGHBG70 54 (*) 60 (**) 200 (***) Model DEGHBG90 54 (*) 60 (**) 200 (***)
- Page 9 From top of countertop (**) Between the back edge of the cut-out and the back of the countertop. (***) From the side edge of the cut-out to any vertical combustible surface. If this distance is less than 200 mm, the surface shall be protected (in accordance with AS/NZS5601.1) to a height of not less than 150 mm above the hob for the full dimension (width or depth) of the cooking surface area.
- Page 10 (for the rear of the cooktop) and four self-threading screws “S”. Figure 3b Model DEGHBG90 (fig. 3b): The kit includes four “F” type brackets (for the front of the cooktop), three “R” type brackets (for the rear of the cooktop) and seven self-threading screws “S”.
- Page 11 Rear Fixing Brackets Front Fixing Brackets Figure 3f Figure 3g G (G1) G (G2)
-
Page 12: Gas Supply
DEGHBG70 only; – with the dual (DB) burner operating at the maximum (inside and outside flames in simultaneously at the Gas regulator maximum) - model DEGHBG90 only. ■ For ULPG models connect the gas supply directly to the appliance test... - Page 13 tighten or replace connections as appropriate. Warning: Do not use any naked flame to check for leaks. The operation of the appliance MUST be tested before leaving. Adjust the test point pressure or supply pressure to the value which is appropriate for the gas type.
- Page 14 1.23 (x2) 13.80 0.66 (x2) 11.40 Only for the models DEGHBG70, DEGHBG90 Only for the model DEGHBG60 Only for the model DEGHBG70 Only for the model DEGHBG90 (Note: Gas type sticker and data plate are attached to the underside of the base of the appliance.)
- Page 15 The burners are designed so that regulation of primary air is not required. Triple-ring compact burner (only for the model DEGHBG60) Figure 5b Dual burner (only for the model DEGHBG90) Triple-ring burner (only for the model DEGHBG70) Injector for Injectors inner crown...
-
Page 16: Minimum Burner Setting Adjustment
Using a screwdriver turn screw “A” until the flame setting is correct (fig. 6). ■ Dual burner, model DEGHBG90 only: For the dual burner set the minimum (as indicated above) for both the gas valves (one for the inner and one for the outer crown). - Page 17 USE and CARE CAUTION: ■ This appliance must be used only for the task it has explicitly been designed for, that is for domestic cooking of foodstuffs. Any other form of usage is to be considered as inappropriate and therefore dangerous. Do not use this appliance as a space heater. ■...
-
Page 18: Gas Burners
Triple-ring compact (TRC) Triple-ring (TR) Dual (DB) (*) IMPORTANT: The Dual burner (model DEGHBG90 only) is controlled by two separate knobs; one knob for the inner crown only and one knob for the outer crown only. The inner and outer crown can be used together or separately. -
Page 19: Using Gas Burners
USING GAS BURNERS ■ Check that the electricity is switched on to allow spark ignition. ■ Make sure that all controls are turned to “ ” (burner off). ■ The gas flow to the burner is controlled by a tap incorporating a safety cut-off valve. If the burner flame should go out for some reason, the safety valve will automatically stop the gas flow. - Page 20 N.B. If your local gas supply makes it difficult to light the burner with the knob set to maximum, set the knob to minimum and repeat the operation. DUAL BURNER - MODELS DEGHBG90 ONLY The Dual Burner is a very flexible burner which allows different regulations and optimal cooking.
- Page 21 DUAL BURNER OPERATION/CONTROL KNOBS MODEL DEGHBG90 ONLY IMPORTANT: After using the dual burner check both the control knobs are in the closed “ ” position. Figure 9...
- Page 22 Triple-ring compact (model DEGHBG60) 26 cm 28 cm Triple-ring (model DEGHBG70) 26 cm 28 cm Dual (inner crown only) (model DEGHBG90) 6 cm 14 cm Dual (outer crown only) (model DEGHBG90) 26 cm 28 cm Dual (inner+outer crown) (model DEGHBG90)
- Page 23 Figure 11 WOK STAND (figs. 12 - 13) This special grille for woks should be placed over the pan-rest for the triple-ring compact, triple ring or Dual burner (depending on models). Warning: ■ The flat-bottomed pans are to be placed directly onto the pan-support. To use the WOK, you must place the wok stand in the CORRECT position as shown.
- Page 24 Do not place anything, e.g. flame tamer, asbestos mat, between pan and pan support as serious damage to the appliance may result. Do not remove the pan support and enclose the burner with a wok stand as this will concentrate and deflect heat onto the hotplate.
-
Page 25: Cleaning And Maintenance
CLEANING and MAINTENANCE GENERAL ADVICE ■ Before you begin cleaning, you must ensure that the appliance is switched off and disconnected from the electrical power supply. ■ Important: The use of suitable protective clothing/gloves is recommended when handling or cleaning of this appliance. ■... -
Page 26: Enamelled Parts
ENAMELLED PARTS ■ All the enamelled parts must be cleaned with a sponge and soapy water only or other non-abrasive products. ■ Dry preferably with a soft cloth. ■ If acid substances such as lemon juice, tomato conserve, vinegar etc. are left on the enamel for a long time they will etch it, making it opaque. - Page 27 OF THE TRIPLE-RING COMPACT (model DEGHBG60 only), TRIPLE-RING (model DEGHGB70 only) AND DUAL BURNER (model DEGHBG90 only) It is very important to check that the burner flame spreader “F1”, “F2” or “F3” and the caps “A”, “B” have been correctly positioned (see figs. 16c, 16d, 16e, 16f, 16g). Failure to do so can cause serious problems.
- Page 28 TRIPLE-RING COMPACT BURNER TRIPLE-RING BURNER (Model: DEGHBG60) (Model:DEGHBG70) Figure 16c Figure 16d DUAL BURNER (Model: DEGHBG90) Figure 16e Figure 16f Figure 16g...
-
Page 29: Pan Supports
This is a natural phenomenon and does not prevent the parts from working properly. TRIPLE-RING COMPACT AUXILIARY, SEMI-RAPID AND RAPID (model , TRIPLE-RING BURNER DEGHBG60 only) (model (Rapid for models DEGHBG70 & DEGHBG90 only) AND DUAL BURNER DEGHBG70 only) (model DEGHBG90 only) Figure 17... -
Page 30: Service And Maintenance
SERVICE AND MAINTENANCE If the ignition spark fails to ignite or does not light the gas, check the following items before calling our Customer Service Centre to obtain the nearest Authorised ELBA APPLIANCES Service Agent shared services with Fisher and Paykel Australia PTY LTD (ELBA Appliances AUS, a division of F&P AUS PTY LTD). - Page 32 Descri pt i ons an d ill ustrati ons in this booklet a re giv en as simpl y ind icat ive. T h e ma nuf a ct ur er r es erv es the right, consider ing t he cha ract eri stics o f t he models described here, at any time and without notice, to make eventual necessary mo d ifi cat i on s f or the ir constr ucti on or for com merc ial n eeds.
Need help?
Do you have a question about the DEGHBG90 and is the answer not in the manual?
Questions and answers