
Related Manuals for DeLonghi DECH84SC


Summary of Contents for DeLonghi DECH84SC
- Page 1 VITROCERAMIC COOKING HOBS Instructions for the use - Installation advices KEEP IN A SAFE PLACE Before operating this cooking hob, please read these instructions carefully...
-
Page 3: Declaration Of Ce Conformity
Dear Customer, Thank you for having purchased and given your preference to our product. The safety precautions and recommendations reported below are for your own safety and that of others. They will also provide a means by which to make full use of the features offered by your appliance. -
Page 4: Important Safety Precautions And Recommendations
IMPORTANT SAFETY PRECAUTIONS AND RECOMMENDATIONS IMPORTANT: This appliance is designed and manufactured solely for the cooking of domestic (household) food and is not suitable for any non domestic application and therefore should not be used in a commercial environment. The appliance guarantee will be void if the appliance is used within a non domestic environment i.e. - Page 5 • Do not touch the appliance with wet or damp hands (or feet). • Do not use the appliance whilst in bare feet. • If you should decide not to use this appliance any longer (or decide to substitute another model), before disposing of it, it is recommended that it be made inoperative in an appropriate manner in accordance to health and environmental protection regulations, ensuring in particular that all potentially hazardous...
- Page 6 • WARNING: Unattended cooking on a hob with fat or oil can be dangerous and may result in fire. NEVER try to extinguish a fire with water, but switch off the appliance and then cover flame e.g. with a lid or a fire blanket. •...
- Page 7 ENERGY LABELLING/ECODESIGN • Commission regulation (EU) No 66/2014 (implementing Directive 2009/125/EC of the European Parliament and of the Council). Reference to the measurement and calculation methods used to establish compliance with the above requirements: • Standard EN 60350-2 (hobs: electric cooking zones and/or areas). USE OF THE APPLIANCE, ENERGY SAVING TIPS ELECTRIC COOKING ZONES AND/OR AREAS •...
-
Page 8: Features And Technical Data
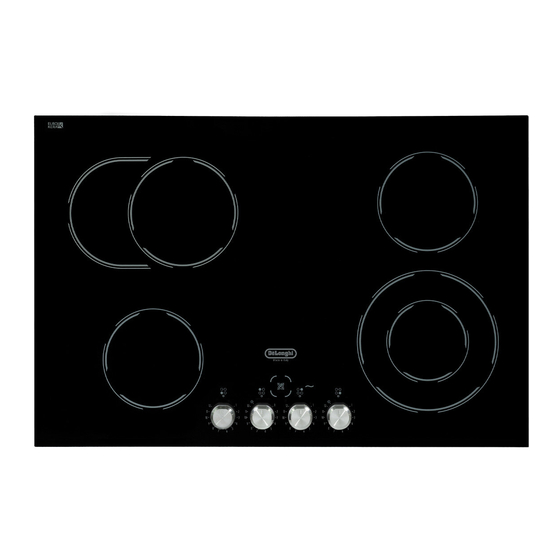
FEATURES AND TECHNICAL DATA 60 cm models Fig. 1.1 Fig. 1.2 9 10 9 10 Electrical insulation Class I Electrical insulation Class I COOKING POINTS COOKING POINTS (fig. 1.1) (fig. 1.2) Hi-light cooking zone Ø 140 mm - Hi-light cooking zone Ø 180 mm - 1200 W 1800 W Hi-light cooking zone Ø... -
Page 9: Controls Description
80 cm models Fig. 1.3 9 10 Electrical insulation Class I COOKING POINTS (fig. 1.3) Hi-light cooking zone Ø 140 mm - 1200 W Oval double hi-light cooking zone Ø 180 x 260 mm - 800/2200 W Hi-light cooking zone Ø 140 mm - 1200 W Double hi-light cooking zone Ø... - Page 10 90 cm models Fig. 1.4 Electrical insulation Class I COOKING POINTS (fig. 1.4) Hi-light cooking zone Ø 180 mm - 1800 W Hi-light cooking zone Ø 140 mm - 1200 W Oval double hi-light cooking zone Ø 180 x 260 mm - 800/2200 W Double hi-light cooking zone Ø...
- Page 11 HOW TO USE THE HOB The ceramic surface of the hob allows a fast transmission of heat in the vertical direction, from the heating elements underneath the ceramic glass to the pans set on it. The heat does not spread in a horizontal direction, so that the glass stays “cool”...
- Page 12 HI-LIGHT DOUBLE ZONE and HI-LIGHT OVAL ZONES The heating element is formed of a 2 coils of resistant material which reaches the working temperature quickly. These zones are controlled by a continuous energy regulator switch (figs. 2.3a - 2.3b). The heat intensity can be regulated continuously from “O” to “12” (max). Check that the hob is clean and then switch on by turning the control knob.
-
Page 13: Cooking Hints
COOKING HINTS Cooking zone Knob knob TYPE OF COOKING setting setting Switched OFF melting operations (butter, chocolate). To maintain food hot and to heat small quantities of liquid (sauces, eggs). To heat bigger quantities; to whip creams and sauces (vegetables, fruits, soups). Slow boiling, i.e.: boiled meats, spaghetti,... -
Page 14: Residual Heat Indicators
RESIDUAL HEAT INDICATORS The hob also features 4 or 5 warning lamps which are wired to the corresponding plate. When the temperature of a cooking plate is over 60°C, the relevant warning lamp is also litup to warn of heat on the surface of the hob. These lamps also stay on after the cooking plates have been switched off to shown that the hob surface is still hot. - Page 15 SAFETY HINTS • Before you switch the hob on, make DISTORTED sure you know which knob controls the PANBASE required cooking zone. We advise you WRONG to set the pan over the cooking zone before switching it on. • Do not use pots and pans with rough bases (pay attention to cookware DISTORTED made of cast-iron).
-
Page 16: Cleaning The Ceramic Hob
CLEANING THE CERAMIC HOB Before you begin cleaning make sure that the hob is switched off. • Remove spillages and other types of incrustations. • Dust or food particles can be removed with a damp cloth. • If you use a detergent, please make sure that it is not abrasive or scouring. Abrasive or scouring powders can damage the glass surface of the hob. - Page 17 Advice for the installer...
-
Page 18: Installation
INSTALLATION CAUTION: • This appliance shall only be serviced by authorized personnel. • This appliance is to be installed only by an authorised person according to the current local regulations and in observation of the manufacturer’s instructions. • Incorrect installation, for which the manufacturer accepts no responsibility, may cause personal injury of damage. - Page 19 This cooktop can be built into a working surface 30 to 40 mm thick and 600 mm deep. In order to install the ceramic hob into the kitchen fixture, a hole with the dimensions shown in figures 3.1a,b,c has to be made, keeping in consideration the following: •...
-
Page 20: Fastening The Cooktop
FASTENING THE COOKTOP Each cooktop is supplied with a set of tabs and screws to fasten it on units with a working surface from 3 to 4 cm deep. The kit includes 4 tabs “A” and 4 self-threading screws “B” (fig. 3.4). •... -
Page 21: Electrical Section
ELECTRICAL SECTION for the UNITED KINGDOM only IMPORTANT: The appliance must be installed by a qualified technician according with the current local regulations and in compliance with the manufacturer instructions. Incorrect installation might cause harm and damage to people, animals or objects, for which the manufacturer accepts no responsibility. Connection to a good earth wiring system is absolutely essential. - Page 22 • The wires in the mains lead are coloured in accordance with the following code: Green & Yellow = Earth Blue = Neutral Brown = Live. As the colours of the wires in the mains lead for the appliance, may not correspond with the coloured markings identifying the terminals in your spur box, proceed as follows: The wire which is coloured green and yellow must be connected to the terminal marked “E”...
- Page 23 CONNECTING THE FEEDER CABLE To connect the feeder cable to the hob it is necessary to carry out the following operations: • Unlock the 2 clips “B” and open the cover “C”. • Unscrew the screw “D” and open completely the cable clamp “E” (fig. 4.3). •...
-
Page 24: Electrical Requirements
for the other countries IMPORTANT: The appliance must be installed by a qualified technician according with the current local regulations and in compliance with the manufacturer instructions. Incorrect installation might cause harm and damage to people, animals or objects, for which the manufacturer accepts no responsibility. Connection to a good earth wiring system is absolutely essential. - Page 25 CONNECTION OF THE POWER SUPPLY CABLE Important! This cooktop must be connected to the electricity supply only by an authorised person. WARNING: If the power supply cable is damaged, it must be replaced only by an authorised service agent in order to avoid a hazard. To connect the feeder cable to the hob it is necessary to carry out the following operations: •...
- Page 26 N L2 220-240 V ac Fig. 4.4 Fig. 4.6 220 - 240 V ac N (L 380-415 V 2N ac 380 - 415 V 2N ac Fig. 4.7 380 - 415 V 3N ac 380-415 V 3N ac Fig. 4.8 Fig.
- Page 28 The manufacturer cannot be held responsible for possible inaccuracies due to printing or transcription errors in the present booklet. The manufacturer reserves the right to make all modifications to its products deemed necessary for manufacture or commercial reasons at any moment and without prior notice, without jeopardising the essential functional and safety characteristics of the appliances.
Need help?
Do you have a question about the DECH84SC and is the answer not in the manual?
Questions and answers