Table of Contents
Advertisement
Quick Links
Advertisement
Table of Contents

Related Manuals for THORLABS BBD202


Summary of Contents for THORLABS BBD202
- Page 1 BBD202 and BBD203 Brushless DC Servo Controllers User Guide...
-
Page 2: Table Of Contents
Contents Chapter 1 For Your Safety ................4 1.1 Safety Information .................. 4 1.2 General Warnings .................. 4 Chapter 2 Overview and Setup ..............5 2.1 Introduction ..................... 5 2.2 APT PC Software Overview ..............7 2.2.1 Introduction ......................7 2.2.2 APTUser Utility .................... - Page 3 Appendix D Specifications and Associated Parts ........69 Specifications ....................... 69 Appendix E Motor Control Method Summary ........... 70 Appendix F Regulatory ................74 Declarations Of Conformity ..................74 Waste Electrical and Electronic Equipment (WEEE) Directive ........75 Appendix G Thorlabs Worldwide Contacts ..........79...
-
Page 4: Chapter 1 For Your Safety
Chapter 1 For Your Safety 1.1 Safety Information For the continuing safety of the operators of this equipment, and the protection of the equipment itself, the operator should take note of the Warnings, Cautions and Notes throughout this handbook and, where visible, on the product itself. The following safety symbols may be used throughout the handbook and on the equipment itself. -
Page 5: Chapter 2 Overview And Setup
3-phase DC motors of up to 5 Amp peak coil current. Integrated into the apt family of products, it offers Thorlabs standard control and programming interface, allowing easy integration into the customer’s own automated motion control applications. - Page 6 For simplicity of operation, the apt™ software incorporates pre-configured settings for each of the Thorlabs stages and actuators, while still exposing all parameters individually for use with other DC motor driven systems.
-
Page 7: Apt Pc Software Overview
2.2 APT PC Software Overview 2.2.1 Introduction As a member of the APT range of controllers, the BBD202 and BBD203 DC motor controllers share many of the associated software benefits. This includes USB connectivity (allowing multiple units to be used together on a single PC), fully featured Graphical User Interface (GUI) panels, and extensive software function libraries for custom application development. -
Page 8: Aptuser Utility
Chapter 2 2.2.2 APTUser Utility The APTUser application allows the user to interact with a number of APT hardware control units connected to the host PC. This program displays multiple graphical instrument panels to allow multiple APT units to be controlled simultaneously. All basic operating parameters can be altered and, similarly, all operations (such as motor moves) can be initiated. -
Page 9: Apt Config Utility
With the APT system, ActiveX Controls are deployed to allow direct control over (and also reflect the status of) the range of electronic controller units, including the BBD202 and BBD203 DC motor controllers. Software applications that use ActiveX Controls... - Page 10 Chapter 2 an ActiveX Control is a language independent software component. Consequently ActiveX Controls can be incorporated into a wide range of software development environments for use by client application developers. Development environments supported include Visual Basic, Labview, Visual C++, C++ Builder, HPVEE, Matlab, VB.NET, C#.NET and, via VBA, Microsoft Office applications such as Excel and Word.
-
Page 11: Software Upgrades
APT controllers. 2.2.5 Software Upgrades Thorlabs operate a policy of continuous product development and may issue software upgrades as necessary. Detailed instructions on installing upgrades are included on the APT Software... -
Page 12: Chapter 3 Getting Started
If you experience any problems when installing software, contact Thorlabs on +44 (0)1353 654440 and ask for Technical Support. DO NOT CONNECT THE CONTROLLER TO YOUR PC YET 1) Insert the CD into your PC. -
Page 13: Mechanical Installation
2- and 3--Channel Brushless DC Servo Controller 3.2 Mechanical Installation 3.2.1 Siting The unit is designed to be mounted free standing on a shelf, benchtop or similar surface. Caution When siting the unit, it should be positioned so as not to impede the operation of the rear panel power supply switch. -
Page 14: Electrical Installation
The unit must be connected only to an earthed fused supply of 110 to 230V. Use only power supply cables supplied by Thorlabs, other cables may not be rated to the same current. The unit is shipped with appropriate power cables for use in the UK, Europe and the USA. -
Page 15: Rear Panel Connections
The USB cable length should be no more than 3 metres unless a powered USB hub is being used. HANDSET IN - Provides connection for the Thorlabs Joystick, MJC001 - see Section A.5. INTERCONNECT - For use in RS232 communications - see Section A.6. -
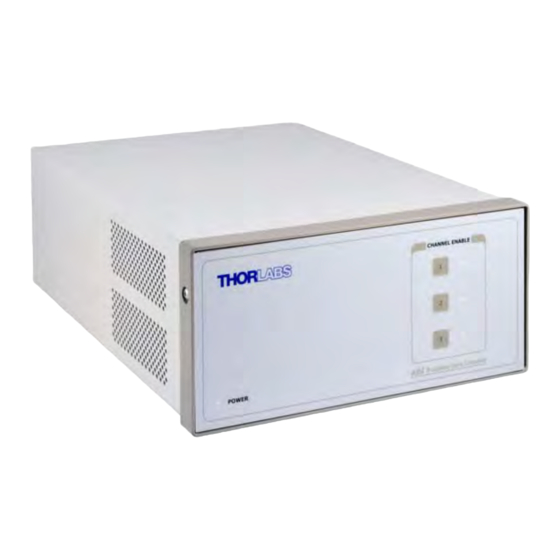
Page 16: Front Panel Controls And Indicators
Disabling the channel allows the motor actuator to be operated manually. Note. On BBD202 units, the Channel 3 LED is not used. It becomes active if a third channel is added later by fitting an additional DC driver card. Contact your Thorlabs representative for more information. -
Page 17: Connecting The Hardware And Powering Up
2- and 3--Channel Brushless DC Servo Controller 3.6 Connecting The Hardware and Powering Up 1) Install the APT Software - see Section 3.1. 2) Connect the stage to the Controller unit. 3) Connect the Controller unit to your PC. Note The USB cable length should be no more than 3 metres unless a powered USB hub is being used. -
Page 18: Verifying Software Operation
Chapter 3 3.7 Verifying Software Operation 3.7.1 Initial Setup The APT Software should be installed (Section 3.1.) and the power up procedure performed (Section 3.6.) before software operation can be verified. 1) Run the APTUser utility and check that the Graphical User Interface (GUI) panels appear and are active (one panel for each channel of operation). -
Page 19: Chapter 4 Operation - Tutorial
PC based APT software. It assumes that the unit is electrically connected as shown in Section 3.4.1. that the APT Software is already installed - see Section 3.1. and that the stage being driven is the Thorlabs MLS203 microscopy scanning stage. -
Page 20: Using The Apt User Utility
Hardware configurations and parameter settings can be saved to a file, which simplifies system set up whenever APT User is run up. Fig. 4.1 Typical APT User Screen 1) Run the APT User program - Start/All Programs/Thorlabs/APT User/APT User. HA0273T Rev C Nov 2012... -
Page 21: Homing Motors
2- and 3--Channel Brushless DC Servo Controller 4.3 Homing Motors The need for homing comes from the fact that on power up the motor (stage) is at a random position, so the value of the position counter is meaningless. Homing involves moving the motor to a known reference marker and resetting the position counter to the associated absolute value. -
Page 22: Moving To An Absolute Position
Chapter 4 4.4 Moving to an Absolute Position Absolute moves are measured in real world units (e.g. millimetres), relative to the Home position. 1) Click the position display. Fig. 4.3 Absolute Position Popup Window 2) Enter 3.0 into the pop up window 3) Click ‘OK’. -
Page 23: Changing Motor Parameters
2- and 3--Channel Brushless DC Servo Controller 4.5 Changing Motor Parameters Note Moves are performed using a Trapezoidal or S-Curve velocity profile (see Section 5.3.4.). The velocity settings relate to the maximum velocity at which a move is performed, and the acceleration at which the motor speeds up from zero to maximum velocity. -
Page 24: Jogging
Chapter 4 4.6 Jogging During PC operation, the motor actuators are jogged using the GUI panel arrow keys. There are two jogging modes available, ‘Single Step’ and ‘Continuous’. In ‘Single Step’ mode, the motor moves by the step size specified in the Step Distance parameter each time the key is pressed. -
Page 25: Graphical Control Of Motor Positions (Point And Move)
2- and 3--Channel Brushless DC Servo Controller 4.7 Graphical Control Of Motor Positions (Point and Move) The GUI panel display can be changed to a graphical display, showing the position of the motor channel(s). Moves to absolute positions can then be initiated by positioning the mouse within the display and clicking. - Page 26 Chapter 4 Move Mode When ‘Move’ is selected, the motors move to an absolute position which corresponds to the position of the cursor within the screen. To specify a move: 1) Position the mouse within the window. For reference, the absolute motor position values associated with the mouse position is displayed in the 'Cursor Position field.
-
Page 27: Setting Move Sequences
2- and 3--Channel Brushless DC Servo Controller 4.8 Setting Move Sequences This section explains how to set move sequences, allowing several positions to be visited without user intervention. For details on moving to absolute positions initiated by a mouse click – see Section 4.11. - Page 28 Chapter 4 3) Select 'New' to display the 'Move Editor' panel. Fig. 4.9 Move Editor Window Move data is entered/displayed as follows: Dist/Pos: - the distance to move from the current position (if 'Relative' is selected) or the position to move to (if 'Absolute' is selected) (values entered in mm). Dwell Time: - after the move is performed, the system can be set to wait for a specified time before performing the next move in the sequence.
- Page 29 2- and 3--Channel Brushless DC Servo Controller 4) Enter the required move data into the Move Editor and click OK. The move data is displayed in the main window as shown below. Fig. 4.10 Main Window with Move Data 5) Repeat step 4 as necessary to build a sequence of moves. Move data can be copied, deleted, cut/pasted and edited by right clicking the data line(s) and selecting the appropriate option in the pop up menu (shown below).
-
Page 30: Using A Joystick Console
Chapter 4 4.9 Using A Joystick Console The MJC001 joystick console has been designed for microscope users, to provide intuitive, tactile, manual positioning of the stage. The console features a two axis joystick for XY control. Up to 3 joysticks can be connected to each other, interfacing neatly into a multi-channel control application. -
Page 31: External Triggering
Any number of 'virtual' control units can be combined to emulate a collection of physical hardware units For example, an application program can be written, then tested and debugged remotely, before running with the hardware. To create a simulated configuration proceed as follows: 1) Run the APT Config utility - Start/All Programs/Thorlabs/APT/APT Config. - Page 32 Chapter 4 2) Click the 'Simulator Configuration' tab. Fig. 4.13 APT Configuration Utility - Simulator Configuration Tab 3) Enter a name (e.g. ‘LAB1’) in the Configuration Names field. 4) In the 'Simulator' field, check the ‘Enable Simulator Mode’ box. The name of the most recently used configuration file is displayed in the 'Current Configuration' window.
- Page 33 8 digits (as displayed in the ‘Load Configuration Details’ window, the first two digits are added automatically and identify the type of control unit. The prefixed digits relating to the BBD202 and BBD203 stepper controllers are: 73xxxxxx - 3 Channel Brushless DC Driver (BBD203) Note.
- Page 34 Chapter 4 clicking the 'Remove' button or by right clicking it and selecting the 'Remove' option from the pop up window). 9) Enter a name into the 'Configuration Names' field. 10) Click 'Save'. 11) Click 'Set As Current' to use the configuration. HA0273T Rev C Nov 2012...
-
Page 35: Chapter 5 Software Reference
Chapter 5 Software Reference 5.1 Introduction This chapter gives an explanation of the parameters and settings accessed from the APT software running on a PC. For information on the methods and properties which can be called via a programming interface, see Appendix E 5.2 GUI Panel The following screen shot shows the graphical user interface (GUI) displayed when accessing the DC controller using the APTUser utility. - Page 36 Calib File - the calibration file associated with the specified channel. Note Calibration files are not applicable for the Thorlabs Brushless DC motor stages such as the MLS203. Min/Max V - the minimum velocity at which a move is initiated, and the maximum velocity at which the move is performed.
-
Page 37: Settings Panel
2- and 3--Channel Brushless DC Servo Controller Ident - when this button is pressed, the LED (on the front panel of the unit) associated with the selected channel will flash for a short period. Active - lit when the unit is operating normally and no error condition exists. Error - lit when a fault condition occurs. - Page 38 Chapter 5 Note Under certain velocity parameter and move distance conditions, the maximum velocity may never be reached (i.e. the move comprises an acceleration and deceleration phase only). The limits for the max velocity or acceleration parameters are dependent on the stage being driven. They can be obtained by calling the GetVelParamLimits method.
- Page 39 2- and 3--Channel Brushless DC Servo Controller motor actuator will accelerate and move at the jog velocity while the button is held down.. Single Step mode velocity jog step size jog velocity distance button button button pressed pressed pressed Continuous mode velocity button released jog velocity...
- Page 40 Chapter 5 Stopping - the way in which the jog motion stops when the demand is removed. Immediate - the motor stops quickly, in a non-profiled manner Profiled - the motor stops in a profiled manner using the jog Velocity Profile parameters set above.
-
Page 41: Stage/Axis Tab
They need to be set accordingly such that a particular stage is driven properly by the system. For Thorlabs stages, the APT server will automatically apply suitable defaults for the parameters on this tab during boot up of the software. - Page 42 Chapter 5 Note The Min Pos and Max Pos parameters can be used to restrict the working range of the stage to a particular area of interest. Pitch - the pitch of the motor lead screw (i.e. the distance (in mm or degrees) travelled per revolution of the leadscrew).
- Page 43 2- and 3--Channel Brushless DC Servo Controller Hardware Limit Switches The operation of the limit switches is inherent in the design of the associated stage or actuator. The following parameters notify the system to the action of the switches when contact is made. Select Rev Switch or Fwd Switch as required, then select the relevant operation.
-
Page 44: Advanced - Control Loop Settingstab
Chapter 5 5.3.3 Advanced - Control Loop SettingsTab Fig. 5.5 Advanced Control Loop Settings Position Loop Control Settings The motion processors within the BBD series controllers use a position control loop to determine the motor command output. The purpose of the position loop is to match the actual motor position and the demanded position. - Page 45 2- and 3--Channel Brushless DC Servo Controller position during motion. i.e. sticksion, vibration…etc .If the proportional term is too high this can lead to overshoot and general instability. If this is too low it can result in a sloppy response. It accepts values in the range 0 to 32767. Integral term - Increasing the integral (Int) term minimises following error and final position error.
- Page 46 Chapter 5 Position PID Settings Summary Stage overshoots the intended position - reduce Int and increase Deriv and Prop terms. Stage doesn't attain final position - increase the Int and Prop terms. Motion is unstable - reduce Prop and Int, increase Deriv. Stage sounds noisy - reduce Deriv.
- Page 47 2- and 3--Channel Brushless DC Servo Controller Current Loop (Settled) Control Settings The following parameters are designed to assist in maintaining stable operation and reducing noise at the demanded position. They allow the system to be tuned such that errors caused by external vibration and manual handling (e.g. loading of samples) are minimized, and are applicable only when the stage is settled, i.e.
-
Page 48: Advanced - Misc. Tab
Chapter 5 5.3.4 Advanced - Misc. Tab Fig. 5.6 Advanced Miscellaneous Settings Motor Output Settings Caution The default values programmed into the APT software will give acceptable performance in most cases. The following parameters are set according to the stage or actuator type associated with the driver and have already been optimized. - Page 49 2- and 3--Channel Brushless DC Servo Controller 30000 (91.6%), then signals greater than 30000 will be output as 30000 and values less than -30000 will be output as -30000. Motor Bias – When an axis is subject to a constant external force in one direction (such as a vertical axis pulled downwards by gravity) the servo filter can compensate by adding a constant DC bias to the output.
- Page 50 Chapter 5 Indicator status bit (bit 13) is set to 0 in the Status Register. When the position error returns to within the window boundary, the status bit is set to 1. Position Profiling To prevent the motor from stalling, it must be ramped up gradually to its maximum velocity.
- Page 51 Joystick If the optional Thorlabs joystick console is being used (MJC001) the following parameters are used to set the velocity and acceleration limits and the direction sense of any moves initiated from the joystick.- see Section 4.9. for more details on joystick use.
- Page 52 Chapter 5 direction for a particular application and is useful when matching joystick direction sense to actual stage direction sense. Note Joystick controlled moves always use a trapezoidal velocity profile. Persist Settings to Hardware - Many of the parameters that can be set for the BBD10x series drivers can be stored (persisted) within the unit itself, such that when the unit is next powered up these settings are applied automatically.
- Page 53 2- and 3--Channel Brushless DC Servo Controller Even when input triggering is disabled, the state of the Trigger In input can be read at any time by using the LLGetStatusBits software method to read the status register bit 1. This allows application software to use the Trigger In input as a general-purpose digital input - see the APTServer helpfile for details on using the LLGetStatusBits method and the status register.
-
Page 54: Troubleshooting And Restoring Default Parameters
Chapter 5 Trigger Out options are set as follows: Disabled – triggering operation is disabled In Motion (Trig HI) – The output trigger goes high (5V) when the stage is in motion. In Motion (Trig Lo) – The output trigger goes low (0V) when the stage is in motion. Move Complete (Trig HI) Move Complete (Trig HI) - The output trigger goes high (5V) when the current move is completed. - Page 55 2- and 3--Channel Brushless DC Servo Controller If adjustment of the parameter values previously described has resulted in unstable or unsatisfactory system response, the ‘Defaults’ tab can be used to reset all parameter values to the factory default settings. To restore the default values: 1) Select the ‘Defaults’...
-
Page 56: Appendix A Rear Panel Connector Pinout Details
Appendix A Rear Panel Connector Pinout Details A.1 Rear Panel MOTOR DRIVE Connectors The ‘MOTOR DRIVE’ connector is a female, round 8-pin DIN type and provides drive connection to the motors. The pin functions are detailed in Fig. A.1.. Description Description Motor Phase V Stage ID... -
Page 57: Rear Panel User Io Connector
2- and 3--Channel Brushless DC Servo Controller A.3 Rear Panel USER IO Connector The ‘USER I/O’ connector is a male, 15 pin D-Type that exposes a number of electrical signals useful for monitoring purposes or fault diagnosis. Description Description (iii) (iii) Trigger In (ii) - Page 58 Appendix A A.3.1 Tirgger Out (Digital Output) The digital output (AxisOut) can continuously sink over 100 mA and source 4 mA from the pull up resistor to 5V. The diode in series with the pull up resistor allows loads powered from up to 24VDC to be switched. The FET driver is internally protected from shorts up to 30 V.
- Page 59 2- and 3--Channel Brushless DC Servo Controller A.3.3 Differential Outputs All differential outputs (QA, QB and IX/Ref) are driven by an AM26C31 line driver, with a 100 Ohm resistor between the output of the line driver and the connector pin. When the stage is being controlled by a joystick, in the absence of a PC, these outputs could be connected to an oscilloscope or custome circuit to facilitate monitoring of the position output.
-
Page 60: Rear Panel Aux I/O Connector
Appendix A A.4 Rear Panel AUX I/O Connector A.4.1 Pin Identification The AUX I/O connector exposes a number of internal electrical signals. For convenience, a number of logic inputs and outputs are included, thereby negating the need for extra PC based IO hardware. Using the APT support software, these user programmable logic lines can be deployed in applications requiring control of external devices such a relays, light sources and other auxilliary equipment. - Page 61 2- and 3--Channel Brushless DC Servo Controller A.4.2 Digital Outputs All digital outputs are of the open-collector type, with a 330 Ohm series resistor. When the output is set to a logic zero (which is also the default state), it behaves as open circuit.
- Page 62 Appendix A A.4.3 Digital Inputs The digital inputs used in the controller are of the standard CMOS logic gate type with TTL compatible input levels and a built-in pull-up resistor (10 kOhm to +5V). They can be connected directly to mechanical switches, open-collector type outputs or most type of logic outputs.
-
Page 63: Rear Panel Handset/Rs232 Connector
RX (controller input) Ground Ground Supply Voltage for Handset 5V TX (controller output) Ground Note Pin 4 is for use only with Thorlabs joystick MJC001. It should not be used to power any other device. Fig. A.11 HANDSET Connector Pin Identification... -
Page 64: Rear Panel Interconnect Connector
Appendix A A.6 Rear Panel INTERCONNECT Connector (RS232) A.6.1 Pin Identification The INTERCONNECT terminal is a male, 9 pin D-Type that exposes electrical signals for use in RS232 communications. This allows control of the device using the low level communications protocol, or other software environments such as micromanager. A 9-way D-type female to female crossover (null modem) cable is required for connecting to the host PC. -
Page 65: Appendix B Using The Rs232 Or Virtual Comm Port
Appendix B Using the RS232 or Virtual Comm Port When using the low level communications protocol messages to develop client applications outside of the APT software, communication with the device is facilitated by using the RS232 comms pins on the rear panel INTERCONNECT connector - see Section A.6. - Page 66 Appendix B 3) The ‘USB Device Properties’ window is displayed. 4) Select the ‘Advanced’ tab, and check the ‘Load VCP’ box. 5) Click OK, then power cycle the device being configured. HA0273T Rev C Nov 2012...
- Page 67 2- and 3--Channel Brushless DC Servo Controller 6) In the device manager, click ‘Ports (COM & LPT)’, and note the ‘APT USB Device Serial Port’ COM port number (e.g. COM3). This COM port can then be used by the client application to communicate with the device using the low level protocol messages.
-
Page 68: Appendix C Preventive Maintenance
The equipment contains no user servicable parts. There is a risk of severe electrical shock if the equipment is operated with the covers removed. Only personnel authorized by Thorlabs Ltd and trained in the maintenance of this equipment should remove its covers or attempt any repairs or adjustments. -
Page 69: Appendix D Specifications And Associated Parts
Appendix D Specifications and Associated Parts D.1 Specifications Drive Connector: 8-Pin DIN, Round, Female (Motor Phase Outputs, Stage ID Input) FEEDBACK Connector: 15-Pin D-Type Brushless Continuous Output: 5A PWM Frequency: 40 kHz Operating Modes: Position, Velocity Control Algorithm:16-bit Digital PID Servo Loop with Velocity and Acceleration Feedforward Velocity Profile: Trapezoidal/S-Curve Position Count: 32 Bit... -
Page 70: Appendix E Motor Control Method Summary
Appendix E Motor Control Method Summary The 'Motor' ActiveX Control provides the functionality required for a client application to control one or more of the APT series of motor controller units. To specify the particular controller being addressed, every unit is factory programmed with a unique 8-digit serial number. - Page 71 2- and 3--Channel Brushless DC Servo Controller GetHWCommsOK Gets the hardware communications OK flag. GetJogMode Gets the jogging button operating modes. GetJogMode_Mode Get the jogging button operating mode (returned by value). GetJogMode_StopMode Gets the jogging button stopping mode (returned by value).
- Page 72 Appendix E GetVelParams_MaxVel Gets the move maximum velocity (returned by value). Identify Identifies the controller by flashing unit LEDs. LLGetDigIPs Gets digital input states encoded in 32 bit integer. LLGetStatusBits Gets the controller status bits encoded in 32 bit integer. LLSetGetDigOPs Sets or Gets the user digital output bits encoded in 32 bit integer.
- Page 73 2- and 3--Channel Brushless DC Servo Controller StopCtrl Stops the ActiveX Control (stops communication with controller) StopImmediate Stops a motor move immediately. StopProfiled Stops a motor move in a profiled (decelleration) manner. GetDCCurrentLoopParams Gets the Current servo loop PID parameter settings applied when the unit is moving GetDCPositionLoopParams Gets the Position servo loop PID parameter settings...
-
Page 74: Appendix F Regulatory
Appendix F Regulatory F.1 Declarations Of Conformity F.1.1 For Customers in Europe This equipment has been tested and found to comply with the EC Directives 89/336/EEC ‘EMC Directive’ and 73/23/EEC ‘Low Voltage Directive’ as amended by 93/68/EEC. Compliance was demonstrated by conformance to the following specifications which have been listed in the Official Journal of the European Communities: Safety EN61010: 2001 Installation Category II, Polution Degree II. -
Page 75: Waste Electrical And Electronic Equipment (Weee) Directive
OEM laser driver cards) • components • mechanics and optics • left over parts of units disassembled by the user (PCB's, housings etc.). If you wish to return a unit for waste recovery, please contact Thorlabs or your nearest dealer for further information. - Page 76 Appendix F F.2.2 Waste treatment on your own responsibility If you do not return an "end of life" unit to the company, you must hand it to a company specialized in waste recovery. Do not dispose of the unit in a litter bin or at a public waste disposal site.
- Page 77 2- and 3--Channel Brushless DC Servo Controller...
- Page 78 Chapter 5 HA0273T Rev C Nov 2012...
-
Page 79: Appendix G Thorlabs Worldwide Contacts
2- and 3--Channel Brushless DC Servo Controller Appendix G Thorlabs Worldwide Contacts USA, Canada, and South America Scandinavia Thorlabs, Inc. Thorlabs Sweden AB 56 Sparta Avenue Box 141 94 Newton, NJ 07860 400 20 Göteborg Sweden Tel: 973-579-7227 Tel: +46-31-733-30-00... - Page 80 Thorlabs Inc. Thorlabs Ltd. 56 Sparta Avenue Saint Thomas Place, Ely Newton, NJ07860 Cambridgeshire CB7 4EX, Tel: +1 973 579 7227 Tel: +44 (0) 1353 654440 Fax: +1 973 300 3600 Fax: +44 (0) 1353 654444 www.thorlabs.com www.thorlabs.com...
Need help?
Do you have a question about the BBD202 and is the answer not in the manual?
Questions and answers