
Related Manuals for Datex-Ohmeda 3770


Summary of Contents for Datex-Ohmeda 3770
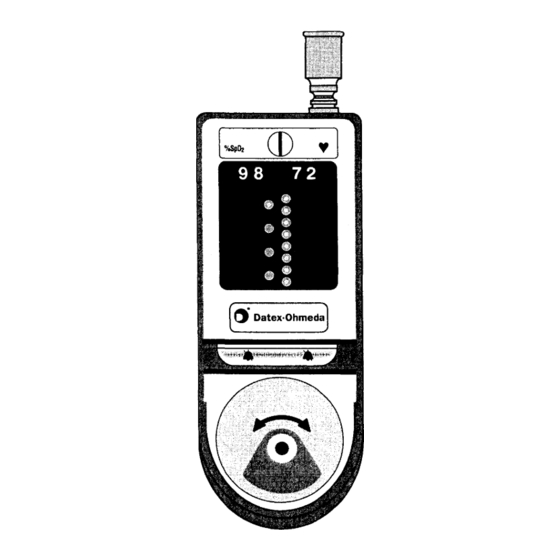
- Page 1 3770/3775 Pulse Oximeter Service Manual %SpO %SpO Not for continuous monitoring 6050-0004-915 Printed in USA...
- Page 3 3770/3775 Pulse Oximeter Service Manual...
- Page 4 Parts that are broken, missing, plainly worn, distorted, or contaminated should be replaced immediately. If repair or replacement become necessary, request service advice from Datex-Ohmeda (information is listed on the back cover). Do not repair this device or any of its parts other than in accordance with written instructions provided by Datex-Ohmeda.
-
Page 5: Table Of Contents
Contents 1/Overview Related information......................1-1 Technical competence.....................1-1 General description.............................1-2 Theory of operation .............................1-2 Calibration............................1-3 Functional components..........................1-4 Digital board............................1-5 80-pin board-to-board connector ..............1-5 Analog board............................1-6 Specifications..............................1-7 Electromagnetic effects .........................1-7 Environment ..........................1-7 EMC performance ......................1-7 International Electrotechnical Commission (IEC) classifications ......1-7 Compliance with standards .......................1-8 Oximeter..............................1-8 Default settings ........................1-8 General............................1-8... - Page 6 Inspecting the oximeter and replacing parts................3-4 Disassembling the oximeter.......................3-4 Replacing parts..........................3-5 Assembling the oximeter......................3-5 Checking normal operation........................3-7 4/Illustrated Parts Service kits—3770 and 3775 oximeters..................4-1 3775 oximeter assembly ..........................4-2 3775 assembly parts ........................4-2 3775 assembly illustration ......................4-3 3770 oximeter assembly ..........................4-4 3770 assembly parts ........................4-4...
-
Page 7: 1/Overview
AA battery pack, are not repeated in this manual. If you need to reference printed circuit board schematics and component lists, purchase and refer to the information contained in the 3770/3775 PCA Drawings Service Kit, REF 6050-0005-558. -
Page 8: General Description
3770/3775 Pulse Oximeter Service Manual General description Two models of the oximeter are available: the 3770 and the 3775. Both oximeters operate on power supplied by a battery pack. In addition, either oximeter, when a nickel-cadmium (NiCd) battery pack is attached, can be positioned in the battery charger monitoring station and operated using the station’s DC (from AC mains) -
Page 9: Calibration
Calibration Datex-Ohmeda pulse oximeters use two wavelength ranges, 650 nm to 665 nm and 930 nm to 950 nm, both with an average power of less than 1 mW. These wavelengths are used to calculate the presence of oxyhemoglobin (O Hb) and reduced hemoglobin (HHb). -
Page 10: Functional Components
3770/3775 Pulse Oximeter Service Manual The calculation of SpO assumes 1.6% carboxyhemoglobin (COHb), 0.4% methemoglobin (MetHb), and no other pigments. Appreciable variation from these values will influence SpO accuracy. These values are based on the Datex- Ohmeda Pulse Oximeter Empirical Calibration Study. -
Page 11: Digital Board
1/Overview Digital board The core processing of the digital board is provided by a 16-bit processor, nonvolatile FLASH memory, semivolatile SRAM, and a Real Time Clock. For signal acquisition, it has an A-to-D converter (which is internal to the processor), I/O ports for timing and control, and an 8-bit D-to-A converter. -
Page 12: Analog Board
< GROUND GROUND* *Essential grounds Figure 1-5. Analog board and digital board system Note: The rotary encoder is installed on the 3775 analog board only; in all other respects the 3770 and 3775 analog boards and their components are identical. -
Page 13: Specifications
Electromagnetic effects The 3770 or the 3775 when used with a LR6 (AA) battery pack, a NiCd battery pack, or a NiCd battery pack in a battery charger monitoring station are referred to as the “system” for EMC purposes. -
Page 14: Compliance With Standards
3770/3775 Pulse Oximeter Service Manual Compliance with standards The presence on the device of any symbol described below indicates compliance with the standard represented by that symbol. Medical Device Directive 93/42/EEC of the European Union for a 0197 class I (with a measuring function), IIa, IIb, or III device. -
Page 15: Power
1/Overview Power Typical consumption: 1.6 W Typical current: 180 mAmps Circuitry Microprocessor controlled Automatic self-test at power on Automatic setting of default parameters (3775 only) Automatic alarm messages Automatic/continuous system diagnostics Sensor emitter wavelength ranges Red LED peak wavelength range: 650 to 665 nm Infrared (IR) LED peak wavelength range: 930 to 950 nm Average power: ≤... -
Page 16: Environmental
3770/3775 Pulse Oximeter Service Manual Environmental Operating Temperature: 0 to 50 ºC (32 to 122 ºF) Humidity: 0 to 95% RH, noncondensing Atmospheric pressure: 550 to 1,060 hPa (8 to 15.4 psia) Vibration: Meets or exceeds: ASTM 4728, (Method C) MIL-STD-810E, Method 514.4, Section I.3.4.3... -
Page 17: Recommended Brands
1/Overview Low battery indicator LED lights depending on the battery cell, as follows: Alkaline <2.5 hours Alkaline rechargeable <1 hour Carbon <2 hours Lithium <1 hour Recommended brands Alkaline Lithium Carbon Duracell ™ Eveready Eveready Eveready™ Rayovac Kodak™ Panasonic™ ® Rayovac , including ®... -
Page 18: Precautions
Datex-Ohmeda for reclamation. Use only a Datex-Ohmeda battery charger to recharge or condition a Datex-Ohmeda NiCd battery pack. Do not use a Datex-Ohmeda battery charger to recharge or condition a NiCd battery pack that is not made by Datex-Ohmeda. -
Page 19: Electrical Shock Hazard
Discard a damaged sensor immediately. Do not repair a damaged sensor or use a sensor repaired by others. To prevent injury or equipment damage, use only Datex-Ohmeda oximeter sensors approved for use with this oximeter. For complete information about the safe and appropriate use of a sensor, consult the instructions for that sensor. -
Page 20: Cautions
• Use only batteries recommended by Datex-Ohmeda in the LR6(AA) battery pack. Service diagnostic mode is to be used by Datex-Ohmeda service personnel only. Cleaning Do not autoclave, pressure sterilize, or gas sterilize the oximeter, printer, battery pack, or battery charger. - Page 21 2/Troubleshooting This chapter contains: • Tables containing messages that may be displayed on the oximeter and conditions that may occur while using the oximeter. • A list of the possible causes for the message or condition. • Recommended actions for responding to the message or to correct the condition.
-
Page 22: 3770/3775 Pulse Oximeter
3770/3775 Pulse Oximeter Service Manual 3770/3775 pulse oximeter Message Cause(s) Recommended action(s) The unit failed the power-on Replace the digital board. See chapter 3. B O O T C O D E sequence of diagnostics. Trend is printing to the printer. - Page 23 2/Troubleshooting 3770/3775 pulse oximeter (continued) Condition Cause(s) Recommended action(s) No display. Unit not receiving power. Make sure a battery pack is correctly inserted in the oximeter and press the on/off button on the front panel of the oximeter. NiCd battery pack needs Insert a charged battery pack.
- Page 24 3770/3775 Pulse Oximeter Service Manual 3770/3775 pulse oximeter (continued) Condition Cause(s) Recommended action(s) Oximeter sounds a Oximeter component failure. Swap boards, starting with the digital constant tone. board. Replace the failed board. See chapter 3. Possible failure points: Digital board:...
-
Page 25: Printer
Make sure the printer and oximeter are properly aligned; transmission is properly positioned for infrared not being received at the printer. transmission. See the 3770/3775 Pulse Oximeter User’s Manual. Printer malfunction. Replace the printer. If the new printer corrects the condition, discard the failed printer. -
Page 26: Battery Charger Monitoring Station
3770/3775 Pulse Oximeter Service Manual Battery charger monitoring station Condition Cause(s) Recommended action(s) Battery charge status The NiCd battery pack is above The charger will automatically start indicator is a steady or below the allowable charging with a flashing green light red light after a battery temperature charging range. - Page 27 2/Troubleshooting Battery charger monitoring station (continued) Condition Cause(s) Recommended action(s) Green LED power Monitoring station is not Ensure that the power cord is plugged indicator is not lit. connected to AC power. into the monitoring station and the AC Unit is not functioning. power source.
-
Page 28: Battery Charger (Single)
3770/3775 Pulse Oximeter Service Manual Battery charger (single) Condition Cause(s) Recommended action(s) Battery charger status NiCd battery pack is not Reinsert NiCd battery pack. indicator is not lit after inserted correctly. a battery pack is inserted. Damaged contacts. Inspect contacts. All three prongs should protrude equally. -
Page 29: 3/Service Policy And Repair Procedures
Service policy Warranty repair and service must be performed by Datex-Ohmeda. When the warranty is not applicable, repairs are made by Datex-Ohmeda at the current list price for replacement parts plus a reasonable labor charge. CAUTION: Only qualified service personnel should perform the procedures described in this manual. -
Page 30: Packaging And Returning Equipment
3770/3775 Pulse Oximeter Service Manual Packaging and returning equipment If you are instructed to ship the monitor to Datex-Ohmeda or an authorized service office for repair, follow these steps: Clean the monitor. See Cleaning procedures later in this chapter. Make sure the monitor is completely dry before you pack it for shipment. -
Page 31: Cleaning Procedures
(do not spray the agent directly on any device). Sensors To clean Datex-Ohmeda reusable oximeter sensors, follow the instructions provided with the sensor. CAUTION: When cleaning oximeter sensors, follow all warnings and cautions stated in the sensor user instructions. -
Page 32: Inspecting The Oximeter And Replacing Parts
Remove foreign material and note those parts that need replacement. Grasp the FlexConnect™ sensor connector and lift up to loosen it from the top bezel. 3770 oximeter: Lift out the board set. 8. 3775 oximeter: • Remove the IR lens (plastic window). -
Page 33: Replacing Parts
Menu select wheel and label Assembling the oximeter Important: During the manufacture of some 3770/3775 oximeters, a bead of silicone sealant was applied to the IR window and sensor connector cutouts on the top and bottom bezels (see Figures 3-1 and 3-2). The sealant was applied to ensure the waterproof integrity of these oximeters. - Page 34 10. Make sure there are no loose parts inside the top bezel. Then, place the bottom bezel on the top bezel and install the screws that connect the bezels: • For the 3770, use four 4-20 x 0.5L screws. • For the 3775, use four 4-20 x 5/8L screws.
-
Page 35: Checking Normal Operation
3775 oximeter: Verify that the PROBE? message appears on the main display. Reattach the sensor to the finger. Verify that the signal strength is good to adequate (green or yellow signal strength indicator is illuminated). For more information, see Data validity and signal strength in the 3770/3775 Pulse Oximeter User’s Manual. - Page 36 3770/3775 Pulse Oximeter Service Manual...
-
Page 37: 4/Illustrated Parts
Spacer, foam 0.25 x 0.125 x 0.75 in. (2) Spacer, foam 0.50 x 0.125 x 1.0 in. Spacer, foam 0.75 x 0.25 x 1.0 in. Kit, analog board, tested, 3770 ...............6050-0003-486 PCA, analog board, 3770 Spacer, foam 0.25 x 0.125 x 0.75 in. -
Page 38: 3775 Oximeter Assembly
3770/3775 Pulse Oximeter Service Manual 3775 oximeter assembly ( REF 6050-0002-601, Rev. P) 3775 assembly parts Each item number listed below identifies a component in the assembly illustration that follows. Item Description Assy, wheel, 3775 Assy, nut, bearing Assy, top bezel, 3775... -
Page 39: 3775 Assembly Illustration
3770/3775 Pulse Oximeter Service Manual 3775 assembly illustration SEE VIEW A 18 (2X) SEE VIEW B ALIGN SHAFT FLATS WITH FLATS IN MOLDED WHEEL VIEW A 13 (4X) SEE VIEW C ITEM 4 TOP VIEW 10 REF 16 REF 25 REF... -
Page 40: 3770 Oximeter Assembly
3770/3775 Pulse Oximeter Service Manual 3770 oximeter assembly (REF 6050-0002-632, Rev. H) 3770 assembly parts Each item number listed below identifies a component in the assembly illustration that follows. Item Description Label, On/Off Assy, top bezel, 3770 Spacer, foam, 0.25 x 0.125 x 0.75... -
Page 41: 3770 Assembly Illustration
3770/3775 Pulse Oximeter Service Manual 3770 assembly illustration 24 REF 16 REF 10 REF VIEW A 8 (4X) SEE VIEW A... - Page 42 3770/3775 Pulse Oximeter Service Manual...
- Page 43 Fax 86 10 6526 0653 France Seoul, Korea Middle East Operations Datex-Ohmeda Pte. Ltd. Datex-Ohmeda S. A. S Tel 82 2 786 7421 PO Box 5527 Room 1708, Yunlong Mansion Parc de Pissaloup, BP 10 Fax 82 2 786 7420 Dubai, United Arab Emirates No.
Need help?
Do you have a question about the 3770 and is the answer not in the manual?
Questions and answers