
Related Manuals for Datex-Ohmeda Aestiva/5


Summary of Contents for Datex-Ohmeda Aestiva/5
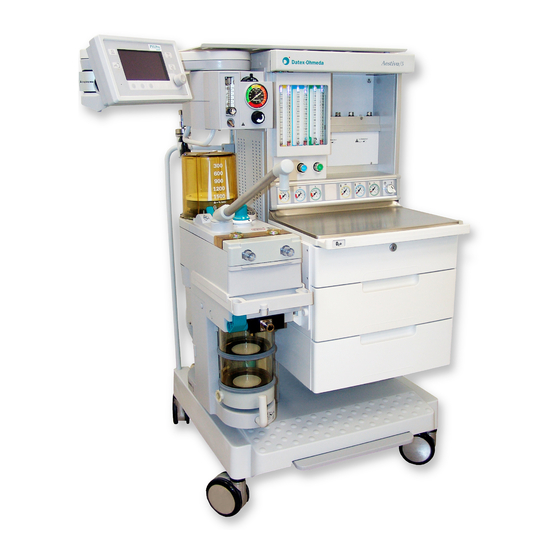
- Page 1 Aestiva/5 Operation Manual - Part 1 Software Revision 4.X System Controls, Operation, Checkout...
- Page 2 Datex-Ohmeda and by Datex-Ohmeda trained personnel. The Product must not be altered without the prior written approval of Datex-Ohmeda. The user of this Product shall have the sole responsibility for any malfunction which results from improper use, faulty maintenance, improper repair, damage, or alteration by anyone other than Datex-Ohmeda.
-
Page 3: Table Of Contents
Table of Contents 1/Introduction How to use this manual ......... 1-2 What is an Aestiva? . - Page 4 Aestiva Start mechanical ventilation ........3-14 Stop mechanical ventilation .
- Page 5 Table of Contents Pipeline and cylinder tests ........A-5 Flow control tests .
- Page 6 Aestiva 1006-0938-000...
- Page 7 1 Introduction In this section How to use this manual ......... .1-2 What is an Aestiva?.
-
Page 8: How To Use This Manual
The appendix provides complete instructions for the preoperative tests shown on the checklist. The Aestiva/5 7900 can be equipped with several optional ventilation functions. References made in this manual to Heliox mode, and SIMV and PSVPro modes, are only applicable to systems equipped with these functions. -
Page 9: Ventilators And Monitors
Introduction Ventilators and monitors The system uses a microprocessor-controlled ventilator with internal monitors, electronic PEEP, multiple modes of ventilation, and a pressure waveform dis- play. Built-in connectors and communication software permit optional cardiovascular and respiratory gas monitoring. 1006-0938-000... - Page 10 Aestiva Two vaporizer positions, left-hand Two vaporizer positions, left-hand Three vaporizer positions, left-hand configuration with basic display configuration with arm display configuration with arm display mount. mount. mount. Three vaporizer positions, right-hand Pendant with arm display mount. configuration with arm display mount. Figure 1-1 •...
-
Page 11: Symbols Used In The Manual Or On The Equipment
Cautions tell about a condition that can cause damage to the equipment. Read and follow all warnings and cautions. Other symbols replace words on the equipment or in Datex-Ohmeda manuals. No one device or manual uses all of the symbols. These symbols include: Í... - Page 12 Aestiva Frame or chassis ground Stock Number å Alarm silence button Serial Number Equipotential Systems with this mark agree with the European Council Directive (93/42/EEC) for Medical Devices when they are used as specified in their Operation and Maintenance Manuals. The xxxx is the certification number of the Notified Body used by Datex- Ohmeda’s Quality Systems.
- Page 13 Introduction 134° C Autoclavable Bag position/ manual ventilation Mechanical ventilation Open drain (remove liquid) Close drain Inspiratory flow Expiratory flow sensor connection End case The primary regulator is set to pressure The primary regulator is set to less than 345 kPa. pressure less than 414 kPa.
- Page 14 Aestiva 1006-0938-000...
- Page 15 2 System Controls and Menus In this section Anesthesia system controls ......... . 2-2 Breathing system controls.
-
Page 16: Anesthesia System Controls
Aestiva Anesthesia system controls W W W W A A A A R R R R N N N N I I I I N N N N G G G G Explosion Hazard. Do not use Aestiva systems with flammable anesthetic agents. - Page 17 2 System Controls and Menus Figure 2-1 shows these controls on the front of the Aestiva. Item Description System switch Set the switch to on to permit gas flow and to turn on the monitoring. Standby Flow controls Turn the control counterclockwise to increase the flow and clockwise to decrease.
- Page 18 Aestiva The circuit breakers are on the rear panel of the Aestiva. Item Description (Figure 2-2) Circuit Breakers System circuit breaker Open Closed (No Power) (Power) Outlet circuit breakers Open (No Power) Closed (Power) Circuit Breaker for Electrical Outlet Electrical Outlet Circuit Breaker for Total Outlet Current Circuit Breaker for Mains Inlet Mains Inlet...
-
Page 19: Breathing System Controls
2 System Controls and Menus Breathing system controls 1. Canister release 2. Auxiliary common gas outlet (optional) 3. Outlet switch (Auxiliary Common Gas Outlet) 4. Door 5. Flow sensor /patient connection (circuit connections) a.Inspiratory (Circle circuit module) or to-fro connection (Mapleson/Bain circuit module) b.Expiratory (Circle circuit module) or fresh gas connection (Mapleson/Bain circuit module) 6. - Page 20 Aestiva Item Description Bag/Vent switch When you first turn on the system, mechanical ventilation is always off. To start mechanical ventilation, move the switch from Bag to Vent. Mechanical ventilation On (gas to bellows) Mechanical ventilation Off (gas to bag arm) APL valve Limits breathing system pressure during manual ventilation.
- Page 21 2 System Controls and Menus Item Description Canister release Open to replace soda lime or remove the canisters. Note, this also opens the breathing system. Turn Pull Open Turn Push Close bypass (optional) Pulling and turning the canister release opens the canisters and activates the CO bypass mode.
- Page 22 Aestiva Item Description Outlet switch Sends fresh gas to the selected outlet when the system has an auxiliary common gas outlet. (optional) Monitoring and ventilation turn off when the auxiliary outlet is selected. Breathing system selected Auxiliary outlet selected 1006-0938-000...
-
Page 23: Vaporizer Controls
2 System Controls and Menus Vaporizer controls Refer to the description in this section and the vaporizer operation and maintenance manual for more detailed information on the vaporizer. Figure 2-4 shows these controls. Item Description Lock lever Turn the lever fully clockwise to lock the vaporizer in position. - Page 24 Aestiva Item Description Indicators All indicators come on at the start. The warm-up (Tec 6 only) indicator goes off after approximately ten minutes when the operational indicator comes on. Other indicators come on during malfunctions. .8 .6 .4 .2 Tec 5 Tec 6 Power Cable (Only the Tec 6 Vaporizer) Concentration Control...
-
Page 25: Ventilator Controls
2 System Controls and Menus Ventilator controls Optional Features The Aestiva 7900 can be equipped with several optional ventilation functions. References made in this manual to Heliox mode, and SIMV and PSVPro modes, are only applicable to systems equipped with these functions. Control panel Ventilator controls include: •... - Page 26 Aestiva All but two of the controls for the ventilator are located on the Ventilation/ Monitoring display. The two controls are: • The system switch, which powers the ventilator. • The Bag/Vent switch, which starts and stops mechanical ventilation. Item Description Menu key Shows the main menu.
- Page 27 2 System Controls and Menus Item Description End Case key End Case helps to prevent false alarms when no patient is connected. It: • Puts the apnea and volume alarms into Standby. • Returns user selections to the most common settings: Cardiac bypass off;...
-
Page 28: How To Set Controls
Aestiva How to set controls The bottom of the screen shows control settings. Notes: • The ventilator will not allow the setting of values it cannot supply. A reject tone will sound or a message will appear on the screen. •... -
Page 29: How To Use The Menu
2 System Controls and Menus How to use the menu Screens go back to the normal display 25 seconds after the last action. During a calibration or other procedure, the screen shows the instructions. Step 1 Push the Menu key to see the main menu. -
Page 30: Menu Map
Aestiva Menu map Figure 2-6 shows the menu map. The table tells you about some of the options. ◊ N N N N o o o o t t t t e e e e : : : : If the Alarm Settings page shows Auto Limits during mechanical ventilation, the system automatically calculates alarm limits. -
Page 31: More About Menu Functions
2 System Controls and Menus More about menu functions Menu Option Function Main Cardiac Bypass Turns off volume and apnea alarms when these are not appropriate (e.g., (In Progress/No) during heart lung bypass). ◊ Alarm Settings Circuit Leak Turns off the alarm tone for circuit leaks. You must set the low alarm (Audio On/Off) first. -
Page 32: How To Change Menu Settings
Aestiva How to change menu This example changes alarm limits. settings The screen goes back to the normal display 25 seconds after the last action. Step 1 Select the desired menu. Step 2 Turn, then push the knob to select an option. Step 3 Turn the knob to change the setting. -
Page 33: Optional Flowmeter And Suction Regulators
2 System Controls and Menus Optional flowmeter and suction regulators These options are available: • An external O flowmeter • Continuous suction regulators (3 Mode models) • A venturi suction regulator (2 Mode models) AA.96.0168.f0499 7* 8 * Only non-venturi regulators have this connection. Venturi regulators generate vacuum from system gas supplies. -
Page 34: Suction Regulator Controls
Aestiva Suction regulator controls Item Description Mode switch: With a continuous suction regulator (3 Modes): • MAX: for maximum suction, set the switch to MAX. • On (|): for adjustable suction, set the switch to On (|) or l. • Off (O): to turn Off suction, set the switch to O. With a venturi regulator (2 Modes): •... -
Page 35: Optional Co Bypass Mode Operation
When operating in CO2 Bypass mode, water condensate may collect in the bypass assembly. The water drains automatically when the canisters are closed. Datex-Ohmeda strongly recommends using CO2 monitoring when using the CO2 Bypass device. Systems which have the optional CO2 Bypass mode installed have the follow- ing label at the canister release. - Page 36 Aestiva 2-22 1006-0938-000...
- Page 37 3 Operation and Tutorial w W W W W A A A A R R R R N N N N I I I I N N N N G G G G In addition to volume apnea and low airway pressure alarms, other ventilator alarms are included to indicate potential hazard conditions.
-
Page 38: Turn On The System
Aestiva Turn On the system Step 1 Connect the power cord to a wall outlet. The mains indicator comes on when AC Power is connected. Step 2 Set the system switch to On (|). Step 3 The display shows the power-up screen, and the system does a series of self tests. -
Page 39: Set The Alarm Loudness
3 Operation and Tutorial Set the alarm loudness Step 1 Select the Screen and Audio Setup menu. • Push the menu key. • Turn, then push the knob to select Screen and Audio. Step 2 Turn, then push the knob to select alarm loudness. - Page 40 Aestiva Step 3 Turn, then push the knob to adjust the volume. Then • The volume range is 1 to 5 (loudest). • As the volume is changed, the system sounds test tones. • Push the knob to save the change. 1006-0938-000...
-
Page 41: Show Or Hide Alarm Limits And Units
3 Operation and Tutorial Show or hide alarm limits and units To simplify the displays, hide alarm limits and units of measurement. If the alarm limits are hidden, the screen automatically shows the limits when: • An alarm occurs. • Volume alarms are off or the auxiliary common gas outlet is selected (monitoring off). - Page 42 Aestiva Step 2 Turn, then push the knob to select Alarm Limits or Units of Measure. Step 3 Turn, then push the knob to select Show or Hide. Push the knob to save Show the change. Then Hide 1006-0938-000...
-
Page 43: Adjust Patient Data For Heliox
3 Operation and Tutorial Adjust patient data for Heliox The Aestiva 7900 can be equipped with several optional ventilation functions. References made in this manual to Heliox mode, and SIMV and PSVPro modes, are only applicable to systems equipped with these functions. When the Heliox mode is selected, the system automatically corrects measurements for the lower density of Heliox (compared to air). -
Page 44: Turn The Volume Alarms On Or Off
Aestiva Step 2 Turn, then push the knob to select Heliox Mode. Step 3 Turn, then push the knob to select Then on or off. You must push the knob to save the change Turn the volume alarms on or off W W W W A A A A R R R R N N N N I I I I N N N N G G G G Do not turn volume alarms off with a spontaneously breathing patient, the system will not alarm for low volume. -
Page 45: Set Alarm Limits
3 Operation and Tutorial Set alarm limits ◊ Note: If the Alarm Settings page shows Auto Limits during mechanical ◊ ventilation, the system is set to automatically calculate limits. Step 1 Select the Alarm Settings menu. • Push the menu key. •... - Page 46 Aestiva Step 3 Turn, then push the knob to change the limit. T T T T h h h h e e e e n n n n • Push the knob to save the change. • The screen returns to the normal display 25 seconds after the last change.
-
Page 47: Set An Audible Alarm For Circuit Leaks
3 Operation and Tutorial Set an audible alarm for circuit leaks The patient circuit leak alarm is activated if less than half of the inspired volume returns through the expiratory flow sensor during mechanical ventilation. To prevent nuisance alarms from a known leak (e.g., an un-cuffed endotracheal tube), set the audio to Off. -
Page 48: Set Cardiac Bypass
Aestiva Step 2 Turn, then push the knob to select circuit leak audio. Step 3 Turn, then push the knob to change the Audio On Then setting. You must push the knob to save Audio Off the change. Set Cardiac Bypass Set Cardiac Bypass to In Progress to prevent volume and apnea alarms when the patient is on cardio-pulmonary bypass. - Page 49 3 Operation and Tutorial Step 1 Select the Cardiac Bypass menu item: • Push the menu key. • Turn, then push the knob to select Cardiac Bypass In Progress. Step 2 Push the knob again to return to No. 3-13 1006-0938-000...
-
Page 50: Start Mechanical Ventilation
Aestiva Start mechanical ventilation W W W W A A A A R R R R N N N N I I I I N N N N G G G G Make sure the patient circuit is correctly assembled and the control settings are correct before you start or stop ventilation. -
Page 51: Stop Mechanical Ventilation
3 Operation and Tutorial Stop mechanical ventilation w W W W W A A A A R R R R N N N N I I I I N N N N G G G G Make sure the patient circuit is correctly assembled and the control settings are correct before you start or stop ventilation. -
Page 52: Set The Ventilation Mode
Aestiva Set the ventilation mode Text below the waveform shows the ventilation mode: • Pressure controlled modes supply a set pressure during inspiration. • Volume controlled modes supply a set tidal volume. Step 1 Select the Ventilation Mode. • Push the menu key. •... - Page 53 3 Operation and Tutorial Step 3 Set the highlighted control parameter. Each mode has one parameter that must be set (V for Volume and SIMV, T T T T h h h h e e e e n n n n Pinspired for Pressure, and Psupport for PSVPro).
-
Page 54: Set Ventilator Controls
Aestiva Set ventilator controls Optional features The Aestiva 7900 can be equipped with several optional ventilation functions. References made in this manual to Heliox mode, and SIMV and PSVPro modes, are only applicable to systems equipped with these functions. The ventilator controls present are based on the ventilation mode. Messages appear on the screen if: •... -
Page 55: Ventilator Controls
3 Operation and Tutorial Ventilator controls Flow Trigger Level This parameter sets the minimum flow detected by the ventilator which triggers the ventilator to deliver a mechanical breath to a spontaneously breathing patient. Only active in SIMV and PSVPro modes. This control sets the inspiratory to expiratory ratio of mechanical breaths supplied to the patient. -
Page 56: Volume Control Mode
Aestiva Trigger Window This control sets the range as a percent of the exhalation phase within which the patient may trigger the next mechanical breath. Only active in SIMV and PSVPro modes. This control sets the tidal volume delivered to the patient in the Volume Control and SIMV modes. -
Page 57: Psvpro Mode
3 Operation and Tutorial Settings Rate Tinspired Psupport PEEP Range 20 -1500 2 - 60 0.2 - 5.0 Off, 2-40 Off, 4 - 30 Increments varies 1 bpm 0.1 s 1 cmH2O 1 cmH2O Increments of 1mL from 20 to 50, 5 mL from 50 to 100, 10 mL from 100 to 300, 25 mL from 300 to 1000, 50 mL from 1000 to 1500 PSVPro mode PSVPro is pressure supported ventilation with apnea backup. -
Page 58: Set Inspiratory Pause (Volume Mode)
Aestiva Set inspiratory pause You can only use inspiratory pause in Volume Control or SIMV modes. In pressure modes, Inspiratory Pause displays a message “No Pause w”. (volume modes) When Pause is on, the inspiratory volume stays in the patient’s lungs for the set pause time at the end of inspiration. - Page 59 3 Operation and Tutorial Step 2 Turn, then push the knob to select Inspiratory Pause. Step 3 Turn, then push the knob to change the setting. You must push the knob to save 20% of T Then the change. 3-23 1006-0938-000...
-
Page 60: Set Simv And Psvpro Controls
Aestiva Set SIMV and PSVPro controls The SIMV and PSVPro modes allow the user to set additional ventilator controls. The Pinspired, Rate, Tinspired, Psupport and PEEP controls can be set using the selection keys. The Plimit, Trigger Window, Flow Trigger Level, and Inspiratory Termination Level may be set through the Setup/Calibration menu. - Page 61 3 Operation and Tutorial Step 3 Turn, then push the knob to select a setting. Step 4 Turn, then push the knob to change the setting. You must push the knob to save Then the change. 3-25 1006-0938-000...
-
Page 62: Silence Alarms
Aestiva Silence alarms The alarm silence key silences current alarms for 120 seconds. When no alarm is active, holding down the alarm silence key for one second pre-silences low or medium priority alarms for 90 seconds. Minimum monitoring cannot be pre-silenced. -
Page 63: Reading The Pressure Waveform (Paw)
3 Operation and Tutorial Reading the pressure waveform (Paw) Different points on the waveform are instantaneous values for measured pressures. The horizontal axis indicates the time scale for the rate, I:E ratio, and inspiratory pause (volume control setting). The vertical axis indicates the pressure. - Page 64 Aestiva Example Volume Control • PEEP: Off • Maximum sensed inspiratory pressure (Pmax): 25 • Mean positive airway pressure (Pmean): 11 Figure 3-1 • Paw waveform in Volume Control mode Example Pressure Control • Pmax: 34 • Upper pressure limit (Plimit): 40 •...
- Page 65 3 Operation and Tutorial Example SIMV • Plateau pressure (Ppl): 15 • Inspiratory time (Tinspired): 1.5 • Inspiratory Pause: 60 Figure 3-3 • Paw waveform in SIMV mode. Example PSVPro • PEEP: 5 • Pressure support: 10 • Mean positive airway pressure (Pmean): 7 Figure 3-4 •...
-
Page 66: Measure Circuit Compliance
Aestiva Measure circuit compliance To measure compressible volume in patient tubes: 1. Set the ventilator to volume control mode. 2. Set a tidal volume (V ) of 500 mL 3. Set a rate of 10 breaths/min. 4. Set an I:E ratio of 1: 1 5. -
Page 67: Show The Service Settings
3 Operation and Tutorial Show the service settings The About Ventilator screen shows ventilator settings that can only be changed by an approved service representative. Item Software Version If you call for service, a representative may ask for this. Facility defaults or last Tells you if the system saves the current settings settings when you turn it off or goes back to facility defaults. - Page 68 Aestiva Step 2 Turn, then push the knob to select About Ventilator. 3-32 1006-0938-000...
-
Page 69: Optional Passive Agss Operation
Passive AGSS may also be used as a protective interface to an externally mounted active AGSS such as the Datex-Ohmeda adjustable Waste Gas Scavenging Interface Valve Assembly. 3-33... -
Page 70: Optional Active Agss Operation
Datex-Ohmeda AGSR assembly The Datex-Ohmeda adjustable Anesthesia Gas Scavenging Receiver (AGSR) assembly may be externally mounted on the dovetail rail behind the breathing system, or on the back of the articulating arm. The AGSR is an active AGSS with adjustable extract flow. -
Page 71: Connecting Active Agss With A Flow Indicator
3 Operation and Tutorial Connecting Active AGSS To use the optional active AGSS on a system which has a flow indicator (on either the left or right side of the breathing system), connect it as follows. with a flow indicator Step 1 Connect the proper hose to the AGSS outlet connector (f) on the rear of the base of the breathing system. -
Page 72: Connecting Active Agss Without A Flow Indicator
Aestiva Connecting Active AGSS The active AGSS option without a flow indicator is for use only with hospital disposal systems having their own visual indicator of disposal flow rate. without a flow indicator The recommended nominal disposal system flow rate is 36 L/min but will operate satisfactorily between 30 and 100 L/min. - Page 73 4 Preoperative Checklist In this section This section is a checklist of the necessary preoperative tests under different conditions. For step-by-step instructions, refer to the appendix “Preoperative Tests.” w W W W W A A A A R R R R N N N N I I I I N N N N G G G G Do not use this system unless you have read each component’s operation and maintenance manual and understand: •...
-
Page 74: Every Day Before The First Patient
Aestiva Every day before the first patient Inspect the system. Look for damage, necessary drugs and equipment, correct breathing circuit setup, and hazardous conditions. Turn on the system. Set the ventilator controls to decrease alarms. Do the pipeline and cylinder tests. Look for sufficient pressures and no high pressure leaks (cylinders). -
Page 75: Every Time A Different Clinician Uses The System
4 Preoperative Checklist Every time a different Do a low-pressure leak test. clinician uses the system Look for damage, necessary drugs and equipment, correct breathing Before every patient circuit setup, and hazardous conditions. Check vaporizer installation: •Make sure the top of each vaporizer is horizontal (not on crooked). •Make sure each vaporizer is locked and cannot be removed. - Page 76 Aestiva 1006-0938-000...
- Page 77 Appendix - Preoperative Tests In this section Test Intervals ............A-2 Every day before the first patient .
-
Page 78: Test Intervals
Aestiva Test Intervals The preoperative tests are done at one of three intervals: Every day before the first patient Every time a different clinician uses the system Before each patient W W W W A A A A R R R R N N N N I I I I N N N N G G G G Do not use this system unless you have read each component’s operation and maintenance manual and understand: •... -
Page 79: Every Day Before The First Patient
Appendix - Preoperative Tests Every day before the first patient Inspect the System W W W W A A A A R R R R N N N N I I I I N N N N G G G G Make sure that the breathing circuit is correctly connected and not damaged. - Page 80 Aestiva 12. On trolley model, make sure the casters are not loose and the brake is set and prevents movement. 13. Connect the power cord to a wall outlet. The mains indicator comes On when AC Power is connected. •If the indicator is not on, the system does not have mains (electrical) power.
-
Page 81: Minimize Alarms (Optional
Appendix - Preoperative Tests Minimize alarms Set the ventilator controls to decrease the number of alarms: (optional) Control Keys: •Volume alarms: Off •Plimit: 100 cmH Alarm menu: •Low O : 21% •High O : Off •Bag/Vent switch: Bag Pipeline and cylinder tests C C C C A A A A U U U U T T T T I I I I O O O O N N N N To prevent damage:... - Page 82 Aestiva •Close the cylinder valve. •Record the cylinder pressure after one minute. If the pressure decreases more than 690 kPa (100 psig) there is a leak: •Install a new cylinder gasket and tighten the tee handle as shown in the Setup section of the Setup, maintenance and troubleshooting manual.
-
Page 83: Flow Control Tests
Appendix - Preoperative Tests Flow control tests W W W W A A A A R R R R N N N N I I I I N N N N G G G G The Link system cannot replace an O monitor. -
Page 84: Vaporizer Back Pressure Test
Aestiva Test the O flow control: •Set the N O flow to 9.0 L/min. •Set the O flow to 3 L/min or higher. •Slowly turn the O flow control clockwise. •Make sure that the N O flow decreases. concentration must be ≥ 21% through the full range. The measured O Set the flow controls to mid range and make sure that the flowtube floats move smoothly. -
Page 85: Power Failure Test
Appendix - Preoperative Tests •If the O flow also decreases more than 1 L/min with a different vaporizer, the malfunction is in the Aestiva. Do not use the Aestiva system until it is serviced. Complete steps 3 and 4 for each vaporizer. Concentration Control .8 .6 .4 .2... - Page 86 Aestiva Alarm tests Connect a test lung to the patient connection. Set the Bag/Vent switch to Vent. Set the controls: •Ventilation Mode: Volume control (Select from main menu) •Ventilator: Tidal Vol: 400 ml Rate: 12 I:E Ratio: 1:2 Plimit: 40 cmH PEEP: Off •Anesthesia Machine flow: minimum flow (25-75 mL/min)
-
Page 87: Precase Steps
Appendix - Preoperative Tests •Make sure that a low minute volume alarm occurs. •Go to the alarms menu. •Set the low minute volume alarm to Off. Test the high airway pressure alarm: •Set Plimit to less than the peak airway pressure. •Make sure that the high airway pressure alarm occurs. -
Page 88: Every Time A Different Clinician Uses The System
Aestiva Every time a different clinician uses the system The following tests must be performed every time a different clinician uses the anesthesia system. W W W W A A A A R R R R N N N N I I I I N N N N G G G G Do not use a system with a low-pressure leak. - Page 89 Appendix - Preoperative Tests •Put your hand on the inlet of the leak test device. Push hard for a good seal. •Remove all air from the bulb. •If the bulb inflates in less than 60 seconds, replace the leak test device. Set the system switch to Standby.
-
Page 90: Low-Pressure Leak Test
Aestiva ISO 5358 or BSI low-pressure leak test wC C C C A A A A U U U U T T T T I I I I O O O O N N N N : : : : You can only do a positive pressure test at the common gas outlet. - Page 91 Appendix - Preoperative Tests C C C C A A A A U U U U T T T T I I I I O O O O N N N N If the needle valve is not fully open, this test can damage the pressure gauge on the test device.
-
Page 92: Before Every Patient
Aestiva Before every patient Inspect the system Before each case, perform the following anesthesia system checks. W W W W A A A A R R R R N N N N I I I I N N N N G G G G Make sure that the breathing circuit is correctly connected and not damaged. - Page 93 Appendix - Preoperative Tests 11. On trolley model, make sure the casters are not loose and the brake is set and prevents movement. 12. Connect the power cord to a wall outlet. The mains indicator comes on when AC Power is connected. •If the indicator is not on, the system does not have mains (electrical) power.
-
Page 94: Minimize Alarms (Optional
Aestiva Minimize alarms Set the ventilator controls to decrease the number of alarms: (optional) Control Keys: •Volume alarms: Off •Plimit: 100 cmH Alarm menu: •Low O : 21% •High O : Off Bag/Vent switch: Bag After you have finished testing, set the Plimit back to a clinically appropriate value. -
Page 95: Breathing System Tests
Appendix - Preoperative Tests With a Tec 6 vaporizer: •Make sure that the vaporizer is under the Tec 6 electrical outlet. •Make sure that the vaporizer is connected to an electrical outlet. •Hold down the alarm silence switch for a minimum of four seconds. •Make sure all indicators come on and the alarm speaker starts. - Page 96 Aestiva Make sure that the one-way valves (breathing circuit module) work correctly. • The inspiratory check valve rises during inspiration and falls at the start of expiration. • The expiratory check valve rises during expiration and fall at the start of inspiration.
-
Page 97: Monitor And Ventilator Tests
Appendix - Preoperative Tests •Release the flush button. The pressure must not decrease. A pressure decrease large enough to see on the gauge indicates a leak. Look for and repair the leak (loose drain plug, open canister, breathing circuit assembly not pushed on completely). •If your system has CO bypass, move the absorber canister release to the open position and do this test again to look for leaks in the bypass. - Page 98 Aestiva •The ventilator displays the correct data. •The bellows inflate and deflate during mechanical ventilation. Set the O flow control to 5 L/min. Make sure that: •The end expiratory pressure is approximately 0 cmH Positive end expiratory pressure when PEEP is Off, may indicate Note: that the scavenging system is not removing enough gas.
- Page 99 Index Bag/vent switch location 2-5 About ventilator Bellows show service settings 2-17 location 2-5 About Ventilator... 3-32 Brake AGSS function of 2-3 connecting 3-34 3-35 Breathing circuit Module operation, active 3-33 location 2-5 Alarm Breathing circuit module tone indicates priority 3-26 display 2-11 Alarm limits Breathing system...
- Page 100 Aestiva End case key Mains inlet function 2-13 location 2-4 location 2-11 Measured values display 2-11 Mechanical ventilation how to start 3-1 3-14 Flow control tests A-7 how to stop 3-15 Flow controls 2-2 Menu function of 2-3 how to change menu settings 2-18 Flow Sensor how to change settings 2-18 location 2-5...
- Page 101 Index Preoperative tests before every patient A-16 Tidal volume 3-20 breathing system tests A-19 Tinspired 3-19 Every day A-3 Every time a different clinician uses the system A-12 flow controls A-7 monitor and ventilator tests A-21 Units pipeline and cylinder supplies A-5 show/hide option 2-17 recommended intervals A-2 vaporizer back pressure A-8...
- Page 102 Aestiva 1006-0938-000...
- Page 103 Warranty This Product is sold by Datex-Ohmeda under the warranties set forth in the following paragraphs. Such warranties are extended only with respect to the purchase of this Product directly from Datex-Ohmeda or Datex-Ohmeda’s Authorized Dealers as new merchandise and are extended to the Buyer thereof, other than for the purpose of resale.
- Page 104 Tel +30 10 962 5136-7 Fax +30 10 962 3687 The addresses listed on this cover are current as of 6/03. For any location changes, please visit our website at www.datex-ohmeda.com and click on the Contacts button. Datex-Ohmeda, Inc. PO Box 7550...
Need help?
Do you have a question about the Aestiva/5 and is the answer not in the manual?
Questions and answers
ABSORBER PANEL OPEN
For the Datex-Ohmeda Aestiva/5, "absorber panel open" refers to the state where the absorber canister is not fully closed or secured. If the message window shows “Close absorber canister,” it means the absorber panel is open, and the system does not have a CO₂ bypass. In this case, the canister must be closed properly to continue system tests or operation.
This answer is automatically generated