Table of Contents
Advertisement
Quick Links
Advertisement
Table of Contents
Troubleshooting

Related Manuals for Datex-Ohmeda 7100


Summary of Contents for Datex-Ohmeda 7100
- Page 1 7100 Anesthesia Ventilator Technical Reference Manual...
- Page 2 7100 Anesthesia Ventilator Datex-Ohmeda products have unit serial numbers with coded logic which indicates a product group code, the year of manufacture and a sequential unit number for identification. AAA F 12345 This alpha character indicates the year of product manufacture and when the serial number was assigned;...
- Page 3 Aestiva and Aespire Anesthesia Machines This document is not to be reproduced in any manner, nor are the contents to be disclosed to anyone, without the express authorization of the product service department, Datex-Ohmeda, Ohmeda Drive, PO Box 7550, Madison, Wisconsin, 53707.
-
Page 4: Important
The information contained in this service manual pertains only to those models of products which are marketed by Datex-Ohmeda as of the effective date of this manual or the latest revision thereof. This service manual was prepared for exclusive use by Datex-Ohmeda service personnel in light of their training and experience as well as the availability to them of parts, proper tools and test equipment. -
Page 5: Table Of Contents
2.4 Electronic and electrical components .........2-9 2.4.1 The Aestiva 7100 ventilator functional blocks ......2-9 2.4.2 The Aespire 7100 ventilator functional blocks . - Page 6 3.1.1 Test the 7100 ventilator ........
- Page 7 Table of Contents 4.10 Diagnostic Tests/Tools ..........4-23 4.10.1 Display A/D Channels .
- Page 8 8.3 7100 Ventilator parts ........
-
Page 9: Introduction
Introduction In this section 1.1 What this manual includes ..........1-2 1.1.1 Software versions . -
Page 10: What This Manual Includes
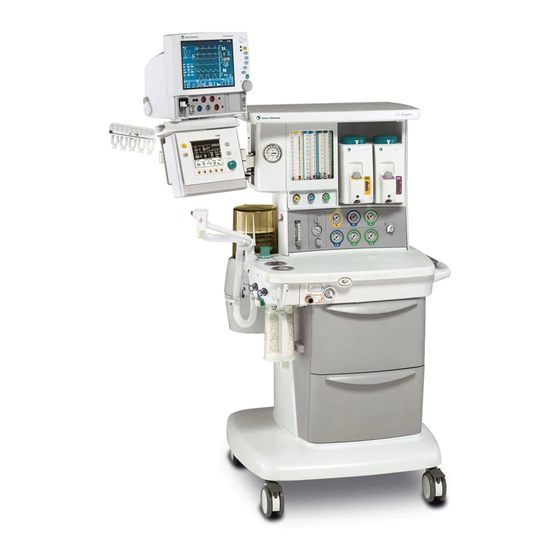
7100 Anesthesia Ventilator 1.1 What this manual includes This manual covers the service information for the 7100 anesthesia ventilator which is an integral component in the Aestiva/5 7100 anesthesia machine and the S/5 Aespire anesthesia. The Aestiva and the Aespire anesthesia machines have their own respective Technical Reference Manuals (TRM). -
Page 11: Standard Service Procedures
1 Introduction 1.2 Standard service procedures 1.2.1 User’s reference Operation and maintenance procedures for the 7100 ventilator are covered in the User’s Reference Manuals (URM) for the respective anesthesia machine. manuals You must have, and be familiar with, the URMs for this product. Study the Aestiva or the Aespire URMs if you need further information about the operation of the system. -
Page 12: Symbols Used In The Manual Or On The Equipment
Cautions tell about a condition that can cause damage to the equipment. Read and follow all warnings and cautions. Other symbols replace words on the equipment or in Datex-Ohmeda manuals. No one device or manual uses all of the symbols. These symbols include:... - Page 13 1 Introduction Plus, positive polarity Movement in one direction Minus, negative polarity Movement in two directions Variability Read top of float Variability in steps Vacuum inlet This way up Suction bottle outlet Lamp, lighting, illumination Cylinder Lock Isolation transformer Unlock Linkage system Close drain Risk of Explosion.
- Page 14 7100 Anesthesia Ventilator Alarm silence touch key Volume alarms On/Off touch key End case touch key Menu touch key Circle breathing circuit module Bain/Mapleson D breathing circuit module The primary regulator is set to pressure The primary regulator is set to pressure <...
-
Page 15: Theory Of Operation
2.4 Electronic and electrical components .........2-9 2.4.1 The Aestiva 7100 ventilator functional blocks ......2-9 2.4.2 The Aespire 7100 ventilator functional blocks . -
Page 16: General Description
Switches Breathing Circuit ID Inspiratory Flow Sensor Bulkhead Connector Expiratory Flow Sensor Absorber Bypass Switch Canister Release Switch Bag/Vent Switch Control Panel Switch Figure 2-1 • 7100 ventilator functional block diagram as used in an Aestiva anesthesia machine 02/03 1006-0836-000... - Page 17 Switch Ventilator Rotary Membrane Monitoring Encoder Switches Board Expiratory Flow Sensor Bulkhead Connector Inspiratory Flow Sensor ACGO O2 Sensor Switch Breathing System Tabletop Figure 2-2 • 7100 ventilator functional block diagram as used in an Aespire anesthesia machine 1006-0836-000 02/03...
-
Page 18: 7100 Ventilator Features
Mechanical ventilation is started with the Bag/Vent switch on the breathing system. • The 7100 ventilator reads the status of the Bag/Vent switch and the breathing circuit type (Circle, Bain — Aestiva only). The operator does not have to set the breathing circuit type from a menu. -
Page 19: 7100 Ventilator Components
2 Theory of Operation 2.3 7100 ventilator components Major components of the 7100 ventilator are found in different locations of the anesthesia machine. These components, in general, serve identical functions in either machine; however, since some components have minor differences and are not interchangeable, they are named differently. -
Page 20: Control Module
(controls operation of the ventilator) a front panel assembly The front panel assembly includes four submodules: an LCD display a keyboard front panel a rotary encoder 10. a speaker Figure 2-4 • 7100 ventilator control module 02/03 1006-0836-000... -
Page 21: Monitoring Interface
• the Auxiliary Common Gas Outlet (ACGO) switch The MIA for the Aestiva 7100 ventilator is located under the front and rear subfloors of the breathing system (below the bulkhead). The VMB for the Aespire 7100 ventilator is located under the tabletop (below the worksurface). -
Page 22: The Pneumatic Vent Engine
7100 Anesthesia Ventilator 2.3.4 The Pneumatic The Pneumatic Vent Engine components in the Aestiva machine or the Aespire machine are identical; however, the complete assemblies are not Vent Engine interchangeable due to packaging considerations. The pneumatic engine enclosure is located in the back chamber of the breathing system and is shielded to contain EMI emissions. -
Page 23: Electronic And Electrical Components
2 Theory of Operation 2.4 Electronic and electrical components 2.4.1 The Aestiva 7100 The Aestiva 7100 ventilator electronic/electrical subassemblies or modules include: ventilator functional blocks • a Power Supply for operation under line power and a backup battery for limited operation in case of power failure;... -
Page 24: The Aespire 7100 Ventilator Functional Blocks
7100 Anesthesia Ventilator 2.4.2 The Aespire 7100 The Aespire 7100 Ventilator electronic/electrical subassemblies or modules include: ventilator functional blocks • a Power Supply for operation under line power and a backup battery for limited operation in case of power failure;... -
Page 25: Power Supply
Figure 2-7 • 7100 Ventilator power supply 2.4.4 Sealed Lead Acid A sealed lead acid battery supplies battery backup for the 7100 ventilator. Since it only provides power in case of a power failure, the battery is in a float Battery charge state most of the time. -
Page 26: Control Board
7100 Anesthesia Ventilator 2.4.5 Control Board The Control Board contains all of the major circuit functions necessary to control ventilator operation. The Control Board comprises three functional circuit types: • power circuits, • analog circuits, • digital circuits. These circuits are detailed individually in the following sections. - Page 27 The 9 VDC supply is used to charge the backup battery. The 6 VDC supply is processed further to supply various power requirement throughout the 7100 ventilator. In case of power failure, the battery is switched in to supply power.
- Page 28 7100 Anesthesia Ventilator 2.4.5.2 Control Board The analog section of the controller board processes inputs from the Analog Circuits Monitoring Interface Board and the Pneumatic Engine Board. It multiplexes the inputs for display by the digital section. • Inspiratory flow •...
- Page 29 2.4.5.3 Control Board The digital section of the controller board includes a MCF5206e ColdFire Digital Circuits microcontroller. The 7100 operating software is stored in 2MB of 8-bit (1Mx16) Flash ROM and includes 1MB of 8-bit (512Kx16) static RAM (SRAM) for operation.
-
Page 30: Monitoring Interface
7100 Anesthesia Ventilator 2.4.6 Monitoring The breathing circuit monitoring interface (MIA in the Aestiva machine and VMB in the Aespire machine) is the interface between the patient circuit interface sensors (the inspiratory and expiratory flow sensor, the O sensor) and the ventilator control module. -
Page 31: Serial Interface
2 Theory of Operation 2.4.7 Serial interface The serial board (SAB/SICB) provides two functions: • It serves as an interface between the control board and switches that are located in the machine itself (not in the breathing system). • It processes serial communications signals from the control board to the RS232 connector (COM 1) on the back panel of the Aestiva machine. -
Page 32: Pneumatic Vent Engine Board
7100 Anesthesia Ventilator 2.4.8 Pneumatic Vent The Pneumatic Vent Engine Board (PEB/VEB) provides two functions: Engine Board • It serves as an interface between the control board and the pneumatic engine. • It processes the output from the airway pressure transducer. -
Page 33: Mechanical Subsystems
2 Theory of Operation 2.5 Mechanical Subsystems Refer to: • Figure 9-3, “Aestiva 7100 anesthesia machine pneumatic diagram,” • Figure 9-4, “Aespire 7100 anesthesia machine pneumatic diagram,” in section 9 for the complete pneumatic/mechanical subsystem. The mechanical subsystem includes: Pneumatic Engine •... -
Page 34: Pressure Regulator
7100 Anesthesia Ventilator 2.5.2 Pressure The pressure regulator is a non-relieving pressure regulator that regulates high pressure filtered supply gas, oxygen or medical air, down to 172 kPa Regulator (25 psi). 2-MICRON TEST INLINE INLET POINT FILTER SUPPLY GAS 35-100 psi... -
Page 35: Exhalation (Peep) Control
2 Theory of Operation 2.5.4 Exhalation The exhalation valve contains an elastomeric diaphragm that is used to control the pressures in the breathing circuit. (PEEP) Control The exhalation valve is normally open. When the exhalation port is open, gas flows from the bellows housing to the scavenging port. -
Page 36: Bleed Resistor
7100 Anesthesia Ventilator 2.5.5 Bleed The bleed resistor is a “controlled leak” from 0 to 10 L/min in response to circuit pressures from 0 to 100 cm H O. The small quantity of pneumatic flow exhausting Resistor through the bleed resistor permits control of the exhalation valve's pilot pressure by modulation of the valve output. -
Page 37: Mechanical Overpressure Valve
2 Theory of Operation 2.5.7 Mechanical The Mechanical Overpressure Valve (MOPV) is a mechanical valve that operates regardless of electrical power. It functions as a third level of redundancy to the Overpressure ventilator's pressure limit control functions, supplying pressure relief at approximately Valve 110 cm H ATMOSPHERE... -
Page 38: Breathing Circuit Flow Sensors
7100 Anesthesia Ventilator 2.5.9 Breathing Two flow sensors are used to monitor inspiratory and expiratory gas flow. The inspiratory flow sensor is downstream of the breathing system inspiratory check valve. Circuit Flow Feedback from the inspiratory transducer is used to supply tidal volumes that make Sensors allowances for the effects of fresh gas flow and circuit compressibility. -
Page 39: Post-Service Checkout
3.1.1 Test the 7100 ventilator ........ -
Page 40: Test The 7100 Ventilator
• in Part 2 of the S/5 Aespire User’s Reference Manual. 3.1.2 Test the anesthesia The 7100 ventilator is an integral component of the Aestiva or the Aespire anesthesia machine. machine To be certain the ventilator is functioning correctly, test the entire system. -
Page 41: Tests And Calibration
Tests and Calibration w w w w WARNING: Post-Service Checkout is required after you complete this section. You must perform Section 3.1 Post-service checkout after performing any maintenance, service or repair. Failure to do so may result in patient injury. In this section To ensure proper operation, the7100 Ventilator includes several tests that run automatically (self tests) and a series of menu pages that a qualified service person can... -
Page 42: Self Tests
7100 Anesthesia Ventilator 4.1 Self tests The 7100 Ventilator software includes self tests that determine whether or not the operating software is functioning properly and whether or not the electronic circuits on the circuit boards are functional. The self tests include: •... -
Page 43: Service Mode
4 Tests and Calibration 4.2 Service Mode The Service Mode is used to test, calibrate, or troubleshoot ventilator related components in the anesthesia machine. There are two ways to enter the service mode: • If the machine is turned off, push and hold in the adjustment knob while setting the system switch to On. -
Page 44: About Ventilator
7100 Anesthesia Ventilator 4.3 About Ventilator The About Ventilator menu identifies the current software loaded into the ventilator’s Flash-ROM memory and displays the total “on time” of the system. • Software Version • Software Date • Hardware ID • Total System On Time •... -
Page 45: Alarm Log
4 Tests and Calibration 4.4 Alarm Log The Alarm Log displays up to 20 of the most current alarm messages that have been logged. Each log entry shows: • Bootup Count number (the bootup count is incremented each time the machine is turned on). •... -
Page 46: Error Log
7100 Anesthesia Ventilator 4.5 Error Log There are two special types of alarms: • Minimum monitoring alarms that stop mechanical ventilation • Minimum shutdown alarms that stop mechanical ventilation and monitoring. An alarm message that results from these special types of alarms is considered an error alarm. -
Page 47: Language
Service Modes menus are shown only in English. The Language menu is used to set the specific language for normal operation. The 7100 ventilator supports the following languages. The language selections appear in language specific text. • English •... -
Page 48: User Settings
7100 Anesthesia Ventilator 4.7 User Settings In normal operation, the user can set several parameters to a personal preference or to compensate for the surrounding influences. The range of some of these settings can vary from machine to machine. The User Settings menu is used to adjust the range to normalized values. -
Page 49: System Configuration
4 Tests and Calibration 4.8 System Configuration The System Configuration menu includes settings that are tailored to the specific machine. The “Altitude,” “Drive Gas,” “Heliox Mode,” “√ Alarm Limits,” “System Type,” and “Flow Sensor Correction” settings are present for all machines. The inclusion of the remaining settings depends on the purchased features for the specific machine. - Page 50 Automatic — User Adjustable System Type Aestiva Currently, the 7100 ventilator is available in the Aestiva machine and the Aespire machine. Since the 7100 ventilator functions identically in either machine, the System Type setting is displayed as “Aestiva.” The cursor will skip over this selection.
-
Page 51: Calibrations
4 Tests and Calibration 4.9Calibrations The Calibrations menu includes service level calibrations of components that need periodic adjustment to maintain specified accuracy. Remarks You can enter these procedure in any order. However, the procedures appear in a logical sequence. Some of the latter procedures require you to have completed some of the earlier procedures. -
Page 52: O2 Calibrations
7100 Anesthesia Ventilator 4.9.1 The O Calibrations take into account the altitude setting. Before starting the calibrations, ensure that the altitude setting (in “System Configuration” menu) Calibrations is set to the appropriate altitude for the machine location. For the “21% O Calibration”... -
Page 53: Zero Flow And Airway Sensors
4 Tests and Calibration 4.9.2 The Zero Flow and Airway Sensors procedure Zero • zeros any offset in the amplifier for the airway pressure sensor Flow and Airway Sensors • determines the zero value for the inspiratory flow and expiratory flow measurement differential pressure transducers. -
Page 54: Adjust Drive Gas Regulator
7100 Anesthesia Ventilator 4.9.3 The Adjust Drive Gas Regulator procedure establishes the required flow rate through the drive gas regulator for proper calibration. Adjust Drive Gas Regulator Remarks The drive gas regulator should provide a constant gas input pressure of 172 kPa (25 psi). -
Page 55: Airway Sensor Span
4 Tests and Calibration 4.9.4 The Airway Sensor Span procedure calculates a gain coefficient for the airway pressure transducer. Airway Sensor Span Calibration setup 1. Disassemble the breathing system to the point where you can remove the (Aestiva machine) exhalation valve. •... - Page 56 7100 Anesthesia Ventilator Calibration setup 1. Remove the ABS breathing system from the machine. (Aespire machine) 2. Remove the Exhalation Valve. 3. Separate the Bellows Module from the Circuit Module. 4. Install the Circuit Module only. 5. Attach a patient circuit tube to the Calibrated Flow Orifice test tool.
-
Page 57: Peep Valve Calibration
4 Tests and Calibration 4.9.5 The PEEP Valve Calibration should be performed: PEEP Valve Calibration • when the machine is first put into service. • at prescribed, planned maintenance intervals. • after the pneumatic engine has been serviced. Real-Time Value Calibration setup After completing the “Airway Sensor Span”... -
Page 58: Inspiratory Valve Calibration
7100 Anesthesia Ventilator 4.9.6 The Inspiratory Valve Calibration should be performed: Inspiratory Valve • when the machine is first put into service. Calibration • at prescribed, planned maintenance intervals. • after the pneumatic engine has been serviced. Calibration setup 1. Remove the bellows and pressure relief valve (pop-off) from the bellows assembly. - Page 59 4 Tests and Calibration Calibration procedure 1. To enter the calibration menu, select “Next Inspiratory Valve Cal Menu”. 2. To start calibration, select “Start Inspiratory Valve Calibration”. Note: This calibration procedure may take up to 5 minutes. The calibration status and progression bar are displayed at the bottom of the screen.
-
Page 60: Pressure Sensitivity
7100 Anesthesia Ventilator 4.9.7 The Pressure Sensitivity calibration calculates correction factors for common mode pressure sensitivity of the differential pressure transducers. The pressure Pressure Sensitivity transducers must be calibrated whenever the MIA/VMB or the Control Board is replaced. This pressure sensitivity calibration is not an automated calibration. Follow the prompts on the screen to complete the calibration. - Page 61 4 Tests and Calibration Real-Time Value 7. To start calibration select “Start Pressure Sensitivity Cal”. • Adjust the APL and fresh gas flow until the real-time pressure reads a stable 10 cm H O — after 5 seconds, select “Save Value”. •...
-
Page 62: Service Calibrations Required
7100 Anesthesia Ventilator 4.9.8 The Service Calibrations Required W menu displays which setting or calibration must be performed when the “Service Calibration w” alarm Service Calibrations appears in normal operation. After the setting or calibration is properly Required completed, the text for that setting or calibration will be removed. -
Page 63: Diagnostic Tests/Tools
4 Tests and Calibration 4.10 Diagnostic Tests/Tools The Diagnostic Tests/Tools menu includes a selection of items that look at individual subsystems of the 7100 Ventilator. 1006-0836-000 02/03 4-23... -
Page 64: Display A/D Channels
7100 Anesthesia Ventilator 4.10.1 The Display A/D Channels menu displays the measured values for each of the A/D channels. Display A/D Channels Remarks The Counts and Actual values are typical for a calibrated system with baseline inputs to the various sensors. - Page 65 4 Tests and Calibration A/D Channel Range Comments Counts Actual (range) Inspiratory Flow 2050 0.000 L/min -120 to 120 L/min Zero Offset Reading (nominal 2050 Counts) (1800-2300) Increased flow = more counts/more positive Expiratory Flow 2050 0.000 L/min -120 to 120 L/min Zero Offset Reading (nominal 2050 Counts) (1800-2300) Increased flow = less counts/more negative...
-
Page 66: Display Discrete I/O Signals
7100 Anesthesia Ventilator 4.10.2 The Display Discrete I/O Signals menu displays discrete binary signals associated with machine switch positions. Display Discrete I/O Signals There are several types of switches in the machine: • some switches are mechanically operated, • some switches are pneumatically operated, •... -
Page 67: Display Battery Status
4 Tests and Calibration 4.10.3 The Display Battery Status menu displays the battery charge status. Display Battery Status Battery Status “Battery Charged” — If none of the following conditions are in effect. (on line power) “Battery Charging w” — Battery Current = -330 to -700 mA “Battery Failure Low”... -
Page 68: Test Panel Switches
7100 Anesthesia Ventilator 4.10.4 In the Test Panel Switches menu the software is set up to receive keyboard button presses and rotary encoder turns. Test Panel Switches Press each button on the panel and the control knob. • When a button is pressed, the icon on the screen next to the button should be highlighted and filled with a checkmark. -
Page 69: Valves - Test Tool
4 Tests and Calibration 4.10.5 The Valves - Test Tool menu allows you to manually control the Inspiratory Valve, the PEEP Valve, and the PEEP Safety Valve, and observe key pressure Valves - Test Tool and flow measurements on the same screen. This menu is mainly used to test the drive gas circuit or to supply drive gas flow for several tests: •... -
Page 70: Test Cpu And Memory
7100 Anesthesia Ventilator 4.10.6 When you start the CPU and Memory Tests, the procedure cycles through the CPU, RAM, Display RAM, and ROM tests until you stop the tests. The procedure Test CPU and Memory keeps track of how many times each test passed or failed. -
Page 71: Test Eeprom
4 Tests and Calibration 4.10.7 When you start the EEPROM Test, the procedure performs the test once and notes whether the test passed or failed. Test EEPROM If the EEPROM test fails, replace the control board. EEPROM Test The software tests all of the EEPROM memory via a bit pattern test. It writes a certain pattern to a block of memory and then reads that block of memory. -
Page 72: Test Serial Port
7100 Anesthesia Ventilator 4.10.8 The Test Serial Port menu includes directions for two tests. Test Serial Port • External Serial Port Testing: The external test requires that you jumper pins 6 and 13 of the serial connector. • Internal Serial Port Testing: The internal test does not require any setup;... -
Page 73: Test 5V Fail Alarm
4 Tests and Calibration 4.10.9 The 5-Volt supply (VDD) is derived in the power section of the control board. It is used to power the digital circuits throughout the ventilator. If the 5-Volt Test 5V Fail Alarm supply fails, the ventilator will sound a continuous alarm tone when the system switch is turned on. -
Page 74: Test Inspiratory Valve
7100 Anesthesia Ventilator 4.10.10 This test only checks the control circuit for the Inspiratory Valve. Since it does not look at the output of the Inspiratory Valve, you do not have to have an active Test Inspiratory Valve drive gas supply. -
Page 75: Test Peep Valve
4 Tests and Calibration 4.10.11 This test only checks the control circuit for the PEEP Valve. Since it does not look at the output of the PEEP Valve, you do not have to have an active drive Test PEEP Valve gas supply. -
Page 76: Test Peep Safety Valve
7100 Anesthesia Ventilator 4.10.12 This test requires an active drive gas supply. Test PEEP Safety Valve To Test the PEEP Safety Valve the software opens the PEEP Safety Valve and checks the output of the Supply Pressure Switch. • If the Supply Pressure Switch detects pressure, the PEEP Safety Valve test passes. -
Page 77: Breathing System Leak Test
4 Tests and Calibration 4.10.13 You can estimate how much of a leak there is in the ventilator portion of the breathing system by closing the patient circuit, inflating the bellows, and Breathing System Leak observing how quickly they fall on their own weight (part of machine checkout Test procedure). -
Page 78: Test Pressure Limit Circuit
7100 Anesthesia Ventilator 4.10.14 The airway pressure limit circuit should trip at approximately 109 cm H Test The Test Pressure Limit Circuit routine: Pressure Limit Circuit • establishes a closed patient airway circuit, • increments the pressure in the airway circuit, •... - Page 79 4 Tests and Calibration Test setup 1. Remove the ABS breathing system from the machine. (Aespire machine) 2. Remove the Exhalation Valve. 3. Separate the Bellows Module from the Circuit Module. 4. Install the Circuit Module only. 5. Set the Bag/Vent switch to Vent. 6.
-
Page 80: Upgrade Options
7100 Anesthesia Ventilator 4.11 Upgrade Options The Upgrade Options menu shows what features are currently available in the ventilator’s software. The ventilator can be upgraded to include additional features by entering the upgrade “Key Code” that the customer has purchased. -
Page 81: Troubleshooting
Troubleshooting w w w w WARNING Post-Service Checkout is required after you complete this section. You must perform Section “3/Post-Service Checkout” after performing any maintenance, service or repair. Failure to do so may result in patient injury. In this section 5.1 Troubleshooting instructions . -
Page 82: Troubleshooting Instructions
7100 Anesthesia Ventilator 5.1 Troubleshooting instructions Some ventilator problems may not generate any ventilator messages, even though the ventilator may not be functioning correctly: • Refer to section 5.2 Troubleshooting guide. For ventilator problems that result in an Alarm or Error message: •... - Page 83 5 Troubleshooting Symptom Probable cause Action • No display 1. Ribbon cable, control board to LCD display 1. Check cable connection. (System switch On; LED lit; 2. LCD display 2. Replace LCD display. Fan running) 3. Control board 3. Replace control board. (The problem is most likely in the Control Module.) The lit LED indicates that AC power is getting to the power supply.
-
Page 84: Alarm And Error Messages
7100 Anesthesia Ventilator 5.3 Alarm and Error messages The Service Mode (refer to section 4) includes a log of the 20 most recent Alarm Message Alarm messages (not shaded) and Error messages (shaded) experienced by the ventilator system. Error Message... - Page 85 5 Troubleshooting Message Alarm/Error Cause User Action/Concerns Service Repair Aux Gas Outlet On User Alarm The outlet selection switch is Connect the patient circuit to the If persists, check: set to the auxiliary auxiliary outlet. • ACGO switch common gas outlet. For mechanical ventilation or •...
- Page 86 7100 Anesthesia Ventilator Message Alarm/Error Cause User Action/Concerns Service Repair Canister Open User Alarm The canister release is open, Close the canister release. If persists, check: causing a large leak • Canister switch (Aestiva only). • Harness to MIA/ (Closed by default in Aespire machine.)
- Page 87 5 Troubleshooting Message Alarm/Error Cause User Action/Concerns Service Repair Exp Reverse Flow User Alarm Flow through the expiratory Look at the check valves. sensor during inspiration Water build up in the flow sensor (for 6 breaths in a row). tubes? Is a flow sensor tube cracked or broken? Replace the expiratory check...
- Page 88 7100 Anesthesia Ventilator Message Alarm/Error Cause User Action/Concerns Service Repair Insp Reverse Flow User Alarm Flow through the inspiratory Look at the check valves. sensor during expiration Water build up in the flow sensor (for 6 breaths in a row).
- Page 89 5 Troubleshooting Message Alarm/Error Cause User Action/Concerns Service Repair Low Paw User Alarm Paw does not rise at least Are circuit connections OK? 4 cm above Pmin during Look at the Paw gauge on the the last 20 sec. absorber. Look for circuit disconnection.
- Page 90 7100 Anesthesia Ventilator Message Alarm/Error Cause User Action/Concerns Service Repair No CO Absorption User Alarm bypass selected User setting. Close the canister release to (Aestiva only). remove CO from exhaled gas. No Exp Flow Sensor User Alarm Electrical signals show the Connect the flow sensors.
- Page 91 5 Troubleshooting Message Alarm/Error Cause User Action/Concerns Service Repair Paw < -10 cm H User Alarm Subatmospheric pressure Check patient condition, (<-10 cm H spontaneous activity? Increase fresh gas flow. Look for high flow through gas scavenging. Calibrate the flow sensors. With active scavenging, check the negative relief valve on the receiver.
- Page 92 7100 Anesthesia Ventilator Message Alarm/Error Cause User Action/Concerns Service Repair Pres/Vol Mon User Alarm ACGO is set to auxiliary gas Connect the patient circuit to the Inactive outlet. auxiliary gas outlet or set the switch to the common gas outlet for normal operation.
- Page 93 5 Troubleshooting Message Alarm/Error Cause User Action/Concerns Service Repair System Leak? User Alarm Leak detected between If you are using Heliox, select The primary cause for ventilator and patient Heliox on the ventilator setup this message is circuit. menu. Look for leaks in the that the bellows absorber system.
- Page 94 7100 Anesthesia Ventilator Message Alarm/Error Cause User Action/Concerns Service Repair Volume Mon User Alarm A flow sensor has been The Volume Monitoring feature is Service Mode: Disabled connected to a non- not active on this system. • System active ventilator Configurations monitoring feature.
-
Page 95: Troubleshooting Flowcharts
5 Troubleshooting 5.4 Troubleshooting Flowcharts 5.4.1 Ventilator assessment process Start Turn on System Is display Proceed Review Active Alarms, to “No Display” Error Log and Alarm Log Troubleshooting Section 5.4.2 there Diagnosis alarms? Achieved? Use Alarm Done Troubleshooting Section 5.3 ALARMS SYMPTOMS Proceed to... -
Page 96: No Display Troubleshooting
7100 Anesthesia Ventilator 5.4.2 No display troubleshooting Start - Turn on System Was there single audio Is Display Dim tone on but information power-up? can be seen? Check Contrast Adjustment User Menu Is there a continuous or Problem cycling audio... -
Page 97: Inaccurate Volume Ventilation Troubleshooting
5 Troubleshooting 5.4.3 Inaccurate volume ventilation troubleshooting Start Do Bit Counts on either channel vary by more Problem than 10 from the initial Continues? zero count? Inspect for leaks Zero Flow Sensor Perform a or water in Transducers and Pressure pneumatic lines Replace both Sensitivity... - Page 98 7100 Anesthesia Ventilator 5.4.4.A MIA board 1. Remove the Bellows Assy and Breathing Circuit subfloor to access the MIA evaluation pneumatic circuit connections. (Aestiva machine) 2. Enter the Valves-Test Tool service page and record the bit counts on the inspiratory and expiratory flow transducers.
-
Page 99: B Vmb Board Evaluation (Aespire Machine)
5 Troubleshooting 5.4.5.B VMB board 1. Remove the tabletop to access the VMB pneumatic circuit connections. evaluation 2. Remove the ABS and the exhalation valve. (Aespire machine) 3. Enter the Valves-Test Tool service page and record the bit counts on the inspiratory and expiratory flow transducers. -
Page 100: No Ventilation Troubleshooting
7100 Anesthesia Ventilator 5.4.6 No ventilation troubleshooting Does Bellows Check all valve calibrations. Start Move? If OK, go to Breathing System Leak Troubleshooting if bellows does not refill Verify pass? Zero Flow and airway pressure 1. Remove bellows assembly transducers 2. -
Page 101: High Intrinsic Peep Troubleshooting
5 Troubleshooting 5.4.7 High intrinsic PEEP troubleshooting Start Problem Verify pass? continues? Zero Flow and Transducer was airway pressure out of calibration transducers Flow from bleed orifice with BTV switch in bag Pressure Transducer Problem position? 1. Perform airway pressure transducer calibration 2. - Page 102 Notes 5-22 02/03 1006-0836-000...
-
Page 103: Maintenance
• The remaining sections, Sections 6.2 and 6.3, detail select maintenance procedures that apply only to the 7100 Ventilator. 6.1 Maintenance Schedule ........... . .6-2 6.2 Free breathing valve maintenance . -
Page 104: Maintenance Schedule
6.1 Maintenance Schedule The 7100 Ventilator is an integral component of the Aestiva/5 7100 anesthesia machine and the S/5 Aespire anesthesia machine. Refer to Section 5, “Maintenance,” in the respective anesthesia machine Technical Reference manual for the “Planned Maintenance Schedule.”... -
Page 105: Free Breathing Valve Maintenance
6 Maintenance 6.2 Free breathing valve maintenance Figure 6-1 • Free breathing valve Refer to Section 7.3 to access the Pneumatic Vent Engine. 1. Unscrew the valve seat ( ) from the side of the interface manifold. 2. Inspect the flapper ( ) and valve seat for nicks, debris and cleanliness. -
Page 106: Mopv Pressure Relief Valve Test
7100 Anesthesia Ventilator 6.3 MOPV pressure relief valve test WARNING Objects in the breathing system can stop gas flow to the patient. This can cause injury or death: • Do not use a test plug that is small enough to fall into the breathing system. -
Page 107: Repair Procedures
Repair Procedures In this section This section covers the repair and replacement procedures for the 7100 Ventilator and its related components. 7.1 Software Installation ............7-2 7.1.1 After replacing the Control Board or the Control Module . -
Page 108: Software Installation
7100 Anesthesia Ventilator 7.1 Software Installation 1. Set the system switch to Standby. 2. Insert the Software Memory Stick ( ) with contacts facing forward into the upgrade slot ( ) of the Control Module. 3. Set the system switch to On. -
Page 109: After Replacing The Control Board Or The Control Module
7 Repair Procedures 7.1.1 After replacing 1. Load the appropriate software revision using a software memory stick that matches the software revision of the replaced control board (control the Control Board module). or the Control Module 2. Enable/Disable the appropriate ventilator settings in the Service Mode, System Configuration menu, Section 4.8, to match the replaced control board. -
Page 110: Control Module
7100 Anesthesia Ventilator 7.2 Control Module The control module is mounted on either a folding mount or on a repositionable arm. In addition to the power cord, signals between the control module and the machine mounted components are sent through three cables that pass through the side of the machine (and through the arm if equipped) and connect to the rear of the control module. -
Page 111: Inside The Control Module
7 Repair Procedures 7.2.1 Inside the control The control module consists of two enclosures: the rear enclosure (A) and the front enclosure (B). To access components within each enclosure, separate module the two halves. (CB) Opening the control module 1. Place the control module face down on a protected surface. 2. -
Page 112: Control Board
7100 Anesthesia Ventilator 7.2.2 Control board (CB) Caution The circuit boards are electrostatic sensitive. Use an anti-static w w w w workstation and wear a wrist grounding strap when handling a circuit board. To replace the control board 1. Disconnect the remaining cables at the left edge of the control board (CB). -
Page 113: Battery And Power Supply
7 Repair Procedures 7.2.3 Battery and power supply Chassis PI - Ground lug from Power Inlet PS - Ground lug from Power Supply CB - Ground lug from Control Board L - Lockwasher N - Keps nut Caution The circuit boards are electrostatic sensitive. Use an anti-static w w w w workstation and wear a wrist grounding strap when handling a circuit board. -
Page 114: Front Enclosure With Control Board Removed
7100 Anesthesia Ventilator 7.2.4 Front enclosure with control board removed To replace the speaker 1. Remove the two screws (A) that hold the speaker assembly (B) to the front enclosure. 2. Reassemble in reverse order. To remove the front enclosure 1. -
Page 115: Front Enclosure Components
7 Repair Procedures 7.2.5 Front enclosure The front enclosure components include: components • The keyboard assembly (A) • The LCD display assembly (B) • The rotary encoder switch (C) To replace the keyboard The LCD display and the rotary encoder are mounted to the keyboard assembly. - Page 116 7100 Anesthesia Ventilator To replace the backlight Do Not Touch Caution Do not touch the glass portion of the backlight. Body oils or other w w w w contaminants can decrease the life of the backlight. 1. Remove the ribbon cable from the LCD display.
-
Page 117: Pneumatic Engine
7 Repair Procedures 7.3 Pneumatic engine Refer to section 6 for pneumatic engine components that are to be serviced under regular maintenance. To service other components of the pneumatic engine, you must first remove it from the housing. 7.3.1 Pneumatic Engine in In an Aestiva machine, the Pneumatic Engine is located in a housing at the rear of the breathing system. -
Page 118: Pneumatic Vent Engine In An Aespire Machine
7100 Anesthesia Ventilator 7.3.2 Pneumatic Vent In an Aespire machine, the pneumatic Vent Engine is located in a housing below the breathing system bellows. Engine in an Aespire machine To remove the pneumatic 1. Disconnect pipeline supplies; close cylinder valves; bleed off pressure. -
Page 119: Pneumatic Engine Components (Aespire Machine)
7 Repair Procedures 7.3.3 Pneumatic engine components (Aespire machine) Regulator (A) Also inspect the two o-rings that seal it to the manifold. Replace as necessary. PEEP Safety Valve (B) Ensure the valve you are installing (white dot) is in this location. PEEP Valve (C) Ensure the valve you are installing (two blue dots) is in this location. -
Page 120: Pneumatic Engine Components (Aestiva Machine)
7100 Anesthesia Ventilator 7.3.4 Pneumatic engine components (Aestiva machine) See Note Regulator (A) Also inspect the two o-rings that seal it to the manifold. Replace as necessary. PEEP Valve (B) Ensure the valve you are installing in this location is marked with two blue dots. -
Page 121: Supply Gas Inlet Filter (Aestiva Machine)
7 Repair Procedures 7.3.5 Supply gas inlet filter (Aestiva machine) Note You can replace the inlet filter without completely removing the pneumatic engine. Before replacing the filter, be sure to observe the following: • Disconnect pipeline supplies; close cylinder valves; bleed off pressure. -
Page 122: Insp/Peep Interface Assembly And Reservoir
7100 Anesthesia Ventilator 7.3.6 Insp/PEEP interface The illustration shows the Pneumatic Engine for an Aestiva machine. These components are (as are the other components) identical in the Vent Engine for assembly and reservoir an Aespire machine; however, in an Aespire machine, the Vent Engine does not include the dual-tube riser (A). -
Page 123: Manifold And Plate Assembly
7 Repair Procedures 7.3.7 Manifold and plate assembly Aestiva machine Manifold plate gasket 1. Ensure that gasket is properly positioned. 2. Carefully install plate onto manifold making sure not to disturb the gasket. 3. Start all screws first. 4. Then, torque to 1.7 N-m (15 lb-in) using sequence shown. Aespire machine 1006-0836-000 02/03 7-17... -
Page 124: Pneumatic Engine Board And Housing (Aestiva Machine)
7100 Anesthesia Ventilator 7.3.8 Pneumatic Engine Note: In an Aespire machine, the Vent Engine Board is mounted directly to the Vent Engine manifold. Refer to the Aespire machine Technical Reference Board and housing Manual for details. (Aestiva machine) To remove the Pneumatic Engine Board and housing in an Aestiva machine, you must first remove the rear subfloor of the breathing system. -
Page 125: Monitoring Interface Assembly (Mia) In An Aestiva Machine
7 Repair Procedures 7.4 Monitoring Interface Assembly (MIA) in an Aestiva machine Note: This section applies only to an Aestiva machine. For an Aespire machine, refer to the Aespire machine Technical Reference Manual for details about the Ventilator Monitoring Board. The MIA is located in the breathing system, below the front and rear subfloors. -
Page 126: Serial Adapter Board (Sab) And Power Cord/Harness
7100 Anesthesia Ventilator 7.5 Serial Adapter Board (SAB) and Power Cord/Harness Note: This section applies only to an Aestiva machine. For an Aespire machine, refer to the Aespire Technical Reference Manual for details about the Serial Isolation and Connector Board. - Page 127 7 Repair Procedures To replace the Serial Adapter Board (SAB) 1. Disconnect the two cables from the bottom of the SAB: • Cable (A) from machine switches (system switch, O flush, O supply). • Cable (B) from control module. 2. Disconnect the serial output cable (C). 3.
- Page 128 7100 Anesthesia Ventilator To replace the power cord/harness A R M Folding Mount 1. Remove the top shroud (A) (refer to Aestiva Machine Service Manual). 2. Remove the harness connector (B) from mounting bracket. 3. Disconnect the ground wires (C).
-
Page 129: Illustrated Parts
8.3 7100 Ventilator parts ........ -
Page 130: Special Instructions
7100 Anesthesia Ventilator 8.1 Special instructions Apply a thin coat of oxygen-use-approved lubricant to o-rings prior to installation (unless otherwise noted). Use: • Krytox GPL 205, Datex-Ohmeda stock number 1001-3854-000 Some screws require an anti-loosening bond. Use: • Loctite #24231, screw lock,... -
Page 131: 7100 Ventilator Parts
8 Illustrated Parts 8.3 7100 Ventilator parts Description Figure 8-1 Display Assembly........ - Page 132 7100 Anesthesia Ventilator 9, 10 143AB99 Figure 8-1 • Display Assembly (shown on Aestiva arm) Item Description Stock Number Control Module 1504-8500-000 Power Cord - Aestiva machine 1504-5705-000 Power Cord - Aespire machine 1009-5711-000 Retainer, power cord 1504-3503-000 Cable, pneumatic engine...
- Page 133 8 Illustrated Parts Refer to Note Section 7.1.2 Figure 8-2 • Display components Item Description Stock Number Control Board 1504-8507-000 Screw, M4x8 SEMS 0140-6226-113 Battery, 6 V 4 AH sealed lead acid 1504-3505-000 Strap, battery retainer 1504-3509-000 Fan, 5 VDC 1504-3516-000 Nut, M3 KEPS 0144-3717-302...
- Page 134 7100 Anesthesia Ventilator Figure 8-3 • Display, front cover assembly Item Description Stock Number Speaker, with harness 1504-3513-000 Screw, M3 0140-6219-128 Enclosure, front 1504-3500-000 Nut, M4 KEPS 0144-3717-314 02/03 1006-0836-000...
- Page 135 8 Illustrated Parts 7, 8 ZIF* Figure 8-4 • Display Keyboard and LCD assembly Item Description Stock Number Rotary Encoder, switch 1503-3012-000 Knob, soft touch 1006-4622-000 Keyboard, front panel 1504-3534-000 Display, LCD 320x240 (includes backlight) 1504-3507-000 Display Cable, flat flex 1504-5602-000 Backlight 1504-8509-000...
- Page 136 7100 Anesthesia Ventilator See Note w w w w Do Not Overtighten Figure 8-5 • Pneumatic Engine, view 1 of 2 (Aestiva machine) Item Description Stock Number Pneumatic Engine Assembly, Service-Aestiva machine 1504-8503-000 Regulator 1504-3623-000 O-ring, 9.25 ID x 12.8 OD (2)
- Page 137 8 Illustrated Parts Figure 8-6 • Pneumatic Engine, view 2 of 2 (Aestiva machine) Item Description Stock Number Interface Manifold, pneumatic engine 1504-8505-000 (with free breathing valve and mechanical overpressure valve) O-ring, 12.42 ID x 15.98 OD (2) 1406-3536-000 a - Seat, free breathing valve 1503-3204-000 b - Valve, flapper 0211-1454-100...
- Page 138 7100 Anesthesia Ventilator w w w w Do Not Overtighten Figure 8-7 • Pneumatic Vent Engine, view 1 of 2 (Aespire machine) Item Description Stock Number Pneumatic Engine Assembly, Service-Aespire machine 1009-8000-000 Regulator 1504-3623-000 O-ring, 9.25 ID x 12.8 OD (2)
- Page 139 8 Illustrated Parts Figure 8-8 • Pneumatic Engine, view 2 of 2 (Aespire machine Stock Number Item Description (Aespire) Interface Manifold, pneumatic engine 1504-8505-000 (with free breathing valve and mechanical overpressure valve) O-ring, 12.42 ID x 15.98 OD (2) 1006-3615-000 a - Seat, free breathing valve 1503-3204-000 b - Valve, flapper...
- Page 140 7100 Anesthesia Ventilator Aestiva machine Figure 8-9 • Manifold plate for an Aestiva machine Item Description Stock Number Manifold — Aestiva machine 1504-8504-000 Manifold — Aespire machine 1504-3715-000 Gasket, manifold — Aestiva machine 1504-3711-000 Gasket, manifold — Aespire machine 1504-3717-000 Plate, manifold —...
- Page 141 8 Illustrated Parts Figure 8-11 • Mounting Bracket, pneumatic engine (Aestiva machine) Item Description Stock Number Pneumatic Engine Board, PEB 1504-8508-000 Cuff, exhalation valve interface 1503-3589-000 Plug, 1/8-inch 1006-3611-000 Shield, cuff protection 1503-3214-000 Screw, M4x8 Pozidriv PAN 1006-3178-000 Bracket, pneumatic engine housing 1503-3206-000 1006-0836-000 02/03 8-13...
- Page 142 7100 Anesthesia Ventilator Figure 8-12 • Serial Adapter Board (Aestiva machine) Note: For the Serial Isolation and Connector Board in the Aespire machine, refer to the Technical Reference manual for the Aespire machine. Item Description Stock Number Serial Adapter Board, SAB...
- Page 143 8 Illustrated Parts Figure 8-13 • Subfloor components (Aestiva machine) Note: For the Ventilator Monitoring Board (VMB) in the Aespire machine, refer to the Technical Reference manual for the Aespire machine. Item Description Stock Number Monitoring Interface Assembly, MIA 1504-7000-000 a - Coupling, inline, black 1503-3128-000 b - Coupling, inline, white...
- Page 144 Notes 8-16 02/03 1006-0836-000...
- Page 145 Figure 9-1 • Aestiva 7100 ventilator block diagram ....... 9-2 Figure 9-2 •...
- Page 146 Monitoring Board O2 Sensor Rotary Membrane Switches Encoder Breathing Circuit ID Inspiratory Flow Sensor Bulkhead Connector Expiratory Flow Sensor Absorber Bypass Switch Canister Release Switch Bag/Vent Switch Control Panel Switch Figure 9-1 • Aestiva 7100 ventilator block diagram 02/03 1006-0836-000...
-
Page 147: Schematics And Diagrams
Monitoring Interface Cable Bag/Vent Switch ABS On Switch Ventilator Rotary Membrane Monitoring Encoder Switches Board Expiratory Flow Sensor Bulkhead Connector Inspiratory Flow Sensor ACGO O2 Sensor Switch Breathing System Tabletop Figure 9-2 • Aespire 7100 ventilator block diagram 1006-0836-000 02/03... -
Page 148: Aestiva 7100 Anesthesia Machine Pneumatic Diagram
HIGH OR LOW CABLE TO FLOW RESTRICTOR FILTER ANESTHESIA VENTILATOR AIR/OXYGEN DISPOSAL CONTROL MACHINE SYSTEM MODULE DISS EVAC OR BSI ROOM OR BOC FLOW INDICATOR (OPTIONAL) ACTIVE GAS SCAVENGING INTERFACE Figure 9-3 • Aestiva 7100 anesthesia machine pneumatic diagram 02/03 1006-0836-000... -
Page 149: Aespire 7100 Anesthesia Machine Pneumatic Diagram
N2O P-LINE (opt, Std US) Airway Flowmeter Module 110 psi Selectatec Manifold Gauge Pressure (Dual Flowtubes Optional) Relief Gauge 5.5 psi Pressure Relief Valve N2O Cyl (opt) Pneumatic Engine Board Ventilator Monitoring Board Figure 9-4 • Aespire 7100 anesthesia machine pneumatic diagram 1006-0836-000 02/03... -
Page 150: Aestiva 7100 Ventilator Wiring Diagram
To O Pressure Limit System Switch Flush Cable to Serial Adapter Board Cable to Pneumatic Engine Board Cable to Monitoring Interface Assembly Airway Pressure Limit Sense Tubing Breathing System Switches Figure 9-5 • Aestiva 7100 ventilator wiring diagram 02/03 1006-0836-000... -
Page 151: Aestiva 7100 Pneumatic Engine And Pneumatic Engine Board
H 2 O ATMOSPHERE VENTILATOR PNEUMATIC ENGINE Flow Sensor Bulkhead Connector Canister Release Breathing Circuit ID Figure 9-6 • Aestiva 7100 Pneumatic Engine and Pneumatic Engine Board Figure 9-7 • Aestiva 7100 breathing system switches to Monitoring Interface Assembly 1006-0836-000 02/03... -
Page 152: Aespire 7100 Ventilator Wiring Diagram
Control/Display Module Task Light RS-232 Inlet Key to Symbols VEB = Vent Engine Board VMB = Ventilator Monitoring Board ACGO ACGO ACGO = Auxiliary Common Gas Outlet ACGO Selector Switch Figure 9-8 • Aespire 7100 ventilator wiring diagram 02/03 1006-0836-000... -
Page 153: Aespire 7100 Ventilator Tubing Diagram
Scavenging Downtube Supply Vaporizer Manifold Sample Return From Flowmeter Vent Engine a - black b - white c - yellow d - blue Ventilator Monitoring Board ACGO ACGO Selector Switch Figure 9-9 • Aespire 7100 ventilator tubing diagram 1006-0836-000 02/03... -
Page 154: Control Module Block Diagram
7100 Anesthesia Ventilator T2L/250V From AC Inlet 5mm x 20mm 6V Battery Line TP10 TP10 TP2 TP3 J1 J2 Backlight TP11 TP11 TP14 TP15 TP12 TP13 TP17 TP16 TP18 +C45 TP19 TP20 TP21 TP21 LCD Display TP22 TP23 TP24 TP25... -
Page 155: Display Panel Block Diagram
9 Schematics and Diagrams To Backlight LCD Display To LCD Display From Rotary Encoder From Front Panel Keyboard To Speaker Figure 9-11 • Display Panel block diagram 9-11 1006-0836-000 02/03... - Page 156 Notes 9-12 02/03 1006-0836-000...
- Page 158 7100 Anesthesia Ventilator Technical Reference Manual, English 1006 0836 000 02 03 B 01 01 02 Printed in USA ©Datex-Ohmeda, Inc. All rights reserved...
Need help?
Do you have a question about the 7100 and is the answer not in the manual?
Questions and answers