
Related Manuals for Gymstick CRANK BIKE X4


Summary of Contents for Gymstick CRANK BIKE X4
- Page 1 RANK BIKE X4 USER MANUAL Read all instructions carefully before operating this product. Retain this Owner’s Manual for future reference.
-
Page 2: Table Of Contents
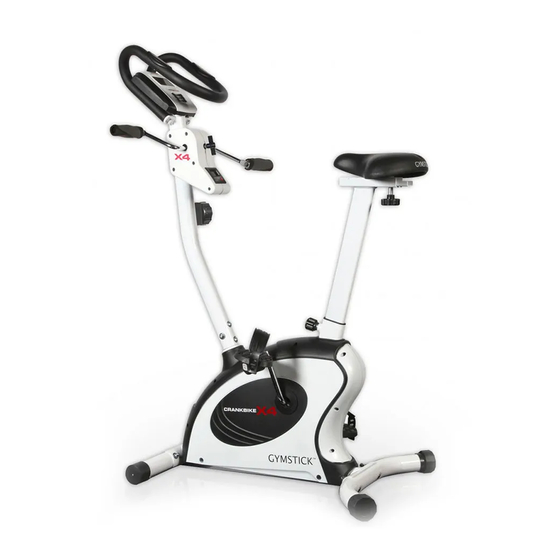
TABLE OF CONTENTS SAFETY PRECAUTIONS ASSEMBLY INSTRUCTIONS 9-12 PARTS LIST COMPUTER INSTRUCTIONS EXPLODED DIAGRAM EXERCISE INSTRUCTIONS HARDWARE PARTS LIST IMPLIED WARRANTY PRE-ASSEMBLY CHECK LIST IMPORTANT SAFETY PRECAUTIONS Please read the entire manual before you assembling or using this exercise bike. In particular, note the following safety precautions: 1. - Page 3 Gymstick Crankbike x4 is the first home exercise bike with pedals also for hands. The bike can be used just for pedalling with legs but the aerobic training will be even 40 % more efficient if the pedalling is performed both with legs and hands.
-
Page 4: Parts List
PARTS LIST PART PART DESCRIPTION DESCRIPTION Main frame Left Pedal Rear stabilizer Crank for mini bike End cap for rear stabilizer Flat washer Φ10*Φ20 Carriage bolt M8 x 60 Powder spacer Front stabilizer Self-tapping screw ST5*15 End cap for front stabilizer Screw ST5*15 Curve washerΦ8*Φ20 Crank w/pulley... -
Page 5: Exploded Diagram
EXPLODED DIAGRAM... -
Page 7: Hardware Parts List
HARDWARE PARTS LIST Description Drawing Q’ty Carriage Bolt M8*60 Curve Washer Φ8*Φ20 Domed Nut M8 Allen Bolt M8*16 PVC Cap M10 T Type Knob Lock knob Spacer Square plate Carriage bolt M8*40 Allen Wrench Allen Wrench Allen Key 6mm Above described parts are all the parts you need to assemble this machine. Before you start to assemble, please check the hardware packing to make sure they are included. -
Page 8: Pre-Assembly Check List
PRE-ASSEMBLY CHECK LIST NO . 1 NO . 12 NO . 5/ 2 NO . 18 NO . 11 NO . 28 NO . 19 NO . 35/ 34 NO . 23L/ R PART NO. DESCRIPTION Q’TY Main Frame 2 / 5 Front / Rear Stabilizer 1 / 1 Front Post... -
Page 9: Assembly Instructions
ASSEMBLY INSTRUCTIONS STEP 1 (a) Attach front stabilizer (5) to main frame (1), tighten with 2 sets of carriage bolt (4), curve washer (7) and domed nut (8). (b) Then, attach rear stabilizer (2) to main frame (1), tighten with 2 sets of Allen bolt (4), curve washer (7) and domed nut (8). - Page 10 HOW TO CONNECT TENSION CONNECTOR Slide the Cable wire from the Upper Tension Connector in between the opening on the wire holder on the Lower Tension Connector. Pull Upper Tension Connector backward and slide the wire through the slot on the bracket.
- Page 11 STEP 3 (a) Attach handlebar (19) to front post. Fasten with 2 sets of flat washer (37), Allen screw (22) and PVC cap (23). (b) Insert hand pulse wires (20) through grommet (17) and insert through the hole in the front post (12), pull the hand pulse wires through the hole at the top of the front post and insert grommet (17) into the front post.
- Page 12 STEP 5 The left pedal (35) and right pedal (34) are marked "L" and "R". Connect them to the appropriate crank arm (41) and connect the handlebar (23) to the mini bike crank. The right pedal is on the right hand side of the cycle as you sit on it. Note that the right pedal should be screwed clockwise and the left pedal counter-clockwise.
-
Page 13: Computer Instructions
COMPUTER INSTRUCTIONS FUNCTIONAL BUTTONS: MODE Push down for selecting functions. To Set the consumer movement of time, distance, calories and hand pulse. RESET For resetting consumer movement of time, distance, calories and hand pulse. FUNCTION AND OPERATIONS: 1.SCAN: Press “MODE” button until “SCAN” appears, monitor will rotate through all the 6 functions: Time, speed, distance, calorie, odometer and pulse. - Page 14 6. ODOMETER: Monitor will display the total accumulated distance. 7. PULSE: Press MODE button until “PULSE” appears. Before measuring your pulse rate, please place your palms of your hands on Both of your contact pads and the monitor will show your current heart beat rate in beats per minute (BPM) on the LCD after 6~7 seconds.
-
Page 15: Exercise Instructions
EXERCISE INSTRUCTIONS Using your X4 Crank Bike will provide you with several benefits, it will improve your physical fitness, tone muscles and in conjunction with a calorie controlled diet help you lose weight. 1. Warming Up Warming up is advisable as it will reduce the risk of cramp and muscle injury and it prepares the body for the workout. -
Page 16: Implied Warranty
• Non-compliance of the operating instructions Wear parts and expendable parts are also not covered. The device is only intended for home use. The warranty does not apply to commercial use of any kind. Manufactured by: Gymstick International Oy Ratavartijankatu 11 15170 Lahti, FINLAND...
Need help?
Do you have a question about the CRANK BIKE X4 and is the answer not in the manual?
Questions and answers