Table of Contents
Troubleshooting

Related Manuals for SVAT CV501 - 16CH


Summary of Contents for SVAT CV501 - 16CH
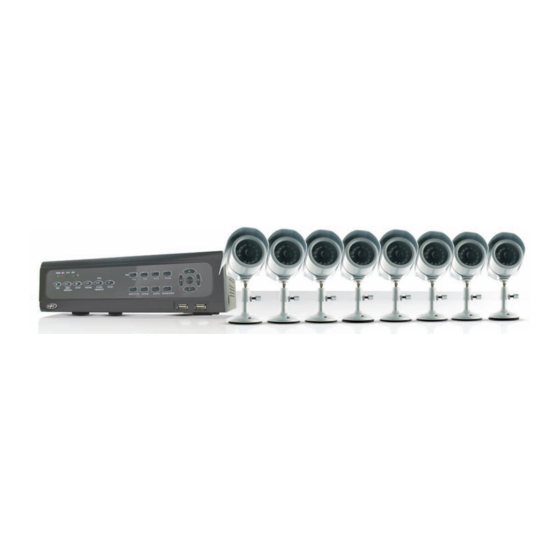
- Page 1 SVAT ELECTRONICS now you can see Web Ready 16 Channel H.264 DVR Security System w/ iPhone & BlackBerry Access and 8 Hi-Res Indoor/Outdoor Night Vision Surveillance Cameras COMPLETE SYSTEM INSTRUCTION MANUAL V1.1 www.svat.com CV501 - 16CH...
- Page 2 Email: support@svat.com Online live web chat: www.svat.com/support Toll free fax: 1.888.771.1701 Note: This is manual version 1.1 for this product. You may find updated versions by visiting our website at www.svat.com CV501 - 16CH NEED HELP? Toll free telephone: 1.866.946.7828...
-
Page 3: Product Warranty Information
This warranty is valid only in Canada and the continental U.S. This warranty cannot be re-issued. Tearing the tamper-proof sticker on the DVR case will void the product warranty. CV501 - 16CH SVAT CANADA 4080 Montrose Road Niagara Falls, ON... -
Page 4: Table Of Contents
Pop up Menu Bar ... 17 Pop up Menu Icons ... 17 MAIN MENU ... 18 CAMERA SETUP ...19 Camera ... 19 Video Adjust ... 19 Camera Title ... 19 Display... 20 Dwell Time ... 20 CV501 - 16CH TABLE OF CONTENTS... - Page 5 DDNS Setup ... 34 RTSP ... 34 Mail Function ... 34 FTP ... 36 BACKUP SETUP ..37 USB Backup ... 37 DVD/CD Backup ... 38 SYSTEM SETUP ...39 Date/Time ... 39 System Type ... 40 CV501 - 16CH ...continued...
- Page 6 ActiveX Installation ... 51 VIEWING YOUR DVR OUTSIDE OF YOUR NETWORK ...52 Port Forwarding ... 52 Finding External IP Address ... 52 Testing ... 53 Troubleshooting ... 53 DDNS CONFIGURATION ...54 DDNS.org ... 54 DDNS Account Setup ... 55 CV501 - 16CH ...continued...
-
Page 7: Introduction
H.264 compression allows you to record and store more footage using less space, so you will never miss an important event. This manual was written to ensure that you get the most out of your CV501 - 16CH DVR. -
Page 8: What Is Included
Our customer support team can be reached by phone 24/7, or by email and live web chat services so that you will always have access to an expert. CV501 - 16CH 2 x Four to One Power... - Page 9 Endless Location Options with 4 Extra Extension Wires We’ve included four extra 60ft extension wires so that you can maximize the distance between your cameras and the DVR. (Wire Model #: CVW62) CV501 - 16CH...
-
Page 10: Additional Accessories
12. 1-4 – Pressing this scrolls through channels (cameras) 1 – 4 one at a time 13. 5-8 – Pressing this scrolls through cameras 5-8 one at a time CV501 - 16CH • CVW62 (60 ft. Camera Extension Cable) 14. 9-12 – Pressing this scrolls through cameras 9-12 one at a time 15. -
Page 11: Back Panel
5. Audio Out - Connect to a speaker or amplifier 6. RS-232/485 – Connects a PTZ (pan/tilt/zoom) adapter Remote Control CV501 - 16CH 7. Video Input – CH 1 to 16 – Camera connections 8. Audio In – Connects to an audio supported camera/ microphone (not included) 9. -
Page 12: Ptz Connection
9 PIN D-SUB adapter for PTZ cameras: ALARM CONNECTION 25 PIN D-SUB adapter for alarm input and relay: CV501 - 16CH 1. 9 PIN D-SUB MALE Connection - Connects into RS 232/485 Port on the back of DVR 2. Connection for a RS 232 PTZ Camera 3. -
Page 13: Things To Consider Before Installation
3. Plug the camera’s power adapter into an AC outlet or power bar. CV501 - 16CH For more information on camera location go to: www.defendercollege.com 2. Plug the included four to one power supply into the camera power... -
Page 14: Connecting Additional Devices To The Dvr
It is recommended to connect the included USB mouse before powering on the DVR. This will speed up the initializing process as well as make the DVR easier to use. 1. Plug the USB connection on the mouse into the USB connection on the front right of the DVR. Note: This Manual was written with the mouse being the main tool for navigation. CV501 - 16CH... -
Page 15: Rca Monitor
CONNECTING YOUR ALARM SYSTEM TO THE DVR The CV501 - 16CH supports a 2 wire (normally open or normally closed) connection for up to sixteen external alarm devices simultaneously using the included alarm adapter. For more information on setting up the DVR to work with these alarms please see “buttons and connections.” Please see your alarm device manufacturer for further instructions on required connections and settings. -
Page 16: Router
Note: We recommend using a surge protected power bar and/or Uninterrupted Power Supply (UPS) backup to prevent damage to your DVR system. CV501 - 16CH 3. Insert the power supply wire into the rear DC 12V port on the DVR. -
Page 17: Getting Started
Using the Mouse • The included USB mouse makes using the CV501 - 16CH simple and efficient. Make sure that the mouse is connected to the front right USB port before powering on the DVR •... -
Page 18: Main Menu
1. Scroll the mouse to the bottom of the screen to reveal Pop Up Menu Bar. 2. Click the to call up the Main Menu. CV501 - 16CH to the right of it, you can works as the escape button, and... -
Page 19: Camera Setup
3. Select ENTER to confirm changes and exit the keyboard. 4. Press ENTER or Click to save. To exit without saving click the X to exit or Press Menu. CV501 - 16CH Click to return to Menu without saving. What the buttons mean: Mostly all of the characters you see on the virtual keyboard will display as seen on the screen. -
Page 20: Display
This is a camera specific setting defined by the manufacturer. Please consult your PTZ camera manual or manufacturer for details on this setting. Supported protocols can be found in the specifications. CV501 - 16CH to exit to the Main Menu without saving. -
Page 21: Ptz Controls
Note: Every time motion is detected an icon will appear, and the camera name from which motion is detected will change from white, to yellow. CV501 - 16CH Note: To exit the PTZ control center, right click the mouse. -
Page 22: Setting Motion
2. Clear: Used to mask off certain areas you do not want to trigger motion detection. 3. EXIT: Saves changes and exits the MOTION DETECTION SETUP MENU. CV501 - 16CH The squared off area shows the area with no detection (would be shaded green) -
Page 23: Recording Setup
7. Exit the main menu . The DVR will take a few moments to load the settings. CV501 - 16CH Note: NTSC is the video standard for North America. Europe and other countries use the PAL video standard. NTSC videos or cameras will not work on PAL television sets or monitors. -
Page 24: Alarm Record
2. Use the mouse wheel or directional keys to change how long you want the DVR to record when an alarm is detected. 3. Press ENTER or Click to save changes. 4. Click to exit. 5. DVR may take a few moments to save the settings. CV501 - 16CH... -
Page 25: Record Quality
Schedule 4, Schedule 5, or manual. The schedule that is displayed on the Record Setup Screen will be the active recording schedule. See the directions on how to setup a schedule in the Schedule setup section. CV501 - 16CH to change the record quality. -
Page 26: Audio Record
There are 5 different options for schedules, so you can set a separate schedule for long weekends, holidays, when you are on vacation, or for the days you will be away from your home/office and have to leave others in charge. Once the schedules are set, it is easy to switch from one to the other. CV501 - 16CH... -
Page 27: Alarm Setup
3. Motion Detection – The DVR will archive and store the footage when motion is detected on any of the 8 cameras when set up. CV501 - 16CH to enter the schedule... -
Page 28: External Alarm Mode
The event log holds the date and time, of the footage which is saved due to an alarm being detected by the DVR and other types of events. The different types of events that are logged are: 1. External Alarm 2. Video Loss 3. Motion Detection 4. Manual Recording 5. Power On CV501 - 16CH... -
Page 29: Buzzer Time Setup
Relay time setup allows you to adjust the length of time the DVR will send an electrical signal through the connected relay device. An external power source is likely required. Please contact your alarm manufacturer for information and assistance with your alarm. Note: SVAT does not provide support for external alarm systems. Please contact the alarm manufacturer for instructions. CV501 - 16CH... -
Page 30: Hard Disk Management
5. Press Menu or select the to return to the Main Menu. 6. Press Menu or select the to exit the Main Menu and save your settings. The DVR may take a few moments to load the settings. CV501 - 16CH... -
Page 31: Hdd Information
6. Press Menu or select the to exit the HDD Management Menu. 7. Press Menu or select the to exit the Main Menu and save your settings. The DVR may take a few moments to load the settings. CV501 - 16CH... -
Page 32: Network Setup
IP addresses. If you are unsure of whether you need a static or dynamic IP address, please contact the person who setup your network or your internet service provider (ISP). A static IP address would be beneficial if your internal IP address changes often. CV501 - 16CH... -
Page 33: Pppoe
2. Enter the Username provided by your ISP. 3. Enter the Password provided by your ISP. 4. Press ENTER on State to update the status. If properly connected, the State will display your connection status as being connected. CV501 - 16CH... -
Page 34: Ddns Setup
To set your DVR to email you when motion and/or the alarm goes off: 1. Click on Menu. 2. Click on the Network setup. 3. Highlight ‘MAIL’ and select the set button CV501 - 16CH or press enter on the front of the DVR. - Page 35 • When you enable motion the DVR will email your set email when motion is detected • When you enable alarm the DVR will email your set email when the alarm is triggered (based on your alarm settings) Note: Motion detection and/or alarm must be set to ON from the main menu. CV501 - 16CH...
-
Page 36: Ftp
Note: Files need to be played back using the playback software. The player can be downloaded from the web interface, the included CD, or from the DVR’s product webpage. See Playback Software for information on how to play back up files. CV501 - 16CH button to save changes and exit the menu. The DVR may take a few moments... -
Page 37: Backup Setup
USB backup recording settings. From this Menu you can choose the start and end time for the USB backup. This will transfer existing video footage in the backup time frame onto the USB drive. CV501 - 16CH... -
Page 38: Dvd/Cd Backup
If the CD/DVD is rewritable, it will erase the disk before backing up the footage on it. Close Disk: Allows you to choose if the CD/DVD you backup the footage to can have more footage/information added to it in the future. Some CD/DVD readers require that the disc is closed. CV501 - 16CH... -
Page 39: System Setup
3. Date Format allows you to choose the syntax to display the Year, Month and Date. This can be changed between YYYY/MM/DD, DD/MM/YYYY, and MM/DD/YYYY depending on what you are most comfortable with. CV501 - 16CH button to save changes and burn the footage from the DVR onto the CD/DVD inserted into... -
Page 40: System Type
3. Use the mouse wheel or directional keys to enable CAMERA TITLE, DVR STATUS and DATE/TIME. By enabling these options, the camera title, the status of the DVR and the date/time will appear on the viewing screen. 4. Select the to save. 5. Exit the Main Menu. It may take a few moments to save the changes. CV501 - 16CH... -
Page 41: Language
1. Select LOAD DEFAULT from the System Setup Menu. 2. Select to enter the load default settings page. 3. Select “Load Setup From Default” and press ENTER or click A warning screen will appear saying: " SYSTEM SETUP WILL INITIALIZE. CONTINUE? YES/NO. " CV501 - 16CH... -
Page 42: Load Backup Usb
5. Repeat steps 2-4 for the End Date. 6. Set the Delay time to accurately reflect the time change during the daylight savings months. Press Menu or click the Return button to save your settings and return to the previous Menu. CV501 - 16CH button. -
Page 43: Live Viewing
Note: The CV501 - 16CH does not include audio supported cameras, but it does support one audio input. If you have attached a microphone, or have a camera that supports audio, you can choose to turn the sound on and off by clicking this button. -
Page 44: Playback
PLAYBACK By clicking the Play button from the Pop Up Menu, front panel, or remote control a Play Search window will pop up. The CV501 - 16CH allows you to review your playback with two different search options: 1. Play Time Search – Allows you to view your recorded footage based on the day and time you wish to preview. -
Page 45: Time Search
MOTION When the DVR detects motion, it will record the date, time, and corresponding channel. The DVR will also display the icon on the channel where motion was detected. CV501 - 16CH or press PLAY or press PLAY on the... -
Page 46: Backup Video Playback
5. Navigate the USB drive and select the *.264 file you wish to view. If you choose to rename the video clip make sure not to change the file extension from .264. 6. Click "Open" on the file you wish to play. Follow the playback controls explained in Backup Player – Playback Control. BACKUP SOFTWARE CV501 - 16CH... -
Page 47: Buttons And Connections
4 – Quad Camera mode displays 4 channels. 9 – 9 channel mode displays 9 channels. 16 – 16 channel mode displays 16 channels. Play Audio – Will play audio through computer if it was recorded onto the backup footage. CV501 - 16CH... -
Page 48: Network Guide
DVR. This can be done by following either of the two methods below. Method 1 only affects websites that you specifically add to the trusted sites list. To change for all websites, use Method 2. CV501 - 16CH... -
Page 49: Method 1
DEFAULT LEVEL and change the security level of the zone to “Low”. This can be done by running the slider to the bottom. This will allow ActiveX controls from the DVR to be downloaded and the DVR to be viewed on the computer. 10. Click Apply. 11. Click OK. CV501 - 16CH... -
Page 50: Method 2
If the computer and the DVR are connected to the same router you can use the internal IP address to view the DVR. If the computer is not connected to the same router and is at a remote location you will need to use the external IP address for the DVR to view the DVR from that computer. CV501 - 16CH... -
Page 51: Login
“Install This Add-on for All Users on This Computer…”. Please be patient as the installation process can take 1-2 minutes. If your ActiveX settings are set correctly you will see the following dialogue box. Click Install. You should now see the web player and the connected cameras. CV501 - 16CH... -
Page 52: Viewing Your Dvr Outside Of Your Network
DVR go to www.whatsmyip.org or www.showmyip.com using a computer that is connected to the same router as the DVR. The web sites will display your external IP address in the top of the web page for your reference. CV501 - 16CH... -
Page 53: Testing
• A DSL modem is preventing the connection because it is on a different sub-network. Contact your ISP to assist with bridging the modem and router together Note: SVAT technical support cannot troubleshoot modems, since changing these settings can potentially render your modem inoperable. Bridging or any other modifications to the modem will need to be completed by the ISP. CV501 - 16CH... -
Page 54: Ddns Configuration
6. Navigate to STATE: and click SET or press ENTER to manually update the website. Note: Before filling in the DYNDNS.com information on your DVR, you must create an account and a hostname for your DVR through the DYNDNS website. CV501 - 16CH... -
Page 55: Ddns Account Setup
2. You will be prompted for a Username and Password. Username: admin Password: admin 3. Click OK and the DVR software and footage will pop up. Note: If using a port other then 80, the port must be specified after your hostname CV501 - 16CH name,... -
Page 56: Network Viewing And Playback
1. Choose the Start and End Time. 2. Press Save. 3. Choose the location to save the backup footage. 4. This will backup the footage in H.264 format to the desired location. Use the player to view the recorded footage. CV501 - 16CH... - Page 57 Play – Plays footage Fast Forward – Fast forwards playback CV501 - 16CH Controls the direction of the PTZ camera. It can be moved Up, Down, Left, and Right. The home button will return the camera to the default camera position.
-
Page 58: Time Point Backup
• When you are done recording, click STOP in the small pop up screen FULL SCREEN – Expands the viewing window to the full size of your monitor SCREEN FORMAT – Change from quad, 9 camera, 16 camera and to single channel viewing. CV501 - 16CH... -
Page 59: Dvr Configuration Options
Displays the current version of firmware loaded onto the DVR. New Firmware (Browse): Browses to the location that the firmware update is stored. Upgrade: Apply the new firmware version. CV501 - 16CH SYSTEM OPTIONS The system information, network information and other options are displayed when this option is clicked. -
Page 60: Network Options
Subject: from the field below as well as information regarding the new connection. This will include the new IP address. CV501 - 16CH Browse to the location where the system configuration settings are stored. Applies the configuration settings from the backup file. - Page 61 Enables or disables the DVR to send email notifications when an external alarm is detected. This requires alarm detection to be set up in the ALARM SETUP menu. The DVR will email based on the parameters below. CV501 - 16CH...
-
Page 62: Other Options
3 is rtsp://IPADDRESS/CH03 • Fill in the spot (above) called IPADDRESS with the external IP address of your DVR network found on http://www.whatsmyip.org Note: Some phones do not require Port Forwarding for internal viewing over WiFi connection. CV501 - 16CH... -
Page 63: Troubleshooting
6. Port 80 is being blocked by your ISP (Internet Service Provider). Try changing the HTTP port to 2000. Port forwarding will need to be changed to use the new port. 7. A DSL modem is preventing the connection because it is on a different sub-network. CV501 - 16CH... -
Page 64: Mobile Viewing Installation Guide
Note: This service uses data on your mobile device which may incur data charges through your cell phone service provider. Contact your cell phone provider to see if the cost for this type of data is covered. CV501 - 16CH iPhone and iTouch Viewing... -
Page 65: Sony Ericson K608I Viewing
The first step is to copy the MobileViewer.jar file to a storage location on your mobile that can be accessed using the file manager on the mobile device. CV501 - 16CH 1. Copy the MobileViewer.jar file from the CD or website onto the desktop. - Page 66 You will return to the site list. 5. Highlight the desired site you wish to connect to. If all your settings are correct you will view the channel of the DVR that you set in the site list settings. CV501 - 16CH • Click Options •...
-
Page 67: Iphone And Itouch Viewing
BlackBerry or one of the subfolders. (The folder needs to be accessible on the BlackBerry) • Disconnect the BlackBerry device from the computer CV501 - 16CH 2. In the address bar type in: http://IPADDRESS/iphone.html. Ex. http://74.11.213.177/iphone.html You will be prompted to enter a username and password. - Page 68 If using a different model of BlackBerry, the Mobile Viewer may be listed with all of the other applications on your phone. Check the Main Menu for Mobile Viewer 5. Once the software has loaded: • Press Options • Select Site List • Click on Add CV501 - 16CH...
- Page 69 IP address of the DVR. • Click Ok or Allow to allow the connection. Note: If all of your settings are correct you will view the channel of the DVR that you set in the Site List Settings. CV501 - 16CH...
-
Page 70: Troubleshooting Guide
To change this go to the Hard Drive set up and turn Overwrite Enabled on • The CV501 - 16CH’s mouse will only work when plugged into USB port on the right side • Check your FPS that you are using, if you are using a high number of FPS then the hard drive will fill up faster. -
Page 71: Camera Troubleshooting
I cannot see at night with my IR night vision cameras My camera is not displaying any image CV501 - 16CH • Make sure the router is properly plugged in and setup • Make sure the DVR is properly plugged into the router •... -
Page 72: Specifications
Autostart Recording Auto Resume Recording Yes (watch dog) CV501 - 16CH • Night vision mode displays in black and white. Make sure there is enough lighting in the room to check if color is working • Power cycle the DVR by unplugging the DVR with a camera still connected. Leave for 10 seconds and pow on again. - Page 73 Peripherals Drive, USB CD/DVD Burners Alarm Sensor Inputs Alarm Relay Outputs PTZ Protocols Pelco-D, Pelco-P, Hunt, Li-lin, Dynacolor, Eyeview, EP-Pelco-D, EP-Pelco-P CV501 - 16CH System Requirements Mac Compatible? PC Requirements for IE broswer Software CD 1 GHz or above 256MB or above...
- Page 74 4.7"(L) x 2.5"(W) x 2.5"(H) Weight Around 325 g Disclaimer: The CV501 - 16CH has been designed to come equipped with VU301-C cameras, depending on the product "kit " you have purchased, your camera type or camera specifications may vary. Feature Notes 1.
-
Page 75: Camera Manual
5. Connect the RCA Video from the 60ft video/power wire (H) into the Channel/Camera inputs on your DVR or monitor. 6. Repeat for all cameras (using two, four to one power supply cables for all 8 included cameras). CV501 - 16CH VU301-C Camera 1. - Page 76 GATEWAY (ROUTER IP): ____________________________________(example) 127.0.0.1 DDNS SERVER:__________________________________________ (example) DDNS.DVRLINK.NET NET CLIENT PORT: ________________________________________(example) 6100 WEB SERVER PORT: _______________________________________(example) 80 MAC ADDRESS: __________________________________________(example) 00-12-3A-45-67-89 EXTERNAL IP ADDRESS: ____________________________________(example) 14.14.243.113 CV501 - 16CH DRILL HOLES IN THESE POSITIONS DRILL HOLES IN THESE POSITIONS...
- Page 77 NOTES AREA CV501 - 16CH...
- Page 78 VISIT US ON THE WEB! • Product Information • User Manuals • Quick Start Guides • Networking Guides www.svat.com SVAT ELECTRONICS • Specification Sheets • Software Updates • Firmware Upgrades Model#: CV501-16CH www.svat.com now you can see...
Need help?
Do you have a question about the CV501 - 16CH and is the answer not in the manual?
Questions and answers