
Related Manuals for SVAT CV0204DVR


Summary of Contents for SVAT CV0204DVR
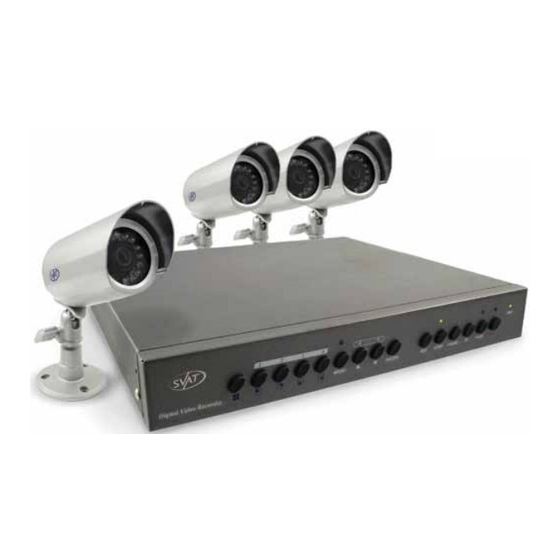
- Page 1 SVAT ELECTRONICS Now You Can See WEB READY DVR SYSTEM W/ 4 OUTDOOR COLOR CCD NIGHT VISION SECURITY CAMERAS COMPLETE SYSTEM Instruction Manual Model # CV0204DVR www.svat.com...
- Page 2 SVAT ELECTRONICS Now You Can See CV0204DVR www.svat.com...
- Page 3 We take quality very seriously. This is why all of our products come with a one year warranty from the original purchase date against defects in workmanship and materials. If you have warranty or support issues please contact us using any of the following methods: SVAT Electronics USA 2315 Whirlpool St., Unit 333 NIagara Falls, New York...
-
Page 4: Table Of Contents
4x Camera Power RCA to RCA Adapters wire (male) - Mounting Hardware - 1 Year Warranty WHAT IS COMPATIBLE The CV0204DVR is compatible with TVs, VCRs, computers and other SVAT systems including: CV67 CVP400C CV0204DVR 4x 60ft Extension 5x BNC Connectors Wires... -
Page 5: Safety Precautions
SVAT ELECTRONICS Now You Can See SAFETY PRECAUTIONS Disposal of Old Electrical & Electronic Equipment (Applicable in the European Union and other European countries with separate collection systems). This symbol on the product or on its packaging indicates that this product shall not be treated as household waste. -
Page 6: Introduction / Features
The CV0204DVR also has a built-in internet server for remote viewing. Just plug the DVR into your internet connection and set it up with the included software. Then simply type in your... -
Page 7: Camera Setup
60ft video/power wire. . Connect the 60ft video/power wire’s male RCA plug to the VIDEO IN port of your TV/monitor/VCR/DVR. CV0204DVR SVAT ELECTRONICS Now You Can See . Match the two arrows on top of both connectoring cables. -
Page 8: Installation
RCA wire, there is no need to plug in the red or white inputs. On your television switch to the video/audio input channel Your system is now installed and ready for use. CV0204DVR SVAT ELECTRONICS Now You Can See... -
Page 9: Name & Function Of Each Part
16. PWR: Power indicator. 3.2 REAR PANEL Video Input [VIDEO IN]: Connect to cameras. DC 12V/ 2.5A [Power Input terminal]: power socket. Video Output [VIDEO OUT]: Connect to the monitor. RJ45: Internet connection terminal. CV0204DVR SVAT ELECTRONICS Now You Can See... -
Page 10: Operating Procedure
SVAT ELECTRONICS Now You Can See 4. OPERATING PROCEDURE 4.1 POWERING ON This DVR is built to be on at all times, and therefore should be connected to a surge protected power bar (UPC power backup). Use the power bar’s switch to turn the unit off and on. This is especially important as loss of power while recording could possibly damage the hard drive. -
Page 11: Playback Mode
When the recording is done, press STOP to return to live mode. During playback, press FF to change the playback speed (FF1, FF2, FF3), or press the REV button to reverse playback. CV0204DVR SVAT ELECTRONICS Now You Can See... -
Page 12: System Setup
(second layer to first layer or third layer to second layer) and will auto update the modified data. Under main menu (first menu layer), the system will enter live mode. Press ENTER to increase or decrease the highlighted setting values. Menu Layer Operation Guide CV0204DVR SVAT ELECTRONICS Now You Can See... - Page 13 “System Setup” is situated on the second menu layer. Under this menu layer user may setup the system time, password, return system to default value, and language preference, etc (VERSION displayed represents the FIRMWARE version). CV0204DVR LOAD DEFAULT SVAT ELECTRONICS...
- Page 14 SVAT ELECTRONICS Now You Can See 5.2.1 TIME SETUP Time Set - Sets the time and date on your DVR. Use the up and down arrows to select a value to change, and press ENTER to change the value. When you are finished, press MENU to return to the previous menu screen.
- Page 15 The password must be entered to stop recording. Select STOP REC again to turn this feature off. When an incorrect password has been entered, “PASSWORD INCORRECT” will be shown on the display. To disable the message, press button: QUAD, CH1, CH2, CH3, or CH4. CV0204DVR SVAT ELECTRONICS Now You Can See...
-
Page 16: Change Password
“PASSWORD CHANGED”. Default Value: 111111 If password entered is incorrect, you will receive a message “NO PASSWORD CHANGED” to inform you (message flashes three times) and the system returns to “Password setup” selection. CV0204DVR SVAT ELECTRONICS Now You Can See... - Page 17 SVAT ELECTRONICS Now You Can See 5.2.3 LOAD DEFAULT Press enter on this option to return the DVR to its factory default settings. Press enter again to confirm, or menu to cancel. When the message “DVR RESET COMPLETED TURN OFF AND ON THE VCR”...
-
Page 18: Language Setup
SVAT ELECTRONICS Now You Can See 5.2.4 LANGUAGE SETUP To setup “LANGUAGE SET” function, press ENTER, to select the desired language (languages supported are Chinese and English). CV0204DVR... - Page 19 “V” indicates the position of the cursor. Press the up and down buttons to move the cursor, and press ENTER to change the title (maximum 8 characters). All channel titles are setup in the same way. CV0204DVR SVAT ELECTRONICS Now You Can See...
- Page 20 Motion Sensitivity - Press ENTER to set up the motion sensitivity level (1-5, 1 being the most sensitive). Hue - Press ENTER to adjust the color of the camera. Contrast - Press ENTER to adjust the camera contrast. Brightness - Press ENTER to adjust the camera brightness CV0204DVR SVAT ELECTRONICS Now You Can See...
- Page 21 “M” (motion) or “A” (alarm) modes are set up under schedule record. Recording frame rates available: NTSC: 30, 15, 10, 7, 5, 4, 3, 2, 1 PAL: 25, 12, 8, 6, 4, 3, 2, 1 CV0204DVR SVAT ELECTRONICS Now You Can See...
- Page 22 (1) When motion has been detected, it will be recorded by “Motion Record Frame Rate”. (2) Otherwise, it is recorded by “Time Record Rate”. _ : OFF. The DVR will not record during the specified time. CV0204DVR SVAT ELECTRONICS Now You Can See...
- Page 23 (this setup is only active when the system is under record status). BUZZER TIME: Press ENTER to setup the buzzer time to continuous (CONT), and press any button to release this setup. CV0204DVR SVAT ELECTRONICS Now You Can See...
- Page 24 Press ENTER to proceed. Press MENU to exit “EVENT LIST” selection. “EVENT LIST” is situated on the second menu layer. Under this menu layer user may setup “TIME SEARCH” or “EVENT SEARCH”. CV0204DVR SVAT ELECTRONICS Now You Can See...
- Page 25 Press button to select the desired time and date. Press ENTER to setup playback starting time and date. Press MENU to exit “TIME SEARCH” selection. Press PLAY button to play. CV0204DVR (< >)MOVE (ENTER) CHANGE (MENU)EXIT (PLAY) PLAY (< >)MOVE...
- Page 26 EVENT SEARCH: Displays all recording events, every page consists of 7 events, and maximum 63 stored events. Press PLAY button to play the selected event. BEGIN: 05/01/15 15:00:01 Displays the beginning and end time of each event. CV0204DVR END: 05/01/15 15:00:06 SVAT ELECTRONICS Now You Can See...
- Page 27 MASTER or SLAVE HDD is full (2 options: OVERWRITE or STOP). MASTER HDD: displays the capacity of the MASTER HDD. MASTER HDD USED: displays the capacity of the MASTER HDD already used. N/A indicates HDD not installed or unable to be detected. CV0204DVR SVAT ELECTRONICS Now You Can See...
- Page 28 INCORRECT” (flashes 3 times), and return to “HARD DRIVE” selection. Once the user formats the hard disk drive (MASTER), the camera title returns to its default setting (CAMERA1/ CAMERA2/ CAMERA3/ CAMERA4), because this setup is stored in the hard disk drive (MASTER). CV0204DVR SVAT ELECTRONICS Now You Can See...
-
Page 29: Dvr Networking Guide
Important Information Please fill in the information you receive during this installation in the areas below: Model Numbers Your router manufacturer: Your router model #: Router IP: DVR IP: Example: 192.168.1.101 External IP: DynDNS User name: DynDNS Password: DynDNS Domain Chosen: Sign-In URL: CV0204DVR SVAT ELECTRONICS Now You Can See Example: D-Link Example: DI-524 Example: 192.168.1.1 Port #: ______ Example: 80 Example: 14.14.243.113 Example: myname1234 Example: 123ABC Example: dyndns.org Example: myname1234. - Page 30 ActiveX Download Control. Your computer is now able to view the feed from the DVR. CV0204DVR SVAT ELECTRONICS Now You Can See Open Internet Explorer. Go to the drop down menu in the TOOLS area and select INTERNET OPTIONS.
- Page 31 192.168.0.1 :80 Some versions of Internet Explorer will not work with a space in the address bar. If this is the case, try it without the space. eg: 192.168.0.100:80 CV0204DVR SVAT ELECTRONICS Now You Can See...
- Page 32 2. Enter the user name admin. Leave the password blank followed by pressing the OK button (unless you have set up a user name and password for your router) 3. Select the Advanced tab. CV0204DVR SVAT ELECTRONICS Now You Can See...
- Page 33 80. Use port 80 unless you have a reason to change the DVR to another port (not recommended). • In the Public port re-enter the port number you entered in the private port field (e.g. 80). • Select the Schedule to Always. • Ensure that the Virtual Server (or forwarding that is being set-up) is set to ENABLED. When complete, select the Apply button located at the bottom of the page to save your changes. Port forwarding is now complete! CV0204DVR SVAT ELECTRONICS Now You Can See...
- Page 34 You should also check all your network connections and go through the above steps again to make sure a configuration error was not made. CV0204DVR SVAT ELECTRONICS Now You Can See...
-
Page 35: Forwarding Outside Your Network
When you click the link, a window will appear that displays “Account Confirmed. ” Click on the login link and enter the user name and password you created. CV0204DVR SVAT ELECTRONICS Now You Can See... - Page 36 10. Type in a host name (subdomain name). We recommend you use your first name or company name. 11. Choose a domain name from the dropdown menu. We recommend using the dvrdns.org suffix. CV0204DVR SVAT ELECTRONICS Now You Can See...
- Page 37 SVAT ELECTRONICS Now You Can See 12. In the IP address field, type in your external IP address (it may also be shown below the field). 13. Leave all the rest of the options as-is, and click Create New Host.
- Page 38 5. Enter the user name, password, and full domain name you configured at www.dyndns.com UserName: myname Password: mypassword DomainName: myname.dvrdns.org 6. Click the OK button located in this section to save your configuration. Reboot the DVR CV0204DVR SVAT ELECTRONICS Now You Can See . Example:...
-
Page 39: Additional Troubleshooting
When entering an external or internal IP address, the port number is required and should be in the following format: 192.168.0.100 :80 OR 192.168.0.100:80 (some browser versions require a space, some do not) CV0204DVR SVAT ELECTRONICS Now You Can See... -
Page 40: Network Remote Control (Optional)
Save Current Picture/ Save the current image. • Welcome! Administrator/ Display current user name. • About/ Version description. Move the cursor inside the image range, right mouse click to display 9 function selections: CV0204DVR Remote control DVR - Main Menu SVAT ELECTRONICS Now You Can See... - Page 41 Time: Image storage according to “time”. Maximum Number of Frame in Each File: Image storage according to “maximum frame”. Save Path: Image storage according to “Save Path”. Pre Name: Image storage according to “Prefix Name”. CV0204DVR SVAT ELECTRONICS Now You Can See...
- Page 42 Supports DVR remote control function (Please refer to 3.1 Front Panel Buttons and Controls). 7.1.7 QUALITY SETTING Network DVR provides 5 image quality settings. The user can select the quality setting from the “Quality” list box. • Highest • High • Medium • • Lowest CV0204DVR SVAT ELECTRONICS Now You Can See...
-
Page 43: Resolution Setting
Only the administrator can select the “Configuration”; the ordinary user account does not have this privilege to access this function. 7.2.1 SYSTEM SETTING The number on Port 1 and Port 2 may be changed, press “OK” button to save the setting. CV0204DVR System Setting Display SVAT ELECTRONICS Now You Can See... - Page 44 Select item “Needed” to enable user authorization function, then each time before login to Network DVR the Login window will request for “User name” and “Password”. To disable user authorization function, select item “No Need”. CV0204DVR User Setting Display SVAT ELECTRONICS Now You Can See...
- Page 45 “OK” button, the selected user account will be deleted from the “Current User List”. 7.2.3 NETWORK SETTING 7.2.3.1 FIXED IP To setup follow the steps below: Select item “Manually”. Enter “IP Address”, “Subnet mask”, and “DNS”. Click “OK” button to save the setting. CV0204DVR User Setting Display SVAT ELECTRONICS Now You Can See...
- Page 46 Once connected, mail the IP address information to the preset e-mail address. After 10 times of connection failure, it aborts the operation and the user can reconnect it by LAN to find the cause. CV0204DVR ADSL Setting Display SVAT ELECTRONICS...
- Page 47 SVAT ELECTRONICS Now You Can See Note: If item “Send mail after connected” is selected, then the Network DVR will send a mail that contains the message “Dial Up IP Address/ Netmask/ Gateway/ DNS Server” will be mailed to the preset e-mail address.
- Page 48 In the configuration menu of your network DVR, click on Firmware Update. Select browse and select the .bin firmware file. Press Open. Press Upload and follow the onscreen instructions. CV0204DVR Select the Firmware to be Updated Uploading the Selected Firmware SVAT ELECTRONICS Now You Can See...
- Page 49 SVAT ELECTRONICS Now You Can See Firmware Update. Press “here” button (1) to update Firmware. Press “here” button (2) to delete the file. The message below displays the writing progress of the firmware update. When Firmware update is completed, it will show 100%, and a message “Click here to reboot DVR browser” will be displayed, requesting to restart the Network DVR. Firmware Update Display. Firmware Update Completed, prompt to restart the device. CV0204DVR...
-
Page 50: Troubleshooting
Problem No display on television DVR not recording No playback During playback, I can’t switch to different camera views. CV0204DVR Solution Make sure all RCA and power cables are plugged in securely and in their proper places. Make sure your television is on the correct channel (input mode). Make sure recording is enabled in each camera’s setting. - Page 51 Problem Unexpected Alarms (beeps) go off. No picture from camera(s) CV0204DVR Solution Video Loss - One of your cameras are disconnected. There are a few options: connect a camera, disable that camera’s channel if you don’t want a camera installed in that channel, or disable the VIDEO LOSS alert alarm by going to MENU>Buzzer Setup>Video...
-
Page 52: Glossary
SVAT ELECTRONICS Now You Can See 9. GLOSSARY DDNS - Dynamic Domain Name Service. Use dyndns.org to track your IP on the Internet and assign it an easy to remember domain name instead of an IP number. Dynamic IP (DHCP) - A DHCP server assigns an IP address automatically when a device connects to the network. -
Page 53: Specifications
SVAT ELECTRONICS Now You Can See 10. DVR SPECIFICATIONS Functionality ... Simplex Video Compression ... Modified MJPEG Resolution ... 720 x 480 Recording Frame Rate ... 30FPS per camera channel Recording Time ... Max. 77 days Recording Resolution ... Max. 640 x 224 Recording Qualities ... - Page 54 SVAT ELECTRONICS Now You Can See Housing Color ... Graphite Grey Power Input ... DC 12V 2.5A Power Adapter Input ... AC 100-250V 50/60Hz Operating Temperature ... 41°F ~ 104°F Operating Humidity ... 30% ~ 80% Dimensions ... 12.6” x 1.8” x 10.6”...
- Page 55 SVAT ELECTRONICS Now You Can See Sun Shield ... Yes IR Cut Filter ... No Housing Material ... Anodized aluminum Housing Color ... Platinum Silver Signal/Noise Ratio ... >48dB Camera Bracket ... Yes Operating Temperature ... -14°F ~ 122°F Operating Humidity ... 98% Camera Power Input ...
- Page 56 SVAT ELECTRONICS Now You Can See SVAT SUPPORTS CRIME STOPPERS Crime Stoppers programs are operated as non-profit charities and are managed by a volunteer board of directors who raise funds and pay rewards to individuals who anonymously call with information that helps solve crime.
- Page 57 SVAT ELECTRONICS Now You Can See SVAT SUPPORTS CRIME STOPPERS To receive more information about Crime Stoppers or to make a charitable donation please fill in the fields below, cut on the dotted line and mail in. CV0204DVR www.svat.com...
- Page 58 SVAT ELECTRONICS Now You Can See NOTES CV0204DVR...
- Page 59 CV0204DVR CV0204DVR NOTES NOTES SVAT ELECTRONICS SVAT ELECTRONICS Now You Can See Now You Can See...
- Page 60 SVAT ELECTRONICS Now You Can See w w w.svat.co m Disc laime r SVAT do e s n ot e n do r se a ny o f S VAT pro d uc ts for any i llegal ac t ivities. SVAT is no t res po n sib le o r li ab le in a ny way s ha pe or fo r m fo r any d am ag e, va n da lis m , t he f t o r any oth er a c tion that may o cc u r w hi le a S VAT p rod u c t is in us e by th e purcha ser.
Need help?
Do you have a question about the CV0204DVR and is the answer not in the manual?
Questions and answers