Table of Contents
Advertisement
Quick Links
Advertisement
Table of Contents

Related Manuals for Interface 9825


Summary of Contents for Interface 9825
- Page 1 Installation & User Manual 9825 9825 Installation & User Manual...
- Page 2 Info Icons Note: "Note" means essential information that will help you use the device more effectively. Caution: "Caution" means this may cause damage to your device or data loss if you do not follow the instructions. Warning: "Warning" means potential danger. Example: property damage, personal Injury or even death. Pre Installation Warnings Warning: This device must be installed and connected by a professional electrical staff with the power supply...
-
Page 3: Table Of Contents
Power On Display Details Keypad Details System Configuration Menu Tree Menu Descriptions Calibration Procedures Industrial Interfaces USB Interface Communication Analog Output Interface I/O Control Applications Setpoint Application Alarm Application Indicator Info Software Version Appendix Appendix 1: Command Output Format 1 - Continuous Mode (ASCII) -
Page 4: Unpacking & Installation
+104°F), relative humidity no more than 95% (Non-Condensing). The 9825 digital indicator uses panel installation, which requires the thickness of the cabinet's front panel to be no more than 4mm. Before installation, remove the two mounting screws from the indicator's clamping strips, then remove the clamping strips. -
Page 5: Connections
2mV/V output, and about 0 ~ 13.5mV when connected to a load cell with a 3mV/V output. The 9825 indicator can drive up to six (6) 350-ohm load cells (or the equivalent resistance of all load cells connected in parallel is higher than 87Ω). - Page 6 Sensor Input Terminal Pin Assignment: Four-Wire Analog (Load Cell) or (Junction Box) Connection: Six-Wire Analog (Load Cell) or (Junction Box) Connection: Interface Inc. www.interfaceforce.com 9825 Installation & User Manual...
-
Page 7: Serial I/O Device Connections
The 9825 indicator comes standard with one USB port. USB Port Connections: The 9825 indicator comes standard with a MINI-USB port that can be connected to a PC. This USB port is designed for data communication and firmware upgrades. Analog Output Connections: Use the JP1 pin header on the internal analog option board to configure the analog output for current output (4-20mA, 0-24mA) or voltage output (0-10V, 0-5V). -
Page 8: Relay Input/Output Control Connections
Relay Input/Output Control Connections: The Output Connections: The 9825 optional I/O control port is relay-based and can be used with an AC or DC power supply. The DC power supply range is 24VDC to 100VDC. The AC power supply range is up to 220VAC. -
Page 9: Basic Operation
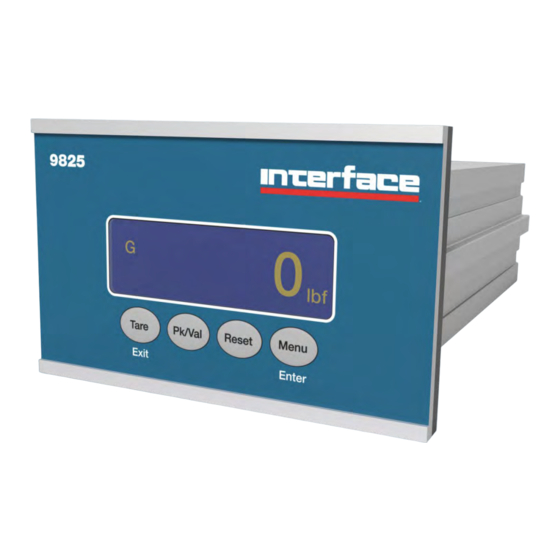
The display will show the Interface logo followed by the Device Mode and Firmware Version. After that, the current force value will be displayed. Display Details: The 9825 utilizes a 128 x 32 dot OLED display with adjustable LED back-light. The table below summarizes the display annunciators. Basic Force Display:... -
Page 10: Keypad Details
Menu (Enter): - When in display mode (Menu Function) - Hold this key until buzzer sounds to enter the setup menu. - When in setup menu (Enter Function) - Saves current setting. Interface Inc. www.interfaceforce.com 9825 Installation & User Manual... -
Page 11: System Configuration
N, kN, g, kg, UNIT_NONE units displayed Nominal Capacity Sets display output 100,000 Integer values from 1 to 100,000 range Disp Resolution Set decimal 1:100,000 Menu options are based on placement and Nominal Capacity value increments Interface Inc. www.interfaceforce.com 9825 Installation & User Manual... - Page 12 Unique ID Display Unique ID Power-On Tare Disable Off, On ↓ Sys Reset Reset to default Press to execute settings. Advanced Menu Password Required Enter Password 336699 to access the Advanced Menu Interface Inc. www.interfaceforce.com 9825 Installation & User Manual...
-
Page 13: Calibration Procedures
Calibration Procedures: Calibration Overview: The 9825 Indicator can be calibrated by using either a Live calibration method or a Key-In calibration method. It is important to set the Nominal Capacity Value before beginning calibration. Live Calibration: The Live calibration method produces the best possible system accuracy. This method... - Page 14 If using a simulator, be sure that the simulator is set to 0mV/V. Press the ↓ (Pk/Val) button to initiate the Zero Calibration. Dashed lines will be displayed at the bottom right of the screen to indicate that the 9825 is capturing the zero point.
-
Page 15: Industrial Interfaces
Industrial Interfaces USB Interface Communication: The 9825 indicator can connect to a PC via USB cable. First a USB driver must be installed on the PC to access the 9825. Measurement data can be accessed by using a terminal emulation application such as HyperTerminal. -
Page 16: I/O Control Applications
- The alarm will sound - The OUT-2 relay will close - The display will send a warning message Otherwise, the symbol will show on the display and the OUT-2 relay will open. Interface Inc. www.interfaceforce.com 9825 Installation & User Manual... -
Page 17: Indicator Info
OUT-4 relay will open. Indicator Info Software Version: This Information can be accessed from the main menu under Menu_System_Version/Date. - Software Version: - Last Update: Interface Inc. www.interfaceforce.com 9825 Installation & User Manual... -
Page 18: Appendix
Appendix 1: Command Output Format 1 - Continuous Mode (ASCII) In this mode of communication, the indicator transmits the data frame continuously. The load value in the frame is expressed in ASCII. Interface Inc. www.interfaceforce.com 9825 Installation & User Manual... -
Page 19: Appendix 2: Command Output Format 1 - Demand Mode (Ascii)
This host device (PC) will output demand command through the serial ports when the scale is in the normal loading status. The demand command format is shown below: The serial output data format is as follows: Interface Inc. www.interfaceforce.com 9825 Installation & User Manual... -
Page 20: Appendix 3: Condec Format Output (Condec)
Demand Commands: "P" > Print "T" > Tare "Z" > Zero "G" > Gross "N" > Net Condec Continuous Output: Note: The starting address 40001 of MODBUS is not suitable for SIEMENS soft. Interface Inc. www.interfaceforce.com 9825 Installation & User Manual... -
Page 21: Specifications
9.5 (0.37) H and 6.5 (0.26) W 91 x 46 Panel Cutout - W x H 3.58 x 1.81 VDC 0-5, 0-10, 2.5+/-2.5, 5+/-5 FAST ANALOG OUTPUT – kHz mA 4-20, 0-24, 12+/-8, 12 +/-12 Interface Inc. www.interfaceforce.com 9825 Installation & User Manual... -
Page 22: Warranty
(1) one year from the date of dispatch. If the 'Interface' product you purchase appears to have a defect in material or workmanship or fails during normal use within the period, please contact your Distributor, who will assist you in resolving the problem.
Need help?
Do you have a question about the 9825 and is the answer not in the manual?
Questions and answers