
Related Manuals for Interface 9840-400


Summary of Contents for Interface 9840-400
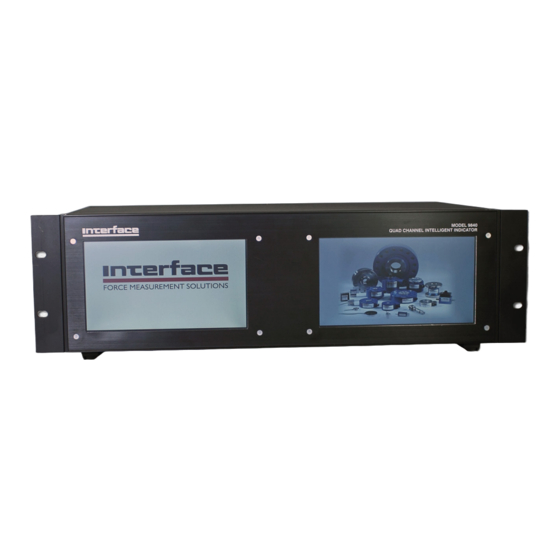
- Page 1 Force Measurement Solutions Model 9840-400 Digital Process Monitor Interface, Inc. 7401 E. Butherus Dr. Scottsdale, Arizona 85260 USA Tel: (480) 948-5555...
-
Page 2: Table Of Contents
I N T E R F AC E M O D E L 9 8 4 0 CONTENTS CONTENTS..............................2 INTRODUCTION ............................5 • QUICK START ............................ 6 OPTION ~ TEDS TEMPLATE 33 (BRIDGE SENSOR) SUPPORT ............9 RUN MODE ..............................10 ............................... - Page 3 I N T E R F AC E M O D E L 9 8 4 0 >>Two Point mV/V ..........................22 >>Six Point mV/V ............................ 22 >>Two Point Data Cal ..........................22 >>Five Point Data Cal ..........................23 >>Cal by Shunt Val ..........................23 .............................
- Page 4 Interface, Inc. Copyright August 24, 2018 all rights reserved. MO D E L 9 8 4 0 P G 4 P U B .
-
Page 5: Introduction
I N T E R F AC E M O D E L 9 8 4 0 INTRODUCTION The Model 9840 is a CE compliant and versatile precision instrument intended for the digital readout of strain gage sensors such as load cells and torque cells. Optical encoders are also supported. -
Page 6: Quick Start
Next connect a load or torque cell to the 9 pin female connector labeled “Load A”. You should use the cabling supplied with your Model 9840 and Interface load or torque cell. If you do not have a factory supplied cable see Appendix B for the recommended cell connection. - Page 7 I N T E R F AC E M O D E L 9 8 4 0 Message Meaning Version X.Y.Z This is the version number. Serial # 12345 This is the serial number. Option # 114236 This is the option number. Touch Screen Vx.y.z This is the version number for the touch screen.
- Page 8 I N T E R F AC E M O D E L 9 8 4 0 The full list of Items with its respective units can be found in the table on page 11 in the Run Mode section. If a torque cell is loaded on any channel, the display will show torque rather than load for that appropriate channel.
-
Page 9: Option ~ Teds Template 33 (Bridge Sensor) Support
I N T E R F AC E M O D E L 9 8 4 0 OPTION ~ TEDS TEMPLATE 33 (BRIDGE SENSOR) SUPPORT The Model 9840 will now support TEDS Template 33 equipped sensors. It is a true plug and play. -
Page 10: Run Mode
I N T E R F AC E M O D E L 9 8 4 0 RUN MODE Selecting Run Mode from the Main Menu will bring you to the Run Mode screen depicting 4 displays of channel information. A display is active when it is indicated with a red ring around it. - Page 11 I N T E R F AC E M O D E L 9 8 4 0 The table below summarizes the unit options for each item. Whether the user sees torque or load for each channel depends upon the cell type that was calibrated or selected for that channel.
-
Page 12: Setup Mode Summary
I N T E R F AC E M O D E L 9 8 4 0 SETUP MODE SUMMARY The table below summarizes the setup mode menus. Detailed information about each individual item is presented in the following sections. Setup mode ╠══════... - Page 13 I N T E R F AC E M O D E L 9 8 4 0 MODEL 9840 Setup Screen For this menu and its sub-menus, the down button navigates forward through the list, and the up button navigates backwards. To exit from setup mode and return to the Main Menu press the Back button for each sub menu that has been entered, or just hit the Cancel button once.
-
Page 14: Entering Numerical Data
I N T E R F AC E M O D E L 9 8 4 0 Entering Numerical Data At times you will need to enter numerical data into the Model 9840. The method is consistent in all cases. The keypad which is always present on the right touch screen (except the Run Mode) will be used to type a number into the left screen when prompted to do so. -
Page 15: User Data Entry
I N T E R F AC E M O D E L 9 8 4 0 MODEL 9840 Alphanumeric Screen >User Data Entry This menu is used to enter numerical constants used by the math options. These constants are listed in a submenu that works exactly like the main setup mode menu. Typical items in this submenu are: >>Base Area Entry This is the area in square inches that is used to calculate load in pounds per square... -
Page 16: Sensor Select
I N T E R F AC E M O D E L 9 8 4 0 >Sensor Select This menu is used to view, select, and delete sensor calibration data on a specific channel or browse through the list of load and torque cell calibration data stored within the Model 9840. -
Page 17: System Options
I N T E R F AC E M O D E L 9 8 4 0 >System Options This menu contains some system wide parameters that are seldom changed. These parameters pertain to how the Model 9840 reads and interprets data as well as how it communicates with a connected computer via the USB or RS232 Serial port on the back. -
Page 18: Retain Tare
I N T E R F AC E M O D E L 9 8 4 0 >>Retain Tare This controls whether the most recent tare value is retained through power down of the unit and used again immediately on power up. Switching “On” this setting will retain the tare on all channels. -
Page 19: Filter Window
I N T E R F AC E M O D E L 9 8 4 0 >>Filter Window This option allows you to enable and set, or disable, a window to be used to turn the filters on or off. If there is a sudden change in the measurement that exceeds this set window, the filter is temporarily turned off to allow the displayed reading to correct itself with the actual reading. -
Page 20: Calibration Mode Summary
I N T E R F AC E M O D E L 9 8 4 0 CALIBRATION MODE SUMMARY The table below summarizes the Calibration Mode menus. Detailed information about each individual item is presented in the following sections. Calibration mode ╚══════... -
Page 21: Calibration Mode
I N T E R F AC E M O D E L 9 8 4 0 CALIBRATION MODE This menu is used to access all methods of calibration that are supported by the Model 9840. Selecting Calibration Mode from the Main Menu Screen will bring up a password entry Screen for the left screen (see above) and an alphanumeric keyboard for the right screen. -
Page 22: Two Point Mv/V
I N T E R F AC E M O D E L 9 8 4 0 Since this shunt check electronically applies approximately half the rated load or torque, it is important that the cell is not loaded when this check is run. If you see the “Cell Overloaded”... -
Page 23: Five Point Data Cal
I N T E R F AC E M O D E L 9 8 4 0 torque are not disturbed since all the readings taken are averaged together to obtain the calibration data. The second mass/torque is then entered and applied to the cell, the Model 9840 will auto fill in this value based off the previously entered total rated load of the cell and the amount of points the calibration requires. -
Page 24: Digital Inputs
Communications Settings The Model 9840 supports remote operation using a standard Remote interface consisting of ASCII characters and terminal emulation software package such as HyperTerminal or ProComm. The baud rate for the Model 9840 is in “Com Baudrate” within the Systems Options of the Setup Menu. -
Page 25: Communications Format
I N T E R F AC E M O D E L 9 8 4 0 To support the multi-drop Remote option each unit is assigned a communications address, which is set using “Com Address” within the Systems Options of the Setup Menu. -
Page 26: Rs232 Run Mode Command Summary
This command fetches the model, version, and serial number of any unit at the specified address. Example: @123H Acknowledge: @ 123 Interface Model 9840 Version 8.0.1 Serial #12345 Option # 457977664 Hello Touch Screen Command (HT) This command operates the same as the hello command, but also appends the touch screen version number. -
Page 27: Question Mark Command (?)
I N T E R F AC E M O D E L 9 8 4 0 Question Mark Command (?) This command returns a list of item numbers and unit numbers that are available on the Model 9840 that is addressed. These numbers are used as arguments for the many of the commands shown below**. -
Page 28: Front Panel Set Command (Fs)
I N T E R F AC E M O D E L 9 8 4 0 Front Panel Set Command (FS) The Front panel Set (FS) command allows you to specify the item number and unit number for what is currently on the front panel display. The format is FS (item number)(unit number), where the first item and unit numbers are 2 digits each and may be found using the question mark command (?). -
Page 29: Value Command (V) For Any Channel
I N T E R F AC E M O D E L 9 8 4 0 Value Command (V) for any channel The value command for any channel is used to read the numerical value of a desired item and unit without altering the front panel display. -
Page 30: Option ~ Print Command (P)
I N T E R F AC E M O D E L 9 8 4 0 The format can also be repeated to view multiple items at once, up to four items. The format is V(item 1)(unit 1)(repeat 1)(item 2)(unit 2)(repeat 2)(item 3)(unit 3)(repeat 3) (item 4)(unit 4)(repeat 4), where item and unit can be any from the question mark command. -
Page 31: Reset Tare , Peak
I N T E R F AC E M O D E L 9 8 4 0 Reset Tare, Peak, Valley or Position Command (R) This command allows you to reset the tare, peak, valley, or position readings. The format is R(tare A)(peak A)(valley A)(tare B)(peak B)(valley B)(position select), where the selects are either a 0 (don’t reset) or a 1 (reset). -
Page 32: Rs232 Setup Mode Command Summary
I N T E R F AC E M O D E L 9 8 4 0 RS232 SETUP MODE COMMAND SUMMARY @(addr) ╠═ User Data Entry ║ ╠═ View current settings ║ ╠═ (channel)(number) # Set Base Area ║ ╚═... -
Page 33: Rs232 Setup Mode Commands
I N T E R F AC E M O D E L 9 8 4 0 RS232 SETUP MODE COMMANDS The commands in this section allow you to change the setup of the Model 9840. You will notice that these commands form a menu which approximately duplicates the Setup Mode menu used during setup of the Model 9840 from the front panel. -
Page 34: Analog Output Command (A)
I N T E R F AC E M O D E L 9 8 4 0 Analog Output Command (A) This command is used to view or set the analog output of the Model 9840. There are two subcommands Analog View (AV) and Analog Set (AS). Analog Output View Command (AV) The Analog View (AV) command has the format AV. -
Page 35: Sensor View Command (Sv)
I N T E R F AC E M O D E L 9 8 4 0 Example: @123SA Acknowledge: @ 123 This is the list of cell calibration data: Ch A = S/N 123456, 100.00 Lb , 3.00150 mV/v, 10.00 V Cal on Oct27-99, 49.532 Lb... -
Page 36: Sensor Delete Command (Sd)
I N T E R F AC E M O D E L 9 8 4 0 Sensor Delete Command (SD) The Sensor Delete (SD) command is used to remove the calibration data for a stored cell from the list. The format is SD(serial number)#. Example: @123SD13368# Acknowledge:... -
Page 37: Calibration Command (C)
I N T E R F AC E M O D E L 9 8 4 0 Calibration Command (C) This command has 8 subcommands. Calibration Check (CC) is used to run a shunt calibration check on a cell. Calibration Begin (CB) starts the calibration of a new or existing cell. - Page 38 I N T E R F AC E M O D E L 9 8 4 0 The format for the CB commands is: For backward compatibility: CB1(space)(channel)(serial number)# Alternatively, to delineate between a Load and a Torque Cell: CB1(cell type)(channel)(serial number)# CB2(space)(month)(day)(year) CB3(space) (excitation)(calibration unit) CB4(space)(rated load)#...
-
Page 39: Calibration Escape Command (Ce)
I N T E R F AC E M O D E L 9 8 4 0 Calibration Escape Command (CE) The Calibrate Escape (CE) command is used to cancel a calibration that was started with the Calibrate Begin (CB) command. This format is CE. Example: @123CE Acknowledge:... -
Page 40: Calibrate By Mv/V Mass And Volt Commands (Cmvm And Cmvv)
I N T E R F AC E M O D E L 9 8 4 0 Calibrate by mV/V Mass and Volt Commands (CMVM and CMVV) The Calibration by mV/V Mass (CMVM) and Volt (CMVV) commands can have up to seven parts each: CMVM1 through CMVM6 and CMVM0;... -
Page 41: Calibrate By Mv/V Torque And Volt Commands (Cmvt And Cmvv)
I N T E R F AC E M O D E L 9 8 4 0 Calibrate by mV/V Torque and Volt Commands (CMVT and CMVV) The Calibration by mV/V Torque (CMVT) and Volt (CMVV) works exactly like the Calibrate by mV/V Mass and Volt commands. -
Page 42: Calibrate By Masses Command (Cm)
I N T E R F AC E M O D E L 9 8 4 0 Calibrate by Masses Command (CM) The Calibrate by Masses (CM) command tells the unit that you are doing a calibration by 2 point mass or by 5 point mass. The format is CM(number of masses). Example: @123CM5 Acknowledge:... -
Page 43: Calibrate By Torque Command (Ct)
I N T E R F AC E M O D E L 9 8 4 0 Example: @123CMP0 Acknowledge: @ 123 Calibrate Command - Reading for Shunt Check... [10 seconds delay] @ 123 Calibrate Command Completed Ch A = S/N 123456, 100.00 Lb , 3.00150 mV/v, 3.00230 mV/v, 3.00238 mV/v,... -
Page 44: Calibrate By Shunt Command (Cs)
I N T E R F AC E M O D E L 9 8 4 0 The Calibrate Torque 2 (CTP2) command has the format CTP2(torque)#. This command can only be issued after the CTP1 command has completed. The example uses 500 LbI for the second calibration torque. -
Page 45: Calibrate Counts-Per-Inch
I N T E R F AC E M O D E L 9 8 4 0 Example: @123CS553.26# Acknowledge: @123 Calibrate Shunt Command - Reading... [10 seconds delay] @123 Calibrate Command - Reading for Shunt Check... [10 seconds delay] @123 Calibrate Command Completed Ch C = Ch A = S/N 123456, 1000.0 Lb , 4.50014 mV/v,... -
Page 46: Limit Set Command (Lis)
I N T E R F AC E M O D E L 9 8 4 0 This line indicates that Limit 1 is a normally open switch (NO) rather than a normally closed switch (NC). The limit is Enabled rather than Disabled. The signal driving this limit is Load in Lb. -
Page 47: Limit Setup Escape (Le)
I N T E R F AC E M O D E L 9 8 4 0 Example 4: @123L1SD 10.0# Acknowledge 4: @ 123 Lim 1 NO Enabled Load A Lb Set 50.00 Trip>Set Latch Off Reset 10.00 Example 5: @123L1SA 10 Acknowledge 5: @ 123... -
Page 48: Option View Command (Ov)
I N T E R F AC E M O D E L 9 8 4 0 Option View Command (OV) The Option View (OV) command returns a list of the current settings of all the system options. The format is OV. Example: @123OV Acknowledge:... -
Page 49: Option Auto-Identify Annunciator (On)
I N T E R F AC E M O D E L 9 8 4 0 Option Auto-Identify Annunciator (ON) The Option Auto-Identify (ON) Annunciator command is used to turn the Auto-ID annunciator “t” on or off. The format is ON(0 or 1) where 0 & 1 turn the annunciator off and on, respectively. -
Page 50: Option Com Address Command (Oa)
I N T E R F AC E M O D E L 9 8 4 0 Option Com Address Command (OA) The Option com Address (OA) command is used to change the communications address assigned to this unit. The format is OA(new address)#. Note that valid addresses are 1 through 254. -
Page 51: Option End Of Transmission Character (Oe)
I N T E R F AC E M O D E L 9 8 4 0 Option End of Transmission Character (OE) The end of transmission character is a non-visible character (hexadecimal 0x04) that is sent at the end of each response by the unit to an RS232 command. The character is sent after the last carriage-return line-feed returned by the unit with one exception: when the user is viewing channel values with the @123V(item)(unit)(repeat) and sets the value of repeat to 2 (streaming output), the character is sent immediately prior to... -
Page 52: Display Filter Command (Df)
I N T E R F AC E M O D E L 9 8 4 0 Display Filter Command (DF) The Display Filter (DF) command sets the filter type and level. The format is DF(type)(level), where type is either 1 for type I filters, or 2 for type II filters, level must be 1, 2, 3, or 4 depending on the level of filtering desired. -
Page 53: Display Filter Window Commands (Dw)
I N T E R F AC E M O D E L 9 8 4 0 Display Filter Window Commands (DW) The Display Filter Window (DW) command set enables and disables the filter window and allows the user to enter the unit and value of the filter window to use. There are two commands used to enable and set the filter windows. -
Page 54: System Calibration Mode
I N T E R F AC E M O D E L 9 8 4 0 SYSTEM CALIBRATION MODE The following procedure should be followed to calibrate the Model 9840 itself. This calibration requires the use of a precision milli-volt per Volt reference which will be attached on the load cell connector. -
Page 55: Appendix A -- Model 9840 Specifications
I N T E R F AC E M O D E L 9 8 4 0 APPENDIX A -- MODEL 9840 SPECIFICATIONS Transducer Interface Excitation 5VDC or 10 VDC software/auto selectable Current Drive 180 mA at 5VDC or 10 VDC... - Page 56 4 independent limits Quad-Limits Setup Front panel, latching or non-latching set points normally open/closed, enable/disable Quad-Limits Output 4 isolated solid state switches Quad-Limits Source Any displayed quantity Serial Interface RS-232 Serial Setup/Output Standard RS-485 Serial Setup/Output Standard Multi-drop RS-232 Optional Standard...
- Page 57 I N T E R F AC E M O D E L 9 8 4 0 Digital Display Display Characters 2 lines by 20 characters available Display Update > 4/Sec Scaling Automatic or manual ± 999,999 Maximum Display Count Decimal Points.
-
Page 58: Appendix B -- Cables And Connectors
2. Incorrect wiring of these ports can cause damage SENSE - LO to the internal circuitry of the unit. Please contact EXCITE - LO Interface if you have questions or need assistance AUTO ID/TEDS with these configurations. AUTO ID/TEDS CHASSIS GND... -
Page 59: Digital I/O Connector
VDC on the “HI” input with respect to the “LO” input. LIM 3 B Other voltage ranges are possible with added LIM 4 A external resistors, contact Interface for details. If LIM 4 B isolation is not required these inputs may be ISO IN 1 - HI... -
Page 60: Option ~ Remote Freeze Cable
I N T E R F AC E M O D E L 9 8 4 0 OPTION ~ Remote Freeze Cable P/N CABLE 988278-010 Remote Actuation Push-Button Display Hold/Freeze Cable (Cable shown is approximately 10 feet) The cable to support the digital input for display HOLD/FREEZE actuation must connect to the 26 pin DIGITAL I/O connector located on the rear panel of the Model 9840. -
Page 61: Digital I/O Connector
I N T E R F AC E M O D E L 9 8 4 0 Digital I/O Connector 1. The source and scaling of ANALOG - OUT is selected through the menus. 2. The HIGH BANDWIDTH - OUT is a buffered analog output permanently connected to the load cell channel. -
Page 62: Precision Shunt Calibration Resistors
I N T E R F AC E M O D E L 9 8 4 0 Precision Shunt Calibration Resistors This diagram shows the connection of the precision internal shunt resistors. The back panel switch (shown to the left of the two resistors) selects between 30 KΩ and 60 KΩ.
Need help?
Do you have a question about the 9840-400 and is the answer not in the manual?
Questions and answers