Spirit XE 700 Owner's Manual
Spirit owner's manual home gym xe700
Hide thumbs
Also See for XE 700:
- Owner's manual (31 pages) ,
- User manual (32 pages) ,
- Service manual (26 pages)

Related Manuals for Spirit XE 700


Summary of Contents for Spirit XE 700
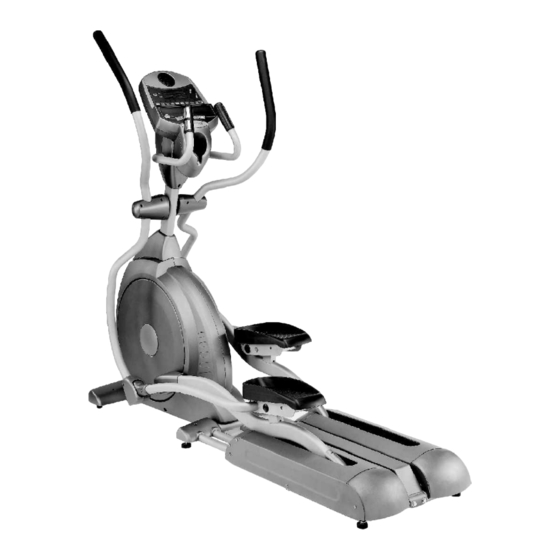
- Page 1 Z100 / Z300 Z500 Z700 OWNER’S MANUAL PLEASE CAREFULLY READ THIS ENTIRE MANUAL BEFORE OPERATING YOUR NEW ELLIPTICAL!
-
Page 2: Table Of Contents
Table of Contents Product Registration Important Safety Instructions Important Electrical Information Important Operation Instructions Assembly Pack Check List Assembly Instructions Features Operation of Your New Elliptical Using a Heart Rate Transmitter Maintenance Manufacturer s Limited Warranty . .2 .. 15 ..16 ...29 ..30... -
Page 3: Product Registration
Through your dealer, Spirit will do all we can to make your ownership experience as pleasant as possible for many years to come. The local dealership where you purchased this elliptical is your administrator for all Spirit warranty and service needs. -
Page 4: Important Safety Instructions
Important Safety Instructions WARNING - Read all instructions before using this appliance. elliptical Do not operate elliptical carpet and may result. Keep children away from the caution areas that can cause harm. Keep hands away from all moving parts. Never operate the elliptical if it has a damaged cord or plug. If the elliptical is not working properly, call your dealer. -
Page 5: Important Electrical Information
This product is self powered by a built in generator but does have the option of being plugged into an A.C. outlet (Optional 24 VAC transformer available through your local Spirit fitness dealer). The following are warnings to be observed when using the A.C. plug in option. -
Page 6: Assembly Pack Check List
Assembly Pack Check List Step1 (#96) 3/8" x 19 x 1.5T Flat Washer (2pcs) (#84) M5 x 12m/m Phillips Head Screw (2pcs) Step 2 (#84) M5 x 12m/m Phillips Head Screw (4pcs) (#76) 3/8 x 3/4 Button Head Socket Screw (2pcs) (#104) 3/8"... - Page 7 Step 3 (#102) Ø 25 Wave Washer (2 pcs) (#107) 3.5 x 12m/m Self Tapping Screw (10pcs) Step 4 (#107) 3.5 x 12m/m Self Tapping Screw (8 pcs) (#100) 5/16" x 18 x 1.5T Flat Washer (2 pcs) (#79) 5/16 x 1-1/4 Hex Head Bolt (2 pcs) (#76) 3/8 x 3/4 Button Head Socket Screw (2pcs)
- Page 8 Tools (#126) Phillips Screw Driver (1 pc) (#125) Combination M6 Allen Wrench & Phillips Head Screw Driver (1 pc) (#124) 13/14m/m Wrench (1 pc) (#129) 12m/m Wrench (1 pc) XE Series Elliptical...
-
Page 9: Assembly Instructions
Assembly Instructions XE700 UNPACKING THE UNIT 1. Using a razor knife (Box Cutter) cut the outside, bottom, edge of box along the dotted Line. Lift Box over the unit and unpack. 2. Carefully remove all parts from carton and inspect for any damage or missing parts. If damaged parts are found, or parts are missing, contact your dealer immediately. - Page 10 Do not force them. There may be another connector on the back of the console. This connector is used for a different product and will remain unused in the XE700. 7. Storing the excess wire back into the console mast, carefully install the console onto the mounting plate and secure using the four M5 X 12mm Phillips head screws (84).
- Page 11 XE Series Elliptical...
- Page 12 STEP 3: HANDLE BAR ASSEMBLY 1. Locate and install the two large wave washers (102) onto the handle bar axle, one on each side. 2. Slide the left and right handle bars onto the appropriate side of the axle. There is a sticker on each handle bar indicating L for left and R for right.
- Page 13 XE Series Elliptical...
- Page 14 STEP 4: FOOT PAD/CONNECTING ARM ASSEMBLY & REAR SHROUD INSTALLATION. 1. Align the hole of the rod end bearing - located at the end of the Connecting Arms (8&9) - with the holes in the bracket of the Handle Bars (10&11). The rod end bearing should be aligned inside the U shaped Handle Bar bracket.
- Page 15 XE Series Elliptical...
-
Page 16: Features
Through research performed with a leading sports scientist and physical rehabilitation expert, Spirit engineering has developed a breakthrough in pedal design. The history of elliptical use over the past few years tells us that many users suffer from ankle, Achilles tendon, knee and/or hip pain. -
Page 17: Operation Of Your New Elliptical
XE700 Console Power on The XE700 has a built-in generator for power and does not need to be plugged into an AC outlet. To power up the Elliptical simply start to pedal, the console will turn on automatically. If the console does not light when you pedal, check that the power switch is set to 0 (Generator). -
Page 18: Console Operation
Console Operation Quick Start This is the quickest way to start a workout. After the console powers up you just press the Start key to begin. This will initiate the Quick Start mode. In Quick Start the Time will count up from zero, all workout data will start to accrue and the workload may be adjusted manually by pressing the Up or Down buttons. - Page 19 The Stop/Reset button actually has several functions. Pressing the Stop/Reset key once during a program will Pause the program for 5 minutes (when you stop pedaling without AC power, the display will turn off, but the memory will be saved for 5 minutes just like the pause mode). If you need to get a drink, answer the phone or any of the many things that could interrupt your workout, this is a great feature.
-
Page 20: Preset Programs
The default computer settings are: Age = 35, Weight = 155 Lbs., Time = 30:00, Max Level: each program has a different maximum work level: Hill = 14, Fatburn = 10, Cardio = 14, Strength = 16, Interval = 14. NOTE: Changing Age and Weight settings will also change these settings in all other programs except the User 1&2 programs. - Page 21 The Programs HILL The Hill program simulates going up and down a hill. The resistance in the pedals will steadily increase and then decrease during the program. To start the Hill program follow the instructions below or just press the Hill button then the Enter button and follow the directions in the message window.
- Page 22 4. Next is Time. You may adjust the Time and press enter to continue. 5. Now you are asked to adjust the Max Level. This is the peak exertion level you will experience during the program. The factory setting is level five. Adjust the level and then press enter.
- Page 23 pressing a User key and following the instructions in the message window. Strength The Strength program is designed to increase muscular strength in your lower body. This program will steadily increase in resistance to a high level and then keeps you there. This is designed to strengthen and tone your legs and gluteus.
- Page 24 5. Now you are asked to adjust the Max Level. This is the peak exertion level you will experience during the program. The factory setting is level seven. Adjust the level and then press enter. 6. Now you are finished editing the settings and can begin your workout by pressing the Start key.
- Page 25 segments have been set. 9. The message window will then tell you to press enter to save the program. After saving the program the message window says New program saved then will give you the option to Start or modify the program. Pressing Stop will exit to the start up screen. 10.
- Page 26 Consult your physician before participating in any exercise program. With all Spirit Heart Rate Control bikes you may use the heart rate monitor feature without using the Heart Rate Control program. This function can be used during manual mode or during any of the nine different programs.
-
Page 27: Rate Of Perceived Exertion
Rate of Perceived Exertion Heart rate is important but listening to your body also has a lot of advantages. There are more variables involved in how hard you should workout than just heart rate. Your stress level, physical health, emotional health, temperature, humidity, the time of day, the last time you ate and what you ate, all contribute to the intensity at which you should workout. -
Page 28: Using A Heart Rate Transmitter
Using a Heart Rate Transmitter How to wear your wireless chest strap transmitter: 1. Attach the transmitter to the elastic strap using the locking parts. 2. Adjust the strap as tightly as possible as long as the strap is not too tight to remain comfortable. 3. - Page 29 Heart Rate Control Program 1 & 2 (HR 1, HR 2) operation Both programs operate the same, the only difference is that HR 1 is set to 60% and HR 2 is set to 80% of maximum heart rate. They both are programmed the same way. To start the HR 1 or HR 2 programs follow the instructions below or just press the HR 1 or HR 2 button then the Enter button and follow the directions in the message window.
-
Page 30: Maintenance
Maintenance: 1. Wipe down all areas in the sweat path with a damp cloth after each workout. 2. If a squeak, thump, clicking or rough feeling develops the main cause is most likely one of two reasons: The hardware was not sufficiently tightened during assembly. All bolts that were installed during assembly need to be tightened as much as possible. -
Page 31: Manufacturer S Limited Warranty
Manufacturer’s Limited Warranty Spirit Manufacturing Inc. warrants all its elliptical parts for a period listed below, from the date of retail sale as determined by sale receipt, or in the absence of a sales receipt eighteen (18) months from the original factory shipping date, whichever comes first. Spirit s responsibilities include providing new or remanufactured parts, at Spirit s option, and technical support to our independent dealers and servicing organizations.
Need help?
Do you have a question about the XE 700 and is the answer not in the manual?
Questions and answers