Table of Contents

Subscribe to Our Youtube Channel
Related Manuals for Gymstick H2O ROWER


Summary of Contents for Gymstick H2O ROWER
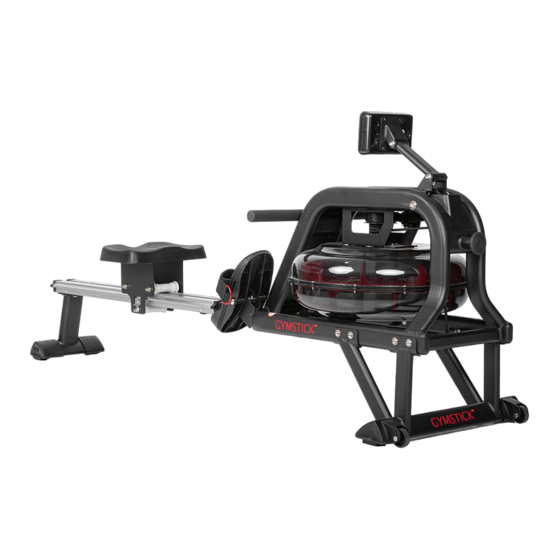
- Page 1 H2O ROWER USER MANUAL IMPORTANT: Read all instructions carefully before using this product. Retain this owner’s manual for future reference. The specifications of this product may vary from this photo, subject to change without notice.
-
Page 2: Table Of Contents
BEFORE YOU BEGIN Thank you for choosing the Gymstick H2O Rower. We take great pride in producing this quality product and hope it will provide many hours of effective exercise to make you feel better, look better and enjoy life to its fullest. -
Page 3: Safety Instructions
14. Before exercising, always do stretching first. 15. Maximum user weight 135 kgs. WARNING! BEFORE BEGINNING THIS OR ANY EXERCISE PROGRAM, CONSULT YOUR PHYSICIAN FIRST. THIS IS ESPECIALLY IMPORTANT FOR INDIVIDUALS OVER THE AGE OF 35 OR PERSONS WITH PRE-EXISTING HEALTH PROBLEMS. H2O ROWER... -
Page 4: Exploded Drawing
EXPLODED DRAWING H2O ROWER... -
Page 5: Parts List
OD35*ID20.2*1.0 Bearing 608ZZ Aluminium Clasp Bushing Lower Pad 50*50*T2.0 Ø6.0*40 Spacer for Bungee Pulley Computer Spacer for Guide Roller Ø14* Ø1.5*19 Sensor Wire Foam Ø98* Ø28*20 Sensor Holder Nylon, black Roller Bearing HK2010 Magnet Ø10*5 Upper Pad 25*25*T2.0 H2O ROWER... - Page 6 PRE-ASSEMBLY CHECK LIST NO.1 NO.2 NO.4 NO.26 NO.25 NO.3 NO.89 NO.46 NO.36 PART NO. DESCRIPTION Q’TY Main frame Front stabilizer Slide rail Rear stabilizer Left end cap Right end cap Seat Computer Chest Belt Manual Hardware packag e H2O ROWER...
-
Page 7: Hardware Package
HARDWARE PACKAGE #35 Limit pad #58 M8*15 4pcs #60 M8*15 16pcs #66 M8*15 4pcs #67 M6*10 2pcs #68 M4*12 2pcs #71 OD20*ID8.5*1.5 20pcs S5 1pc #75 S13-17 1pc #103 1pc #104 1pc #105 M4*12 2pcs H2O ROWER... -
Page 8: Assembly Instructions
Slide the Seat (No.36) onto the Slide Rail (No.3). Secure the Stopper (No.35) with 2 Flat Cross Screws (No.67). Then attach the Rear Stabilizer (No.4) to the Slide Rail (No.3) with 4 Washers (No.71) and 4 Outer Hex Screws (No.66). Tighten with Spanner (No.75). #66 M8*15 4pcs #67 M6*10 2pcs #71 OD20*ID8.5*1.5 4pcs S13-17 H2O ROWER... - Page 9 #103 #104 #105 M4*12 2pcs # 75 S13-17 1pc STEP 3: Attach L & R End Caps (No.25 & 26) to Front Stabilizer (No.2). Then tighten with 2 Cross Screws (No.68) using Spanner (No.75). #68 M4*12 2pcs S13-17 H2O ROWER...
- Page 10 (No.71) and 8 Screws (No.60). Tighten with Allen Wrench (No.74). Note: You can put 3~4 screws into the holes first, and start tightening by hand. After all the screws are put in, then tighten with the tool. #60 M8*15 8pcs #71 OD20*ID8.5*1.5 8pcs H2O ROWER...
- Page 11 Attach the Slide Rail (No. 3) to the Main Frame (No. 1) using 4 Washers (No. 71), 4 Screws (No. 60) and 4 Flat Screws (No. 58). Insert all 8 screws partially into the holes first, and then tighten with Allen Wrench (No.74). #58 M8*15 4pcs #60 M8*15 8pcs #71 OD20*ID8.5*1.5 8pcs #74 S5 H2O ROWER...
- Page 12 ASSEMBLY INSTRUCTION STEP 6: Attach the Support for computer (No.5) to Main Frame, tighten with 4 Washers (No.71) and 4 Screws (No.60). #60 M8*15 4pcs #71 OD20*ID8.5*1.5 4pcs The assembly is complete! H2O ROWER...
-
Page 13: How To Fill And Empty The Tank
Filling the tank over this limit will void the warranty. • The resistance depends on the water level in the tank. Water level 1 is the lowest resistance. Level 6 is the highest resistance. Fig. A Fig. B Water level label H2O ROWER... -
Page 14: Adjustments Guide
Once removed, you may increase the ope- ning of the pedal strap by pulling the mesh end up and to the right. H2O ROWER... -
Page 15: Moving The Machine
With the wheels on the ground, you can transport the rower to the desired location with ease. ADJUSTING THE BALANCE Adjust the End Caps on the Rear Stabilizer (No.4) of the machine if the machine is unbalanced during use. H2O ROWER... -
Page 16: Storage
Rear Stabilizer (No.4) to raise the rower to vertical position. If not using the rower for more than a month, empty the tank before storing. WARNING! Moving parts can cause serious injury. Keep you hands away from the rail when training! H2O ROWER... -
Page 17: Instruction Manual For Computer
INSTRUCTION MANUAL FOR COMPUTER The computerized display console on the H2O Rower allows the user to tailor a personalized workout by monitoring their progress. During a workout, the display console will alternately and repeatedly display the Time, Time/500M, SPM, Distance, Strokes, Total Strokes, Calories Burned and Pulse (all of the above). - Page 18 DISTANCE, STROKES, CALORIES, or PULSE. (You can only set the value for one function to countdown. For example, if you have set the target value for TIME, then DISTANCE can’t be set.) B. The computer counts the value of your workout. Press START to start. H2O ROWER...
- Page 19 Screen will display your heart rate recovery status with the F1, F2….to F6 F1 is outstanding. F6 is poor. User may keep exercising to improve the heart rate recovery status. (Press the RECOVERY button again to return the main display) H2O ROWER...
- Page 20 If there is a problem with the display, try changing the batteries first. When changing the batteries, change both of them. Do not mix battery types. Do not mix old and new batteries. Dispose of old batteries according to your regional guidelines. H2O ROWER...
-
Page 21: Correct Rowing Method
CATCH The rower bends knees, reaches out arms, and his body leans towards the flywheel. All strength is focused on legs and back. Start rowing. Note: arms shall be straight, and shoulders shall be relaxed. H2O ROWER... -
Page 22: Warm Up And Cool Down Routine
SHOULDER LIFTS Lift your right shoulder toward your ear for one count. Then lift your left shoulder up for one count as you lower your right shoulder. H2O ROWER... - Page 23 15 counts and repeat with left foot. INNER THIGH STRETCH Sit with the soles of your feet together and your knees pointing outward. Pull your feet as close to your groin as possible. Gently push your knees toward the floor. Hold for 15 counts. H2O ROWER...
- Page 24 Keep your right leg straight and the left foot on the floor; then bend the left leg and lean forward by moving your hips toward the wall. Hold, then repeat on the other side for 15 counts. H2O ROWER...
-
Page 25: Implied Warranty
Note: Wear parts and expendable parts are also not covered. The device is intended for home use. Manufactured for: Gymstick International Oy Ratavartijankatu 11 15170 Lahti, FINLAND Devices marked with this symbol must be disposed of separately from your household waste, as they contain valuable materials which can be recycled.
Need help?
Do you have a question about the H2O ROWER and is the answer not in the manual?
Questions and answers