Table of Contents

Related Manuals for Gymstick CROSSTRAINER GX 4.0


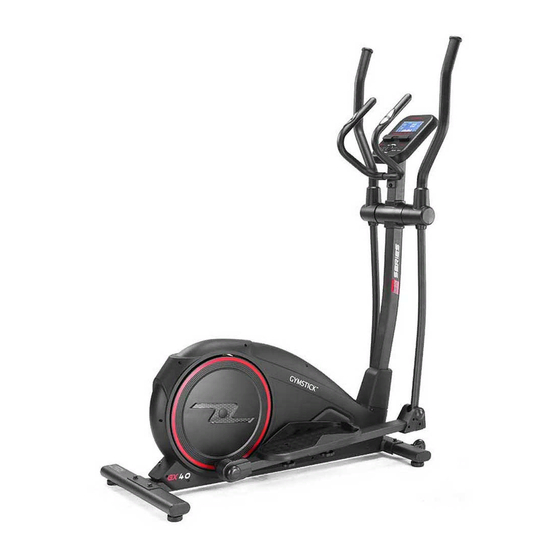
Summary of Contents for Gymstick CROSSTRAINER GX 4.0
- Page 1 GX4.0 CROSSTRAINER USER MANUAL IMPORTANT: Read all instructions carefully before using this product. Retain this owner’s manual for future reference. The specifications of this product may vary from this photo, subject to change without notice.
-
Page 2: Table Of Contents
BEFORE YOU BEGIN Thank you for choosing the Gymstick GX4.0 Crosstrainer. We take great pride in producing this quality product and hope it will provide many hours of effective exercise to make you feel better, look better and enjoy life to its fullest. -
Page 3: Safety Instructions
SAFETY INSTRUCTIONS Basic precautions should always be followed, including the following safety instructions when using this equipment: Read all instructions before using this equipment. 1. Keep children and pets away from the machine at all times. DO NOT leave unattended children in the same room with the machine. -
Page 4: Exploded Drawing
EXPLODED DRAWING GX4.0 CROSSTRAINER... -
Page 5: Parts List
PARTS LIST Description Description 001 Computer Adaptor 002 Handrail Foam Grip Ø24x30x500 2 Screw M5*12 003 Self-tapping Screw ST4.2*16 Bushing Ø31.8* Ø19.2*75 004 Handlebar Wave Washer Ø19XØ26x0.3 005 Handlebar End Cap Ø25x1.5 Front Post 006 Hand Pulse Sensor with Wire Sensor Wire L=1150mm L=750mm Washer Ø8*Ø16*1.5... - Page 6 PARTS LIST Description Description 061 Connecting rod small bushing 087 Belt Pulley with Crank Ø14* Ø10*10 088 Bolt M6*15 062 Washer Ø10*Ø20*2.0 089 Spring Washer Ø6 063 Rotate the tube Cover-A 090 Nut M6 064 Rotate the tube Cover-B 091 Belt 065 Motor 092 Flywheel 066 Screw ST4.2*15...
-
Page 7: Hardware Packing List
HARDWARE PACKING LIST GX4.0 CROSSTRAINER... -
Page 8: Assembly Instruction
ASSEMBLY INSTRUCTIONS STEP 1. Front and Rear Stabilizer Installation A. Position two Foot Pads (41) onto the Front Stabilizer (38). B. Position two Foot Pads (41) onto the Rear Stabilizer (51). C.Remove two M8x20 Bolts (14), two Spring Washers Ø8(8) and two Washers Ø8*Ø16*1.5(37) from the Front Stabilizer (38). - Page 9 ASSEMBLY INSTRUCTIONS STEP 3. Left/Right Handrail Arms, Left/Right Foot Bars Installation Remove two M8*20 Bolts (14), two Ø8 Spring Washers (8), two Ø8*Ø32x2.0 Big Washers (15), and two Ø19*Ø26*0.3 Wave Washers (34) from the left and right horizontal axes of the Front Post (35).
- Page 10 ASSEMBLY INSTRUCTIONS STEP 4. Rotate the tube Cover- A/B, Left/Right Foot Bar Cover and Left/Right Foot Pedals Installation Attach the Left Foot Bar Cover-A/B (48/47) onto the Left Foot Bar (44) with three Self-tapping Screws ST4.2*16(3). Attach the Right Foot Bar Cover-A/B (49/50) onto the Right Foot Bar (44)with three Self-tapping Screws ST4.2*16(3).
- Page 11 ASSEMBLY INSTRUCTION STEP 5. Left/Right Installation Attach the Left/Right Handrails (11, 39) onto the Left/ Right Handrail Arms (20,21) with four Nuts M8 (19), four Big Arc Washers Ø8*Ø20*2.0 (18) and four Bolts M8*43 (17). Tighten cap nuts with the Multi Hex Tool with Phillips Screwdriver provided.
- Page 12 ASSEMBLY INSTRUCTION STEP 8. Handlebar and Computer Installation Remove four M5*12 screws (32) from the back of the Computer (1). Remove bolts with the Multi Hex Tool with Phillips Screwdriver provided. Remove two M8*20 Bolts (9) and two Ø8*Ø16*1.5 Washers (37) from the Front Post (35). Remove bolts and curve washers with the S6 Allen Wrench provided.
-
Page 13: Computer Operation Instructions
COMPUTER OPERATION INSTRUCTIONS KEY FUNCTIONS START/STOP(ST/SP): 1. Starts and Pauses workouts 2. Start body fat measurement DOWN: Decrease value of selected workout parameter: TIME, DISTANCE, etc. During the workout it will decrease the resistance load Increases value of selected workout parameter. During the workout, it will increase the resistance load. - Page 14 COMPUTER OPERATION INSTRUCTIONS MANUAL PROGRAM (P1) Selecting “MANUAL” using UP OR DOWN KEY then pressing ENTER KEY. First parameter “TIME” will flash so value can be adjusted using UP OR DOWN KEY. Press ENTER KEY to save value & move to next parameter to be adjusted. Continue through all desired parameters, pressing START/STOP to start workout.
- Page 15 COMPUTER OPERATION INSTRUCTIONS HEART RATE CONTROL PROGRAM (P8-P10) There are 3 selection for target pulse: P8 - 55% TARGET H.R= 55% of (220-AGE) P9 - 75% TARGET H.R= 75% of (220-AGE) P10 - 90% TARGET H.R= 90% of (220-AGE) Setting Parameters for HEART RATE CONTROL: Selecting “One of HEART RATE CONTROL PROGRAM”...
- Page 16 COMPUTER OPERATION INSTRUCTIONS BODY FAT PROGRAM (P12) Setting Parameters for BODY FAT PROGRAM: Selecting “BODY FAT PROGRAM” using UP OR DOWN KEY then pressing ENTER. 1. “MALE ” will flash so Gender can be adjusted using UP OR DOWN KEY, press ENTER to save gender and move to next data.
-
Page 17: Maintenance
General released a report on physical activity and stated exercise as key component for disease prevention and healthier living. Your heart rate level can help you gauge the intensity of your exercise. The Gymstick console has a wireless heart rate receiver that can detect a signal being transmitted from a wireless chest strap. -
Page 18: Troubleshoot
TROUBLESHOOTING Problem Possible cause Solu on 1. Motor problem a) Check the Magne c Resistance System to ensure that it is set correctly and the resistance can be freely adjusted. A symptom of this problem is the Motor will struggle to adjust the resistance and will start making an abnormal sound. -
Page 19: Warm Up And Cool Down Routine
WARM UP AND COOL DOWN ROUTINE A good exercise program consists of a warm-up, aerobic exercise, and a cool down. Do the entire program at least two to three times a week, resting for a day between workouts. After several months you can increa- se your workouts to four or five times per week. - Page 20 SIDE STRETCHES Open your arms to the side and lift them until they are over your head. Reach your right arm as far toward the ceiling as you can for one count. Repeat this action with your left arm. QUADRICEPS STRETCH With one hand against a wall for balance, reach behind you and pull your right foot up.
- Page 21 TOE TOUCHES Slowly bend forward from your waist, letting your back and shoulders relax as you stretch toward your toes. Reach as far as you can and hold for 15 counts. HAMSTRING STRETCHES Extend your right leg. Rest the sole of your left foot against your right inner thigh.
-
Page 22: Implied Warranty
• Non-compliance of the operating instructions The device is intended for home use. Manufactured for: Gymstick International Oy Ratavartijankatu 11 15170 Lahti, FINLAND Devices marked with this symbol must be disposed of separately from your household waste, as they contain valuab- le materials which can be recycled.
Need help?
Do you have a question about the CROSSTRAINER GX 4.0 and is the answer not in the manual?
Questions and answers