Table of Contents

Related Manuals for Gymstick AIR ROWER PRO


Summary of Contents for Gymstick AIR ROWER PRO
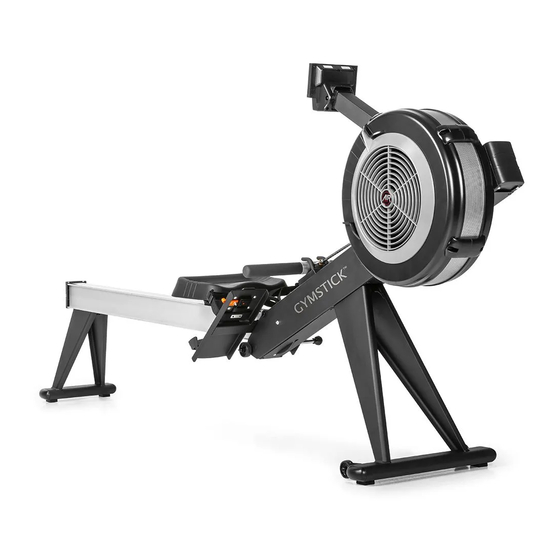
- Page 1 AIR ROWER PRO USER MANUAL IMPORTANT: Read all instructions carefully before using this product. Retain this owner’s manual for future reference. The specifications of this product may vary from this photo, subject to change without notice.
-
Page 2: Table Of Contents
BEFORE YOU BEGIN Thank you for choosing the Gymstick Air Rower Pro. We take great pride in producing this quality product and hope it will provide many hours of effective exercise to make you feel better, look better and enjoy life to its fullest. -
Page 3: Safety Instructions
14. Before exercising, always do stretching first. 15. Maximum user weight 160 kgs. WARNING! BEFORE BEGINNING THIS OR ANY EXERCISE PROGRAM, CONSULT YOUR PHYSICIAN FIRST. THIS IS ESPECIALLY IMPORTANT FOR INDIVIDUALS OVER THE AGE OF 35 OR PERSONS WITH PRE-EXISTING HEALTH PROBLEMS. AIR ROWER PRO... -
Page 4: Exploded Drawing
EXPLODED DRAWING AIR ROWER PRO... -
Page 5: Parts List
Nylon Insert Lock Nut Foot Pad Washer M4*Φ10*1T Ring Cover Sensor Bracket Tapping Screw M4*10mm Sensor Swivel Axial Heart Rate Receiver Swivel Axial Socket Φ21.5*12mm 1/2"*2.0T*Φ23 Handle Holder Washer Philip Head Socket Screw M5*10mm Cap Head Socket Screw M10*16mm AIR ROWER PRO... - Page 6 Right Console Tube Cover Nylon Insert Lock Nut 40*80 Φ50 Moving Wheel M10*16mm Phillip Head Socket Screw M8*40mm M10*1.5T*Φ20 M6*50mm 40*32mm M4*12mm M4*12mm M8*35mm M8*16mm M8*Φ16*1.5T 40*80 40*32mm Ball Head Screw M4*10mm M4*12mm Spring Washer Pedal Stable Bracket AIR ROWER PRO...
-
Page 7: Hardware Package
(J0) M8 Nylon Nut (J1) Bolt M10x16mm (J2) Washer M10x1.5t (J3) Bolt M6x50mm (J4) Screw M4x12.7mm (J6) Bolt M8x16mm (J7) Washer M8x1.5t (J8) Pull pin (J9) S crew (J5) Bolt M8x25mm M4x 10 mm (J10) Spring Washer AIR ROWER PRO... -
Page 8: Assembly Instructions
Once wires are connected CAREFULLY secure Console Tube (G) to the stem of Base Leg (A). PLEASE BE CAREFUL OF EXPOSED WIRE ENDS. THE WIRES SHOULD RECEDE BACK INTO STEM ONCE CONNECTED IN ORDER TO PREVENT DAMAGE OR DISLOCATION. AIR ROWER PRO... - Page 9 To install Rear Base Leg (D), face Base Railing (B) face down so that the receiving device for the seat cushion is on the floor. Place Rear Base Leg (D) above the pre-screwed holes of the Base Rail (B). Once placed secure with 2 (J1) Bolt(s) and (J2) washer(s). AIR ROWER PRO...
- Page 10 NOTE: You must install foot pedals before moving forward with the assembly process. Should Step 5 be skipped the Pre-screwed holes on the base railing would cover up the pre screwed holes on the Forward Base leg where the foot pedals are to be installed. AIR ROWER PRO...
- Page 11 Secure Forward Base (A) to Base Railing (B) with 4 Bolts (J6) and 4 Washers (J7). NOTE: Please be sure to tighten and secure ALL BOLTS AND WASHERS IN THEIR PLACE TO ENSURE A SOLID AND SECURE foundation to the rower. AIR ROWER PRO...
- Page 12 NOTE: Please use a firm grip on ALL MOVING PARTS when folding the Rower. The weight of the rower will cause Forward Base (A) to drop aggressively when folding and will cause Base Railing (B) to drop aggressively when unfolding. AIR ROWER PRO...
-
Page 13: Adjustments
ADJUSTMENTS Damper Lever Foot Height Adjuster Push down to adjust the position of the heel support. AIR ROWER PRO... -
Page 14: Console Operation Instructions
PRE-BUILT PROGRAMS Toggle through the menu using the UP/DOWN arrows to select from various pre-built programs: Quick Start, Competition Racing, lnterval/Tabata, Target time, Target Distance, Target Calories, Target strokes or Target Distance. AIR ROWER PRO... - Page 15 4. If you stop rowing, the time shown on the lower right window of monitor will pause. When you start rowing again, it will continue operating from where you left off. 5. Press the STOP button to pause the monitor. AIR ROWER PRO...
-
Page 16: Quick - Program
1. Once your target race distance is set, the program defaults to a 2:15 TIME / 500M setting. 2. Users can use the ”UP / DOWN” button to change the ”TIME / 500M” settings. Press the ENTER key when finished. AIR ROWER PRO... -
Page 17: Interval - Program
3. Then, the user will be able to set the amount of work based on one of those 4 metrics, rest time, interval rounds, press the ENTER key when you are finished. AIR ROWER PRO... - Page 18 1. Once the number of strokes is set, the program will default to a 150 calorie target. 2. You can use the ”UP / DOWN” button to change the amount of calories. Press the ENTER key when you are finished. AIR ROWER PRO...
-
Page 19: Time - Program
1. When the user selects the TIME program, the program defaults to a time of 20 minutes. 2. Users can use the ”UP / DOWN” button to change the amount of time. Press the ENTER key when finished. AIR ROWER PRO... - Page 20 2. Press the UP / DOWN button to display other metrics such as the TOTAL TIME, AVG / 500M, AVG METER / STROKE, MAX HR, MAX WATT, AVG WATT, CAL / HR, WATT CHART, and FORCE CURVE in the middle window. AIR ROWER PRO...
-
Page 21: Custom Program
CALORIES setting procedure 1. Once the number of strokes is set, the program will default to 150 calories. 2. You can use the ”UP / DOWN” button to change the amount of calories. Press the ENTER key when finished. AIR ROWER PRO... - Page 22 3. If you stop rowing, the time shown on the lower right window of monitor will pause. When you start rowing again, it will continue operating from where you left off. 4. Press the STOP button to pause the monitor. AIR ROWER PRO...
-
Page 23: Correct Rowing Method
CATCH The rower bends knees, reaches out arms, and his body leans towards the flywheel. All strength is focu- sed on legs and back. Start rowing. Note: arms shall be straight, and shoulders shall be relaxed. AIR ROWER PRO... -
Page 24: Warm Up And Cool Down Routine
SHOULDER LIFTS Lift your right shoulder toward your ear for one count. Then lift your left shoulder up for one count as you lower your right shoulder. AIR ROWER PRO... -
Page 25: Side Stretches
INNER THIGH STRETCH Sit with the soles of your feet together and your knees pointing outward. Pull your feet as close to your groin as possible. Gently push your knees toward the floor. Hold for 15 counts. AIR ROWER PRO... -
Page 26: Toe Touches
Keep your right leg straight and the left foot on the floor; then bend the left leg and lean forward by moving your hips toward the wall. Hold, then repeat on the other side for 15 counts. AIR ROWER PRO... -
Page 27: Implied Warranty
Devices marked with this symbol must be disposed of separately from your household waste, as they contain valuable materials which can be recycled. Proper disposal protects the environment and human health. Your local authority or retailer can provide information on the matter. AIR ROWER PRO...
Need help?
Do you have a question about the AIR ROWER PRO and is the answer not in the manual?
Questions and answers