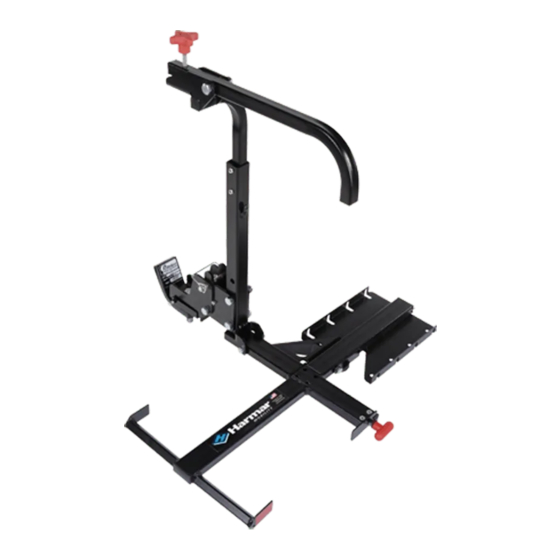
Harmar Mobility AL003 Installation & Owner's Manual
Hide thumbs
Also See for AL003:
- Installation and owner's manual (8 pages) ,
- Installation & service manual (36 pages) ,
- Owner's manual (20 pages)
Table of Contents
Advertisement
Quick Links
Advertisement
Table of Contents

Summary of Contents for Harmar Mobility AL003
- Page 1 AL003 TILT-N-TOTE INSTALLATION/ OWNER'S MANUAL 22DEC2021 | 630-00096 B...
-
Page 3: Table Of Contents
AL003 TABLE OF CONTENTS TABLE OF CONTENTS SAFETY ....................4 Safety Definitions ..........4 INTRODUCTION .................. 5 Device Name: AL003 ........... 5 Read and Understand .......... 5 Technical Specifications ........5 PREPARATION ..................6 Unboxing ............. 6 INSTALLATION ................... 7 Ball Mount and Hitch Adapter Installation ... -
Page 4: Safety
• Caution: Before driving off with the wheelchair WARNING on the AL003, make sure that the wheelchair is firmly held down on the platform. Indicates a hazardous situation that, if not • Caution: When driving with the wheelchair avoided, could result in death or serious injury. -
Page 5: Introduction
AL003: SECTION 2 INTRODUCTION SECTION 2 INTRODUCTION DEVICE NAME: AL003 Indications of Use: The intended use of the AL003 is to lift, secure and transport an unoccupied folded manual wheelchair for patients or mobility-impaired persons. READ AND UNDERSTAND Read and understand this manual prior to installation. -
Page 6: Preparation
PREPARATION SECTION 3 PREPARATION The AL003 is packaged with a ball mount and stabilizer. If a Class 1, 2, 3, or 5 hitch adapter is required, it has to be ordered separately. Be sure and check the contents of the box against the package checklist to be sure that all parts are included for proper installation. -
Page 7: Installation
SECTION 4 INSTALLATION BALL MOUNT AND HITCH • Flat Hitch Bar ADAPTER INSTALLATION WARNING Do not attach the AL003 ball mount from underneath the flat hitch bar • Flat Hitch Bar with Ball Mount inverted and Stabilizer omitted • Class 1 or 2: Solid Bar Hitch Adapter... -
Page 8: Hold-Down Arm Installation
AL003: SECTION 4 INSTALLATION REMOVE, REMOVE, REMOVE, FLIP, FLIP, MOVE UP, MOVE UP, RE-ATTACH RE-ATTACH RE-ATTACH AS SHIPPED Measure from Hitch Bar to ground 14-18" 12-16" 10-14" 8-12" ORIENTATION OF Class 1, 2, 3, and 5 HITCH ADAPTERS IS IDENTICAL... -
Page 9: Operation
AL003: SECTION 5 OPERATION LOADING WHEELCHAIR 3. Tilt the platform to the ground. See Figure 4-7. 1. Pull up on the platform handle and hold the yellow handle. See Figure 4-5. PL ATFORM HANDLE YELLOW HANDLE Figure 4-7 4. Flip the hold-down arm upright. See Figure 4-8. - Page 10 AL003: SECTION 5 OPERATION Figure 4-9 6. Once the larger wheels are seated in the platform cradle, pull up on the wheelchair Figure 4-11 handles. Once level, the platform will 8. Your wheelchair is now ready for transport. automatically latch into place. See Figure 4-10.
-
Page 11: Unloading Wheelchair
AL003: SECTION 5 OPERATION UNLOADING WHEELCHAIR 3. Push down on the wheelchair handles, tilting the smaller front wheels off of the platform. Roll the wheelchair off of the platform and rest all four 1. Release pressure off of the hold-down arm by wheels on the ground. - Page 12 AL003: SECTION 5 OPERATION PL ATFORM HANDLE Figure 4-18 Figure 4-16 6. Lift the platform upright. See Figure 4-17. Figure 4-17 7. Pull up on the platform handle and place the keeper slot onto locking tab. See Figure 4-18. AL003:...
-
Page 13: Tilt Away Feature
TILT AWAY FEATURE 3. To get the lift back in the upright position, simply lift the AL003, align the holes for the hitch pin, and replace the hitch pin. Be sure to The tilt away feature allows for easy access to the secure the hitch pin with the pin retainer. -
Page 14: Maintenance
AL003: SECTION 6 MAINTENANCE SECTION 6 MAINTENANCE • Every 6 months oil or grease the pivot points on all moving parts • Check for paint chips and touch up any bare metal with a good black enamel or lacquer to inhibit rust. This may be necessary more frequently when subjected to salt air or road salt. -
Page 15: Troubleshooting
AL003: SECTION 6 TROUBLESHOOTING SECTION 7 TROUBLESHOOTING PROBLEM POSSIBLE CAUSE SUGGESTIONS • Hold-down arm will not stay Tighten or loosen bolts until hold- Improper adjustment at pivot upright or is difficult to move. down arm or platform operates points. smooth with some resistance. -
Page 16: Warranty
SECTION 7 3-YEAR TRANSFERABLE WARRANTY The lift came with a separate warranty form on page Harmar Mobility warrants its lift products against 17. To register the lift, the warranty form must be defects in material, mechanical and electrical returned within ten (10) days of installation. This component (parts), excluding labor costs, batteries, warranty policy page must remain in the owner’s... - Page 17 AL003: SECTION 5 WARRANTY PLEASE FILL OUT ALL FIELDS AND RETURN WITHIN TEN (10) DAYS OF PRODUCT INSTALLATION. Fax completed form to 1-866-234-5680 or mail to: Harmar, ATTN Warranty Department, 1500 Independence Blvd., Suite 220, Sarasota FL 34234. PRODUCT INFORMATION...
- Page 18 AL003: SECTION 5 WARRANTY Page Intentionally Left Blank AL003: Installation/Owner's Manual 22DEC2021 | 630-00096-B...
- Page 19 NOTES AL003: Installation/Owner's Manual 22DEC2021 | 630-00096-B...
- Page 20 1500 Independence Blvd., Ste 220 Sarasota, FL 34234 800.833.0478 harmar.com...


Need help?
Do you have a question about the AL003 and is the answer not in the manual?
Questions and answers