Table of Contents
Advertisement
Quick Links
Optical Measuring Instrument
Accessory
Instruction Manual
USPM-RU-W series
USPM-TU
Before use
Thank you for purchasing our transmit unit. In order to use this product safely and to
maximize the benefits from doing so, be sure to read this instruction manual completely
before use. This manual describes only the contents of the transmit unit, thus read this
manual together with the "instruction manual for the NIR Micro-spectrophotometer
USPM-W-B" in the attached sheet.
Please keep this manual close at hand when using the product, and store it carefully for
future reference after you have read it.
This instruction manual contains a warranty card (on page 5). Confirm and fill in the
necessary items and store the warranty card in a safe place.
PV8355F4E007
I
Advertisement
Table of Contents

Related Manuals for Olympus USPM-RU-W Series


Summary of Contents for Olympus USPM-RU-W Series
- Page 1 Optical Measuring Instrument Accessory Instruction Manual USPM-RU-W series USPM-TU Before use Thank you for purchasing our transmit unit. In order to use this product safely and to maximize the benefits from doing so, be sure to read this instruction manual completely before use.
-
Page 2: Table Of Contents
Table of Contents Description of Precautions, Rated Display, and Symbol Marks ······································································ 1 Safety Precautions ····················································· 3 Features of this Product ·············································· 6 Confirmation of Packaged Products ························· 7 Part Names and Functions/Specifications ················· 9 Equipment Installation and Connection ··················· 12 Usage ······························································... -
Page 3: Description Of Precautions, Rated Display, And Symbol
Description of Precautions, Rated Display, and Symbol Marks [Symbol marks regarding safety] The marks below are displayed on the NIR Micro-spectrophotometer itself. Understand the meaning of the marks and handle the unit carefully. Mark Description Do not touch because the surface is hot. Otherwise you can get burned. - Page 4 [Symbol marks related to packaging] The meanings of symbol marks indicated on the package of this product are as follows. Indicates the proper upper direction of the packaged cargo Indicates that the packaged cargo must not be exposed to rain Indicates that packaged cargo must be carefully handled because contents are easily damaged Indicates the recycle mark indicating compliance with China RoHS...
-
Page 5: Safety Precautions
Safety Precautions Intended purpose of this product The purpose of this product is to measure spectral transmission factors through the combined use of the “NIR Micro-spectrophotometer (USPM-W-B)” as specified by our company. Do not use this product for any use other than this intended purpose. See the instruction manual of the main set regarding how to use the “NIR Micro-spectrophotometer (USPM-W-B).”... - Page 6 Symbols denoting prohibition (prohibited actions) Symbols denoting obligation (mandatory actions) Symbols denoting caution General cautions on handling this product Make confirmation through the combined use of the “general cautions on handling this product” in the instruction manual of the NIR Micro-spectrophotometer USPM-W-B. Observe the cautions below when handling this product.
- Page 7 This warranty guarantees free repair under the conditions described below. (Conditions regarding free-of-charge repair) Olympus Corporation will repair free of charge any problem due to failure in manufacturing, provided that it has occurred during correct usage compliant with the manual and warning labels during the warranty period.
-
Page 8: Features Of This Product
For details on how to have defects repaired overseas, consult the consult with contact point listed in the attached sheet. * The warranty card guarantees any free-of-charge repair under the terms and conditions specified in this document. The warranty is not intended to restrict the right of the customer. -
Page 9: Confirmation Of Packaged Products
1. Confirmation of Packaged Products Make confirmation through the combined use of “1. Confirmation of Packaged Products” in the instruction manual for the NIR Micro-spectrophotometer USPM-W-B. Make sure, according to the table below, that the main set and supplied accessories are completely received and check whether products are missing or damaged. - Page 10 [Packing box for the transmit unit] Name Quantity Remarks Instruction manual for Transmittance This document Measurement Unit USPM-TU Transmit unit *1 [Packing box for the collimator unit for transmittance and tilt stage] Name Quantity Remarks collimator unit for transmittance Tilt stage Lamp housing Lamp cable Four auxiliary...
-
Page 11: Part Names And Functions/Specifications
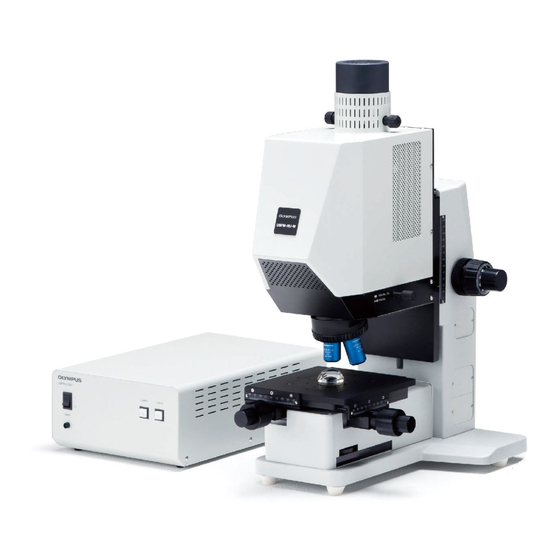
2. Part Names and Functions/Specifications 2.1.Main unit part names and functions Make confirmation through the combined use of “2.1 Main unit part names and functions” in the instruction manual for the NIR Micro-spectrophotometer USPM-W-B. 1. collimator unit for transmittance 4. Polarization unit 3. - Page 12 Transmit unit This unit adjusts the outgoing beams using tilt and shift adjustment knobs. Tilt adjustment knob Adjusts the position of the outgoing beams back and forth Shift adjustment knob Adjusts the position of the outgoing beams back and forth Tilt stage The tilt stage adjusts the tilt of the two axes to an optical axis using a tilt stage adjustment knob.
- Page 13 2.2. Product specifications Make confirmation through the combined use of “2.3 Product specifications” in the instruction manual for the NIR Micro-spectrophotometer USPM-W-B. The descriptive contents correspond to the specifications required when the transmit unit for the NIR Micro-spectrophotometer is incorporated into the device. Items Specifications Name...
-
Page 14: Equipment Installation And Connection
3. Equipment Installation and Connection 3.1. Equipment transportation and installation See “3.1 Equipment Transportation and Installation” in the instruction manual for the NIR Micro-spectrophotometer USPM-W-B. 3.2.Halogen lamp attachment and replacement Set the power switch to OFF for safety, pull out the power cord from the wall outlet, and cool the halogen lamp and lamp socket sufficiently before installing and removing the halogen lamp. - Page 15 3.3.Device connection Be careful not to apply excessive force, as cables are susceptible to bending and torsion. For cable setting, keep cables away from something sharp. Confirm that all power switches are set to OFF and that the power cord has been removed from the wall outlet. The power cord may melt and short-circuit if it makes contact with the lamp housing.
-
Page 16: Usage
4. Usage This chapter describes the outline of the equipment operation according to the general procedure. For details on use, conduct full training from the standpoint of a specialist. 4.1. Measurement flow Start the controller supply unit and computer and then start the software. →... - Page 17 (13) Confirm the results. → See “4.14 Checking the results.” (14) Shut down the software and then shut down the controller supply unit and computer. → See “4.15 Termination.” 4.2. Start-up For the handling of the computer, see the computer’s instruction manual for correct usage procedure.
- Page 18 4.4. Optical path switching settings * Option Gently operate the optical path switching knob used for the optical switching unit. Applying excessive force during operation may cause damage, necessitating replacement. (1) For the customer who purchased a Reflectivity Measurement Unit for 45-Degree , set the optical path switching knob.
- Page 19 4.6. Setting a work setting file For more details, see “6.2 Work setting” in the Software Instruction Manual USPM-SA. (1) Select [Set] - [Work] from the file menu. A WORK setting window appears. File menu (2) Set the reference. Click and fix FIXED.
- Page 20 4.7. Position adjustment of a reference (standard light flux) Gently operate the adjustment knobs used for the transmission measurement unit. Applying excessive force during operation may cause damage, necessitating replacement. [Window switching method] Double-click the black portion of the LIVE window. The FOCUS and CT windows are switched.
- Page 21 (4) Adjust the outgoing beam’s shift for a reference (standard light flux). First, CT windows are switched .move the portion shown in the figure below while clicking it and adjust the gain so that an image is displayed. Adjust the image so that it is displayed in a circle.
- Page 22 The Information window opens that displays the sampling interval. After that, Click OK to end the operation.Then, the shutter operates again. 4.9. Acquiring a background value (1) Click BACKGROUND1 on the operation panel. A clicky sound is generated, and then a warning alarm sounds as the process finishes. As the data is saved, an asterisk (*) appears at the left of BACKGROUND1 in the operation panel.
- Page 23 4.14. Checking the results For details on the main window of the software, see “4. Main Window” in the Software Instruction Manual USPM-SA. (1) GRAPH window (2) TEXT window (3) DIAGRAM window File menu (4) Operation panel (6) LUMINANCE TEXT window (5) LUMINANCE window (detailed values) (1) GRAPH window...
- Page 24 (4) Operation panel (detailed numeric values) The detailed numeric values of various measurement results can be confirmed in the data field on the left of the main window. To move the displayed wavelength, use the <, <<, >, and >> buttons in the data field. To delete the measurement result, click the Delete button.
-
Page 25: Notes On Storing
5. Notes on Storing 5.1. Storing See “5.1 Storage” in the instruction manual for the NIR Micro-spectrophotometer USPM-W-B. 5.2. Maintenance See “5.2 Maintenance” in the instruction manual for the NIR Micro-spectrophotometer USPM-W-B. 5.3. Wavelength offset The method used to offset the spectral transmission factor is not provided. Our company does not perform offset. -
Page 26: Appendix
Appendix To customers who execute micro-spectrophotometry by placing a sample on the tilt stage It is recommended to adjust the tilt of the tilt stage vertically to the optical axis when the customer who purchased a transmit unit and 45-degree expansion unit performs micro-spectrophotometry. - Page 27 Cleaning the transmission window glass (1) See Section 3.6 in the instruction manual for the NIR Micro-spectrophotometer USPM-W-B and remove the work installing plate. (2) Adjust the scale of the shift stage to point 0. (3) In the figure below, the transmission window glass is viewed in the portion circled in red.
- Page 28 ******************************************************************************************************* Printed in Japan. © 2011 Olympus Corporation. All rights reserved. The contents of this manual shall not be reproduced or distributed in part or in whole without Olympus’s consent. The company and product names described in this manual may be trademarks or registered trademarks of their respective proprietors.
- Page 29 Shinjuku Monolith , 3-1,Nishi Shinjuku 2-chome ,Shinjuku-ku ,Tokyo ,163-0914, Japan TEL.0120-58-0414 FAX.03-6901-4251 +81-3-6901-4251 OLYMPUS KOREA CO., LTD. 8F Olympus Tower , 446 Bongeunsa-ro , Gangnam-gu, Seoul , Korea , 135-509 Tel: +82-2-6255-3458 OLYMPUS (THAILAND) CO., LTD. 159 Serm-mit Tower, 9 floor, unit# 906-910, Sukhumvit21 road, North Klongtoey,...