Table of Contents
Advertisement
INSTRUCTIONS
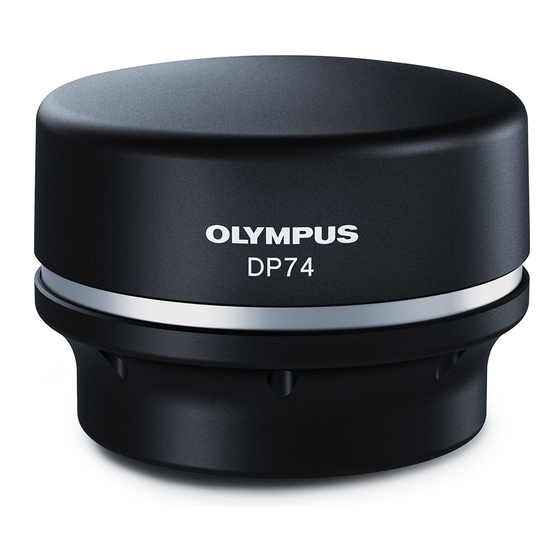
DP74
Microscope Digital Camera
This instruction manual is for the Olympus microscope digital camera DP74.
To obtain optimum performance of this product and to ensure the safety, study this manual
thoroughly before operating this product and keep it on hand during operation of this product.
Retain this instruction manual in an easily accessible place near the work desk for future
Optical Microscope Accessory
reference.
For products included in the configuration of this system, see page 18 of this instruction
manual.
A X 8 9 0 0
Advertisement
Table of Contents

Related Manuals for Olympus DP74


Summary of Contents for Olympus DP74
- Page 1 DP74 Microscope Digital Camera This instruction manual is for the Olympus microscope digital camera DP74. To obtain optimum performance of this product and to ensure the safety, study this manual thoroughly before operating this product and keep it on hand during operation of this product.
- Page 2 Refer to your local Olympus distributor in EU for return and/or collection systems available in your country. NOTE: This product has been tested and found to comply with the limits for a Class A digital device, pursuant to Part 15 of the FCC Rules.
-
Page 3: Table Of Contents
Table of Contents Introduction ............................... 1 Safety precautions ............................2 Handling precautions..........................6 1 System diagram .............................18 2 Nomenclature of respective portions .................19 3 Assembly ..............................21 3-1 Attaching the camera head ........................21 3-2 Installing the low-profile bracket ......................23 3-3 Installing the PCIe interface board .................... - Page 4 DP74 4 Installation of software ........................30 5 Outline of image acquisition procedures ..............32 6 External trigger function ........................ 34 7 Specifications ............................36 8 Troubleshooting ............................ 42...
-
Page 5: Introduction
DP74 Introduction With this microscope digital camera DP74 attached to the Olympus microscope using the C-mount camera adapter, the image from the microscope can be acquired. Using this microscope digital camera DP74 in combination with non-Olympus C-mount camera adapters or non-... -
Page 6: Safety Precautions
DP74 Safety precautions If the product is used in a manner not specified by this manual, the safety of the user may be imperiled. In addition, the product may also be damaged. Always use the product according to this instruction manual. - Page 7 Do not move the PC or apply an impact to the PC while the power is ON. Always use the power cord provided by Olympus. If the proper power cord is not used, the electric safety and the EMC (Electro-Magnetic Compatibility) performance of the product cannot be assured.
- Page 8 DP74 CAUTION - Prevention of electric shock - Never insert any tools or metal fragments in the air vents of the product. It could cause electric shock or failure of the product. Keep the power cord and cables well away from the lamp housing.
- Page 9 Precautions for high temperature interface board Right side of the fan on the PCIe Precautions for using the adjacent slot of 6, 26 interface board the PCIe interface board. If label becomes dirty or is peeled off, contact Olympus for replacement.
-
Page 10: Handling Precautions
1. If this product is operated continuously for a long time period, the foreign objects, etc. attached to the inside of camera may be reflected to the observed image. If the attachment of foreign objects is suspected, contact Olympus. However, if you intend to operate this product continuously for a long time period, it is recommended to apply the patch file (to this product) that suppresses the generation of foreign objects. - Page 11 DP74 3. Do not install the following boards in the adjacent slot on the fan side of the PCIe interface board. Otherwise, it may deteriorate product performance. · Graphic board · PCIe interface board of DP80, DP73 or DP72 ·...
- Page 12 DP74 Image data 1. The recorded image data may be lost (corrupted) in the following cases. Olympus is not liable for the loss (corruption) of recorded data. · When the user or a third party carried out a repair to the product.
- Page 13 2. The PC used with this system should set up and run the OS designated by Olympus. For the OS in the PC, the user is requested to create a backup and retain it carefully. (Olympus does not support the OS-related matters including its backup.) For details of the PC and OS, refer to their respective manuals.
- Page 14 DP74 Trademark Microsoft Windows are either registered trademarks or trademarks of Microsoft Corporation in the United States and/or other countries. Intel and Intel Core are trademarks of Intel Corporation in the United States and/or other countries. Other company names or product names described in this manual are either registered trademarks or trademarks of...
- Page 15 X : Not recommended to use, since the four corners of the image may be darkened due to incompatible specifications with DP74. 2. If the intermediate tubelength is long (see examples below), the periphery of the field of view may be obscured depending on the observation tube and/or objective used together.
- Page 16 4. Performances in combination use of this product and non-Olympus microscopes have not been evaluated. Non- Olympus microscopes and non-Olympus C-mount lenses can be used if they match a 1/1.2 inch or larger image sensor and the lens projection length from the C-mount body attaching section is no more than 4.5 mm. However, problems, such as shading, etc.
- Page 17 DP74 8. If the camera or microscope is vibrated during image acquisition in 3CMOS mode (5760 x 3600 / 2880 x 1800 / 1920 x 1200 pixels), the image may be disturbed. The several causes for the vibration are, operation of keyboard and mouse on the same table where the microscope equipped with the camera is placed, vibration from the equipment with built-in air cooling fan placed on the same table as microscope, etc.
- Page 18 DP74 15. The position navigator function does not necessarily guarantee the operations of all specimens, observation conditions and operation methods. 16. The position navigator function is not available in the following cases. · When there is no specimen in the observation field of view.
- Page 19 Even though the above mentioned recommended operating environments are satisfied, it does not necessarily guarantee the functions of combination use with all commercially-available PCs. Refer to Olympus website to check the PCs whose performances in combination use with this system were confirmed.
- Page 20 DP74 2. CPU Olympus does not guarantee the performance of the PC where a CPU not compatible with Core series or non-Intel chipset is installed. 3. HDD free space The HDD free space is the space that is required not to cause any problem when installing or running the system.
- Page 21 DP74 Maintenance and storage 1. Do not leave stains or fingerprints on the lenses and filters. If they get dirty, blow away dust with a commercially- available blower and gently wipe the lens or filter with a piece of cleaning paper (or clean gauze).
-
Page 22: System Diagram
Camera head Camera interface cable Desktop PC Low-profile bracket cellSens software OLYMPUS Stream C-mount software camera adapter Consult Olympus for the compatible microscope and C-mount camera adapter. Consult Olympus for the microscope, camera adapter and DP2-TWAIN to be used together. -
Page 23: Nomenclature Of Respective Portions
DP74 Nomenclature of respective portions Camera head Any product connected to the camera head should be an Olympus-designated product or a product NOTE in compliance with the requirements of IEC60950 or CISPR22/24 (international standards related to product safety). If products other than these products are connected, Olympus cannot guarantee any performance of the camera. - Page 24 DP74 (PCI standard half-size, low-profile size compatible) PCIe interface board Connector (page 27) Low-profile Camera interface cable (page 27) bracket (page23) Software (option) cellSens/OLYMPUS Stream...
-
Page 25: Assembly
DP74 Assembly 3-1 Attaching the camera head · Do not touch the C-mount thread, since it is sharp. NOTE · Be careful not to drop the camera head and the C-mount camera adapter when attaching or detaching them. · Be sure to attach the C-mount camera adapter by screwing it into the camera head securely. - Page 26 · If a non-Olympus C-mount camera adapter is used, the optimum optical performance may not be obtained. · Do not use the non-Olympus C-mount camera adapter NOTE which has a threaded section d longer than 4.5 mm,...
-
Page 27: Installing The Low-Profile Bracket
DP74 3-2 Installing the low-profile bracket If the PCIe slot of the desktop PC is the low profile specifications, it is required to replace the existing bracket with the low-profile bracket. · To avoid damage caused by static electricity, touch an... -
Page 28: Installing The Pcie Interface Board
DP74 3-3 Installing the PCIe interface board Be careful not to cut your fingers by sharp portions within CAUTION the PC. · Before installing the PCIe interface board on the PC, be NOTE sure to read the instruction manual for the PC to prevent the damage. - Page 29 DP74 Open the housing of the desktop PC. Remove the slot cover a of an unused PCIe slot on the motherboard. Select the position of the PCIe slot whose electrical mode NOTE (data transfer rate) is X4 or more. The electrical mode (data transfer rate) of PCIe slots might differ from the mechanical mode (slot shape) of them.
- Page 30 DP74 Insert the PCIe interface board b into the PCIe slot c carefully without touching the board surface directly by hand. Do not install the following boards in the adjacent slot on NOTE the fan side of the PCIe interface board. Otherwise, it may deteriorate product performance.
-
Page 31: Connecting The Camera Interface Cables
DP74 3-4 Connecting the camera interface cables · Be sure to turn OFF the power of the PC before connecting CAUTION the camera interface cables. · Always use the camera interface cable provided by Olympus. · Keep the camera interface cables well away from equipment generating high heat, such as the lamp housing of microscope. - Page 32 · Be sure to connect the camera interface cable to the NOTE connector where this product name “DP74” is displayed. Be careful not to connect the camera interface cable to the display connector of the PC. And also be careful not to connect the display cable to the connector where this product name “DP74”...
-
Page 33: Connecting The External Equipments
(page 34). Insert the connector of the BNC cable of the external equipment into the connector a of the PCIe interface board of the PC. To use the external triggering function, the software NOTE cellSens / OLYMPUS Stream is required. -
Page 34: Installation Of Software
(For the change of user account, refer to the Help of Windows ® TWAIN Driver DP2-TWAIN DP2-TWAIN is not included in this product. Download the installer from Olympus web site. When using DP2-TWAIN with 64-bit OS, the commercially-available software that supports TWAIN in 64-bit native operation is required. - Page 35 Selecting the device When selecting the device in cellSens or OLYMPUS Stream, specify it in the device list shown below. The device list is displayed when you startup cellSens or OLYMPUS Stream for the first time. Or, in Menu bar, select [Acquisition] [Devices] [Device List] to display the device list.
-
Page 36: Outline Of Image Acquisition Procedures
DP74 Outline of image acquisition procedures For detail operating procedures, refer to the instruction manual or Help of software you will use. Brightfield observation Setup microscope. Recheck and perform fine adjustment as needed. Set exposure mode. Manual Exposure mode? Manual... - Page 37 DP74 Fluorescence observation Setup microscope. Recheck and perform fine adjustment as needed. Set exposure mode. Manual Exposure mode? Manual Exposure mode? Fine adjustment of SFL Auto exposure time Set exposure time. SFL Auto Move area and correct exposure. Select metering area (Full image, 30%, 1%, 0.1%)
-
Page 38: External Trigger Function
Trigger input When the trigger signal is inputted from external equipments, the still image can be acquired using cellSens / OLYMPUS Stream. When the trigger signal is detected at the edge, the image is acquired with the pre-set exposure time. The positive and negative logics of signals can be switched with cellSens / OLYMPUS Stream. - Page 39 When the trigger signal is outputted from cellSens/OLYMPUS Stream, the open/close of the commercially-available shutter can be controlled. The trigger signal is outputted in interlock with the image acquisition operation by cellSens/OLYMPUS Stream. The positive and negative logics of signals can be switched and the exposure time lag from outputting the trigger signal to the start of exposure (0 to 2 s) can be set by cellSens/OLYMPUS Stream.
-
Page 40: Specifications
DP74 Specifications The specification item with the mark can be set in combination with cellSens or OLYMPUS Stream. The specification item with the mark can be set in combination with OLYMPUS Stream. The specification item with the mark may differ depending on the specified exposure time or operating status of the PC. - Page 41 DP74 Item Specifications A/D conversion Resolution: 12 bit Exposure Exposure modes Auto / SFL Auto / Manual control AE lock Available AE pause Available Exposure correction Correction range: ±2.0 EV, 1/3 EV step Metering area Full image / 30% / 1% / 0.1% (The metering area can be moved freely.) Exposure time 39 μs to 60 s...
- Page 42 DP74 Item Specifications 5760 x 3600 (3CMOS): approx. 7 s Still image acquisition time 2880 x 1800 (3CMOS): approx. 7 s (from start of image acquisition to 1920 x 1200 (3CMOS): approx. 0.8 s display of image) 5760 x 3600 (pixel shift): approx. 3 s 2880 x 1800 (pixel shift): approx.
- Page 43 DP74 Item Specifications White balance Area-specified / Manual Black balance Area-specified / Manual Contrast mode Normal / medium / High / Linear Sharpness filter Soft / Normal / Strong 1 / Strong 2 / Strong 3 sRGB / AdobeRGB Color space...
- Page 44 DP74 Item Specifications PC interface PCI Express Rev.2.0 x4 Compatible with low profiles Applicable OS Microsoft Windows 10 Pro (64 bit) ® ® Microsoft Windows 8.1 Pro (64 bit) ® ® Microsoft Windows 7 Ultimate / Professional SP1 (32 bit / 64 bit) ®...
- Page 45 DP74 Item Specifications Operating environment · Indoor use · Altitude: Max. 2000 meters · Ambient temperature: 10 to 35 °C (50 to 95 °F) · Relative humidity: 80% for temperatures up to 31 °C (88 °F) (without condensation) In case of over 31 °C (88 °F), the relative humidity is decreased linearly through 70% at 34 °C(93 °F), 60% at 37 °C(99 °F), to...
-
Page 46: Troubleshooting
DP74 Troubleshooting If problems occur, please review the following list and take remedial action as needed. If you cannot solve the problem after checking the entire list, please contact Olympus for assistance. Problem Cause Remedy Page The software does not start. - Page 47 In some cases, you may need to press manual) the [Cancel] button on the status bar and acquire the image again. cellSens / OLYMPUS Stream is Wait until the processing of file save, (Online processing of file save, etc. etc. is completed, and acquire the next manual) still image.
- Page 48 DP74 Problem Cause Remedy Page The abnormal temperature error One of the following boards is installed Move the relevant board to the different occurs. in the adjacent slot on the fan side of slot. the PCIe interface board. · Graphic board ·...
- Page 49 DP74 Problem Cause Remedy Page The image is too dark. The exposure correction is set to the - Return the exposure correction value (Online side beyond the appropriate value. to 0 and set the appropriate exposure manual) correction value. The bright area of the image is set as...
- Page 50 DP74 Problem Cause Remedy Page The colors of the image are The reference area for white balance is Select the area where nothing is shown (Online strange. not selected appropriately. on the background as the reference manual) area for white balance.
- Page 51 DP74 Problem Cause Remedy Page The acquired image is not in The specimen is not brought into focus. Adjust the focus accurately with the fine – focus. focusing knob. The image is acquired by bringing Adjust the parfocality between the...
- Page 52 The files acquired and saved The effective data is lower 10-bit out of Use cellSens / OLYMPUS Stream to with 10-bit color/10-bit grayscale 16-bit file format. However, your software open the image file.
- Page 53 Repair request If you cannot solve the problems even though taking actions described in Troubleshooting, please contact Olympus for assistance. At that time, please tell them the following information as well. If this product is combined with PC, please provide us the PC model name, OS, free space in HDD, memory, and CPU.
- Page 54 If no power supply cord is provided, please select the proper power supply cord for the equipment by referring to “Specifications” and “Certified Cord” below: Caution : In case you use a non-approved power supply cord for Olympus products, Olympus can no longer warrant the electrical safety of the equipment.
- Page 55 DP74 Certification mark Country Agency Country Agency Certification mark Argentina IRAM Italy Australia Japan Austria ÖVE Netherlands KEMA Belgium CEBEC Norway NEMKO Canada Spain Denmark DEMKO Sweden SEMKO Finland Switzerland United ASTA France Kingdom Germany U.S.A. Ireland NSAI...
- Page 56 DP74 Table 2 HAR flexible cord Approval organizations and cordage harmonization marking methods Alternative marking utilizing Printed or embossed black-red-yellow thread harmonization marking (May be (Length of color section in mm) Approval organization located on jacket or insulation of internal wiring)
- Page 57 DP74 Österreichischer Verband für <ÖVE> <HAR> Elektrotechnik (ÖVE) Danmarks Elektriske Materialkontroll <DEMKO> <HAR> (DEMKO) National Standards Authority of Ireland <NSAI> <HAR> (NSAI) Norges Elektriske Materiellkontroll NEMKO <HAR> (NEMKO) Asociacion Electrotecnica Y <UNED> <HAR> Electronica Espanola (AEE) Hellenic Organization for ELOT <HAR>...
- Page 60 Manufactured by Shinjuku Monolith, 2-3-1 Nishi-Shinjuku, Shinjuku-ku, Tokyo 163-0914, Japan Distributed by AX8900 06 Issued in January, 2021...
Need help?
Do you have a question about the DP74 and is the answer not in the manual?
Questions and answers