Table of Contents
Advertisement
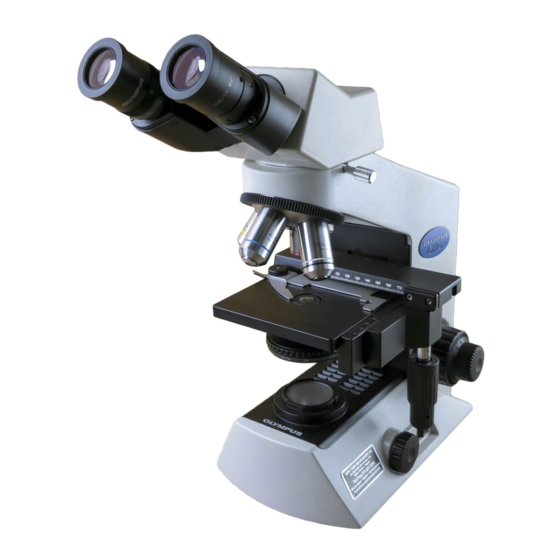
INSTRUCTIONS
CX21
EDUCATION MICROSCOPE
This instruction manual is for the Olympus Education Microscopes Model CX21. To ensure the
safety, obtain optimum performance and to familiarize yourself fully with the use of this microscope,
we recommend that you study this manual thoroughly before operating the microscope. Retain this
instruction manual in an easily accessible place near the work desk for future reference.
A X 7 4 0 3
Advertisement
Table of Contents

Related Manuals for Olympus CX21


Summary of Contents for Olympus CX21
- Page 1 CX21 EDUCATION MICROSCOPE This instruction manual is for the Olympus Education Microscopes Model CX21. To ensure the safety, obtain optimum performance and to familiarize yourself fully with the use of this microscope, we recommend that you study this manual thoroughly before operating the microscope. Retain this instruction manual in an easily accessible place near the work desk for future reference.
-
Page 3: Table Of Contents
CX21 CONTENTS IMPORTANT — Be sure to read this section for safe use of the equipment. — STANDARD COMPONENT UNITS NOMENCLATURE SUMMARY OF BRIGHTFIELD OBSERVATION PROCEDURE DETAILED OBSERVATION PROCEDURE 7-11 Turning the Lamp ON ........... Placing Specimen on the Stage .... -
Page 4: Safety Precautions
Do not place the microscope on a flexible surface, as this could result in blocking the air vents and cause overheating or a fire. 4. Always use the power cord provided by Olympus. If no power cord is provided, please select the proper power cord by referring to the section “PROPER SELECTION OF THE POWER SUPPLY CORD”... -
Page 5: Maintenance And Storage
[Warning against high temperature in position frame lamp bulb replacement] If the warning label is stained or peeled off, contact Olympus. Getting Ready 1. A microscope is a precision instrument. Handle it with care and avoid ² subjecting it to sudden or severe impact. -
Page 6: Intended Use
Caution If the microscope is used in a manner not specified by this manual, the safety of the user may be imperiled. In addition, the equipment may also be damaged. Always use the equipment as outlined in this instruction manual. The following symbols are used to set off text in this instruction manual. -
Page 7: Standard Component Units
CX21 STANDARD COMPONENT UNITS }After opening the package, make sure that the correct component units for the selected set are present. · The differences between the CX21FS1 and CX21FS2 lie in the number of objectives and presence of immersion oil. -
Page 8: Nomenclature
NOMENCLATURE }The following items have been attached at the factory to prevent deterioration during transport. Remove these items and retain them for future use. Then loosen the observation tube clamping knob and correct the orientation of the eyepieces as shown in the illustration below. 1 Revolving nosepiece/observation tube transport band 2 Stage and specimen holder protection sheet 3 Protective pad below the stage... -
Page 9: Summary Of Brightfield Observation Procedure
CX21 SUMMARY OF BRIGHTFIELD OBSERVATION PROCEDURE (Controls Used) (Page) Set the main switch to “ I " (ON) and adjust 1Main switch (P. 7) 2Light intensity adjustment knob (P. 7) the brightness. 3Specimen holder (P. 7) Place the specimen on the stage. -
Page 10: Detailed Observation Procedure
DETAILED OBSERVATION PROCEDURE Turning the Lamp ON (Fig. 4) 1. Set the main switch 1 to “ I ” (ON). 2. Rotating the light intensity adjustment knob 2 in the direction of the arrow increases brightness and rotating it in the opposite direction de- creases brightness. -
Page 11: Adjusting The Focus
CX21 Specimen holder scales (Fig. 7) }Theses scales allow the position (coordinates) being observed on the specimen to be identified. Even after the specimen is moved, it can be returned easily to the original position. 1. The horizontal coordinate can be read at position 1 on the specimen holder. -
Page 12: Adjusting The Interpupillary Distance
Pre-focusing Knob (Fig. 10) }The pre-focusing knob controls the mechanism for preventing collision between the specimen and objective. 1. After bringing the specimen into focus, turn the pre-focusing knob 1 inside the hole of the arm so that the pre-focusing mechanism hits the stage guide. -
Page 13: Adjusting The Condenser Position And Aperture Iris Diaphragm
CX21 Adjusting the Condenser Position and Aperture Iris Diaphragm (Fig. 14) }The condenser is usually used in the highest position. If the entire observed field of view is not bright enough, brightness may be improved by lowering the condenser slightly. -
Page 14: Using The 100X Immersion Objective
}The designated immersion oil should be attached to the top lens of the 100X immersion objective. Otherwise, the observed image will be unable to be focused on. # Always use immersion oil supplied by Olympus. 1. Focus on the specimen using all objectives, starting from the lowest- power objective to higher-power objective. -
Page 15: One-Point Advice
CX21 ONE-POINT ADVICE How To Track a Microscopic Image To track an image moving leftwards Move the slide (or to move the glass to the specimen image left. rightwards): Direction of moving the image To move the Move the slide specimen image glass down. -
Page 16: Troubleshooting Guide
Under certain conditions, performance of the unit may be adversely affected by factors other than defects. If problems occur, please review the following list and take remedial action as needed. If you cannot solve the problem after checking the entire list, please contact Olympus for assistance. Problem... - Page 17 CX21 Problem Cause Remedy Page 12. Objective hits the specimen when The specimen is upside down. Set the specimen correctly with the an objective is switched to a higher- cover glass on the top. magnification objective. The cover glass is too thick.
-
Page 18: Specifications
SPECIFICATIONS Item Specifications 1. Optical system UIS (Universal Infinity System) optical system 2. Illumination Built-in illumination system. 6 V, 20 W halogen bulb 6V20WHAL (PHILIPS 7388) (Average life time: Approx. 100 hr. when used as directed) 100-120/220-240 V 0.42/0.25A, 50/60 Hz 3. -
Page 19: Optical Characteristics
CX21 OPTICAL CHARACTERISTICS The following table shows the optical characteristics of com- Magnification binations of eyepieces and objectives. The figure on the right shows the performance data engraved on the objectives. Mechanical tube Number of aperture length Cover glass thickness... -
Page 20: Assembly
ASSEMBLY }Each standard set can be assembled by simply attaching the lamp bulb, daylight (blue) filter and power cord. Installing/Replacing the Lamp Bulb (Fig. 17) # Before attaching the lamp bulb, remove the parts that may drop ³ such as the filter and specimen from the microscope frame, and place it on the back so that the bottom can be seen from the front. -
Page 21: Connecting The Power Cord
” (OFF) before con- ² necting the power cord. Always use the power cord provided by Olympus. If no power cord is provided, please select the proper power cord by referring to the section “PROPER SELECTION OF THE POWER SUPPLY CORD” at ³... -
Page 22: Optional Accessories
Eyepieces WHC15X WHC15X-H Eyepiece micrometer Cord Hanger CH3-CH Filter Holder Microscope Frame CH2-FH CX21 Reflection Mirror 45 mm filter CH20-MM 32.5 mm filter Darkfield Ring CH2-DS 10-2 Installation and Operation of Optional Accessories Cord Hanger CH3-CH (Figs. 21 & 22) }When the CH3-CH cord hanger is attached on the back of the micro- scope frame, the power cord can be wound around it for storing. -
Page 23: Filter Holder Ch2-Fh
Converts the color of light for color photography (with a day- 150, 200 light film). For other filters, contact Olympus. Filters similar to the above having a diameter of 45 mm are also available for insertion in the window lens. -
Page 24: Eyepieces Whc15X/Whc15X-H
Eyepieces WHC15X/WHC15X-H (Fig. 26) }The standard 10X eyepieces are clamped using screws. 1. Using a small flat-blade screwdriver, loosen the clamping screw 1 of a 10X eyepiece and remove it. 2. Insert the WHC15X or WHC15X-H into the eyepiece sleeve and tighten the clamping screw 1. -
Page 25: Proper Selection Of The Power Supply Cord
If no power supply cord is provided, please select the proper power supply cord for the equipment by referring to “ Specifications ” and “ Certified Cord ” below: CAUTION: In case you use a non-approved power supply cord for Olympus products, Olympus can no longer warrant the electrical safety of the equipment. - Page 26 Table 2 HAR Flexible Cord APPROVAL ORGANIZATIONS AND CORDAGE HARMONIZATION MARKING METHODS Alternative Marking Utilizing Printed or Embossed Harmoniza- Black-Red-Yellow Thread (Length tion Marking (May be located on Approval Organization of color section in mm) jacket or insulation of internal wir- ing) Black Yellow...
- Page 28 Shinjuku Monolith, 3-1, Nishi Shinjuku 2-chome, Shinjuku-ku, Tokyo, Japan Wendenstraße 14-18, 20097 Hamburg, Germany 3500 Corporate Parkway, P.O. Box 610, Center Valley, PA 18034-0610, U.S.A. One Corporate Drive, Orangeburg, NY 10962, U.S.A. 491B River Valley Road, #12-01/04 Valley Point Office Tower, Singapore 248373 31 Gilby Road, Mount Waverley, VIC., 3149, Australia 5301 Blue Lagoon Drive, Suite 290 Miami, FL 33126, U.S.A.
Need help?
Do you have a question about the CX21 and is the answer not in the manual?
Questions and answers