Table of Contents
Advertisement
Advertisement
Table of Contents

Related Manuals for FeiYu Tech SCORP PRO


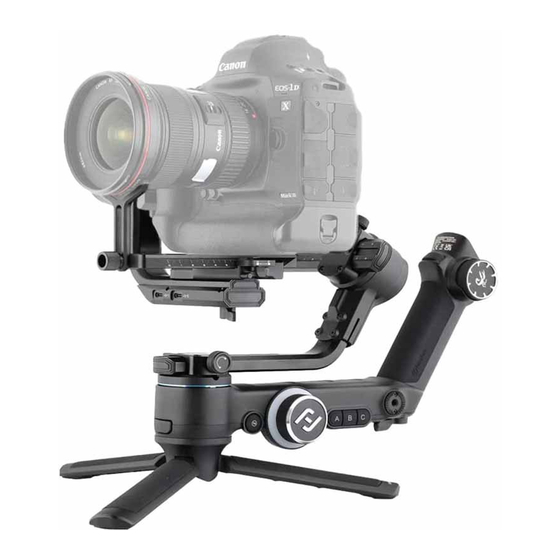
Summary of Contents for FeiYu Tech SCORP PRO
- Page 1 Instructions V 1.1 Tutorial Videos...
-
Page 2: Table Of Contents
Catalogue 1. Overview ……………………………………………………………………………………………………… 1 2. Getting started ……………………………………………………………………………………………… 3 2.1 Charging ……………………………………………………………………………………………………………… 3 2.2 Install the tripod …………………………………………………………………………………………………… 3 2.3 Install the remote control handle ………………………………………………………………………………… 4 2.4 Adjust the gimbal to gimbal balancing position ……………………………………………………………… 4 3. Mounting the Camera ……………………………………………………………………………………… 5 3.1 Attach the quick release plate and camera backing base(Optional) ………………………………………... - Page 3 The camera shutter cable is equipped for controlling the photo taking, video recording and focusing directly at handle. Feiyu SCORP Pro also come with camera control port, image transmission port and 2 extension ports, which support to connect focus motor and other extension device at the same time.
-
Page 4: Overview
Download the App Scan the QR code to download the app, or search for "Feiyu SCORP" in the App Store or Google Play. * Requires iOS 9.0 or above, Android 6.0 or above. Android 1. Overview * Not include camera. [18] [19] [17]... - Page 5 [37] [23] [36] [35] [24] [25] [26] [34] [27] [38] [39] [P3][P4] [33] [40] [41] [28] [29] [32] [30] [31] [1] Touch Screen [18] Vertical quick release [33] Remote control handle [2] Shutter button plate safety lock [34] Multifunction knob [3] Joystick [19] Tilt lock (Handle knob)
-
Page 6: Getting Started
2. Getting started 2.1 Charging Please fully charge the battery before power on the gimbal for the first time. Charging with USB2.0 to Type-C cable, supports quick charge. ② Handle charging port ① Gimbal charging port Handle charging only Charge for gimbal and handle 2.2 Install the tripod Install the 3/8 - 1/4 inch thread insert ①... -
Page 7: Install The Remote Control Handle
2.3 Install the remote control handle When install the handle, please wedge in the buckle ① , then push down the handle from ② , until the handle lock ③ is engaged, then toggle the handle lock lever to the locked position to finish the installation. -
Page 8: Mounting The Camera
3. Mounting the Camera Before mounting the camera, make sure the camera is ready for shooting (Install the camera lens, and the lens cover should be removed, the memory card and battery needs to be inserted to the camera, and battery is fully charged) , complete all the steps which mentioned in chapter "2. -
Page 9: Mount Camera On Gimbal
3.3 Mount camera on gimbal Horizontal mounting Unlock the quick release plate safety lock ① , push the plate with the mounted camera into the slot ② in direction of arrow, lock the safety lock ① once the camera is roughly balanced. It is recommended to push the camera against the tilt axis. Unlock the slider lock ③... - Page 10 Remove: Unlock the quick release plate safety lock ① , remove the quick release plate while pressing anti-drop column ④ Vertical mounting Unlock the vertical quick release plate safety lock ⑤ , push the plate with the mounted camera into the slot ⑥...
-
Page 11: Gimbal Balancing
4. Gimbal Balancing Please balance the gimbal before shooting. Make sure the camera and lens are ready for shooting, and the gimbal is powered off or in sleep mode before balancing. It is recommended to hold up the camera first, then move the slide arm, cross arm and vertical arm. -
Page 12: Balancing The Roll Axis
4.4 Using the memory slider Feiyu SCORP Pro come with the memory slider which can make balancing easier. After balancing the gimbal, move the memory slider to the hole in axis, and make the red dot on the memory slider exposing from the hole, in order to mark the current position. -
Page 13: Power On/ Off& Wake Up
↑ Memory slider ← The position of memory sliders 5. Power ON/ OFF& Wake up 5.1 Power ON/ OFF (1) Before power on the gimbal, make sure you have balanced gimbal, and unlocked all the three axes. (2) If you haven't unlocked all the 3 axes, gimbal will enter sleep mode to protect itself. Please single tap power button to wake up gimbal after unlocked all the 3 axes. -
Page 14: Lock/Unlock Screen
5.2 Lock/Unlock screen Lock screen: Single tap to lock screen. Unlock screen: Single tap again to unlock the screen. Motor power Follow speed Motor power Follow speed Screen locked.Press Power Screen unlock button to unlock Scenario Scenario Lock screen Unlock screen 5.3 Sleep/Wake up Sleep: Double tap power button to enter sleep mode. -
Page 15: Other Function Introduction
① ② ③ ④ ⑤ Lock 6.2 Other function introduction Auto rotation (Please refer to chapter 8.3.5) Camera will auto rotate to shoot according to the rotation speed and direction that set by users. It can be used to achieve the image rotating scene which been used frequently in movie Inception. -
Page 16: App Connecting
7. App Connecting 7.1 Connect with Feiyu SCORP APP (1)Turn on the gimbal (2)Turn on the smartphone Bluetooth, run Feiyu SCORP APP, tap the top of the home page to connect gimbal. After the connection succeed, it's easy to control gimbal via APP, including control the pan and tilt axis angle with the virtual joystick, switch modes, set motor power/ camera parameters/follow speed, set other functions, parameters, and update firmware. - Page 17 When not connected to gimbal, prompt user to connect with gimbal. [2] Disconnect device Tap to disconnect current connecting device. [3] Scenarios Provide auto rotation (can be used to achieve the image rotating scene which been used frequently in movie Inception), panorama, timelapse (Motionlapse/Static timelapse/Hyperlapse) , track video and other usage scenarios for user.
- Page 18 [9] Horizon calibration Calibrate the gimbal with the auto calibration function(Recommended) or adjust it manually (When not in FPV or FFW mode). [10] More Set boot silent, disable selfie, manual lock, check firmware information and update firmware, restore the default settings. [11] Back Tap to return to home page.
-
Page 19: Operation
[20] Lock mode Tap to enter lock mode. [21] Shutter Tap to start/stop recording or take photo. [22] Switch between photo/video mode Tap to switch between switch between photo/video mode [23] Pan follow (PF) Tap to enter pan follow (PF) mode. [24] Pan and tilt follow (PTF) Tap to enter pan and tilt follow (PTF) mode. - Page 20 8.1.2 Handle power button Long press: Power on/off the whole combination (Remote control handle installed) Power on/off the handle (Remote control handle detached) Single tap: Wake up Double tap: Enter sleep mode 8.1.3 Gimbal mode button Single tap: Pan follow/Lock mode (Switch in turn) Double tap: PTF Triple tap: FPV 8.1.4 Handle mode button...
- Page 21 8.1.6 Joystick Push: Control the movement of the tilt and pan axes. 8.1.7 Shutter button* Press half way: Focus Single tap (Fully): Start/Stop recording Long press (Fully): Take photo 8.1.8 Focusing wheel* Turn: Control electronic focusing The camera must support this function. 8.1.9 A/B/C button Long press: Mark the current position as A/B/C Single tap: Return to the position A/B/C that you have...
- Page 22 8.1.11 Knob function switching button Single tap: Switch the control object while the multifunction knob(manin knob) controlling the movement of the 3 axes (Tilt/Pan/Roll) Long press: Switch the control options of multifunction knob(manin knob) in turn (The movement of the 3 axes/ Electronic focus/Focus motor 1) 8.1.12 Multifunction knob (Main knob)
-
Page 23: Touch Screen Operation
*Need to connect with camera. Refer to the camera compatibility list on https://www.feiyu-tech.com/feiyu-scorp-pro/ Connect camera with shutter cable 8.2 Touch screen operation [2][3][4][5] Motor power Follow speed [10] Scenario Homg page [1] Handle battery Show the current battery level of handle. [2] Camera connection Icon appears after camera connect to the gimbal successfully. - Page 24 [3] Bluetooth connection Icon appears after Bluetooth is connecting. And the icon won't be shown if Bluetooth disconnect. [4] Gimbal connection icon The icon appears when the handle is connected with gimbal, the icon won't be shown if the handle is detached. [5] Motion sensing icon The icon appears after enter motion sensing mode, the icon won't be shown if gimbal is not in motion sensing mode.
- Page 25 Focus motor Shutter Joystick settings 1800 2400 1 60 Gimbal settings 3200 Tilt Roll Knob settings Main knob Aux knob settings settings Swipe from right to Swipe from left to Swipe up left right Multifunction knob Joystick, gimbal and Shooting parameters settings more settings settings...
- Page 26 Swipe from left to right Shutter 1800 2400 1 60 3200 - Camera settings Set aperture, ISO, shutter speed and show current resolution, fps after connecting with camera. Swipe up Focus motor Tilt Roll Main knob Aux knob settings settings - Main knob settings Set the control object for multifunction knob (Main knob), can be set as control axes, control electronic focus, control focus motor.
-
Page 27: Function Operation
Focus motor Main knob control panel Aux knob control panel Tilt Roll Main knob Aux knob Switch the control object for aux knob settings settings Switch the control bject for main knob *Main knob and aux knob will control the same object while the synchronous switch is turning on. - Page 28 8.3.2 Follow speed settings Tap "Follow speed" in home page, and select different preset gimbal follow speed profiles: Slow/Med/Fast, or custom follow speed and dead zone. Slow Motor power Follow speed Fast Scenario Custom 8.3.3 Follow mode settings Tap the lower left icon in home page to select follow modes. Motor power Follow speed Lock...
- Page 29 8.3.4 Timelapse Select “Scenario” in home page, then select “Timelapse”. Select motionlapse/ static timelapse/hyperlapse according to what you need, and follow the tips to set the parameters to start shooting. Time Interval Timelapse Motionlapse Motor power Follow speed Inception mode Static timelapse Clip length 8s Photos 120...
- Page 30 Timelapse Motor power Follow speed Inception mode 180° Panorama Custom Scenario 3*3: Take 3 images above in every three layers (9 images in total). 180° : Take 4 lateral images. Custom: Custom the shooting angle for pan/tilt axis, focal length, overlap and interval parameters to take panorama photos.
- Page 31 Panorama Motor power Follow speed Portrait mode Selfie mode Exit selfie mode Scenario Disable selfie: Swipe from left to right in home page, then select “Gimbal settings”, enable the disable selfie switch, then the selfie mode will not be entered if the trigger button is tapped three times.
-
Page 32: Remote Control Handle Operation
Smoothness Smoothness Horiz 0° Vert 0° Horiz 0° Vert 0° Preview Start shooting Preview Start shooting The shooting progress will show up on the screen, if need to stop it midway, tap “Stop shooting” to stop it. After the shooting complete, tap “Confirm and return” to exit. 8.4 Remote control handle operation Using steps for remote control handle (1) Connect and power on: Connect the handle with the gimbal, long press one... -
Page 33: Control Ports
Extension port 1/Focus motor port 1 ② ④ Image transmission port Extension port 2/Focus motor port 2 9. Specifications Product name Feiyu SCORP Pro 3-Axis Camera Handheld Stabilizer Product model Feiyu F4 Max. Tilt Range 340° Max. Roll Range 340°... - Page 34 Accessories USB 2.0 to Type-C Type-C to Micro(A03) Type-C to Mini (B02) ×1 ×1 ×1 Type-C to Multi Type-C to Type-C (C02) Type-C to TRS2.5 (T02) Sony shutter cable ×1 ×1 ×1 Type-C to 2.5mm Panasonic Tripod Quick release plate shutter cable (DC2.5mm) ×1 ×1...
- Page 35 Storage and Maintenance 1. Keep the product out of the reach of children and pets. 2. DO NOT leave the product near heat sources such as a furnace or heater. DO NOT leave the product inside of a vehicle on hot days. 3.
- Page 36 This document is subject to change without notice. If you have any questions about this document, please contact us by the following ways. Manufactured by: Guilin Feiyu Technology Incorporated Company Website: www.feiyu-tech.com E-mail: support@feiyu-tech.com Tel: +86 773-2320865...
Need help?
Do you have a question about the SCORP PRO and is the answer not in the manual?
Questions and answers