Table of Contents
Advertisement
Advertisement
Table of Contents

Related Manuals for FeiYu Tech SCORP Mini


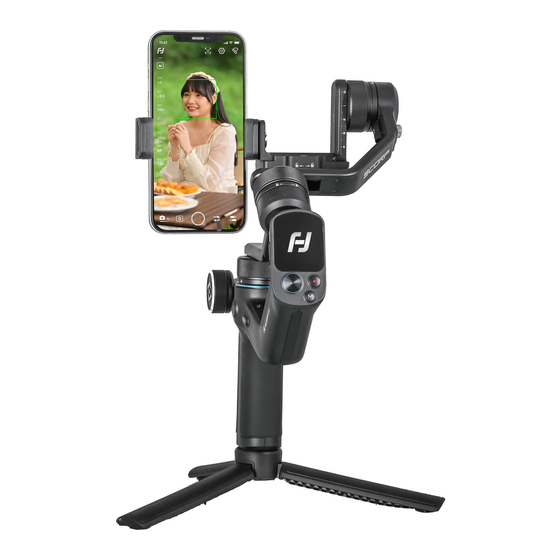
Summary of Contents for FeiYu Tech SCORP Mini
- Page 1 Instructions V 1.0 Tutorial Videos...
-
Page 2: Table Of Contents
Catalogue 1. Overview …………………………………………………………………………………………………… 1 2. Getting started ……………………………………………………………………………………………… 2 2.1 Charging ……………………………………………………………………………………………………………… 2 2.2 Adjust the gimbal to gimbal balancing position ……………………………………………………………… 2 3. Mounting the Camera/Smartphone …………………………………………………………………… 3 3.1 Attach the quick release plate …………………………………………………………………………………… 3 3.2 Install lens holder (Optional) ……………………………………………………………………………………… 3 3.3 Mount camera on gimbal …………………………………………………………………………………………... - Page 3 Introduction Feiyu SCORP-Mini is a professional 3-axis handheld gimbal for mirrorless camera, pocket camera, action camera, smartphone which developed by Guilin Feiyu Technology Incorporated Company. Feiyu SCORP-Mini is designed with button area, multifunction knob and touch screen, which can switch follow modes, control the rotation, control focus motor and the parameters settings by one hand.
-
Page 4: Overview
1. Overview * Not include camera. [14] [15] [16] [27] [20] [17] [21] [22] [26] [25] [18] [13] [12] [19] [11] [28] [23] [24] [10] [29] [1] Power button [11] Multifunction knob [22] Cross arm [2] Trigger button [12] Slider lock [23] Pan axis [13] Quick release plate safety lock [24] Pan lock... -
Page 5: Getting Started
2. Getting started 2.1 Charging Please fully charge the battery before power on the gimbal for the first time. Charging with USB 2.0 to Type-C cable, supports quick charge which charging power ≤ 18W. 2.2 Adjust the gimbal to gimbal balancing position The gimbal is folded by default, please unlock all the three axes and adjust the gimbal to gimbal balancing... -
Page 6: Mounting The Camera/Smartphone
3. Mounting the Camera/Smartphone Take camera mounting as an example. Before mounting the camera, make sure the camera is ready for shooting (Install the camera lens, and the lens cover should be removed, the memory card and battery needs to be inserted to the camera, and battery is fully charged) , complete all the steps which mentioned in chapter "2. -
Page 7: Mount Camera On Gimbal
3.3 Mount camera on gimbal Unlock the quick release plate safety lock ① , install the plate with the mounted camera into the slot ② in direction of icon, lock the safety lock ① once the camera is roughly balanced. It is recommended to push the camera against the tilt axis. Unlock the slider lock ③... -
Page 8: Balancing The Tilt Axis
4.1 Balancing the tilt axis 4.1.1 Balancing the vertical tilt a. Unlock the tilt lock ① , and loosen the slide arm lock knob ② b. Rotate the tilt axis so that the camera lens is pointing upward. Check the direction which the lens tilts to. -
Page 9: Balancing The Roll Axis
4.2 Balancing the roll axis a. Unlock the roll lock ① , check the direction which the camera tilts to. b. If the camera tilts to one side, then the camera is that side heavy, loosen the cross arm lock knob ②... -
Page 10: Power On/ Off& Wake Up
5. Power ON/ OFF& Wake up 5.1 Power ON/ OFF (1) Before power on the gimbal, make sure you have balanced gimbal, and unlocked all the three axes. (2) If you haven't unlocked all the 3 axes, gimbal will enter sleep mode to protect itself. -
Page 11: Lock/Unlock Screen
5.2 Lock/Unlock screen Lock screen: Single tap to lock screen. Unlock screen: Single tap again to unlock the screen. Motor power Follow speed Motor power Follow speed Screen locked.Press F2 Screen unlock button to unlock Scenario Scenario Lock screen Unlock screen 5.3 Sleep/Wake up Sleep: Double tap power button to enter sleep mode. -
Page 12: Other Function Introduction
④ Lock All 3 axes do not follow the movement of user's hand, gimbal keeps the direction of the camera fixed. ⑤ Flash follow, where all 3 axes follow the movement of user's hand in high follow speed. ① ② ③... -
Page 13: App Connecting
The camera turns 180° horizontally, selfie shooting is available. Track video Record track video according to the waypoints which has been set. Manual lock Manually move camera to desired position, and hold for half a second. New tilt /pan positions are automatically saved. 7. -
Page 14: Function Introduction Of Feiyu Scorp App
(2)Turn on the smartphone Bluetooth, run Feiyu SCORP App, tap the top of the home page to connect gimbal. After the connection succeed, it's easy to control gimbal via App, including control the pan and tilt axis angle with the virtual joystick, switch modes, set motor power/ camera parameters/follow speed, set other functions, parameters, and update firmware. - Page 15 [1] Gimbal control access Display the product name and device battery of current connecting gimbal, tap to enter gimbal operation interface, which allows user to use virtual joystick to control gimbal, switch follow modes, recenter gimbal, adjust horizontal angle manually. When not connected to gimbal, prompt user to connect with gimbal.
- Page 16 [9] Horizon calibration Calibrate the gimbal with the auto calibration function(Recommended) or adjust it manually (When not in FPV or FFW mode). [10] More Set boot silent, disable selfie, manual lock, check firmware information and update firmware, restore the default settings. [11] Back Tap to return to home page.
- Page 17 [20] Shutter Tap to take photo in photo mode. Tap to start/stop recording in video mode. [21] Switch between photo/video mode Tap to switch between switch between photo/video mode [22] Pan follow (PF) Tap to enter pan follow (PF) mode. [23] Pan and tilt follow (PTF) Tap to enter pan and tilt follow (PTF) mode.
-
Page 18: Function Introduction Of Feiyu On App
7.3 Function introduction of Feiyu ON App Shooting Interface Control Interface XXXXXX FY_XXXXXXXX_xx [10] [11] [12] [13] [14] [16] [16] [1] Back Tap to return to previous menu. [2] Album Tap to enter album. [3] Gimbal control Tap to enter gimbal remote control interface, which allows user to use virtual joystick to control gimbal and switch follow modes. - Page 19 Tap to check current connecting gimbal and it’s battery, user can also update firmwares for gimbal. [5] Switch between photo/video mode Tap to switch between switch between photo/video mode. [6] Switch usage scenarios In photo mode: Free panorama /Ultra-wide angle / 180° panorama / 360° panorama / Normal photo / Overlapping image / Light rail mode / Quick panorama.
-
Page 20: Operation
[14] Pan follow (PF) Tap to enter pan follow (PF) mode. [15] Pan and tilt follow (PTF) Tap to enter pan and tilt follow (PTF) mode. [16] FPV Tap to enter FPV (All follow) mode. 8. Operation 8.1 Button operation 8.1.1 Power button Long press: Power on/off... - Page 21 8.1.4 Joystick Push: Control the movement of the tilt and pan axes. 8.1.5 Shutter button* Press half way: Focus Single tap (Fully): Start/stop recording Long press (Fully): Take photo 8.1.6 FPV button Single tap: Enter/Exit FPV mode 8.1.7 F1 button Double tap: Enter/Exit portrait mode 8.1.8 F2 button...
- Page 22 8.1.9 Knob function switching button Single tap: Switch the control object while controlling the movement of the 3 axes (Tilt/Pan/Roll) Long press: Switch the control options of Multifunction knob in turn (The movement of the 3 axes/Electronic focus/Focus motor) 8.1.10 Multifunction knob Turn: (1) Control the movement of the roll, tilt and pan axes.
-
Page 23: Touch Screen Operation
8.2 Touch screen operation [2][3] Motor power Follow speed Scenario Home page [1] Current battery level Show the current battery level of gimbal. [2] Camera connection Icon appears after camera connect to the gimbal successfully. The icon won’t be shown if camera doesn’t connect to gimbal. [3] Bluetooth connection Icon appears after Bluetooth is connecting. - Page 24 Lock: All 3 axes do not follow the movement of user's hand, gimbal keeps the direction of the camera fixed. FFW: Flash follow, where all 3 axes follow the movement of user's hand in high follow speed. [7] Scenario Select gimbal usage scenario (timlapse, auto rotation, panorama, portrait mode, selfie mode, track video, etc.) Focus motor Shutter...
- Page 25 Including disable selfie, manual lock, and horizon calibration settings. - More Silent switch, select language, restore the default settings, check version information. Swipe from left to right Shutter 1800 2400 1 60 3200 - Camera settings Set aperture, ISO, shutter speed and show current resolution, fps after connecting with camera.
-
Page 26: Function Operation
Focus motor Electronic focus/focus motor control pane Axes control panel Tilt Roll Knob settings Set parameters for multifunction knob 8.3 Function operation 8.3.1 Motor power settings Please set motor power first after powering on gimbal for the first time or after changing a new camera/lens. - Page 27 8.3.2 Follow speed settings Tap "Follow speed" in home page, and select different preset gimbal follow speed profiles: Slow/Med/Fast, or custom follow speed and dead zone. Slow Motor power Follow speed Fast Scenario Custom 8.3.3 Follow mode settings Tap the lower left icon in home page to select follow modes. Motor power Follow speed Lock...
- Page 28 8.3.4 Timelapse Select “Scenario” in home page, then select “Timelapse”. Select motionlapse/ static timelapse/hyperlapse according to what you need, and follow the tips to set the parameters to start shooting. Time Interval Timelapse Motionlapse Motor power Follow speed Inception mode Static timelapse Clip length 8s Photos 120...
- Page 29 mode to start shooting a series of interconnecting still images. Users can then generate a panorama using image processing software. Timelapse Motor power Follow speed Inception mode 180° Panorama Custom Scenario 3*3: Take 3 images above in every three layers (9 images in total). 180°...
- Page 30 Panorama Motor power Follow speed Portrait mode Selfie mode Scenario Exit selfie mode Disable selfie: Swipe from left to right in home page, then select “Gimbal settings”, enable the disable selfie switch, then the selfie mode will not be entered if the trigger button is tapped three times.
-
Page 31: Control Ports
Smoothness Smoothness Horiz 0° Vert 0° Horiz 0° Vert 0° Preview Start shooting Preview Start shooting The shooting progress will show up on the screen, if need to stop it midway, tap "Stop shooting" to stop it. After the shooting complete, tap "Confirm and return" to exit. 8.4 Control ports There is a camera control port and extension port on the fixed plate, to control camera and other extension devices, such as focus motor, etc. -
Page 32: Specifications
9. Specifications Product name Feiyu SCORP-Mini 3-Axis Camera Handheld Stabilizer Product model Feiyu-F1 Max. Tilt Range +170° ~ -45° Max. Roll Range +40° ~ -40° Max. Pan Range 360° Weight About 787g Payload Capability About 1200g (Well-balanced) Battery life 13 Hours Battery 2500mAh Operating Voltage... - Page 33 Notice 1. Make sure motor spinning is not blocked by external force when the product is power on. 2. The product DO NOT contact water or other liquid if the product is not mark waterproof or splash- proof. Waterproof and splash-proof product DO NOT contact sea water or other corrosive liquid. 3.
- Page 34 Facebook Youtube Twitter lnstagram Website This document is subject to change without notice. If you have any questions about this document, please contact us by the following ways. Manufactured by: Guilin Feiyu Technology Incorporated Company Website: www.feiyu-tech.com E-mail: support@feiyu-tech.com Tel: +86 773-2320865...
Need help?
Do you have a question about the SCORP Mini and is the answer not in the manual?
Questions and answers
как сбросить до заводских настроек скорп мини ?