
Subscribe to Our Youtube Channel
Related Manuals for Matsusada DOEF Series


Summary of Contents for Matsusada DOEF Series
- Page 1 Instruction Manual DOEF series MODEL *243.9.024* B/N 243.9.024 Rev. 0.4 F-RA-001-3R2...
- Page 2 ◆ No patent liability is assumed with respect to the use of the information contained herein. Moreover, because Matsusada Precision is constantly striving to improve its high-quality products, the information contained in this manual is subject to change without notice.
- Page 3 Bistable push button switch for preventing electric shock) Indicates the possible danger of death if Bistable push button switch you drink it and burns or blindness if it attaches. Indicates the possible danger of exposure Alternative Current to radiation. DOEF series Matsusada Precision...
- Page 4 It may result in electric shock or fire. Regarding the input voltage Check the page describing the input terminals and input voltage in the instruction manual. Do not provide any voltage out of the specifications. DOEF series Matsusada Precision...
- Page 5 In order to avoid electric shock, ground the terminals to discharge using a short-circuit grounding apparatus and check the voltage again. The terminals here mean all terminals like input and output terminals and terminals for communications and remote controls. DOEF series Matsusada Precision...
- Page 6 It requires to be replaced at regular intervals to extend the lifetime. For the replacement, contact us. (It requires a replacement charge separately. Do not replace it by yourself, as there is a risk of electric shock.) DOEF series Matsusada Precision...
-
Page 7: Table Of Contents
Operation for Protective Function ......................46 4-2-1 Protection Types: .......................... 46 4-2-2 Protection Systems: ........................46 4-2-3 Fault and Factors ......................... 46 4-2-4 Fault Release ..........................47 4-2-5 Setting Values for Protection ......................48 4-2-6 Protection Settings ........................49 DOEF series Matsusada Precision... - Page 8 Setting Method and Range of Voltage Limit, Current Limit, and Voltage Cutoff Values ....107 Setting Protection System ......................... 107 Setting range and unit for DC voltage (DCV) ..................108 Display Digit and Resolution for Voltage Measurement ..............108 Combined use with Communication Options ..................109 10 Troubleshooting ............................112 DOEF series Matsusada Precision...
-
Page 9: Introduction
When placing it, be careful not to get your fingers caught in the bottom of it. Do not carry the unit by the handles on the front panel. It may result in damage to the unit and/or injury. Matsusada Precision DOEF series... -
Page 10: Installation
It is especially dangerous that the load is capacitive or a long cable is used. Make it a rule to touch load with right hand. How to ground Use an outlet with a ground terminal. Improper grounding may result in electric shock. Matsusada Precision DOEF series... - Page 11 Inadequate bandwidth causes not only decrease in the output amplitude but much difference between the input and output phases. Therefore, use the unit while monitoring the output waveform. 100% (Vpp) f [Hz] Frequency ratio against fc Declination of output swing by frequency Matsusada Precision DOEF series...
-
Page 12: External Appearance
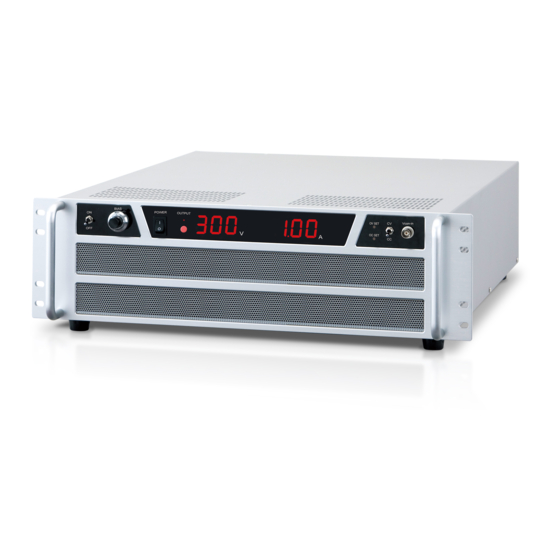
2 External Appearance 2 External Appearance External Appearance 2-1-1 Front Panel: 400W model Operation panel 2-1-2 Front Panel: 600W model Operation panel 2-1-3 Front Panel: 1200W model Operation panel Matsusada Precision DOEF series... -
Page 13: Operator Interface
25 Sync clk input terminal (Option) Output terminal 26 Sync clk output terminal (Option) Voltage monitor terminal 27 Sync trigger connector (Option) Current monitor terminal 28 Communication connector (Option) External signal terminal 29 Master/slave connector (Option) Analog remote connector Matsusada Precision DOEF series... -
Page 14: Rear Panel: 600W Model
25 Sync clk input terminal (Option) Output terminal 26 Sync clk output terminal (Option) Voltage monitor terminal 27 Sync trigger connector (Option) Current monitor terminal 28 Communication connector (Option) External signal terminal 29 Master/slave connector (Option) Analog remote connector Matsusada Precision DOEF series... -
Page 15: Dimensions
2 External Appearance Dimensions 2-3-1 400W Model Matsusada Precision DOEF series... -
Page 16: Model
2 External Appearance 2-3-2 600W Model Matsusada Precision DOEF series... -
Page 17: 1200W Model
2 External Appearance 2-3-3 1200W Model Matsusada Precision DOEF series... -
Page 18: Handling
If an abnormality is suspected, check the output waveform with a sine wave, and then decide whether or not to add a C-R series circuit. Current Current Time Time Normal square Resonating square wave wave Matsusada Precision DOEF series... -
Page 19: Connecting The Ac Input Cable
The current limit protection has two types: one limits high-speed pulse current and another steady-state current. The above current limit protection is for the steady-state current and its response rate is approx. one millisecond as same as the voltage limit protection. Matsusada Precision DOEF series... -
Page 20: Sink Power Protection
Avoid continuous use at a high frequency that would reduce the output amplitude of this unit. It can increase the internal loss of the unit and lead to failure. For your safety, be sure to ground the GROUND terminal. Matsusada Precision DOEF series... -
Page 21: Other Functions
For example, the remote switch, door switch, and operation mode can be set. Moreover, it is also available to generate DC voltage or current, or AC voltage, current, or frequency proportional to an external input signal. For details, refer to [4-5 Analog Remote Function]. Matsusada Precision DOEF series... -
Page 22: Operation
It will take approx. 20 seconds. Do not set the POWER switch to OFF during it. Otherwise, the memory is not correctly initialized. Such abnormality may occur by the POWER switch being turned off during memory write or by external noise. If this phenomenon occurred, please contact us. Matsusada Precision DOEF series... -
Page 23: Output On/Off
When the LS function is not used, disable it. [If FAULT is displayed after the output was turned ON] A protection is activated and the unit is in a fault state. Check the settings of the protection and the load. Matsusada Precision DOEF series... -
Page 24: Screen Description
+10.000V +10.003 V 20.0V Freq 1.00kHz Vrms 14.138 V Wave SINE [Settings] [Measurement] Sphs 0.0deg Setting Measurement data Irms 14.146 A values ZeroPhs +9.997 A MSR SET MORE... Main Set1 Matsusada Fig. Layout of the screen Matsusada Precision DOEF series... - Page 25 In the box, voltage, current, frequency, waveform, and measurement setting are displayed. +10.000V +10.003 V 20.0V Freq 1.00kHz Vrms 14.138 V Main Set1 Wave SINE Sphs 0.0deg Irms 14.146 A ZeroPhs +9.997 A MSR SET MORE... Main Set1 Matsusada Matsusada Precision DOEF series...
- Page 26 In the box, the settings of the soft start or soft stop are displayed. Soft Start: ON Time: 0000s 001.0ms DCV: Ramp StartV: +10.000V Soft start EndV: -10.000V ACV: Const StartV: 20.0V EndV: FRQ: Sweep StartF: 10.00kHz EndF: 1.00kHz Soft Start Matsusada Precision DOEF series...
- Page 27 In the box, the settings of the protection are displayed. PROT CutOff +10.003 V Vlim+ +22.0V Vlim- -22.0V Vrms 14.138 V Ilim+ +22.0A Protect Ilim- -22.0A Irms 14.146 A 22.0V +9.997 A 22.0A -200W Matsusada Protect Matsusada Precision DOEF series...
-
Page 28: Switches And Dial Description
PROT switch SQC switch DC/AC DC/ACDC switch ▼ Downward movement switch (in setting) ◄/MEM Leftward movement switch (in setting)/Memory switch SET/SAVE SET/SAVE switch ▲ Upward movement switch (in setting) ►/LOCK Rightward movement switch (in setting)/LOCK switch Matsusada Precision DOEF series... -
Page 29: Transition To Settable State
V l i m - C u t O f f P R O T + 2 2 . 0 V V l i m + - 2 2 . 0 A V l i m - Matsusada Precision DOEF series... -
Page 30: Save And Cancel Settings
After the previous settings were restored, the changeable screen will return to the normal screen. SET/SAVE switch: Saves any changes by pressing it. CANCEL switch: Cancels any changes by pressing it when the Main Set1 screen is displayed. Matsusada Precision DOEF series... - Page 31 After the setting data is saved, the screen will return to the previous one. Cancel Protection settings cannot be canceled. Make sure to press the PROT switch to save the settings. PROT switch: Saves settings by pressing it. Matsusada Precision DOEF series...
-
Page 32: Moving Between Setting Items And Digits Of Figure
D C V + 2 0 . 0 0 0 V A C V . 0 V F r e q 1 . 0 0 k H z ▲ Upward “ ” movement switch Downward “▼” movement switch Matsusada Precision DOEF series... - Page 33 . 0 0 0 V A C V 2 0 . 0 V F r e q 1 . 0 0 k H z ◄ ► Leftward “ ” movement switch Rightward “ ” movement switch Matsusada Precision DOEF series...
-
Page 34: How To Set Each Item
This shows the setting item: DC and AC voltage. The unit is [V]. Fig. CV mode This shows the current mode: CC This shows the setting item: DC and AC current. The unit is [A]. Fig. CC mode Matsusada Precision DOEF series... - Page 35 The AC setting items are displayed and possible to be set. Fig. AC+DC mode This shows the current mode: DC In the case of DC mode: setting items displayed and impossible to be set. Fig. DC mode Matsusada Precision DOEF series...
- Page 36 The display items and units of the setting values vary depending on the selected mode: CV or The item is DC voltage, DCV. The unit is [V]. Fig. DC voltage setting in CV mode The item is DC current, DCI. The unit is [A]. Fig. DC current setting in CC mode Matsusada Precision DOEF series...
- Page 37 The display items and units of the setting values vary depending on the selected mode: CV or The item is AC voltage, ACV. The unit is [V]. Fig. AC voltage setting in CV mode The item is AC current, ACI. The unit is [A]. Fig. AC current setting in CC mode Matsusada Precision DOEF series...
- Page 38 [Voltage-shift option, only for 60 [V] model] When the voltage-shift option is installed in the unit, the DC voltage setting values and the range differ from the standard mode. Refer to [9 Voltage-shift Option]. Matsusada Precision DOEF series...
- Page 39 Moves to the right digit by pressing it. The unit of the displayed frequency and the setting resolution vary between over and lower than 1kHz. +10.000V +10.000V 20.0V 20.0V Freq 101.00kHz Freq 99.009Hz Fig. Over 1kHz Fig. Lower than 1kHz Matsusada Precision DOEF series...
- Page 40 The setting of the starting phase is shown. ZeroPhs Fig. Sine wave is selected. Wave SQUA Set the waveform to the square wave. The setting of the on-duty is shown. Duty 55.0% ZeroPhs Fig. Square wave is selected. Matsusada Precision DOEF series...
- Page 41 The setting of the starting phase is shown. ZeroPhs Fig. Sine wave is selected. Set the waveform to the square wave. Wave SQUA The setting of the on-duty is shown. Duty 55.0% ZeroPhs Fig. Square wave is selected. Matsusada Precision DOEF series...
- Page 42 In order to set the zero-cross update, select the item in the Main Set1 and change the setting by turning the DIAL. DIAL: Changes the zero-cross update settings by turning it. Wave SINE SPhs 90.0deg Zero-cross update: ON or OFF ZeroPhs Fig. Zero-cross update Matsusada Precision DOEF series...
- Page 43 DC voltage and current are measured with Vrms an Irms. Use Vdc and Idc for DC voltage and current and Vrms and Irms for AC voltage and current of sine waves. Matsusada Precision DOEF series...
- Page 44 In the above condition, press the ENTER switch. The item in the first position will be highlighted. ENTER switch With the first position selected, turning the DIAL will change the measurement value along with the measurement item. DIAL Matsusada Precision DOEF series...
- Page 45 The screen will return to the ordinal display after the setting data was saved. When settings other than measurement are continued, press the CANCEL switch with a measurement item selected. This will bring you back to the “MSR SET” screen. CANCEL switch Matsusada Precision DOEF series...
- Page 46 Moreover, the protection itself may malfunction because the cutoff protection uses root-mean-square values. Use the limit protection as much as possible when the function is enabled. Ext Signal Ext-sig setting: ON or OFF Soft Start Soft Stop Fig. External signal setting Matsusada Precision DOEF series...
- Page 47 Ramp and sweep set period of time. The setting parameters cannot be modified while the soft start or soft stop function is in operation. Please note that end values differ from the normal output one. Matsusada Precision DOEF series...
- Page 48 In the state, pressing the ENTER switch displays the soft start setting screen. Ext Signal MID1 +10.003V Soft Start Soft Stop Vrms 14.138 V SYSTEM Response FAST Irms 14.146 A Sense Enter switch Sync Trig +9.997 A Sync Clk Matsusada Main Set2 Fig. “Soft Start” selected. Matsusada Precision DOEF series...
- Page 49 DIAL. Soft Start: ON Time: 0000s 001.0ms DCV: Ramp StartV: +10.000V EndV: -10.000V ACV: Const StartV: 20.0V EndV: FRQ: Sweep StartF: 10.00kHz EndF: 1.00kHz Soft Start Matsusada Precision DOEF series...
- Page 50 LS. [Voltage-shift option, only for 60 [V] model] When the voltage-shift option is installed in the unit, the DC voltage setting values and the range differ from the standard mode. Refer to [9 Voltage-shift Option]. Matsusada Precision DOEF series...
- Page 51 Sync Trig +9.997 A Enter switch Sync Clk Matsusada Main Set2 Fig. “SYSTEM” selected Save Time +10.003V Communi ------- BaudRate 9600 Vrms 14.138 V Terminate Address Irms 14.146 A Command +9.997 A Matsusada SYSTEM Fig. “SYSTEM” setting Matsusada Precision DOEF series...
- Page 52 Regarding the setting of the communication option, refer to [5 Communication Option]. Save Time +10.003V Communication type Communi ------- Baud rate BaudRate 9600 Vrms 14.138 V Terminator Terminate Address Address Irms 14.146 A Command Command +9.997 A Matsusada SYSTEM Matsusada Precision DOEF series...
- Page 53 Ext Signal +10.003V Soft Start Soft Stop Vrms 14.138 V SYSTEM Response FAST Irms 14.146 A Settings for extension: Sense Unchangeable +9.997 A Sync Trig Settings for options Sync Clk Matsusada Main Set2 Matsusada Precision DOEF series...
-
Page 54: Operation For Protective Function
The state is called “Fault”. Fault displayed position Blinking Fig, Fault state due to overcurrent The protection indicating a fault state: Sink power protection Door switch protection Over temperature protection Matsusada Precision DOEF series... -
Page 55: Fault Release
When over-temperature protection has been activated: Turn off the unit and wait for 30 minutes or more to turn it on again. If the protection is activated continuously, it may be something wrong with it, please contact Matsusada Precision DOEF series... -
Page 56: Setting Values For Protection
Setting range: 0.1 to rating x 110% Setting unit: 0.1 [A] [Setting of cutoff protection for sink power] Setting range: −1 to −300 [W] for 600W model −1 to −600 [W] for 1200W model Setting unit: 1 [W] Matsusada Precision DOEF series... -
Page 57: Protection Settings
Moves to the below item by counterclockwise decreases pressing it. value. ► Rightward movement switch “ ”: ◄ Leftward movement switch “ ”: Moves to the right digit by pressing it. Moves to the left digit by pressing it. Matsusada Precision DOEF series... - Page 58 After the settings, press the PROT switch again to save the changes and the screen will return to the normal one. PROT switch [Voltage shift option only for 60V model] When the voltage shift option is installed, the setting value and range for DC voltage are different. Refer to [9 Voltage Shift Option]. Matsusada Precision DOEF series...
-
Page 59: Keylock Function
In order to save select your desired memory number, select the number in the “MEM Recall” or “MEM Store” screen by turning the DIAL. Press the “ENTER” switch to execute the memory call or store. The screen will return to the ordinary one. Matsusada Precision DOEF series... - Page 60 Increases the memory number by turning it clockwise. Decreases the memory number by turning it counter-clockwise. ENTER switch: MEM switch: Executes memory call or memory store. Switches from the ordinary screen to “MEM Recall” and “MEM Store”. Matsusada Precision DOEF series...
-
Page 61: Analog Remote Function
Step output bit 1 Output COM level DC_POLE Setting signal of DC polarity Input COM level DCAC_EN DCAC_SET enabled Input COM level Remote switch Input COM level Not connected CVCC_SET Setting signal of CV/CC mode Input COM level Matsusada Precision DOEF series... -
Page 62: Functional Description
Analog remote function is enabled with the signal. Moreover, each control signal can be enabled or disabled respectively, such as voltage, current, frequency, and so on. When a control signal is not enabled, the setting signal will be ignored. Matsusada Precision DOEF series... -
Page 63: Ls: Remote Switch Function
Select “LS” in the SYSTEM setting screen using the downward movement switch “▼”. Set “EN” by turning the DIAL. After the setting is complete, press the SET/SAVE switch to save the change. The function is activated when “EN” is set here. Fig. LS function setting. Matsusada Precision DOEF series... - Page 64 Set “LS” to “EN” while the LS signal is closed. In this case, the OUTPUT LED will not blink and the output is in off state. In the state, open the LS signal. The OUTPUT LED will blink. Matsusada Precision DOEF series...
-
Page 65: Ld (Interlock) Function
In the case where the LS signal has been used, first, close the external relay for LS or set the TTL signal for it to low, second, open it or set the signal to high Matsusada Precision DOEF series... -
Page 66: Output State
CLOSE: OUTPUT ON lower 4-5-6 Step Code Output This outputs a two-bit code set at the sequence edit. [Internal circuit and signal logic] Internal circuit 4.7kΩ 10Ω 8, 21 Set=1: Output ‘H’ level Set=0: Output ‘L’ level lower Matsusada Precision DOEF series... -
Page 67: Analog Remote
Use a TTL signal or a relay contact for the external setting. Internal circuit External connection TTL LOW = Enabled TTL signal TTL HIGH = Disabled 5kΩ (COM) External relay CLOSE = Enabled External relay OPEN = Disabled 100Ω External relay (COM) Matsusada Precision DOEF series... - Page 68 Voltage can be set in CV mode and current in CC mode. DC voltage and current can be set in DC mode. DC voltage and current, AC voltage, current, and frequency can be set in ACDC mode. Matsusada Precision DOEF series...
- Page 69 Pin 9: DC_POLE signal Low or close: Negative High or open: Positive [Connection] Internal circuit External connection (Analog COM) − External voltage 0 to 10V Input impedance ≈10kΩ Matsusada Precision DOEF series...
- Page 70 When analog signals are input, the text of the currently enabled setting values will be displayed in black. Set each value while checking the displayed values. Furthermore, analog signals linearly change as shown below. Setting value Input analog signal Matsusada Precision DOEF series...
-
Page 71: Sequence Function
Moreover, a large amount of data in CV mode and CC mode with 1,024 steps respectively as well as the number of programs and steps are possible to be stored, which has improved easy to use. Matsusada Precision DOEF series... -
Page 72: Outline Of Sequence Specifications
The number of programs in CV mode and CC mode can be set respectively. However, when the setting of the number of programs is changed, be careful that the stored data so far will be initialized. Matsusada Precision DOEF series... -
Page 73: Description Of Sequence Screen
Prog No. Vrms 0.142 V [Measurement] Step Irms 0.033 A 5.6 s Time Loop -10.015 A Prog Edit Sequence Matsusada [Current screen] [Sequence condition] Run, Stop, or Pause Current program number Current step number Elapsed time Matsusada Precision DOEF series... -
Page 74: Program Edit
Step No. : 34 Time: 0000s 001.0ms DCV : Ramp StartV: +10.000V [Step setting] EndV: -10.000V Time Voltage/Current ACV : Const StartV: 20.0V Ramp EndV: Sweep FRQ : Sweep StartF: 10.00kHz EndF: 1.00kHz Matsusada Step Edit 1 [Current screen] Matsusada Precision DOEF series... -
Page 75: Step Edit 2
Runs or stops sequence. DIAL: Changes setting values.. CANCEL: Discards edited settings ENTER: Saves or checks sequence data. Direction switch: Changes items or digits for settings SQC switch: Shifts to sequence operation or switches between edit screens. Matsusada Precision DOEF series... -
Page 76: Shift To Sequence Operation
In addition, to return the unit from the sequence operation to the normal one, press the SQC switch while the sequence operation has stopped or sequence settings are not executed. Normal operation OUTPUT ON OUTPUT OFF Press SQC switch Press SQC switch Sequence operation SEQUENCE RUN SEQUENCE STOP SEQUENCE EDIT Matsusada Precision DOEF series... -
Page 77: State Of Sequence Operation
Prog No. SQC Stop Vrms 0.142 V Step <Sequence Pause> Irms 0.033 A 5.6 s Time SQC Pause Loop -10.015 A Prog Edit Matsusada Sequence Fig. Sequence state OUTPUT LED Fig. Sequence stat and OUTPUPT LED Matsusada Precision DOEF series... - Page 78 Even when the sequence program has been terminated and the output is held, pressing the OUPUT switch turns off the output. Current program number Current step number Elapsed time Number of loops to date Fig. Display during sequence run Matsusada Precision DOEF series...
-
Page 79: Edit, Save, And Cancel Of Program Data
In order to cancel the sequence data edit and restore the settings before editing, press the CANCEL switch while editing. The screen will shift to the sequence stop. Select “Prog Edit” and then press CANCEL. Fig. Program edit screen Fig. Sequence stop Matsusada Precision DOEF series... - Page 80 Do not turn off the unit while the message appears. It indicates that the data is being saved. Do not turn off the unit while the message appears. Doing so, the data will not be correctly stored in memory and it may lead to malfunction. Matsusada Precision DOEF series...
-
Page 81: Program Parameters
” or upward “▲” “▼ movement switch. Set your desired value by turning the DIAL. When “0” is set, the steps are not repeated. When “---“ is set, the number of loops is set to infinite. Matsusada Precision DOEF series... - Page 82 For the initialization, it takes approx. five seconds. Do not turn off the unit during this period. Do not turn off the unit while the message appears. Doing so, the data will not be correctly stored in memory and it may lead to malfunction. Matsusada Precision DOEF series...
- Page 83 Fig. “Change Prog Num selected Program Data Clear Press ENTER Press CANCEL Prog No. End Step Loop Number End Setting Change Prog Num 64 Program Data Clear Fig. Changing program number Press ENTER Fig. Initializing sequence data Matsusada Precision DOEF series...
- Page 84 Program Data Clear Press ENTER Fig. Initializing sequence data Do not turn off the unit while the message appears. Doing so, the data will not be correctly stored in memory and it may lead to malfunction. Matsusada Precision DOEF series...
-
Page 85: Step Parameters
No. of jumps 1 to 999 When the set value is exceeded, the next step will be executed. Step code Set two bits step code. 00, 01, 10, 11 Save Save sequence program data Matsusada Precision DOEF series... - Page 86 Jump Step : 38 jumping destination Jump Number : 199 No. of jumps Step code Step Code : 0 (b0), 1 (b1) Save Save (Sequence Run Page) Matsusada Step Edit 2 Fig. Step Edit 2 screen Matsusada Precision DOEF series...
- Page 87 The range that can be set: 0 to rating x 105% AC end voltage/current Select “EndV” on Step Edit 1 and then set a voltage or current value by turning the DIAL. The range that can be set: 0 to rating x 105% Matsusada Precision DOEF series...
- Page 88 Select “Jump Step” on Step Edit 2 and set your desired jump count by turning the DIAL. 17. Step code Set two bits step code. Select “Step Code” on Step Edit 2 and set your desired step number by turning the DIAL. Matsusada Precision DOEF series...
- Page 89 Do not turn off the unit while the message appears. It indicates that the data is being saved. Do not turn off the unit while the message appears. Doing so, the data will not be correctly stored in memory and it may lead to malfunction. Matsusada Precision DOEF series...
-
Page 90: Master/Slave Option (Parallel Operation)
Since the D-sub cover of the cable is labeled like "Master", "Slave1", and "Slave2", please connect the cable connector to the M/S connector (D-sub 15-pin, female) on the rear panel of the unit and secure the cable connector by tightening the screws Master Master unit Slave1 Slave 1 Slave 2 Slave2 Matsusada Precision DOEF series... -
Page 91: Master/Slave Operation Procedures
It means the master unit was first activated. On the other hand, if you want to turn the power off, be sure to turn off the slave units first and then the master or turn them off at the same time. If the order is reversed, the unit may not operate properly. Matsusada Precision DOEF series... - Page 92 When the master/slave operation is controlled via the communication option, only the master unit communicates with a controller. The slave units are not allowed to use communication function. The communication function is available in unit operation. Matsusada Precision DOEF series...
-
Page 93: How To Operate Master/Slave
The displayed measurement values are the values measured by the unit. , including the current values. The current value displayed is just for the slave unit alone. It indicates the slave unit 1. In the case of the slave unit2, <SLAVE2> will be displayed. Matsusada Precision DOEF series... - Page 94 The number of slave units can be set to 0 to 2, but when setting the number of slave units to 0, connect the cable to the master unit only and do not connect it to the slave units. Matsusada Precision DOEF series...
- Page 95 When using the communication option, only the master unit is connected to a controller via communication and set the same values to the master unit as for the local operation and settings. The slave units are not allowed to use communication function. Matsusada Precision DOEF series...
- Page 96 When changed the settings for the slave units, be sure to save the settings, set the POWER switch to OFF, and then set the POWER switch to ON again to restart the unit. Without rebooting the units, it may not operate properly. Matsusada Precision DOEF series...
- Page 97 When reading out measured values with the communication option, only the master unit is connected to a controller via the communication and read out the total values across the entire master/slave units. The slave units are not allowed to use communication function. Matsusada Precision DOEF series...
-
Page 98: Master/Slave Protective Operation
Master unit After removing the factors from the unit and press the Slave 1 "OUTPUT" switch to clear. The slave unit 1 detected an error and the entire units are in a fault state. Slave 2 Matsusada Precision DOEF series... - Page 99 Fault state due to interlock activated Master unit (only itself) FAULT (E02) OT! Fault state due to overtemperature Each unit Ex. Display on a unit that has been stopped due to an error occurred in another unit An error detected in DETECT FAULT! another unit Matsusada Precision DOEF series...
-
Page 100: Cautions In Master/Slave Operation
Make sure the connection; if it does not follow the above instruction, it leads to malfunction. Output terminals Master unit Master unit Load Slave 1 Load Slave 1 Slave 2 Slave 2 Not OK example example Matsusada Precision DOEF series... -
Page 101: Synchronized Operation Option (Synchronous Trigger And Synchronous Clock)
It is possible to connect other instruments that can be synchronized with a 10 MHz clock, but it is not guaranteed to work with them other than DOEF series. When the master/slave operation (parallel operation) option is used, synchronous operation is not available. -
Page 102: Synchronous Trigger
Synchronous master unit TRIG_MOUT Output Synchronous master unit trigger TRIG_SIN Synchronous slave unit trigger Input Synchronous slave unit TRIG_SOUT Synchronous slave unit trigger Output Synchronous slave unit Common of synchronous signal 9 to 15 Not used Matsusada Precision DOEF series... - Page 103 Pin 5 TRIG_MOUT Synchronous slave unit 1 Pin 2 SIN Pin 3 SOUT Pin 6 TRIG_SIN Pin 4 COM Pin 8 COM Pin 7 TRIG_SOUT Synchronous slave unit 2 Pin 2 SIN Pin 6 TRIG_SIN Pin 8 COM Matsusada Precision DOEF series...
-
Page 104: Setting Synchronous Trigger
"MORE", and press the ENTER switch to switch from Main Set 1 to Main Set 2. Use the downward "▼" movement switch to select "Sync Trig" and set OFF/ MAS (synchronous master unit)/ SLV (synchronous slave unit) by turning the DIAL. Then, press the SET/SAVE switch to save the setting. Matsusada Precision DOEF series... -
Page 105: Applications For Synchronous Trigger
In the case where a fault occurred on a synchronous slave unit: The output of the synchronous slave unit that the fault occurred on is only turned off. Remove the factors that caused the fault on the synchronous master unit and clear the fault. Matsusada Precision DOEF series... -
Page 106: Synchronous Clock
Clock reference unit Any unit can be used as the reference unit for the clock CLK OUT Units operating synchronously CLK IN Coaxial cable CLK OUT Units operating synchronously CLK IN Coaxial cable Matsusada Precision DOEF series... -
Page 107: Setting Synchronous Clock
Unit 1 Synchronous clock setting: DEN (Disabled) ✽ This unit will be a reference for the synchronous clock operation. Unit 2 Synchronous clock setting: EN (Enabled) Unit 3 Synchronous clock setting: DEN (Disabled) Matsusada Precision DOEF series... - Page 108 DIAL. Then, press the SET/SAVE switch to save the setting. On communication, the synchronization clock needs to be enabled or disabled with the EXTCLK command. For details, refer to [DOEF series communication instruction manual]. Matsusada Precision DOEF series...
-
Page 109: Locking The Clock
(i.e., The input clock cannot be used as the reference one.) If this happened, turn off the unit and check the connection before trying to operate it again. Matsusada Precision DOEF series... -
Page 110: Input And Output Signals Of Synchronous Clock
If units receiving the clock are turned on before the reference unit, the clock may not be locked properly. Matsusada Precision DOEF series... -
Page 111: Communication Options
Communication Settings This product can be controlled remotely using external communications. The following describes the settings of the unit. For details on operations, commands, etc., please refer to DOEF series communication instruction manual Settings The communication settings are located on the SYSTEM screen. The settings vary depending on the type of communications. -
Page 112: How To Set
Select "Unit No.”. Set the unit number by turning the DIAL. Select “Command” and set it by turning the DIAL. After the settings are complete, turn off the unit and on again. After restarting the unit, the settings will be effective. Matsusada Precision DOEF series... -
Page 113: Voltage Shift Option
Ex.: When Vlim- is set to -115V, the setting range of Ilim- is -0.1A to rating x -60%. Models without the voltage shift option, the range and settings are shown in [4-2-5 Setting Values for Protection] on page. Matsusada Precision DOEF series... - Page 114 Case of Vlim+ = +5V, Vlim- = -115V Fig. DC output voltage range and output current When the positive voltage limit (Vlim+) is 60V or more and the negative voltage limit (Vlim-) is -60V or less, the output current is limited. Matsusada Precision DOEF series...
-
Page 115: Setting Method And Range Of Voltage Limit, Current Limit, And Voltage Cutoff Values
Setting Protection System In the DOEF series, the limit or cutoff protection can be selected, but models with the voltage shift option, limit protection will also operate at the same time, since voltage shift is performed even if cutoff protection is selected. -
Page 116: Setting Range And Unit For Dc Voltage (Dcv)
No. of display digits: 5 digits Vdc (Voltage DC value) Min unit: 0.01A Min unit: 0.001A Vmax (Max voltage) No. of display digits: 5 digits No. of display digits: 5 digits Vmin (Min voltage) Min unit: 0.1A Min unit: 0.001A Matsusada Precision DOEF series... -
Page 117: Combined Use With Communication Options
DC voltage value, and each measurement values. Note that the initial values on the remote control also differ. Table: Setting unit, minimum/maximum values for each command (Matsusada original command) No. of Function... - Page 118 4 digits readout Voltage min value readout MEASure:VOLTage:MINimum 0.1V 4 digits ✽1 It will be determined depending on the positive voltage limit protection value. ✽2 It will be determined depending on the negative voltage limit protection value. Matsusada Precision DOEF series...
- Page 119 9 Voltage Shift Option Table: Initial values for each setting when shifting to the remote control Related command Item Initial value (State) (Matsusada original command) DCVSET DC output setting [SOURce]:VOLtage:DC Start DC voltage for soft start SSTArt:DCVStart End DC voltage for soft start SSTArt:DCVEnd 0V (CV mode)
-
Page 120: Troubleshooting
No output or the output does not meet Is the input voltage within the specifications? the preset value. 400W models: 100 to 240Vac, 50/60Hz, single phase 600W, 1.2kW models: 200 to 240Vac, 50/60Hz, single phase Is the wiring correct? Matsusada Precision DOEF series... - Page 122 Revision History Rev. No. Rev. Date Revision Contents 2016/05 First edition Added “Revision History”. Added “Note” and “Warranty” 2020/10 Corrected spelling mistakes. Applied new format.
Need help?
Do you have a question about the DOEF Series and is the answer not in the manual?
Questions and answers