Table of Contents
Advertisement
Quick Links
HPE Apollo 2000 Gen10 Plus Chassis User Guide
Abstract
This document is for the person who installs, administers, and troubleshoots servers and storage systems. Hewlett
Packard Enterprise assumes that you are qualified in the servicing of computer equipment, trained in recognizing hazards
in products with hazardous energy levels, and are familiar with the weight and stability precautions for rack installations.
Part Number: P26200-002
Published: August 2020
Edition: 2
Advertisement
Table of Contents

Related Manuals for Hewlett Packard Enterprise HPE Apollo 2000 Gen10 Plus


Summary of Contents for Hewlett Packard Enterprise HPE Apollo 2000 Gen10 Plus
- Page 1 HPE Apollo 2000 Gen10 Plus Chassis User Guide Abstract This document is for the person who installs, administers, and troubleshoots servers and storage systems. Hewlett Packard Enterprise assumes that you are qualified in the servicing of computer equipment, trained in recognizing hazards in products with hazardous energy levels, and are familiar with the weight and stability precautions for rack installations.
- Page 2 Copyright 2020 Hewlett Packard Enterprise Development LP Notices The information contained herein is subject to change without notice. The only warranties for Hewlett Packard Enterprise products and services are set forth in the express warranty statements accompanying such products and services.
-
Page 3: Table Of Contents
Contents HPE Apollo 2000 Gen10 Plus System................7 Component identification....................8 System components........................................8 Front panel components......................................8 Information pull tab....................................10 Front panel LEDs and buttons....................................10 Front panel LED power fault codes..............................12 Chassis UID LED......................................12 UID button functionality..................................12 Rear panel components......................................13 Rear panel LEDs and buttons....................................14... - Page 4 HPE Installation Service..................................35 Setting up the system....................................35 Operational requirements......................................37 Site requirements......................................37 Space and airflow requirements................................. 37 Temperature requirements................................... 37 Power requirements....................................38 Grounding requirements..................................38 Device bay thermal requirements..............................38 Rack warnings and cautions....................................39 Server warnings and cautions....................................40 Electrostatic discharge......................................41 Hardware options installation..................
- Page 5 Active Health System....................................69 HPE iLO 5............................................70 iLO Federation......................................70 iLO Service Port......................................71 iLO RESTful API......................................72 RESTful Interface Tool.....................................72 iLO Amplifier Pack...................................... 72 Integrated Management Log....................................72 Intelligent Provisioning......................................72 Management security.........................................73 Scripting Toolkit for Windows and Linux............................... 73 HPE Message Passing Interface...................................73 HPE Performance Cluster Manager...................................
- Page 6 Websites..........................89 Support and other resources..................90 Accessing Hewlett Packard Enterprise Support............................90 Accessing updates........................................90 Remote support..........................................91 Documentation feedback......................................91...
-
Page 7: Hpe Apollo 2000 Gen10 Plus System
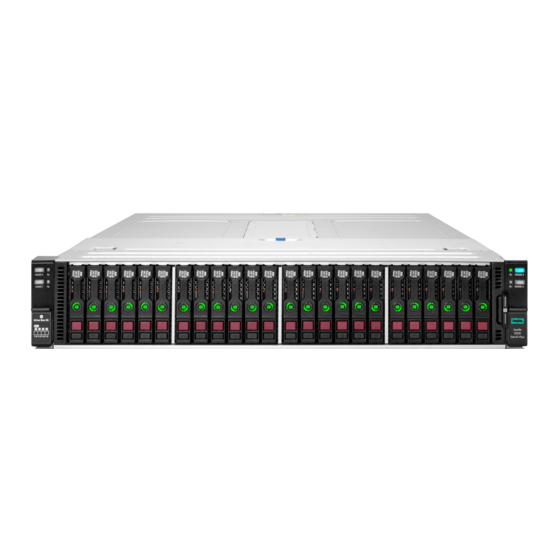
HPE Apollo 2000 Gen10 Plus System The HPE Apollo 2000 Gen10 Plus System is a dense, multiserver platform that packs incredible performance and workload flexibility into a small data center space. The system offers a density-optimized, shared infrastructure with a flexible scale-out architecture. -
Page 8: Component Identification
Component identification System components Item Description Fan board System interconnect assemblies Access panel Power backplane-distribution board assembly PDB cover Rack consolidation management (RCM) module (optional) Server blank 1U server node Chassis Front panel components HPE Apollo n2400 Gen10 Plus Chassis Component identification... - Page 9 Item Description Nonremovable bezel blanks Chassis information pull tab HPE Apollo n2600 Gen10 Plus Chassis with 8 SFF drives Item Description SFF hot-plug drives Chassis information pull tab Nonremovable bezel blanks HPE Apollo n2600 Gen10 Plus Chassis with 24 SFF drives Item Description SFF hot-plug drives...
-
Page 10: Information Pull Tab
Information pull tab Item Description QR code label Chassis serial number/product ID label Use a mobile device to scan the QR code label to display the chassis mobile product page (https://www.hpe.com/qref/ apollo2000gen10plus). This page contains links to chassis setup information, spare part numbers, QuickSpecs, troubleshooting resources, and other useful product links. - Page 11 Item Description Status Definition Deactivated Node 1 UID button/LED Solid blue Activated Flashing blue • 1 flash per second = Remote management or firmware upgrade in progress • 4 flashes per second = iLO manual soft reboot sequence initiated • 8 flashes per second = iLO manual hard reboot sequence in progress Deactivated...
-
Page 12: Front Panel Led Power Fault Codes
UID button functionality The UID button can be used to display the Server Health Summary when the server will not power on. For more information, see the latest HPE iLO 5 User Guide on the Hewlett Packard Enterprise website. Component identification... -
Page 13: Rear Panel Components
Rear panel components Item Description Power supply 2 Power supply 1 1, 2 Apollo Platform Manager (APM) 2.0 port in the APM module APM 2.0 port in the RCM module iLO ports The RCM and APM modules are both chassis options. To enable the APM 2.0 port, in the System Utilities screen, select System Configuration >... -
Page 14: Rear Panel Leds And Buttons
Rear panel LEDs and buttons Item Description Status Definition Power supply LED Solid green The power supply is operating normally. One or more of the following conditions exists: • Power is unavailable • Power supply failure • Power supply is in standby mode •... -
Page 15: Server Node Orientation
Server node orientation The server node cover facilitates smooth node entry and ejection from the bay. When installing the server into the bay, observe the correct node orientation. • Left side—The node cover must be facing down with the release lever on the top side of the bay. •... -
Page 16: Drive Numbering
1U system • Node 1 > Drive box 1 • Node 2 > Drive box 2 • Node 3 > Drive box 3 • Node 4 > Drive box 4 Drive numbering Apollo n2600 Gen10 Plus Chassis with 8 SFF drives Apollo n2600 Gen10 Plus Chassis with 24 SFF drives HPE Smart Carrier drive LEDs and components This HPE Smart Carrier supports SAS, SATA, and NVMe drives. - Page 17 HPE Smart Carrier drive LEDs Item Description Status Locate • Solid blue = The drive is being identified by a host application. • Flashing blue = The drive carrier firmware is being updated or requires an update. Activity ring • Rotating green = Drive activity.
-
Page 18: Fan Numbering
HPE Smart Carrier components Item Description Definition Drive handle • Pull the open handle to remove a drive. • Close the handle to fully seat and lock a drive into place. Handle release button Releases the drive handle for removal and insertion. Fan numbering The system supports up to seven non-hot-plug, dual-rotor fans. -
Page 19: Fan Board Connectors
Fan board connectors Item Description Drive backplane power cable connectors Right front I/O cable connector SAS expander sideband cable connector Fan connectors Left front I/O cable connector Power backplane-distribution board components Item Description Power backplane Power backplane connector Fan board connector Energy pack connector Power interface board (PIB) connectors Power distribution board (PDB) -
Page 20: Operations
APM command. Also, different caps can be applied to user-defined groups using flexible zones within the same rack. Hewlett Packard Enterprise recommends configuring the APM such that it controls only one rack. For more information, see the HPE Apollo Platform Manager User Guide (https://www.hpe.com/support/ APM_UG_en). -
Page 21: Remove The Hot-Plug Drive
iLO includes the iLO RESTful API, which is Redfish API conformant. The iLO RESTful API is a programming interface that is used to perform server configuration, inventory, and monitoring tasks. These tasks are done by sending basic HTTPS operations to the iLO web server. For more information, see the iLO RESTful API documentation at: https://hewlettpackard.github.io/ilo-rest-api-docs Remove the hot-plug drive... -
Page 22: Remove The Server Blank
3. If needed, release the power cord from the power supply strain relief strap. 4. Disconnect the power cord from the power supply. 5. If the RCM module is installed, do the following: a. Disconnect all cables from the RCM module. b. -
Page 23: Disconnect The Tube Set
Disconnect the tube set Procedure 1. Power down the server. 2. Push the female connector (jack) to the male connector (plug) for about 1/8 of an inch. 3. Rotate the female connector counter-clockwise until the tube is pushed off the connector by the springs inside. Remove the server CAUTION: To avoid accidentally dropping the server, observe the following: •... -
Page 24: Extend The Chassis From The Rack
Procedure 1. Power down the server. 2. Make sure that the server Do not remove LED is off. 3. If installed, disconnect the tube set. 4. Disconnect all peripheral cables from the server. 5. Remove the server: a. Loosen the release lever thumbscrew (callout 1). b. -
Page 25: Remove The Chassis From The Rack
Before you perform this procedure, review the: ◦ Rack warnings and cautions Server warnings and cautions ◦ • A fully populated chassis is heavy. Hewlett Packard Enterprise recommends removing the external chassis components before removing the chassis from the rack. Operations... - Page 26 Procedure Power down the servers. Remove all power: a. Disconnect each power cord from the power source. b. Disconnect each power cord from the chassis. If installed, disconnect the tube set. Disconnect all peripheral cables from the servers and chassis. Label the drives before removing them.
-
Page 27: Remove The Access Panel
12. Place the chassis on a sturdy, level surface. Remove the access panel WARNING: To reduce the risk of personal injury from hot surfaces, allow the drives and the internal system components to cool before touching them. CAUTION: To prevent damage to electrical components, take the appropriate anti-static precautions before beginning any installation, removal, or replacement procedure. -
Page 28: Install The Access Panel
a. Loosen the thumbscrew (callout 1). b. To disengage the access panel from the chassis, slide the panel towards the rear chassis (callout 2). c. Lift the access panel up and off the chassis (callout 3). Install the access panel Procedure 1. -
Page 29: Install The Chassis Into The Rack
4. Perform the post-installation or maintenance steps required by the procedure that required the access panel removal. Install the chassis into the rack Prerequisites • Before you perform this procedure, make sure that you have a T-25 Torx screwdriver available. •... - Page 30 2. Install the following components: a. Install all drives. b. Install all power supplies. c. If removed, install all server blanks. d. Install all servers. 3. Connect all peripheral cables to the servers and chassis. 4. If removed, connect the tube set. 5.
-
Page 31: Install The Server Blank
9. Power up the servers. Install the server blank Procedure Slide the server blank into the chassis. Install the server CAUTION: To avoid accidentally dropping the server, observe the following: • Always support the bottom of the server when removing and sliding it into the server bay. •... -
Page 32: Connect The Tube Set
Procedure 1. Determine the correct orientation for the server installation. 2. If you are installing a server in a system that is operational with fewer than four servers, remove the server blank. 3. Install the server: a. Slide the server into the chassis (callout 1). b. - Page 33 Operations...
-
Page 34: Setup
Setup General site planning Before you begin installing the HPE Apollo 2000 Gen10 Plus System, Hewlett Packard Enterprise recommends that you plan and coordinate the installation process with an authorized HPE representative or partner. Proper planning provides a more efficient installation process and leads to greater availability, reliability, and serviceability of the system. -
Page 35: Hpe Installation Service
Setting up the system HPE Installation Service HPE Installation Service provides basic installation of Hewlett Packard Enterprise branded equipment, software products, as well as HPE-supported products from other vendors that are sold by HPE or by HPE authorized resellers. The Installation Service is part of a suite of HPE deployment services that are designed to give users the peace of mind that comes from knowing that their HPE and HPE-supported products have been installed by an HPE specialist. - Page 36 Rack rail kit (optional) • Documentation Remove the following components: A fully populated chassis is heavy. Hewlett Packard Enterprise recommends removing the external chassis components before installing the chassis into the rack. a. Remove all drives. b. Remove all power supplies.
-
Page 37: Operational Requirements
Leave a minimum clearance of 121.9 cm (48 in) from the back of the rack to the back of another rack or row of racks. Hewlett Packard Enterprise servers draw in cool air through the front door and expel warm air through the rear door. -
Page 38: Power Requirements
CAUTION: To reduce the risk of damage to the equipment when installing third-party options: • Do not permit optional equipment to impede airflow around the server or to increase the internal rack temperature beyond the maximum allowable limits. • Do not exceed the manufacturer’s TMRA. Power requirements Installation of this equipment must comply with local and regional electrical regulations governing the installation of IT equipment by licensed electricians. -
Page 39: Rack Warnings And Cautions
Slipping and falling chassis will cause bodily injury or damage the chassis, so use extreme care when pulling the chassis out from the rack. Hewlett Packard Enterprise is not responsible for any injury or damage caused by the mishandling of the chassis. -
Page 40: Server Warnings And Cautions
CAUTION: Before installing the system into a rack, be sure to properly scope the limitations of the rack. Before proceeding with the installation, consider the following: • You must fully understand the static and dynamic load carrying capacity of the rack and be sure that it can accommodate the maximum weight of the system . -
Page 41: Electrostatic Discharge
Improper grounding can cause electrostatic discharge. For more information, refer to "Electrostatic discharge." CAUTION: To avoid data loss, Hewlett Packard Enterprise recommends that you back up all server data before installing or removing a hardware option, or performing a server maintenance or troubleshooting procedure. -
Page 42: Hardware Options Installation
Hardware options installation Hardware option installation guidelines WARNING: To reduce the risk of personal injury from hot surfaces, allow the drives and the internal system components to cool before touching them. CAUTION: To prevent damage to electrical components, properly ground the server before beginning any installation procedure. -
Page 43: Pcie Riser Requirement For Drive Installation
• The NVMe SSD is a PCIe bus device. You cannot remove the devices attached to a PCIe bus until the device and the bus completes and ceases the signal/traffic flow. CAUTION: Do not remove an NVMe SSD from the drive bay while the Do not remove LED is on. This status indicates that the device is still in use. - Page 44 3. Install the drive. 4. Determine the status of the drive from the drive LED definition. The installation is complete. To configure arrays, see the HPE Smart Array SR Gen10 Configuration Guide at the Hewlett Packard Enterprise website. Hardware options installation...
-
Page 45: Redundant Fan Option
Redundant fan option To provide sufficient airflow to the system when a fan rotor fails, the server supports redundant fans. All fans support in- rack serviceability with all servers in the chassis powered down. Fan behavior The following system behavior is exhibited when a fan rotor failure occurs. •... - Page 46 Install the fans. Install the access panel. 10. Slide the chassis back into the rack until the bezel ears are flushed against the rack columns. 11. Secure the chassis to the rack: a. Open the bezel ear latch (callout 1). b.
-
Page 47: Energy Pack Option
The installation is complete. Energy pack option Hewlett Packard Enterprise offers a centralized backup power source option to back up write cache content on P-class Smart Array controllers in case of an unplanned server power outage. One energy pack option can support multiple devices. An energy pack option is required for P-class Smart Array controllers. -
Page 48: Installing An Energy Pack
Installing an energy pack Prerequisites • Verify that a Smart Array P-class controller is installed in the server. • Before you perform this procedure, make sure that you have a T-10 Torx screwdriver available. Procedure Power down the servers. Remove all power: a. - Page 49 Install the PDB cover: a. Insert the PDB cover tabs into the chassis slots (callout 1). b. Slide the cover towards the rear chassis (callout 2). c. Install the cover screws (callout 3). 10. Install the access panel. 11. Install the chassis into the rack. 12.
-
Page 50: Power Supply Options
The required number and type of power supplies varies depending on the system configuration. Hewlett Packard Enterprise recommends using the HPE Power Advisor to estimate power consumption based on the configuration at a system, rack, and multirack level. You can access the Power Advisor from the Hewlett Packard Enterprise websites https://www.hpe.com/info/hpepoweradvisor or https://dcia.itcs.hpe.com. - Page 51 The PIB and power cord for the Flexible Slot and Performance power supplies are not interchangeable. Verify that the installed PIB and the power cord are compatible with the new power supply. For information on the PIB and power cord compatible with supported power supplies, see the product QuickSpecs on the Hewlett Packard Enterprise website: https://www.hpe.com/servers/apollo2000. Procedure 1.
-
Page 52: Power Interface Board Options
4. Slide the power supply into bay until it clicks into place. 5. If the RCM module is installed, do the following: a. Close the RCM module latch (callout 1), and then tighten the thumbscrew (callout 2). b. Cable the RCM module. 6. -
Page 53: Installing The Pib Assembly
PIB assembly. For information on the PIB and power cord compatible with supported power supplies, see the product QuickSpecs on the Hewlett Packard Enterprise website: https://www.hpe.com/servers/apollo2000 Before you perform this procedure, make sure that you have a T-10 Torx screwdriver available. - Page 54 Remove the existing PIB assembly. 10. Install the new PIB assembly: • PIB assembly for Flexible Slot power supplies • PIB assembly for Performance power supplies Hardware options installation...
- Page 55 11. Install the energy pack: a. Connect the energy pack cable (callout 1). b. Place the front end of the energy pack in the PIB bracket (callout 2), then press the rear end down (callout 3). 12. Install the PDB cover: a.
-
Page 56: Rcm Module Option
13. Install the access panel. 14. Install the chassis into the rack. 15. Connect all peripheral cables to the servers and chassis. 16. If removed, connect the tube set. 17. Connect each power cord to the chassis. 18. Connect each power cord to the power source. 19. - Page 57 Prerequisites Before you perform this procedure, make sure that you have the following items available: • T-10 Torx screwdriver • T-15 Torx screwdriver Procedure Power down the servers. Remove all power: a. Disconnect each power cord from the power source. b.
- Page 58 Retain this blank for future use. Slide the RCM module into the bay. 10. Tighten the RCM tray thumbscrew. Hardware options installation...
- Page 59 11. Connect the RCM sideband cable to the PDB and RCM board (callout 1), and then press down the cable to affix it to the chassis base (callout 2). The red wire in the RCM sideband cable indicates the cable alignment to pin 1 of the cable connectors on PDB and RCM board.
- Page 60 14. Install the chassis into the rack. 15. Close the RCM module latch (callout 1), and then tighten the thumbscrew (callout 2). 16. Cable the RCM module. 17. Connect all peripheral cables to the servers and chassis. 18. If removed, connect the tube set. 19.
-
Page 61: Enabling The Ilo Ports On The Rcm Module
Enabling the iLO ports on the RCM module Procedure 1. During the server startup sequence, press F9 key to access System Utilities. 2. From the System Utilities screen, select System Configuration > iLO 5 Configuration Utility > Network Options. 3. Select ON from the Network Interface Adapter drop-down menu. 4. - Page 62 Hardware options installation...
-
Page 63: Cabling
Cabling Cabling guidelines The cable colors in the cabling diagrams used in this chapter are for illustration purposes only. Most of the system cables are black. Observe the following guidelines when working with system cables. Before connecting cables • Note the port labels on the PCA components. Not all of these components are used by all systems: ◦... -
Page 64: Front I/O Cabling
• Remove cables that are no longer being used. Retaining them inside the system can restrict airflow. If you intend to use the removed cables later, label and store them for future use. Front I/O cabling Cable color Description Orange Ambient temperature sensor cable Blue Left front I/O cable... -
Page 65: Drive Backplane Cabling
Drive backplane cabling The drive backplane cabling images in this section show the following: • Drive power connections from the fan board to the drive backplane. • Server node signal connections from the system interconnect posts to the drive backplane. n2600 8 SFF U.3 drive backplane cabling Drive power cabling Cable color... -
Page 66: N2600 24 Sff Basic Drive Backplane Cabling
Cable color Description Pink Signal cable for the server node 1 Gold Signal cable for the server node 2 Blue Signal cable for the server node 3 Orange Signal cable for the server node 4 n2600 24 SFF basic drive backplane cabling Drive power cabling Cable color Description... -
Page 67: Energy Pack Cabling
Cable color Description Pink Signal cable for the server node 1 Gold Signal cable for the server node 2 Blue Signal cable for the server node 3 Orange Signal cable for the server node 4 Energy pack cabling APM module cabling Cabling... -
Page 68: Rcm Sideband Cabling
RCM sideband cabling Cabling... -
Page 69: Software And Configuration Utilities
Active Health System Viewer (AHSV) is an online tool used to read, diagnose, and resolve server issues quickly using AHS uploaded data. AHSV provides Hewlett Packard Enterprise recommended repair actions based on experience and best practices. AHSV provides the ability to: •... -
Page 70: Hpe Ilo 5
When you download and send Active Health System data to Hewlett Packard Enterprise, you agree to have the data used for analysis, technical resolution, and quality improvements. The data that is collected is managed according to the privacy statement, available at https://www.hpe.com/info/privacy. -
Page 71: Ilo Service Port
RESTful API ◦ Hewlett Packard Enterprise recommends the HPE USB to Ethernet Adapter (part number Q7Y55A). Hewlett Packard Enterprise recommends the HPE Micro USB to USB Adapter (part number 789904-B21). When you use the iLO Service Port: • Actions are logged in the iLO event log. -
Page 72: Ilo Restful Api
HTTPS operations (GET, PUT, POST, DELETE, and PATCH) to the iLO web server. To learn more about the iLO RESTful API, see the Hewlett Packard Enterprise website (https://www.hpe.com/support/ restfulinterface/docs). -
Page 73: Management Security
NOTE: After you have selected a mode, you must reprovision the server to change the mode that launches when you boot to F10. Intelligent Provisioning prepares the system for installing original, licensed vendor media and Hewlett Packard Enterprise- branded versions of OS software. Intelligent Provisioning also prepares the system to integrate optimized server support software from the Service Pack for ProLiant (SPP). -
Page 74: Hpe Performance Cluster Manager
HPE Message Passing Interface documentation on the Hewlett Packard Enterprise website (http://www.hpe.com/ software/mpi). HPE Performance Cluster Manager HPE Performance Cluster Manager is a point of contact for the deployment, system management, monitoring, and reporting on the HPE cluster system. For more information, see the HPE Performance Cluster Manager documentation on the Hewlett Packard Enterprise website (https://www.hpe.com/software/hpcm). -
Page 75: Secure Boot
NOTE: The boot mode you use must match the operating system installation. If not, changing the boot mode can impact the ability of the server to boot to the installed operating system. Prerequisite When booting to UEFI Mode, leave UEFI Optimized Boot enabled. Procedure 1. -
Page 76: Launching The Embedded Uefi Shell
• Using the System Utilities options described in the following sections. • Using the iLO RESTful API to clear and restore certificates. For more information, see the Hewlett Packard Enterprise website (https://www.hpe.com/info/redfish). • Using the secboot command in the Embedded UEFI Shell to display Secure Boot databases, keys, and security reports. -
Page 77: Hpe Infosight For Servers
This method requires an administrator to download the HPE SSA executables and install them. You can run HPE SSA online after launching the host operating system. For more information, see HPE Smart Array SR Gen10 Configuration Guide at the Hewlett Packard Enterprise website. HPE InfoSight for servers The HPE InfoSight portal is a secure web interface hosted by HPE that allows you to monitor supported devices through a graphical interface. -
Page 78: Keeping The System Current
Keeping the system current Updating firmware or system ROM To update firmware or system ROM, use one of the following methods: • The Firmware Update option in the System Utilities. • The fwupdate command in the Embedded UEFI Shell. • Service Pack for ProLiant (SPP) •... - Page 79 Procedure 1. Access the System ROM Flash Binary component for your server from the Hewlett Packard Enterprise Support Center. 2. Copy the binary file to a USB media or iLO virtual media. 3. Attach the media to the server.
-
Page 80: Drivers
Download Smart Update Manager for Linux • Download specific drivers To locate the drivers for a server, go to the Hewlett Packard Enterprise Support Center website, and then search for the product name/number. Software and firmware Update software and firmware before using the server for the first time, unless any installed software or components require an older version. -
Page 81: Operating System Version Support
Better use of server, storage, and networking technology For more information, see the Hewlett Packard Enterprise website: https://www.hpe.com/services/consulting Proactive notifications 30 to 60 days in advance, Hewlett Packard Enterprise sends notifications to subscribed customers on upcoming: • Hardware, firmware, and software changes •... -
Page 82: Troubleshooting
Integrated Management Log Messages and Troubleshooting Guide for HPE ProLiant Gen10 and Gen10 Plus servers and HPE Synergy provides IML messages and associated troubleshooting information to resolve critical and cautionary IML events. To access troubleshooting resources for your product, see the Hewlett Packard Enterprise Information Library: • For Gen10 servers, see https://www.hpe.com/info/gen10-troubleshooting. -
Page 83: Safety, Warranty, And Regulatory Information
Additional regulatory information Hewlett Packard Enterprise is committed to providing our customers with information about the chemical substances in our products as needed to comply with legal requirements such as REACH (Regulation EC No 1907/2006 of the European Parliament and the Council). A chemical information report for this product can be found at: https://www.hpe.com/info/reach... -
Page 84: Turkey Rohs Material Content Declaration
ЖШС «Хьюлетт-Паккард (К)», Қазақстан Республикасы, 050040, Алматы к., Бостандык ауданы, Әл-Фараби даңғ ылы, 77/7, Телефон/факс: +7 727 355 35 50 Manufacturing date: The manufacturing date is defined by the serial number. If you need help identifying the manufacturing date, contact tre@hpe.com. Turkey RoHS material content declaration Türkiye Cumhuriyeti: AEEE Yönetmeliğine Uygundur Ukraine RoHS material content declaration... -
Page 85: Specifications
Specifications Environmental specifications Specification Value Temperature range — Operating 10°C to 35°C (50°F to 95°F) Nonoperating –30°C to 60°C (–22°F to 140°F) Relative humidity (noncondensing) — Operating 8% to 90% 28°C (82.4°F), maximum wet bulb temperature Nonoperating 5% to 95% 38.7°C (101.7°F), maximum wet bulb temperature All temperature ratings shown are for sea level. -
Page 86: Power Supply Specifications
Power supply specifications CAUTION: Do not mix power supplies with different efficiency and wattage in the chassis. Install only one type of power supply. Verify that all power supplies have the same part number and label color. The system becomes unstable and may shut down when it detects mismatched power supplies. -
Page 87: Hpe 1800 W-2200 W Flex Slot Platinum Hot-Plug Power Supply
HPE 1800 W–2200 W Flex Slot Platinum Hot-plug Power Supply Specification Value Input requirements — Rated input voltage 200 VAC to 240 VAC 240 VDC for China only Rated input frequency 50 Hz to 60 Hz (Not applicable to 240 VDC) Rated input current 10.0 A at 240 VAC 8.2 A at 240 VDC for China Only... - Page 88 Specification Value Nominal input current 15.8 A at 200 VAC 11.7 A at 277 VAC Maximum rated input wattage rating 3127 W at 200 VAC 3210 W at 277 VAC BTUs per hour 10,671 at 200 VAC 10,951 at 277 VAC Power supply output —...
-
Page 89: Websites
Storage white papers and analyst reports https://www.hpe.com/storage/whitepapers For additional websites, see Support and other resources. Product websites HPE Apollo 2000 Gen10 Plus Chassis product page https://www.hpe.com/servers/apollo2000 HPE Apollo 2000 Gen10 Plus Chassis support page https://www.hpe.com/support/apollo2000gen10plus HPE Apollo 2000 Gen10 Plus Chassis user documents https://www.hpe.com/info/apollo2000gen10plus-docs... -
Page 90: Support And Other Resources
• For live assistance, go to the Contact Hewlett Packard Enterprise Worldwide website: https://www.hpe.com/info/assistance • To access documentation and support services, go to the Hewlett Packard Enterprise Support Center website: https://www.hpe.com/support/hpesc Information to collect • Technical support registration number (if applicable) •... -
Page 91: Remote Support
Documentation feedback Hewlett Packard Enterprise is committed to providing documentation that meets your needs. To help us improve the documentation, send any errors, suggestions, or comments to Documentation Feedback (docsfeedback@hpe.com). When submitting your feedback, include the document title, part number, edition, and publication date located on the front cover of the document.
Need help?
Do you have a question about the HPE Apollo 2000 Gen10 Plus and is the answer not in the manual?
Questions and answers