Table of Contents
Advertisement
Quick Links
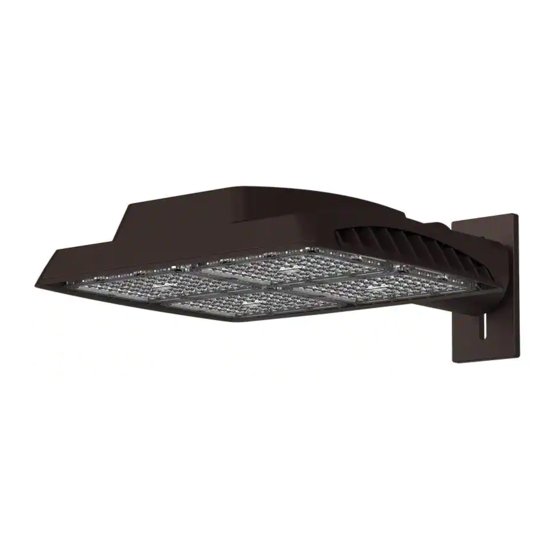
Item # 0000 000 000
Model No.
USE AND CARE GUIDE
LED
Questions, problems, missing parts? Before returning to the store,
call Commercial Electric Customer Service
8 a.m. - 7 p.m., EST, Monday – Friday, 9 a.m. – 6 p.m., EST, Saturday
1-877-527-0313
HOMEDEPOT.COM
THANK YOU
We appreciate the trust and confidence you have placed in Commercial Electric through the purchase of this LED
area light. We strive to continually create quality products designed to enhance your home. Visit us online to see our
full line of products available for your home improvement needs. Thank you for choosing Commercial Electric!
Advertisement
Table of Contents

Subscribe to Our Youtube Channel
Related Manuals for Commercial Electric GRD150-PC-4K-BZ


Summary of Contents for Commercial Electric GRD150-PC-4K-BZ
- Page 1 THANK YOU We appreciate the trust and confidence you have placed in Commercial Electric through the purchase of this LED area light. We strive to continually create quality products designed to enhance your home. Visit us online to see our...
-
Page 2: Table Of Contents
Table of Contents Table of Contents......2 Package Contents......Safety Information....... 2 Hardware Included......5 Warranty.......... 3 Mounting Methods......6 Pre-Installation......4 Installation........7 Planning Installation....Operation ........31 Specifications......... Care and Cleaning......32 Tools Required....... Troubleshooting......32 Safety Information IMPORTANT This product must be installed in accordance with the applicable National Electrical Code and local building codes by a person familiar with the construction and operation of the product and... -
Page 3: Warranty
Warranty This is a limited warranty offered by Commercial Electric for a period of five years from the date of purchase to its customers. Commercial Electric warrants to customers that the products will be free from defects in material and workmanship. The obligation of Commercial Electric under... -
Page 4: Pre-Installation
Pre-Installation PLANNING INSTALLATION Before installing the light fixture, ensure that all parts are present. Compare parts with the Hardware Included and Package Contents sections. If any part is missing or damaged, do not attempt to assemble, install, or operate this light fixture. SPECIFICATIONS MODEL GRD100... -
Page 5: Package Contents
Pre-Installation (continued) HARDWARE INCLUDED NOTE: Hardware not shown to actual size. Part Description Quantity Wire Nut Flat washer Spring washer Photocell black cover label Allen key 5/16 in. for center bolt 8-32 Screw for slipfitter cover Mounting nut plate (for mounting to hollow metal poles) Slipfitter cover 5/16 in. -
Page 6: Mounting Methods
Mounting Methods CHOOSE YOUR MOUNTING The fixture can be mounted in the following ways: Swivel Slipfitter Knuckle Arm Mount: Use the default swivel slipfitter knuckle on a 2-3/8 in. to 2-1/2 in. (outside diameter) round pipe, or fit to standard tenon arms for ground, pole, or wall mounting (straight tenon arm included). -
Page 7: Installation
Installation Shutting Off Electric Power Verify wall switch is in OFF position (fig 3). At the main electrical panel, turn off the circuit breaker that supplies power to the junction box you are working on (fig 4). For screw-in type fuses, unscrew the fuse that supplies power to the outlet junction box you are working on (fig 5). - Page 8 Installation (continued) For Mounting on a 2-3/8 to 2-1/2-in. Tenon Arm Pipe Follow Step 3A to 3F Pages 9 to 14 Ground/Wall Mount Straight Tenon Plate (Included) 2-3/8 in. 2-3/8 in. 2-3/8 in. 2-3/8 in. 2-3/8 in. Wall L-Shape Ground/Wall Mount 2, 3, or 4-Arm Bullhorn Tenon Square and Round Pole Tenon Plate...
- Page 9 Installation (continued) Slipfitter Knuckle Arm Mounting Attach slipfitter to pole, pipe, or tenon (applicable for 2-3/8 in. outside diameter round pipe, poles or tenon mounting only) Slide slipfitter (C) side A onto pipe, pole top or tenon. Route supply wires into bottom of slipfitter (C) and out the opening in the side as shown in (fig 7). Side A (fig 7).
- Page 10 Installation (continued) Slipfitter Knuckle Arm Mounting Tighten set screws Tighten the 4 set screws using Allen key 5/32 in. (JJ) as shown in (fig 8). Side A (fig 8).
- Page 11 Installation (continued) Slipfitter Knuckle Arm Mounting Attach light fixture to slipfitter NOTE: The fixture comes with the 2-3/8 in. swivel slipfitter arm (C) side B already attached to the fixture (A). Align the light fixture (A) and slipfitter (C) side B with slipfitter (C) side A (fig 9). Route supply wires from slipfitter (C) side A through holes in slipfitter (C) side B (fig 10).
- Page 12 Installation (continued) Slipfitter Knuckle Arm Mounting Tighten center bolt Select the desired aiming angle, then insert 3/8 in. spring washer (LL) and 3/8 in. center bolt (KK) through slipfitter (C) side B and into slipfitter (C) side A. Tighten 3/8 in. center bolt (KK) to 20 ft-lb of torque. (fig 11) (fig 11).
- Page 13 Installation (continued) Slipfitter Knuckle Arm Mounting Making electrical connections FOR NON DIMMING ELECTRICAL WIRING (Follow these steps when NOT wiring to a 0-10V dimmer.) Connect lighting fixture black wire to supply black wire (line), lighting fixture white wire to supply white wire (common), and the lighting fixture green wire to the supply ground wire (fig 12).
- Page 14 Installation (continued) Making Electrical Connections Install cover plate Tuck completed wiring into knuckle section. Attach using 8-32 screws (FF). Take care not to pinch wires when installing slipfitter cover (HH). (fig 14).
- Page 15 Installation (continued) For Mounting Directly to a Square Metal Pole Follow Step 4A to 4H Pages 16 to 21 JUMP AHEAD IF... MOUNTING TO WALL OR FLAT SURFACE WITH THE INCLUDED TENON ARM PIPE Jump to Step 5 starting on Page 23 HOMEDEPOT.COM Please contact 1-877-527-0313 for further assistance.
- Page 16 Installation (continued) Mounting Fixture on the Square Pole Drill mounting holes on the surface 5/8 in. 3/8 in. (for supply wires) (for 5/16 in. hardware) Remove the pole's top cover, if applicable. Drill mounting holes into the pole or surface by referring to the drilling details in (fig 15).
- Page 17 Installation (continued) Mounting Fixture on Square Pole Slide slipfitter (C) side A onto horizontal tenon adapter (D). Route supply wires into bottom of slipfitter (C) and out the opening in the side as shown in (fig 17). Side A (fig 17). Slipfitter Knuckle Arm Mounting Tighten set screws Tighten the 4 set screws using Allen key...
- Page 18 Installation (continued) Mounting Fixture on Square Pole Attach light fixture to slipfitter NOTE: The fixture comes with the 2-3/8 in. swivel slipfitter arm (C) side B already attached to the fixture (A). Align the light fixture (A) and slipfitter (C) side B with slipfitter (C) side A (fig 19). Route supply wires from slipfitter (C) side A through holes in slipfitter (C) side B (fig 20).
- Page 19 Installation (continued) Mounting Fixture on Square Pole Tighten center bolt Select the desired aiming angle, then insert 3/8 in. spring washer (LL) and 3/8 in. center bolt (KK) through slipfitter (C) side B and into slipfitter (C) side A. Tighten 3/8 in. center bolt (KK) to 20 ft-lb of torque (fig 21). (fig 21).
- Page 20 Installation (continued) Mounting Fixture on Square Pole Making electrical connections FOR NON DIMMING ELECTRICAL WIRING (Follow these steps when NOT wiring to a 0-10V dimmer.) Connect lighting fixture black wire to supply black wire (line), lighting fixture white wire to supply white wire (common), and the lighting fixture green wire to the supply ground wire (fig 22).
- Page 21 Installation (continued) Making Electrical Connections Install cover plate Tuck completed wiring into knuckle section. Attach using 8-32 screws (FF). Take care not to pinch wires when installing slipfitter cover (HH). (fig 24). HOMEDEPOT.COM Please contact 1-877-527-0313 for further assistance.
- Page 22 Installation (continued) For Mounting to a Wall or Flat Surface Follow Step 5A to 5G Pages 23 to 28...
- Page 23 Installation (continued) Mounting Fixture on the Wall For Direct to Wall: Align the horizontal tenon adapter (D) holes with the holes pre-drilled in the wall. Use proper bolts or wall anchors (not provided) for the type of wall, and tighten to sufficient torque setting.
- Page 24 Installation (continued) Mounting Fixture on the Wall Slide slipfitter (C) side A onto horizontal tenon adapter (D). Route supply wires into bottom of slipfitter (C) and out the opening in the side as shown in (fig 26.) Side A (fig 26). Mounting fixture on the wall Tighten set screws Tighten the 4 set screws using Allen key...
- Page 25 Installation (continued) Mounting Fixture on the Wall Attach light fixture to slipfitter NOTE: The fixture comes with the 2-3/8 in. swivel slipfitter arm (C) side B already attached to the fixture (A). Align the light fixture (A) and slipfitter (C) side B with slipfitter (C) side A. (fig 28) Route supply wires from slipfitter (C) side A through holes in slipfitter (C) side B.
- Page 26 Installation (continued) Mounting Fixture on the Wall Tighten center bolt Select the desired aiming angle, then insert 3/8 in. spring washer (LL) and 3/8 in. center bolt (KK) through slipfitter (C) side B and into slipfitter (C) side A. Tighten 3/8 in. center bolt (KK) to 20 ft-lb of torque. (fig 30) (fig 30).
- Page 27 Installation (continued) Mounting Fixture on the Wall Making electrical connections FOR NON DIMMING ELECTRICAL WIRING (Follow these steps when NOT wiring to a 0-10V dimmer.) Connect lighting fixture black wire to supply black wire (line), lighting fixture white wire to supply white wire (common), and the lighting fixture green wire to the supply ground wire (fig 31).
- Page 28 Installation (continued) Mounting Fixture on the Wall Install cover plate Tuck completed wiring into knuckle section. Attach using 8-32 screws (FF). Take care not to pinch wires when installing slipfitter cover (HH). (fig 33).
- Page 29 Installation (continued) Adjust the FIxture Head Orientation on SlipfItter Knuckle Remove the plug from the side of the knuckle arm (C). (fig 34) Use the 5/16 in. Allen key (EE) to loosen the 3/8 in. center bolt. (fig 35) Adjust the angle to desired orientation for the fixture. (fig 36) Retighten center screw to 20 ft-lb (27 Nm) of torque.
- Page 30 Installation (continued) Slipfitter Tenon Mounting Accessories Mounting accessories for standard 2-3/8 in. slipfitters are available. Please visit your local hard- ware store or contact our customer support so we can assist in securing mounts and accessories. Ground/Wall Mount Straight Tenon Plate (included) 2-3/8 in.
-
Page 31: Operation
Operation Selecting Dusk-to-Dawn or Switch-Activated Control NOTE: Photocell (E) must be installed on fixture for both dusk-to-dawn and switch controlled operation. Fixture will not work if photocell is not installed. AUTOMATIC OPTION 1: DUSK-TO-DAWN OPERATION NIGHTTIME ON Dusk-to-dawn operation enables the light fixture to automatically turn ON when dark outside and turn OFF when the sun rises, thus saving you energy. -
Page 32: Care And Cleaning
Care and Cleaning appearance, clean the light fixture with clear water and a soft, damp cloth only. Do not use abrasive cleaners or cleaners that contain alcohol. Do not apply paints, solvents, or any other chemicals on this light fixture. They could cause a premature deterioration of the finish and may void the warranty. - Page 33 Questions, problems, missing parts? Before returning to the store, call Commercial Electric Customer Service 8 a.m. - 7 p.m., EST, Monday – Friday, 9 a.m. – 6 p.m., EST, Saturday 1-877-527-0313 HOMEDEPOT.COM Retain this manual for future use.
Need help?
Do you have a question about the GRD150-PC-4K-BZ and is the answer not in the manual?
Questions and answers