Table of Contents
Advertisement
Quick Links
Advertisement
Table of Contents

Related Manuals for Robe Divine 160 RGBW


Summary of Contents for Robe Divine 160 RGBW
- Page 1 QR code for user manual Version 1.7...
-
Page 2: Table Of Contents
3.3 Top hat and half top hat installation ........................8 3.4 Barn door and Wire guard/anti-glare installation ....................9 3.5 DMX 512 connection ............................9 4. Divine 160 RGBW - DMX protocol ........................... 11 5. Control menu ................................14 5.1 Fixture Address ..............................14 5.2 Fixture information ............................. -
Page 3: Safety Instructions
Divine 160 RGBW FOR YOUR OWN SAFETY, PLEASE READ THIS USER MANUAL CAREFULLY BEFORE POWERING OR INSTALLING YOUR Divine 160 RGBW! Save it for future reference. This device has left our premises in absolutely perfect condition. In order to maintain this condition and to ensure safe operation, it is absolutely necessary for the user to follow the safety instructions and warnings written in this manual. - Page 4 Divine 160 RGBW Keep combustible materials at least 0.3 m away from the fixture. If the fixture has been exposed to drastic temperature fluctuation (e.g. after transportation), do not switch it on immediately. The arising condensation of water might damage your device. Leave the device switched off until it has reached room temperature.
-
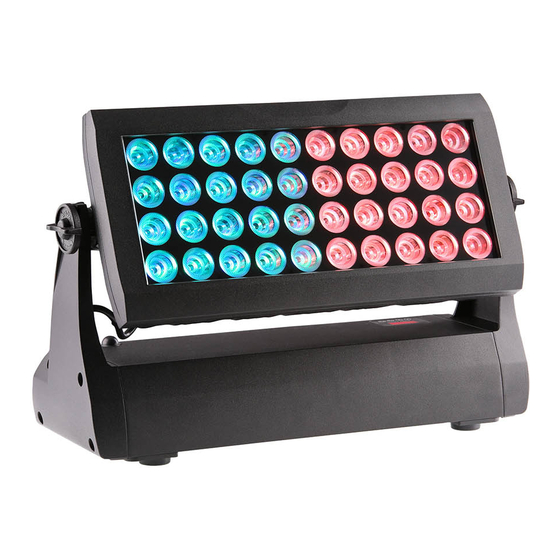
Page 5: Fixture Exterior View
This device falls under class one and must be grounded! The Divine 160 RGBW is equipped with auto-switching power supply that automatically adjusts to any 50-60Hz AC power source from 100-240V (CE) or 100-277 V (US). The fixture must be connected to a non-dimmable power source in order to avoid damage to its internal power supply and other electrical components. -
Page 6: Mounting The Fixture
Disconnect the fixture from mains prior to start any installation/assembly works. The Divine 160 RGBW can be arranged in any position/orientation without altering its operation characteristics. The LED module can be tilted to desired position by means of the tilt lock. - Page 7 Divine 160 RGBW CAUTION! Use 2 mounting brackets Omega CL and appropriate clamps to rig the fixture on the truss. Make sure that the device is fixed properly! Ensure that the structure (truss) to which you are attaching the fixtures is secure .
-
Page 8: Top Hat And Half Top Hat Installation
Divine 160 RGBW Possible positions of the adaptors Omega adaptors CL with clamps: 2-bracket installation 2-bracket installation 1-bracket installation 3.3 Top hat and half top hat installation Half top hat Top hat 1. Unscrew screws M3x5 (3) to remove the bottom part (2) of the top hat (half top hat). -
Page 9: Barn Door And Wire Guard/Anti-Glare Installation
Divine 160 RGBW 3.4 Barn door and Wire guard/anti-glare installation Barn door Wire guard/anti-glare 1. Unscrew screws M3x5 (3) to remove the bottom part (2) of the barn door (wire guard/anti-glare). 2. Place the upper part (1) of the barn door (wire guard/anti-glare) on the fixture head and secure it by means of two screws M5x10 (4) /M5x8 for wire guard/anti-glare/ with spring washers to the two threaded holes (A) on the back side of the fixture head. - Page 10 Divine 160 RGBW Caution: Terminate the link by installing a termination plug in the output of the last fixture. The termination plug is a male 5-pin XLR plug (IP 67 rating) with a 120 Ohm resistor soldered between Signal (–) and Signal (+).
-
Page 11: Divine 160 Rgbw - Dmx Protocol
Divine 160 RGBW 4. Divine 160 RGBW(RGBA) - DMX protocol Version 1.4 Mode 1 Mode 2* Mode 3 Mode 4 Value Function Type of Channel Channel Channel Channel control Special functions 0-19 Reserved (0=default) To activate following functions , stop in DMX value for at least 3 sec. - Page 12 Divine 160 RGBW White (Amber) - zone 3 0-255 LEDs saturation control (0-100%) (255=default) proportional Red - zone 4 0-255 Red LEDs saturation control (0-100%) (255=default) proportional Green - zone 4 0-255 Green LEDs saturation control (0-100%) (255=default) proportional Blue - zone 4...
- Page 13 Divine 160 RGBW Zone order:...
-
Page 14: Control Menu
Divine 160 RGBW 5. Control menu The Divine 160 RGBW is equipped with a 4-segment LED display which allows you to set the fixture´s behaviour according to your needs, obtain information on its operation, control all range of effects and program it in stand-alone mode. -
Page 15: Personality
DM.In.---DMX values. Select this function to read DMX values of each channel received by the fixture. 5.3 Personality Use this menu to modify the Divine 160 RGBW operating behaviour. DM.Pr. --- DMX preset. Select this menu item to set a desired DMX mode. Please refer to the chapter "DMX protocol"... - Page 16 Divine 160 RGBW If time between two receiving DMX values is > than fade time set in the item “F.tin. “, the entire adjusted fade time will be used. If time between two receiving DMX values is < than fade time set in the item“F.tin.“, the adjusted fade time will be reduced to fill entire time between the two receiving DMX values.
-
Page 17: Manual Mode
5. 5 Test sequences Use this menu to run demo-test sequences without an external controller, which will show you some possibilities of using the Divine 160 RGBW. 5.6 Stand-alone setting The fixtures on a data link are not connected to the controller but can execute pre-set programs which can be different for every fixture. - Page 18 Divine 160 RGBW Auto. --- Automatic playback. This function allows you to select the program which will be played after switching the fixture on. Selected program will be played continuously in a loop. 1. Use the UP/DOWN buttons to select test program (“tESt”), user program (“u.PrG”) or disable this function (OFF).
-
Page 19: Special Functions
If you use the Robe Universal Interface, connect a USB port of your computer with the Robe Universal Interface by means of the USB cable and DMX input of the fixture with the DMX output of the Robe Universal Interface via a DMX cable. -
Page 20: Technical Specifications
In case upload process is interrupted (e.g. power loss), the fixture stays in “Updating mode” and you will have to repeat the software update again. Another way, how to update software in the fixtures (especially large installation of fixtures) is to use the ROBE Uploader. It is a software for automatized software update of ROBE fixtures. - Page 21 Divine 160 RGBW • Strobe effect with variable speed (max. 20 flashes per second) • Pre-programmed random strobe pulse-effects Dimmer • Smooth 16-bit dimming from 0 - 100 % Connection • 2x Outdoor DMX cable CA-0611 + 2x 5-pin XLR (male,female IP 67) •...
-
Page 22: Cleaning And Maintenance
Maintenance and service operations are only to be carried out by a qualified person. Should you need any spare parts, please use Robe OEM parts. 7.1 Replacing a fuse This replacement has to be realized by a qualified person or Robe service worker only. -
Page 23: Disposing Of The Product
To preserve the environment please dispose or recycle this product at the end of its life according to the local regulations and codes. Specifications are subject to change without notice May 31, 2022 Copyright © 2017-2022 Robe Lighting - All rights reserved Made in CZECH REPUBLIC by ROBE LIGHTING s.r.o. Palackeho 416/20 CZ 75701 Valasske Mezirici...
Need help?
Do you have a question about the Divine 160 RGBW and is the answer not in the manual?
Questions and answers