Epson SureColor P8570D Series User Manual
Hide thumbs
Also See for SureColor P8570D Series:
- Quick start manual (3 pages) ,
- User manual (381 pages) ,
- User manual (396 pages)
Table of Contents
Advertisement
Quick Links
Advertisement
Table of Contents

Related Manuals for Epson SureColor P8570D Series


Summary of Contents for Epson SureColor P8570D Series
- Page 1 ® ® Epson SureColor P8570D/T7770D Series User's Guide...
-
Page 3: Table Of Contents
Selecting the Date and Time ......................26 Setting a Password and Locking the Control Panel ............... 27 Using AirPrint ............................ 29 Using the Epson Smart Panel Mobile App..................30 Using Power Saving Settings ......................30 Changing the Sleep Timer Settings ....................30 Changing the Power Off Timer Settings .................. - Page 4 Loading Cut Sheets ........................90 Loading Poster Board........................99 Creating Custom Paper Settings ...................... 110 Selecting Custom Paper Configurations..................111 Creating Custom Paper Settings Using Epson Media Installer............ 111 Edit Media Settings Options....................114 Downloading Epson Media Settings .................... 115 Paper Feed Adjustment........................116 Optimizing the Media Settings (Automatic Adjustment)...............
- Page 5 Loading Media for Auto Take-up ....................118 Removing the Auto Take-up Media ..................... 131 Available Epson Papers ........................135 Borderless Paper Type Compatibility ....................148 Paper or Media Type Settings - Printing Software................149 Selecting the Paper Settings for Each Source - Control Panel ............150 Paper Type Settings - Control Panel ...................
- Page 6 Color Mode Options - Mac ...................... 186 Print Quality Settings - Mac..................... 188 Selecting Print Layout Options - Mac................... 189 Selecting Advanced Settings - Mac ..................... 189 Selecting Roll Paper Settings - Mac .................... 192 Selecting Paper Configuration Settings - Mac ................195 Managing Color - Mac .........................
- Page 7 Checking Ink Cartridge and Maintenance Box Status with Windows........... 263 Checking Cartridge and Maintenance Box Status - Mac ............. 264 Purchase Epson Ink Cartridges and Maintenance Box ..............265 Ink Cartridge and Maintenance Box Part Numbers..............265 Removing and Installing Ink Cartridges.................... 266 Replacing the Maintenance Box.......................
- Page 8 Cleaning the Platen and Borderless Pad Edges................298 Wiping Around the Print Head ......................302 Cleaning the Print Head Cap Area ....................307 Moving or Transporting Your Product....................321 Discharging Ink..........................325 Solving Problems ............................ 327 Checking for Software Updates......................327 Product Status Messages ........................
- Page 9 Overall Print Quality is Poor......................350 Lines Are Misaligned ........................351 Prints are Scuffed or Smeared ....................351 Prints are Wrinkled ........................352 Margins Appear in Borderless Prints ................... 353 Uninstall Your Product Software....................... 353 Uninstalling Product Software - Windows ..................354 Uninstalling Product Software - Mac....................
- Page 10 Default Delay Times for Power Management for Epson Products ..........380 Copyright Attribution ........................381...
-
Page 11: Surecolor P8570D/T7770D Series User's Guide
SureColor P8570D/T7770D Series User's Guide Welcome to the SureColor P8570D/T7770D Series User's Guide. For a printable PDF copy of this guide, click here. -
Page 12: Introduction To Your Printer
Using Power Saving Settings Printer Usage Guidelines Product Features The Epson SureColor P8570D/T7770D Series printers include these special features: High productivity • Print accurate A1/D-size prints in 16 seconds • Print posters, photos, and POP displays at speeds over 300 sq ft/hr, and CAD and technical drawings at speeds over 1400 sq ft/hr •... -
Page 13: Optional Equipment And Replacement Parts (U.s./Canada)
(U.S.) or proimaging.epson.ca (Canada), select your product series and product, and click the Where to Buy button. Or call 800-GO-EPSON (800-463- 7766) in the U.S. or 800-807-7766 in Canada. Option or part Part number Replacement printer cutter blade... -
Page 14: Optional Equipment And Replacement Parts (Latin America)
Plan (SureColor T7770D) Parent topic: Product Features Optional Equipment and Replacement Parts (Latin America) You can purchase genuine Epson ink, paper, and accessories from an Epson authorized reseller. To find the nearest reseller, visit latin.epson.com or call your nearest Epson sales office. -
Page 15: Notations Used In The Documentation
Parent topic: Product Features Notations Used in the Documentation Follow the guidelines in these notations as you read your documentation: • Warnings must be followed carefully to avoid bodily injury. • Cautions must be observed to avoid damage to your equipment. •... -
Page 16: Product Parts - Front
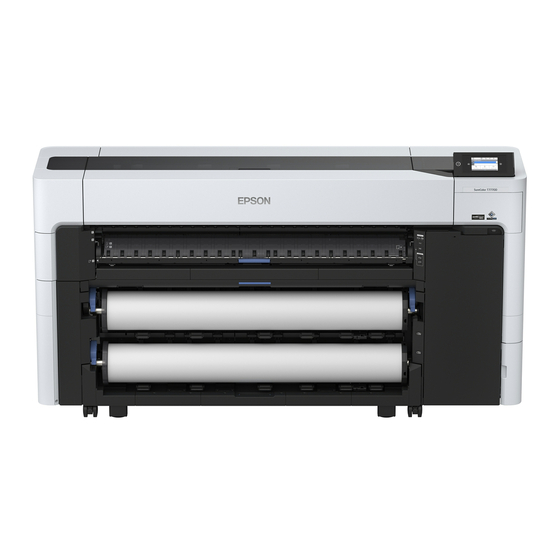
Product Parts - Front Maintenance cover (open to replace auto cutter blade) Paper support (adjust position according to media type; set to top position when replacing borderless maintenance box) Roll 1 (can be used optionally as a take-up reel) Roll 2 Security lock slot (front) USB memory port (print directly from a connected USB memory device) Paper basket... - Page 17 Paper support lock lever Front caster Roll Paper Area Spindle lock lever Paper stop Spindle...
- Page 18 Roll paper core adapter Roll 2 unit lock lever Roll 2 unit Roll 2 eject button Roll 1 eject button Manual take-up button (manually take-up media when Roll 1 is set to automatic take-up) Pause/resume (take-up) button Take-up direction switch (print-side in or print-side out) Borderless maintenance boxes (for borderless printing) Parent topic: Printer Part Locations...
-
Page 19: Product Parts - Inside
Product Parts - Inside Auto cutter blade Print head Drying prevention caps (cover the print head nozzles to prevent them from drying when not printing) Wipers (wipe off ink that is stuck to the surface of the print head nozzles) Suction cap (pulls the optimum amount of ink from the print head nozzles during head cleaning) - Page 20 Ink Compartment Ink cartridge cover Maintenance box cover Maintenance box Ink cartridges Parent topic: Printer Part Locations Related tasks Replacing the Cutter Wiping Around the Print Head Cleaning the Platen and Borderless Pad Edges Cleaning the Print Head Cap Area...
-
Page 21: Product Parts - Back
Product Parts - Back Port cover Ethernet LAN port USB port (for computer connection) Option slot (for optional SSD unit) Adobe Embedded Print Engine DC inlet (connect supplied power cable) Security lock slot (rear) Rear cover Rear paper feed slot (for feeding cut sheet/poster board from the rear) Adjustable feet... -
Page 22: Using The Control Panel
Parent topic: Printer Part Locations Using the Control Panel See these sections to learn about the control panel and select control panel settings. Control Panel Changing the LCD Screen Language Selecting the Date and Time Setting a Password and Locking the Control Panel Parent topic: Introduction to Your Printer Control Panel... - Page 23 LCD Screen Display Note: The home screen varies depending on the printer model and options installed. You can select the icon to toggle between the home screen and the ink level display. Access menu items Displays the printer's status, error messages, and other information Displays roll paper information When roll paper is not loaded, - - - is displayed.
- Page 24 Switches the paper source Select during printing to print the next page from the selected paper source. If there is no paper loaded in either paper source, select to display the Paper Setting screen. Displays the amount of ink remaining in the ink cartridges The abbreviation below each bar indicates the ink color.
- Page 25 Network status icons : No Ethernet connection : Ethernet connection established : No Wi-Fi connection : Wi-Fi network error or the product is searching for a connection : Wi-Fi connection established; the number of bars indicates signal strength : No Wi-Fi Direct connection : Wi-Fi Direct connection established Displays the Maintenance menu Switches the home screen display...
-
Page 26: Changing The Lcd Screen Language
Changing the LCD Screen Language You can change the language used on the LCD screen. 1. Select the home icon, if necessary. 2. Select the icon. 3. Select General Settings > Basic Settings > Language. You see this screen: 4. Select a language. 5. -
Page 27: Setting A Password And Locking The Control Panel
3. Select General Settings > Basic Settings > Date/Time Settings. You see this screen: 4. Select Date/Time. 5. Select the date format you want to use. 6. Use the on-screen keyboard to enter the current date and select OK. 7. Select the time format you want to use. 8. - Page 28 • Certain Maintenance Settings • System Administration settings • Web Config settings • EpsonNet Config settings Note: This setting can be locked by an administrator. If you cannot access or change this setting, contact your administrator for assistance. For more information on administration settings, see the online Administrator's Guide.
-
Page 29: Using Airprint
Note: You can restore the administrator password to the default password by selecting Restore Default Settings on the Admin Password screen and entering the administrator password. If you forget your password, contact Epson for assistance. Parent topic: Using the Control Panel... -
Page 30: Using The Epson Smart Panel Mobile App
Wi-Fi or Wired Networking Using the Epson Smart Panel Mobile App Use this free Apple and Android app to set up and control your Epson product. Epson Smart Panel also lets you check product status. Note: App features may vary depending on your Epson product. -
Page 31: Changing The Power Off Timer Settings
Note: At default settings, your product will enter sleep mode if no operations are performed for 15 minutes. 1. Select the home icon, if necessary. 2. Select the icon. 3. Select General Settings > Basic Settings > Sleep Timer. You see a screen like this: 4. -
Page 32: Printer Usage Guidelines
2. Select the icon. 3. Select General Settings > Basic Settings > Power Off Timer. You see a screen like this: 4. Select a time period between 30minutes and 12h (12 hours). Note: Increasing the time will affect the printer’s energy efficiency. Please consider the environment before making any changes. -
Page 33: Installation Space
Installation Space Make sure that you clear the following amount of space so that you can eject paper and replace consumables as necessary. 72.75 inches 1 - Space between the wall and the printer 2.75 inches (70 mm) (1848 mm) 2 - To replace maintenance box: 2.95 inches (75 mm) 19.64 inches 3 - To open or close the Roll 2 unit: 24.84 inches (631 mm) -
Page 34: Storing Your Printer
• Check to make sure you maintain the specified humidity range, especially in dry areas or air conditioned environments. • Keep the printer out of direct sunlight. • Do not install the printer next to heat sources or directly in the path of exhaust from a ventilator or air conditioner. - Page 35 • Make sure that the print head is in the home position before storing the printer. If it is left away from the home position for a long time, the print quality may decline. Turn the printer on and then off again to move the print head to the home position.
-
Page 36: Wi-Fi Or Wired Networking
Wi-Fi or Wired Networking See these sections to use your product on a Wi-Fi or wired network. Network Security Recommendations Wi-Fi Infrastructure Mode Setup Wi-Fi Direct Mode Setup Wi-Fi Protected Setup (WPS) Printing a Network Status Sheet Printing a Network Connection Report Changing or Updating Network Connections Network Security Recommendations To help deter unauthorized access to your product over a network, you should protect your network... -
Page 37: Wi-Fi Infrastructure Mode Setup
The wireless router or access point can be connected to your computer over a wireless or wired network. Note: You cannot connect to a wired and wireless network at the same time. Epson product Wireless router or access point Computer with a wireless interface... -
Page 38: Selecting Wireless Network Settings From The Control Panel
To install your product on a wireless network, install the necessary software by downloading it from the Epson website. The installer program guides you through network setup. Note: This setting can be locked by an administrator. If you cannot access or change this setting, contact your administrator for assistance. - Page 39 LCD screen and should be able to connect to your product directly from your computer or device, and then print. If you are printing from a computer, make sure you installed the network software from the Epson website. Note: If you don't see the icon, you may have selected the wrong network name or entered the password incorrectly.
-
Page 40: Wi-Fi Direct Mode Setup
You can set up your product to communicate directly with your computer or another device without requiring a wireless router or access point. In Wi-Fi Direct Mode, the product itself acts as a network access point for up to 4 devices. Epson product Computer with a wireless interface Other wireless device... -
Page 41: Wi-Fi Protected Setup (Wps)
LCD screen and should be able to connect to your product directly from your computer or device, and then print. If you are printing from a computer, make sure you installed the network software from the Epson website. Note: If you don't see the icon on the LCD screen, you may have selected the wrong network name or entered the password incorrectly. -
Page 42: Using Wps To Connect To A Network
LCD screen and should be able to connect to your product directly from your computer or device, and then print. If you are printing from a computer, make sure you installed the product software from the Epson website. Note: If you don't see the icon, restart the access point, move it closer to the printer, and repeat these steps to try again. -
Page 43: Printing A Network Connection Report
You see a screen like this: 3. Select Print Status Sheet > Print. Examine the settings shown on the network status sheet to diagnose any problems you have. Parent topic: Wi-Fi or Wired Networking Related tasks Printing a Network Connection Report Printing a Network Connection Report You can print a network connection report to view solutions to any problems you may have using your product on a network. - Page 44 You see a screen like this: 3. Select Connection Check > Print Check Report. 4. Select Print. Examine the error codes and solutions shown on the network connection report. Network Connection Report Codes and Messages Parent topic: Wi-Fi or Wired Networking Related tasks Printing a Network Status Sheet...
-
Page 45: Network Connection Report Codes And Messages
Network Connection Report Codes and Messages Check the error codes and messages on the network connection report to solve problems you may encounter with network connections. The tables here list solutions to problems based on the error codes and messages that may appear on the top of the report. Error code Message Note: Error codes and messages listed here may not all apply to your product. - Page 46 Error code and message Solution E-2, E-3, or E-7 Check the following: No wireless network names (SSID) found. • Make sure your router or access point is turned on, and Confirm that the router/access point is is correctly connected to your computer or network turned on and the wireless network (SSID) device.
- Page 47 Error code and message Solution If the security on your router or access point is not one of the following types, change the type of security on your Security mode (e.g. WEP, WPA) does not router or access point and reset your product's network match the current setting of the printer.
- Page 48 Error code and message Solution Make sure your computer or network device are turned on. Also make sure that you can access the Internet and Confirm the connection and network setup other devices on the same network from the devices you of the PC or other device.
- Page 49 Error code and message Solution E-12 Make sure other devices on the network are turned on and do the following: Confirm the following: • Make sure the IP address, subnet mask, and default -Entered security key/password is correct gateway addresses are correct, if you are entering them -Index of the security key/password is set to manually.
-
Page 50: Changing Or Updating Network Connections
Network Environment Messages Message Solution The Wi-Fi environment needs to be Move your product closer to your router or access point, improved. Turn the wireless router off and and remove any obstacles between them. Then turn off then turn it on. If the connection does not your router or access point, wait about 10 seconds, and improve, see the documentation for the turn it back on again. -
Page 51: Accessing The Web Config Utility
Wi-Fi connection. 1. Disconnect the USB cable from your product. 2. Uninstall your product software. 3. Download and install your product software from the Epson website using the instructions on the Start Here sheet. Parent topic: Changing or Updating Network Connections... -
Page 52: Changing A Wi-Fi Connection To A Wired Network Connection
Changing a Wi-Fi Connection to a Wired Network Connection If you have already connected your product to your computer wirelessly, you can change to a wired network connection if necessary. 1. Select the home icon, if necessary. 2. Select the icon. -
Page 53: Disabling Wi-Fi Features
1. Do one of the following: • Windows: Uninstall your product software. • Mac: Go to the next step. 2. Download and install your product software from the Epson website using the instructions on the Start Here sheet. Parent topic:... -
Page 54: Media Handling
Follow these guidelines as you load media in your product and remove printed media: • Maintain a constant room temperature when using Epson special media; optimal conditions are between 59 °F (15 °C) and 77 °F (25 °C), with 40 to 60% humidity. Changes in temperature and humidity may cause paper to become wavy or curled. - Page 55 • Do not place unwrapped media directly on the floor or press it against your clothing to avoid damaging the media surface. Make sure media is clean from debris and dust before loading. • Load media just before printing on it to avoid creases from the pressure rollers; creases may cause jams or cause the media to rub against the print head.
-
Page 56: Roll Paper Handling
• Typically, prints and photos can fade over time due to the effects of light and various environmental factors. This also applies to Epson special media, however, the degree of color distortion can be minimized by following proper storage procedures. See the documentation supplied with Epson special media for detailed information on handling the paper after printing. - Page 57 4. Lift up to release the paper output tray, then gently pull the tray open and place it into position A (the lowest position) as shown.
- Page 58 Note: Close the paper output flap if it is open. 5. Pull up the lock lever on the roll paper holder. Note: Make sure you pull the lock lever all the way up to unlock it completely.
- Page 59 6. Remove the spindle. 7. Remove the transparent paper stop from the spindle.
- Page 60 8. Do one of the following: • 2-inch roll core: If installed, remove the core adapters from both paper stops. Push the two tabs on each paper stop to remove the adapter.
- Page 61 • 3-inch core: Install the core adapters on both paper stops. Align the triangle marks on the paper stop with the triangle marks on the adapter and push the adapter in until the tabs are secured. 9. Insert the spindle into the roll paper core as shown, with the leading edge of the roll paper facing towards you.
- Page 62 10. Attach the transparent paper stop to the spindle and press it in until there is no gap between the paper stop and the roll paper. 11. Make sure both paper stops are flush against the roll paper. 12. Place the spindle into the grooves on the printer with the black paper stop on the right.
- Page 63 Note: It is important to select the correct media type for each loaded media. Most Epson media will be loaded with the driver installation. If the paper type is not displayed on the control panel or in the printer driver, you can create a custom paper setting using the control panel, Epson Media Installer, or Epson Edge Print.
- Page 64 • If you want to be notified when paper is low, select Remaining Alert and enter an amount. Note: When you enable Remaining Amount Management, the printer prints a barcode on the leading edge of the roll when you remove the roll paper. When you reload the paper, the printer reads the barcode and automatically sets the paper type and amount remaining.
- Page 65 • Insert the leading edge of the paper into the paper feed slot until you hear a sound. 19. A message appears on the LCD screen when your printer is ready to print.
- Page 66 Parent topic: Roll Paper Handling Related references Roll Paper Options - Windows Paper Setting Menu Paper Specifications Available Epson Papers Related tasks Removing Roll 1 Selecting Advanced Settings - Mac Creating Custom Paper Settings Using Epson Media Installer...
-
Page 67: Loading Roll 2
Loading Roll 2 You can load roll paper with a 2- or 3-inch core and a width of 10 to 44 inches (254 to 1118 mm). Load roll paper onto the spindle before loading the roll paper in the printer. 1. - Page 68 4. Lift up to release the paper output tray, then gently pull the tray open and place it into position A (the lowest position) as shown.
- Page 69 Note: Close the paper output flap if it is open. 5. Pull up the lock lever on the roll paper holder. Note: Make sure you pull the lock lever all the way up to unlock it completely.
- Page 70 6. Pull out the Roll 2 unit. 7. Remove the spindle. 8. Remove the transparent paper stop from the spindle.
- Page 71 9. Do one of the following: • 2-inch roll core: If installed, remove the core adapters from both paper stops. Push the two tabs on each paper stop to remove the adapter.
- Page 72 • 3-inch core: Install the core adapters on both paper stops. Align the triangle marks on the paper stop with the triangle marks on the adapter and push the adapter in until the tabs are secured. 10. Insert the spindle into the roll paper core as shown, with the leading edge of the roll paper facing towards you.
- Page 73 11. Attach the transparent paper stop to the spindle and press it in until there is no gap between the paper stop and the roll paper. 12. Make sure both paper stops are flush against the roll paper. 13. Place the spindle into the grooves on the Roll 2 unit with the black end of the spindle on the right, and push the Roll 2 unit in.
- Page 74 Note: It is important to select the correct media type for each loaded media. Most Epson media will be loaded with the driver installation. If the paper type is not displayed on the control panel or in the printer driver, you can create a custom paper setting using the control panel, Epson Media Installer, or Epson Edge Print.
- Page 75 • If you want to be notified when paper is low, select Remaining Alert and enter an amount. Note: When you enable Remaining Amount Management, the printer prints a barcode on the leading edge of the roll when you remove the roll paper. When you reload the paper, the printer reads the barcode and automatically sets the paper type and amount remaining.
- Page 76 • Insert the leading edge of the paper into the paper feed slot until you hear a sound. 20. A message appears on the LCD screen when your printer is ready to print.
- Page 77 Parent topic: Roll Paper Handling Related references Roll Paper Options - Windows Paper Setting Menu Paper Specifications Available Epson Papers Related tasks Removing Roll 2 Selecting Advanced Settings - Mac Creating Custom Paper Settings Using Epson Media Installer...
-
Page 78: Cutting Roll Paper
Cutting Roll Paper The printer has a built-in cutter that can automatically cut most paper types or you can cut your prints manually. When Auto Cut is turned on, paper is automatically cut after each page prints, or if the roll paper leading edge is not straight. -
Page 79: Printing Cutting Guidelines
1. Turn off the Auto Cut setting in the printer driver or the control panel, depending on the situation: • If you want to cut the paper manually, turn off the setting in the printer driver. Select Advanced > Roll Paper Option > Auto Cut. Note: The Auto Cut setting in the printer driver takes priority over the setting in the control panel. -
Page 80: Removing Roll 1
Parent topic: Cutting Roll Paper Removing Roll 1 When you finish printing on roll paper, remove it from the printer to avoid indenting or creasing the paper. Note: If you enabled Remaining Amount Management, the printer prints a barcode on the leading edge of the roll when you remove the roll paper. - Page 81 2. On the LCD screen, select > Paper Setting > Roll 1 > Remove. Note: You can also eject the roll paper by pressing the Roll 1 release button. The printer rewinds the roll paper. Note: If printed paper is not cut and remains loaded in the printer, select >...
- Page 82 3. Pull up the lock lever on the roll paper holder to release it. Note: Make sure you pull the lock lever all the way up to unlock it completely. 4. Lift the roll paper out of the printer to remove it.
- Page 83 5. Remove the transparent paper stop from the spindle. 6. Remove the spindle from the roll paper. 7. Reattach the transparent paper stop to the spindle 8. Place the spindle into the grooves on the printer with the black end of the spindle on the right.
-
Page 84: Removing Roll 2
9. Push down the lock lever on the roll paper holder to lock it in place. 10. Rewind the paper carefully and place it in its original package. Note: Store roll paper on its end or horizontally (if the packaging end-caps are installed). Never store roll paper on its edge, as a flat spot can develop and lead to imaging artifacts on the prints. - Page 85 Caution: Do not pull out the Roll 2 unit while the paper is loaded. Otherwise, the paper may wrinkle when you slide the Roll 2 unit back in. When reinstalling the Roll 2 unit, slowly slide it in while taking-up the paper by hand.
- Page 86 2. On the LCD screen, select > Paper Setting > Roll 2 > Remove. Note: You can also eject the roll paper by pressing the Roll 2 release button. The printer rewinds the roll paper. Note: If printed paper is not cut and remains loaded in the printer, select >...
- Page 87 3. Pull up the lock lever on the roll paper holder to release it. Note: Make sure you pull the lock lever all the way up to unlock it completely. 4. Pull out the Roll 2 unit.
- Page 88 5. Lift the roll paper up to remove it. 6. Remove the transparent paper stop from the spindle. 7. Remove the spindle from the roll paper. 8. Reattach the transparent paper stop to the spindle...
- Page 89 9. Place the spindle into the grooves on the Roll 2 unit with the black end of the spindle on the right. 10. Push down the lock lever on the roll paper holder to lock it in place. 11. Rewind the paper carefully and place it in its original package. Note: Store roll paper on its end or horizontally (if the packaging end-caps are installed).
-
Page 90: Cut Sheet Handling
Cut Sheet Handling You can load a variety of types and sizes of cut sheet paper in your product. Loading Cut Sheets Loading Poster Board Parent topic: Media Handling Loading Cut Sheets You can feed cut sheets from the front or the back of the printer. In both cases, the paper is ejected from the front after printing. - Page 91 3. Lift up to release the paper output tray, then gently pull the tray open and place it into position B (the middle position) as shown.
- Page 92 Note: Close the paper output flap if it is open.
- Page 93 4. Do one of the following: • Feeding from the back of the printer: Align the left edge of the paper with the vertical line on the left side of the rear paper feed slot. Make sure the printable side of the paper is facing up.
- Page 94 Feed the paper straight into the printer as shown. • Feeding from the front of the printer: Align the right edge of the paper with the right side of the front paper feed slot. Make sure the printable side is facing up.
- Page 96 Insert the paper straight into the printer until the trailing edge is above the loading mark on the roll paper cover (the top edge of the ruler).
- Page 97 Note: Make sure the paper passes under the internal rollers as shown. 5. On the LCD screen, select the paper size that matches the loaded paper. If the loaded paper does not match the paper size displayed on the screen, select Paper Size to set the correct size. Note: Store cut sheet media flat in its original packaging.
- Page 98 9. Pull out the paper basket, if necessary. Note: If you are printing on media larger than can fit in the paper basket, do not pull out the paper basket. 10. To remove a cut sheet from the printer, select >...
-
Page 99: Loading Poster Board
Related tasks Removing Roll 1 Removing Roll 2 Creating Custom Paper Settings Using Epson Media Installer Loading Poster Board You can feed poster board from the front or the back of the printer. In both cases, the poster board is... - Page 100 Set the paper feed location from the LCD screen before printing. Select > General Settings > Printer Settings > Paper Source Settings > Cut Sheet/Poster Board Paper Slot, and select Front or Back. Load poster board in portrait orientation (short edge first), otherwise print quality may decline. You can load poster board up to .06 inches (1.5 mm) thick.
- Page 101 3. Lift up to release the paper output tray, then gently pull the tray open and place it into position B (the middle position) as shown.
- Page 102 Note: Close the paper output flap if it is open.
- Page 103 4. Do one of the following: • Feeding from the back of the printer: Align the left edge of the poster board with the vertical line on the left side of the rear paper feed slot. Make sure the printable side is facing up.
- Page 104 Feed the poster board straight into the printer as shown. • Feeding from the front of the printer: Align the right edge of the poster board with the right side of the front paper feed slot. Make sure the printable side is facing up.
- Page 106 Insert the poster board straight into the printer until the trailing edge is above the loading mark on the roll paper cover (the top edge of the ruler).
- Page 107 Note: Make sure the poster board passes under the internal rollers as shown. 5. On the LCD screen, select the paper size that matches the loaded paper. If the loaded paper does not match the paper size displayed on the screen, select Paper Size to set the correct size. Note: Store cut sheet media flat in its original packaging.
- Page 108 9. When loading poster board that is 23.6 inches (600 mm) or longer, pull out the paper basket. The basket can be used as a support to prevent the poster board from bending during printing.
- Page 109 11. Support the ejected media with both hands so that it does not touch the floor, then select OK. Parent topic: Cut Sheet Handling Related references Paper Specifications Paper Specifications Available Epson Papers Related tasks Removing Roll 1 Removing Roll 2 Creating Custom Paper Settings Using Epson Media Installer...
-
Page 110: Creating Custom Paper Settings
Creating Custom Paper Settings You can create and store up to 30 custom paper settings for use in printing on non-Epson paper or paper that is not supported by the Epson printer driver. 1. Load the type of paper that you want to configure in the printer. -
Page 111: Selecting Custom Paper Configurations
Creating Custom Paper Settings Using Epson Media Installer You can use Epson Media Installer to create and store custom paper settings for use in printing on non- Epson paper or paper that is not supported by the Epson printer driver. You create custom paper settings by copying an existing paper setting, renaming it, and assigning an ICC profile. - Page 112 Windows taskbar, or click the up arrow and right-click the printer icon, then selecting Printer Settings. Select the Utility tab and click Epson Media Installer. • Mac: Open the Applications > Epson Software > Epson Utilities folder and double-click Epson Media Installer. 2. Click Media Management, if necessary.
- Page 113 The new Media Type setting is available in your printer driver and on the printer control panel. Note: If the printer driver is uninstalled, paper types previously added using Epson Media Installer may not appear when the driver is reinstalled. To re-register the paper information, open Epson Media Installer, and click Media Management >...
-
Page 114: Edit Media Settings Options
Parent topic: Creating Custom Paper Settings Edit Media Settings Options You can select the following options on the Edit Media Settings screen. Setting Description Media Setting Name Change the media name Media Type Set a paper category and paper type; the new media type can be selected in the printer driver and on the LCD screen Platen Gap Set the distance between the print head and the paper;... -
Page 115: Downloading Epson Media Settings
Creating Custom Paper Settings Using Epson Media Installer Downloading Epson Media Settings You can download new or updated media settings for Epson media using the Epson Media Installer utility. Note: To install media settings on the printer, you must be connected to the printer. -
Page 116: Paper Feed Adjustment
3. Click the name of the media settings you want to download and click Download and Register. The new settings are available in your printer driver and on the printer control panel. Note: See Epson's YouTube page for more information about Epson Media Installer. Parent topic:... -
Page 117: Optimizing The Media Settings (Automatic Adjustment)
Adjusting the Paper Feed Parent topic: Media Handling Related concepts Print Head Nozzle Check Optimizing the Media Settings (Automatic Adjustment) You can perform an automatic feed adjustment from the product control panel. Make sure the length of the loaded media is at least 22 inches (558 mm) and the width is 15 inches (388 mm) or wider. Note: You may not be able to perform automatic adjustment depending on the media you are using. -
Page 118: About The Auto Take-Up Function
About the Auto Take-up Function The auto take-up function automatically rolls up printed media as you print. You can use Roll 1 as a take- up unit for media with the printable side in (on the right) or printable side out (on the left). It is best to do the following when using the auto take-up function: •... - Page 119 5. Lift up to release the paper output tray, then gently pull the tray open and place it into position A (the lowest position) as shown.
- Page 120 6. Open the paper output flap.
- Page 121 7. Move the paper output tray into position B (the middle position) as shown.
- Page 122 8. Pull up the lock lever on the Roll 1 spindle. Note: Make sure you pull the lock lever all the way up to unlock it completely. 9. Remove the spindle.
- Page 123 10. Remove the transparent paper stop from the spindle.
- Page 124 11. Remove the rim of the paper stop from the end of the spindle.
- Page 125 12. Do one of the following: • 2-inch roll core: If installed, remove the core adapters from both paper stops. Push the two tabs on each paper stop to remove the adapter. • 3-inch core: Install the core adapters on both paper stops. Align the triangle marks on the paper stop with the triangle marks on the adapter and push the adapter in until the tabs are secured.
- Page 126 13. Insert the spindle into the roll core as shown. 14. Attach the transparent paper stop to the spindle so that the gap between the paper stop and the roll core is approximately 0.4 inches (10 mm).
- Page 127 15. Place the spindle into the grooves on the printer with the black paper stop on the right. 16. Push down the lock lever on the Roll 1 spindle to lock it in place.
- Page 128 17. Press the pause/resume button. 18. Use the take-up direction switch to select either printed side in (right) or printed side out (left), then press the pause/resume button again. 19. Select the paper information area on the LCD screen and select Feed to Take-up Position to position the paper so that it can be attached to the take-up roll.
- Page 129 21. Cut the leading edge of the paper as shown.
- Page 130 22. Confirm the take-up direction and tape the edge of the media to the center of the core as shown. • Printed side out • Printed side in...
-
Page 131: Removing The Auto Take-Up Media
23. Select and hold Forward on the control panel to feed the roll paper about one revolution of the take- up roll core. 24. Press and hold the Manual take-up button to wind the roll paper once around the roll core. 25. - Page 132 2. Cut the media and press the Manual take-up button to roll the cut end onto the take-up roll. 3. Pull up the lock lever on the Roll 1 spindle. Note: Make sure you pull the lock lever all the way up to unlock it completely.
- Page 133 4. Remove the spindle. 5. Remove the transparent paper stop from the spindle. 6. Slide the taken-up media off of the spindle.
- Page 134 7. Re-attach the rim of the paper stop to the end of the spindle. 8. Re-attach the transparent paper stop to the spindle. 9. Place the spindle into the grooves on the printer with the black paper stop on the right.
-
Page 135: Available Epson Papers
(U.S.) or proimaging.epson.ca (Canada), select your product series and product, and click the Where to Buy button. Or call 800-GO-EPSON (800-463- 7766) in the U.S. or 800-807-7766 in Canada. Note: For the most updated list of supported Epson papers, visit proimaging.epson.com... - Page 136 Note: Paper/media availability varies by country. Roll Paper Paper Type Size Part number Amount Epson Cold Press Bright 17 inches (432 mm) × 50 feet S042313 1 roll (15.2 m) 24 inches (610 mm) × 50 feet S042314 1 roll (15.3 m)
- Page 137 1 roll (30.5 m) 44 inches (1118 mm) × 100 feet S045588 1 roll (30.5 m) Epson Metallic Photo Paper Luster 16 inches (406 mm) × 100 feet S045592 1 roll (30.5 m) 24 inches (610 mm) × 100 feet S045593 1 roll (30.5 m)
- Page 138 Paper Type Size Part number Amount Epson Proofing Paper White 13 inches (300 mm) × 100 feet S042002 1 roll Semimatte (30.5 m) 17 inches (432 mm) × 100 feet S042003 1 roll (30.5 m) 24 inches (610 mm) × 100 feet...
- Page 139 Paper Type Size Part number Amount Epson Ultra Premium Photo Paper 13 inches (330 mm) × 32.8 feet S041409 1 roll Luster (10 m) Epson Exhibition Canvas Matte 13 inches (330 mm) × 20 feet S045255 1 roll (6.1 m) 17 inches (432 mm) ×...
- Page 140 Paper Type Size Part number Amount Epson Exhibition Canvas Gloss 13 inches (330 mm) × 20 feet S045241 1 roll (6.1 m) 17 inches (432 mm) × 40 feet S045242 1 roll (12.2 m) 24 inches (610 mm) × 40 feet...
- Page 141 Paper Type Size Part number Amount Epson Premium Semigloss Photo 24 inches (610 mm) × 100 feet S041393 1 roll Paper (170) (30.5 m) 36 inches (914 mm) × 100 feet S041394 1 roll (30.5 m) 44 inches (1118 mm) × 100 feet...
- Page 142 Paper Type Size Part number Amount Epson Singleweight Matte Paper 17 inches (432 mm) × 132 feet S041746 1 roll (40.2 m) 24 inches (610 mm) × 132 feet S041853 1 roll (40.2 m) 36 inches (914 mm) × 132 feet...
- Page 143 1 roll (15.3 m) 44 inches (1118 mm) × 50 feet S450090 1 roll (15.3 m) Epson Legacy Baryta II 17 inches (432 mm) × 50 feet S450094 1 roll (15.2 m) 24 inches (610 mm) × 50 feet S450095 1 roll (15.3 m)
- Page 144 13 × 19 inches (330 × 483 mm) S045590 17 × 22 inches (432 × 559 mm) S045591 Epson Metallic Photo Paper Luster Letter (8.5 × 11 inches S045516 [216 × 279 mm]) 13 × 19 inches (330 × 483 mm) S045517 17 ×...
- Page 145 Paper Type Size Part number Sheet Count Epson Photo Paper Glossy Letter (8.5 × 11 inches S041649 [216 × 279 mm]) 11 × 17 inches (279 × 432 mm) S041156 13 × 19 inches (330 × 483 mm) S041143 Letter (8.5 × 11 inches S041271 [216 ×...
- Page 146 Paper Type Size Part number Sheet Count Epson Premium Photo Paper Letter (8.5 × 11 inches S041331 Semi-gloss [216 × 279 mm]) 13 × 19 inches (330 × 483 mm) S041327 8 × 10 inches (203 × 254 mm) S041467 Letter (8.5 ×...
- Page 147 17 × 22 inches (432 × 559 mm) S041908 13 × 19 inches (330 × 483 mm) S041339 Epson UltraSmooth Fine Art Paper 13 × 19 inches (330 × 483 mm) S041896 17 × 22 inches (432 × 559 mm) S041897 Epson Watercolor Paper Radiant 13 ×...
-
Page 148: Borderless Paper Type Compatibility
Examples of Borderless Paper Types • Epson Singleweight Matte Paper • Epson Doubleweight Matte Paper • Epson Premium Glossy Photo Paper (250) • Epson Premium Semigloss Photo Paper (170) • Epson Premium Glossy Photo Paper (170) • Epson Premium Semimatte Photo Paper (250) •... -
Page 149: Paper Or Media Type Settings - Printing Software
Doubleweight Matte Paper Epson Premium Presentation Paper Matte Enhanced Matte Paper Archival Matte Paper Epson High Quality Ink Jet Paper Photo Quality Ink Jet Paper Epson Premium Glossy Photo Paper (170) Premium Glossy Photo Paper (170) Epson Premium Semigloss Photo Paper (170) -
Page 150: Selecting The Paper Settings For Each Source - Control Panel
For this paper Select this Paper Type or Media Type setting Epson Premium Photo Paper Semi-gloss Premium Semigloss Photo Paper Epson Premium Luster Photo Paper (260) Premium Luster Photo Paper (260) Epson Ultra Premium Photo Paper Luster Photo paper (generic) -
Page 151: Paper Type Settings - Control Panel
You see a screen like this: 3. Select the paper source you want to select settings for, then select the following settings depending on your paper source selection: • Roll 1/Roll 2: Select Change Paper Type > Paper Type and select the type of paper you loaded, then select Paper Width and select the width of the loaded paper. - Page 152 Paper type loaded Paper Type setting Epson Doubleweight Matte Paper Doubleweight Matte Epson Premium Photo Paper Glossy Premium Glossy Sheet Photo Paper Epson Premium Presentation Paper Matte Matte Paper Tracing paper/vellum paper Polyester banner (generic) Heavyweight Polyester Enhanced Adhesive Synthetic Paper Enhanced Adhesive Syn.
-
Page 153: Printing From A Computer
You can print with your product using any Windows application, as described in these sections. Note: If you are using your Epson product with the Windows 10 S operating system, you cannot use the software described in this section. You also cannot download and install any Epson product software from the Epson website for use with Windows 10 S;... -
Page 154: Selecting Basic Print Settings - Windows
Parent topic: Printing from a Computer Selecting Basic Print Settings - Windows Select the basic settings for the document you want to print. 1. Open a document for printing. 2. Select the print command in your application. Note: You may need to select a print icon on your screen, the Print option in the File menu, or another command. - Page 155 SureColor P8570D...
- Page 156 SureColor T7770D 4. Select the Current Settings option. 5. Click Settings to select the Document Size setting that matches the size of the digital document you are printing. Note: The Document Size should be set before selecting an Output Size. 6.
- Page 157 7. If you want your printout to be a different size than the selected document size, select the Output Size setting. Make sure to select a paper size that is larger than the selected document size or enlargement setting. Note: Select Custom Paper Size to set a user-defined output size. 8.
-
Page 158: Document Size Options - Windows
Note: If you deselect the Simple Settings checkbox, available options depend on the selected Select Target setting. To choose a setting for each option, select Custom as the Select Target setting. 13. To see a preview of how your document will print, select Print Preview. (The preview appears after you click Print but before printing starts.) 14. -
Page 159: Paper Source Options - Windows
Paper Source Options - Windows You can select any of the available options in the Source menu to print on the paper loaded in that source. Roll Auto Selects the appropriate roll for printing. Roll 1 Selects roll paper loaded in Roll 1. Roll 2 Selects roll paper loaded in Roll 2. - Page 160 EPSON Standard (sRGB) Optimizes the sRGB space. Adobe RGB Optimizes the Adobe RGB space. Business Graphics Performs color correction to optimize your images based on the sRGB space (SureColor T7770D only). Line Drawing Optimizes color correction for line drawings by processing the border between lines and the background as discontinuous.
-
Page 161: Print Quality Options - Windows
Click Settings to open the Color Controls window, where you can specify values for adjusting brightness, contrast, saturation, and individual Cyan, Magenta, and Yellow color tones. You can choose from two Gamma settings, and use either a color circle or slide bar to adjust color. Parent topic: Selecting Basic Print Settings - Windows Print Quality Options - Windows... - Page 162 Fine For text and graphics with good quality and print speed. High For photos and graphics with high print quality. Quality Select to prioritize print quality over print speed. Max Quality Select to use the maximum print quality; print speed may be slower. Parent topic: Selecting Basic Print Settings - Windows...
-
Page 163: Using Layout Manager - Windows
Using Layout Manager - Windows Layout Manager lets you include multiple pieces of print data created in different applications onto one sheet of paper for printing. - Page 164 You can also place the same print data multiple times as shown here.
- Page 165 You can place print data in different sizes and orientations to maximize media usage, as shown here.
- Page 166 You can place print data on roll paper as shown here. 1. Open the file you want to print in your application. 2. Select the print command in your application. 3. Select the Layout Manager checkbox on the Printer Settings tab. 4.
- Page 167 6. Leave the Layout Manager screen open and repeat steps 1 to 4 to arrange additional print data. The pages are added to the Layout Manager screen. 7. Do the following to arrange objects on the Layout Manager screen: • Drag pages to move and resize them. •...
-
Page 168: Selecting Print Layout Options - Windows
Selecting Print Layout Options - Windows You can select a variety of layout options for your document on the Layout tab. • To select multiple copies and their print order, select the Copies, Collate, and Reverse Order options. • To print multiple pages on one sheet of paper, or print one image on multiple sheets of paper, select the Page Layout checkbox and select the option you want. -
Page 169: Selecting Advanced Settings - Windows
Folded Double-Side Prints two consecutive pages on one sheet of paper. The second page is flipped and printed next to the first page, allowing the sheet to be folded to make a 2-sided document. Click Settings to select a binding edge option and set margins. N-up Prints 2 (2-up) or 4 (4-up) pages on one sheet of paper. -
Page 170: Roll Paper Options - Windows
• To create or edit custom printing settings, select Custom Settings. • To control how roll paper is cut after printing, select an Auto Cut option. Select other roll paper options as necessary. • To adjust the ink saturation level, click Advanced Media Control and adjust the settings as necessary. - Page 171 • Single Cut: Prints images end-to-end with no gap between them. Borderless images may overlap slightly. • Double Cut: Increases the space between each image and trims each print individually, providing the cleanest edge for borderless printing. Auto Rotate Automatically positions the image or print data to fit the roll paper. Print Page Line Prints lines between pages as a guide for manual cutting.
-
Page 172: Selecting Additional Settings - Windows
• Click Print Head Cleaning to clean the print head if you notice banding or gaps in your printouts. • Click Epson Status Monitor 3 to check the printer's status. • Click Monitoring Preferences to select the error notifications displayed on the Epson Status Monitor 3 screen, or add a shortcut to the utility in the Windows taskbar. -
Page 173: Saving, Sharing, And Customizing The Printer Settings
• Click Epson Media Installer if the media type you want to use is not displayed on the control panel or in the driver; you can add media information from the Internet. • Select a Language option for the language you want to use for the printer software screens. - Page 174 You see a window like this: 3. Verify that your settings are correct, enter a name for the group of settings in the Name field, and click Save. 4. Do the following as necessary: • If you need to delete a group of settings you have created, select the name of the group of settings from the list and click Delete.
-
Page 175: Printing Your Document Or Photo - Windows
Printing Your Document or Photo - Windows Printing Your Document or Photo - Windows Once you have selected your print settings, you are ready to save your settings and print. 1. Click OK to save your settings. You see your application's Print window, such as this one: 2. -
Page 176: Checking Print Status - Windows
Checking Print Status - Windows During printing, you see this window showing the progress of your print job. It allows you to control printing and check ink cartridge status. • To cancel printing, click Cancel. • To see print jobs waiting to print, click Print Queue. •... -
Page 177: Changing The Language Of The Printer Software Screens
You see the printer settings window: 3. Select the print settings you want to use as defaults in all your Windows programs. 4. Click OK. These settings are now the defaults selected for printing. You can still change them as needed for printing in any program session. -
Page 178: Changing Automatic Update Options
2. Select Printer Settings. You see the printer settings window. 3. Click the Utility tab. You see these options: 4. Select the language you want to use as the Language setting. 5. Click OK to close the printer software window. The printer software screens appear in the language you selected the next time you access them. -
Page 179: Printing On A Mac
You can print with your product using any Mac printing program, as described in these sections. Note: If you have an Internet connection, it is a good idea to check for updates to your product software on Epson's support website or using Epson Software Updater. Selecting Basic Print Settings - Mac... -
Page 180: Selecting Basic Print Settings - Mac
Selecting Paper Configuration Settings - Mac Managing Color - Mac Sizing Printed Images - Mac Selecting Printing Preferences - Mac Printing Your Document or Photo - Mac Parent topic: Printing from a Computer Selecting Basic Print Settings - Mac Select the basic settings for the document you want to print. Note: Some screens may look different, depending on the Mac OS version you are using. - Page 181 You see the expanded printer settings window for your product: 5. Select the Copies and Pages settings as necessary. Note: If you do not see these settings in the print window, check for them in your application before printing. They may be accessible by selecting Page Setup from the File menu. 6.
- Page 182 For each paper size, there are three entries in the list. In most cases, select the paper size as usual. If you wish to print a banner using banner printing software or print the image at full size without any adjustment for margins, select a paper size with (Roll Paper Banner) or (Retain Scale) in the name, such as A2 (Roll Paper Banner).
- Page 183 You see a screen like this: Note: Depending on the Mac OS version you are using, you may not see a Printer Settings option. If not, select Printer Features from the pop-up menu and scroll down to view all of the driver options.
- Page 184 9. If Roll Switching is set to Auto when the printer driver is opened, the screen will show the settings for the roll paper currently in use. Change the paper, if desired. Note: Click Acquire Info to refresh the settings if you loaded or changed paper after opening the print window.
-
Page 185: Paper Size Options - Mac
• High Speed: select for Bi-Directional printing • Emphasize Thin Lines: select to smooth out jagged edges in low-resolution images Note: The Emphasize Thin Lines setting may reduce print speed, especially if the printer is connected wirelessly. If you enable this setting, use a wired connection. Note: Available options depend on the selected Select Target setting. -
Page 186: Paper Source Options - Mac
Note: If you want to select Retain Scale of Document or Banner, but they are not available, check the Paper Size list and select a paper size that has (Retain Scale) or (Roll Paper Banner) included in the paper name. For example, to print a banner on A2-width paper, select A2 (Roll Paper Banner) as the Paper Size setting. - Page 187 EPSON Standard (sRGB) Optimizes the output to mimic sRGB (best if sRGB is the source color space). Adobe RGB Optimizes the output to mimic Adobe RGB (best if sRGB is the source color space). Business Graphics Performs color correction to optimize your images based on the sRGB space (SureColor T7770D only).
-
Page 188: Print Quality Settings - Mac
Click Settings to open the Color Controls window, where you can specify values for adjusting brightness, contrast, saturation, and individual Cyan, Magenta, and Yellow color tones. You can choose from two Gamma settings, and use either a color circle or slide bar to adjust color. Parent topic: Selecting Basic Print Settings - Mac Print Quality Settings - Mac... -
Page 189: Selecting Print Layout Options - Mac
Parent topic: Selecting Basic Print Settings - Mac Selecting Print Layout Options - Mac You can select a variety of layout options by selecting Layout from the pop-up menu on the print window. • To print multiple pages on one sheet of paper, select the number of pages in the Pages per Sheet pop-up menu. - Page 190 You see this window: Note: Some settings may not be available, depending on the selected paper source and the Roll Paper option you selected for your paper size. 2. Select one of the following Auto Cut settings: • Off: Select this option to cut your prints manually. •...
- Page 191 • Single Cut: Prints images end-to-end with no gap between them. Borderless images may overlap slightly. • Double Cut: Increases the space between each image and trims each print individually, providing the cleanest edge for borderless printing. 3. Select the following settings as necessary: •...
-
Page 192: Selecting Roll Paper Settings - Mac
5. Select Expansion to adjust the amount of image expansion when printing borderless images. Note: This option is available only when you choose a Paper Size setting with a Borderless option. Parent topic: Printing on a Mac Selecting Roll Paper Settings - Mac To print on roll paper, you select the roll paper size and roll paper options from the Printer Settings menu. - Page 193 You see this window: Note: Some settings may not be available, depending on the Roll Paper option you selected for your Paper Size. 9. Select one of the following Auto Cut Settings: • Off: Select this option to cut your prints manually. •...
- Page 194 • Single Cut: Prints images end-to-end with no gap between them. Borderless images may overlap slightly. • Double Cut: Increases the space between each image and trims each print individually, providing the cleanest edge for borderless printing. 10. Select the following settings as necessary: •...
-
Page 195: Selecting Paper Configuration Settings - Mac
Printing on a Mac Selecting Paper Configuration Settings - Mac If you are using non-Epson media and need to fine-tune its print quality, select Advanced Media Control from the pop-up menu. Select the available options as necessary. Note: Before adjusting the Advanced Media Control settings, select the Media Type setting that is closest to the paper you are using. -
Page 196: Color Matching Options - Mac
Prints using standard color profiles for your product and paper to help match image colors. You can customize the conversion method and filter settings on the ColorSync pop-up menu in the print window. EPSON Color Controls Lets you manage color using controls in your printer driver or turn off color management. Parent topic:... -
Page 197: Sizing Printed Images - Mac
Sizing Printed Images - Mac You can adjust the size of the image as you print it by selecting Paper Handling from the pop-up menu on the Print window. • To collate multiple copies into sets of documents, select the Collate pages checkbox. •... -
Page 198: Printing Preferences - Mac
You see a screen like this: 4. Select any of the available printing options. 5. Click OK. Printing Preferences - Mac Parent topic: Printing on a Mac Printing Preferences - Mac You can select from these settings on the Options tab. Acquire printer information automatically Ensures that the paper size and paper type settings are automatically updated if paper is loaded or changed after closing the print window. -
Page 199: Printing Your Document Or Photo - Mac
Establish bidirectional communication Allows the product to communicate with the computer. Do not change the default setting unless you experience issues when using a shared printing pool. Default media type Select the Media Type that you want to use as the default in the printer driver. Parent topic: Selecting Printing Preferences - Mac Printing Your Document or Photo - Mac... -
Page 200: Checking Print Status - Mac
Checking Print Status - Mac Parent topic: Printing on a Mac Checking Print Status - Mac During printing, you can view the progress of your print job, control printing, and check ink status. 1. Click the printer icon when it appears in the Dock. You see the print status window: 2. -
Page 201: Printing Cad Drawings
Printing CAD Drawings Your product can print CAD drawings from CAD software applications. You can print them using the CAD/Line Drawing mode in the printer driver or change settings in the product to emulate HP-GL/2 or HP RTL modes. The product automatically switches between normal printing and HP-GL/2 or HP RTL emulation printing based on the print data it receives. - Page 202 8. Do one of the following: • SureColor P8570D: For Print Quality, select Select Target > Standard. Select Color, Black, or Black (Bi-Level) as the Print Mode setting.
-
Page 203: Printing Cad Drawings In Hp-Gl/2 Or Hp Rtl Mode
• SureColor T7770D: For Print Quality, select Select Target, and then select CAD/Line Drawing - Black, CAD/Line Drawing - Color, or CAD/Line Drawing - Bi-Level. Note: Available settings depend on the selected media type. 9. Select any other printing settings as necessary and click OK. 10. - Page 204 1. On the LCD screen, select > General Settings > Printer Settings > Universal Print Settings. You see this screen: 2. Make sure the Paper Source setting is set to Roll Paper. Note: If roll paper is not selected when HP-GL2 or HP RTL print data is sent, an error occurs. 3.
-
Page 205: Printing From A Shared Folder
You see this screen: 6. Change the settings as necessary. 7. Select the left arrow to return to the previous screen. 8. Select Printing Language. • If you are printing over USB, select USB and change the Printing Language setting to HP-GL/2. •... -
Page 206: Setting Up A Shared Folder From The Control Panel
1. On the LCD screen, select Network Folder. The files in the shared folder appear. 2. Select a single file to print. 3. Change the settings as necessary. 4. Select Print. You can print the following file types from a shared folder: •... -
Page 207: Setting Up A Shared Folder Using Web Config
1. On the LCD screen, select > General Settings > Network Settings > Advanced > Shared Folder. You see this screen: 2. Enter the following information about the shared folder: • Folder Name: Enter the network path to the shared folder. You are limited to 255 characters. •... -
Page 208: Printing From A Web Browser
You see this screen: 3. Enter the following information about the shared folder: • Print from Folder: Select Enable. • Folder Name: Enter the network path to the shared folder. You are limited to 255 characters. • User Name: Enter a user name for the computer. •... -
Page 209: Switching The Roll Paper For Printing
You see this screen: 4. Select your print settings from the basic and advanced settings tab. Note: As soon as you select a file to print, printing will begin. Make sure you select all necessary settings before selecting a file. 5. -
Page 210: Switching Rolls According To Paper Type
Switching Rolls According to Paper Type If you frequently use different paper types for different purposes, such as printing drawings for review on plain paper and printing drawings for submission on colored paper, you can set the printer to automatically switch to the roll that has the same paper type as the print job. 1. - Page 211 • Mac: Select Printer Settings from the dropdown menu on the Print screen, then select Auto as the Roll Switch setting.
- Page 212 5. Choose from the following to select the paper type: • Windows: Select the paper type you want to print on in Media Category > Paper Type.
-
Page 213: Switching Rolls According To Page Size
• Mac: Select the paper type you want to print on in Media Type. 6. Select other settings as necessary, then print. The printer will automatically switch to the roll that has the same paper type as the print job. Parent topic: Switching the Roll Paper for Printing Related tasks... - Page 214 3. Choose from the following: • Select Optimize Margins to print on the roll paper with smaller margins. • Select Width Match to print on the roll paper with the same paper width as the print job. Note: Select Disable to print regardless of the paper width. 4.
- Page 215 • Mac: Select Printer Settings from the dropdown menu on the Print screen, then select Auto as the Roll Switch setting.
- Page 216 5. Choose from the following: • Windows: Select Document Size > Settings > Page Size and set the paper size set in the software.
-
Page 217: Switching Rolls When Paper Runs Out
• Mac: Select the paper size you want to print on in Paper Size. 6. Select other settings as necessary, then print. The printer will automatically switch to the roll that has the same paper size as the print job. Parent topic: Switching the Roll Paper for Printing Related tasks... - Page 218 2. Select > General Settings > Printer Settings > Paper Source Settings > Roll Paper Setup > Roll Switching > Auto > Paper Length from the printer’s control panel. 3. Select Remaining Amount Priority. Note: To prevent the roll paper from being switched during printing, select Data Length Priority, and select the remaining roll paper management settings before printing.
- Page 219 • Mac: Select Printer Settings from the dropdown menu on the Print screen, then select Auto as the Roll Switch setting. 5. Select other settings as necessary, then print. Printing starts from the roll with the least amount of paper remaining. When the paper runs out, the printer automatically switches the roll paper to continue printing.
-
Page 220: Printing From A Usb Memory Device
Printing from a USB Memory Device You can save JPG, TIFF, HP-GL/2, or PDF files on a USB memory device and then connect the device to the printer for printing. USB Memory Device Requirements Connecting and Printing from a USB Memory Device USB Memory Device Requirements Make sure your USB memory device meets these requirements. -
Page 221: Memory Device Settings Menu
2. Press the home button, if necessary. 3. Select Memory Device. 4. Select the menu option that matches the format of the file you want to print. 5. Do one of the following to select a single image to print: •... - Page 222 Setting Options Description Paper Source Roll 1 Selects the paper source Roll 2 Cut Sheet Poster Board Color Mode B&W Selects the color mode to use when printing Color Advanced Setting Options Description Quality Standard Specifies the print quality Speed Fine Super Fine Page Margins option...
- Page 223 Setting Options Description Color Mode Poster(Photo)/Perspect Prints posters and perspective drawings that use photos with natural colors Poster/Document Prints posters with both text and illustrations with vivid colors Performs color correction when printing topographical maps CAD/Line Drawing Perform color correction when printing CAD drawings and other line drawings Off (No Color Turns off color management in the printer...
-
Page 224: Using The Control Panel Menus
Using the Control Panel Menus Follow the instructions in these sections to access the printer menu system and select settings. Accessing the Printer's Menus Paper Setting Menu Basic Settings Menu Printer Settings Menu Network Settings Menu Storage Settings Menu System Administration Menu Maintenance Menu Printer Status Menu Accessing the Printer's Menus... - Page 225 Roll 1 menu Setting Options Description Remove — Rewinds the loaded roll paper until it is ejected from the paper feeder; information on how to remove the roll paper is displayed on the LCD screen Feed/Cut Paper Backward Moves the paper backward or forward, or cuts it using the built-in cutter Forward...
- Page 226 Setting Options Description Print Adjustments Automatic Adjustment Select Standard to automatically adjust the paper feed and alignment settings Select Details if standard adjustment results are not satisfactory, or if you want to customize the setting based on specific printing needs Paper Feed Adjust Select Auto to automatically adjust the paper feed settings...
- Page 227 Setting Options Description Advanced Paper Settings Various options See the Advanced Paper Settings table below Remaining Amount Remaining Amount Select On to display and record the amount of Management Management remaining roll paper Remaining Amount Select the amount of roll paper remaining Remaining Alert Select the amount of remaining roll paper before a warning is displayed...
- Page 228 Auto Select to control the paper ejection roller; select Auto to use the roller automatically depending on the type of Epson paper; select Do Not Use Use to always use the roller to eject paper; select Do Not Use when you are concerned...
- Page 229 Caution: If the Paper Size Check setting is set to Off, the printer may print beyond the edges of the paper, causing ink to get on the printer. Roll 2 menu Setting Options Description Remove — Rewinds the loaded roll paper until it is ejected from the paper feeder;...
- Page 230 Setting Options Description Print Adjustments Automatic Adjustment Select Standard to automatically adjust the paper feed and alignment settings Select Details if standard adjustment results are not satisfactory, or if you want to customize the setting based on specific printing needs Paper Feed Adjust Select Auto to automatically adjust the paper feed settings.
- Page 231 Setting Options Description Advanced Paper Settings Various options See the Advanced Paper Settings table below Remaining Amount Remaining Amount Select On to display and record the amount of Management Management remaining roll paper Remaining Amount Select the amount of roll paper remaining Remaining Alert Select the amount of remaining roll paper before a warning is displayed...
- Page 232 Auto Select to control the paper ejection roller; select Auto to use the roller automatically depending on the type of Epson paper; select Do Not Use Use to always use the roller to eject paper; select Do Not Use when you are concerned...
- Page 233 Caution: If the Paper Size Check setting is set to Off, the printer may print beyond the edges of the paper, causing ink to get on the printer. Cut Sheet menu Setting Options Description Remove — Ejects cut sheets; information on how to remove the cut sheets is displayed on the LCD screen...
- Page 234 Setting Options Description Print Adjustments Automatic Adjustment Select Standard to automatically adjust the paper feed and alignment settings Select Details if standard adjustment results are not satisfactory, or if you want to customize the setting based on specific printing needs Paper Feed Adjust Select Auto to automatically adjust the paper feed settings...
- Page 235 Setting Options Description Advanced Paper Settings Various options See the Advanced Paper Settings table below Change Paper Type/Paper Paper Type Select a paper category and paper type Size Paper Width Select the width of the loaded paper, or select User-Defined if the width is not listed Advanced Paper Settings menu [in the Cut Sheet menu] Setting Options...
- Page 236 Auto Select to control the paper ejection roller; select Auto to use the roller automatically depending on the type of Epson paper; select Do Not Use Use to always use the roller to eject paper; select Do Not Use when you are concerned...
- Page 237 Setting Options Description Print Adjustments Paper Feed Adjust Select Manual and select an adjustment setting from the following: • Select Quality First to print adjustment patterns to adjust the feed for image quality • Select Length Accuracy First if you are printing images that require more precise dimensions and length, such as CAD files Ruled Line Alignment...
-
Page 238: Basic Settings Menu
Setting Options Description Paper Size Check Select On to detect the paper width when paper is loaded Select Off if a paper setting error occurs when paper is correctly loaded Paper Feed Offset –1.0 to 1.50 Select the amount of offset necessary to reduce banding on uneven color in printouts;... - Page 239 Setting Options Description Sounds Button Press Adjusts the volume of control panel sounds Paper Set Adjusts the volume of load paper alerts Completion Notice Adjusts the volume of print completion notification Error Tone Adjusts the volume of error notifications Sound Type Adjusts the type of control panel sounds Inside Light...
-
Page 240: Printer Settings Menu
Setting Options Description Print Screen Professional Switches the Home screen mode Simple Operation Time Out Select On to return to the Home screen after a few minutes of inactivity Length Unit Selects the unit of length displayed on the LCD screen ft/in Default Screen (Job/Status) Job Status... - Page 241 Setting Options Description Auto Cleaning Select the option to automatically perform a print head check and cleaning when the printer turns on and before printing Select Standard to set a normal automatic cleaning, or Custom to set the timing and frequency of automatic cleaning from the following options: •...
- Page 242 Setting Options Description Memory Device Interface Enable Select whether to Enable or Disable use of a memory device Disable Thick Paper Select On to widen the platen gap to prevent scuffing if you are printing on thick paper Bidirectional Select On if you want the print head to move left and right during printing Select Off to decrease misalignment of ruled lines, but slow down printing...
- Page 243 Setting Options Description Roll Paper Setup Auto Loading Automatically feeds roll paper into the printer Roll 1 Function Select Take-up to use Roll 1 for take-up, otherwise select Advance Roll Switching Select Auto to automatically switch to the appropriate roll paper for a print job. You can select settings for switching according to Paper Type, Paper Width, or Paper Length.
- Page 244 Setting Options Description Cut Settings Auto Cut Automatically cuts the roll paper after printing Print Cutting Guideline Select On to print cut lines on roll paper (if Auto Cut is turned off) Wait for Cut Between Select On to pause before cutting pages after Pages printing Cut for Borderless Print Select Two Cuts to insert a margin and cut...
- Page 245 Setting Options Description Platen Gap Offset Standard Adjusts the distance between the print head and the paper Wide Wider Widest Cut Sheet/ Poster Board Front Select a location for loading cut sheets or Slot poster board Back Custom Paper Setting You can select individual paper settings for each registered custom paper setting (01 to 30).
- Page 246 Setting Options Description Platen Gap Auto Select the distance between the print head and the paper; displayed when using a custom paper type Top Margin 3 mm Select the margin for the leading edge of the printed image 15 mm Depending on the paper type and printing 20 mm environment, colors may be uneven near the...
- Page 247 Setting Options Description Paper Feed Offset –1.0 to 1.50% Select the amount of offset necessary to reduce banding on uneven color in printouts; displayed when using a custom paper type. Delete — Deletes the registered custom paper setting Universal Print Settings Adjust these settings as necessary when printing in HP-GL/2 or HP RTL mode, or when using AirPrint.
- Page 248 Setting Options Description Page Margins option Clip By Margins Adds the page margin value inside the hard clip area of the PS command of the data, or the size selected for the Base Output Size. Any print object in the margin area is clipped and not printed.
- Page 249 Setting Options Description Select Target Poster(Photo)/Perspective Select desired settings (SureColor P8570D only) Poster/Document (SureColor T7770D only) CAD/Line Drawing Off (No Color Management) Save To Optional storage Print And Save Select settings for the optional SSD Unit unit Print Only Save Only HP-GL/2 Unique Settings Adjust these settings as necessary when printing in HP-GL/2 or HP RTL mode.
- Page 250 Setting Options Description Select Target Poster(Photo)/Perspective Select desired settings (SureColor P8570D only) Poster/Document (SureColor T7770D only) CAD/Line Drawing Off (No Color Management) Select Palette Software Print according to the pen configurations set in the application and ignore the built-in printer palette Default Print according to the built-in printer palette settings (logical pen with a pen width of 0.35...
- Page 251 Setting Options Description RGB Source Various options Selects the RGB color definition to simulate when printing RGB data Rendering Intent Various options Selects how to convert color spaces for various simulations Black Point Compensation On Set to Off to darken shadows when converting from a wide color space to a narrow color space Preserve Black...
-
Page 252: Network Settings Menu
Network Settings Menu Select > General Settings > Network Settings to configure your printer's network settings. Setting Options Description Wi-Fi Setup Connect via Wi-Fi Displays the available Wi-Fi connection methods (Wi-Fi Setup Wizard, Push Button Setup(WPS), Others) Wi-Fi Direct Select device and connection settings Android Other OS Devices Change... - Page 253 Setting Options Description Shared Folder Access Access Allows administrators to grant access to Control shared folders to specific users, or Operation Authority restrict shared folder access to Automatic Delete Setting administrators only. Authority Specify whether to Allow or Not Allow access control, then assign authority rights.
-
Page 254: System Administration Menu
Parent topic: Using the Control Panel Menus System Administration Menu Select > General Settings > System Administration to configure security settings and update firmware. Setting Options Description Security Settings Restrictions Turns on or off access rights to specified options; see the Restrictions table below. - Page 255 Setting Options Description Password Encryption Encrypts the administrator password. The printer will restart to apply the setting. Caution: Do not turn the power off while the printer is restarting or you may damage your data and lose any printer settings you have selected. You will need to set the password again.
- Page 256 Firmware Update Update Select Start Checking to access the Epson website and search for a firmware update. The printer must be connected to the internet. Follow the prompts to update the firmware, which can take up to 5 minutes or more.
-
Page 257: Maintenance Menu
Maintenance Menu Select > Maintenance to run nozzle checks, cleaning cycles, and other maintenance operations. Caution: Follow the instructions in the topic links below the table to use these menu settings correctly. Setting Description Print Head Nozzle Check Prints a nozzle check pattern so you can check for clogged nozzles Print Head Cleaning Perform if the nozzle check pattern has faint or missing areas... -
Page 258: Printer Status Menu
Parent topic: Using the Control Panel Menus Related tasks Checking the Nozzles Using the Product Control Panel Cleaning the Print Head Using the Product Control Panel Discharging Ink Replacing the Cutter Removing and Installing Ink Cartridges Replacing the Maintenance Box Replacing the Borderless Maintenance Boxes Running a Power Cleaning Using the Product Control Panel Wiping Around the Print Head... - Page 259 Displays the connection status of the authentication device; available only when an authentication device is configured Epson Open Platform Information Displays the Epson Open Platform version and product key; available only when Open Platform is configured Parent topic: Using the Control Panel Menus...
-
Page 260: Replacing Ink Cartridges And Maintenance Boxes
When a maintenance box is full, you need to replace it. Note: Please dispose of your used Epson branded ink cartridges responsibly and in accordance with local requirements. If you would like to return your used ink cartridges to Epson for proper disposal, please go to epson.com/recycle... - Page 261 • Do not disassemble the ink cartridges or maintenance boxes. • If ink gets on your skin, wash it off with soap and water. If it gets in your eyes, flush them immediately with water. Failure to observe this precaution could result in bloodshot eyes or mild inflammation. If problems persist, consult a physician.
-
Page 262: Check Cartridge And Maintenance Box Status
• The ink cartridges may contain recycled materials; this does not affect printer functions or performance. Parent topic: Replacing Ink Cartridges and Maintenance Boxes Check Cartridge and Maintenance Box Status Your product and its software will let you know when an ink cartridge is low or expended, or when a maintenance box needs to be replaced. -
Page 263: Checking Ink Cartridge And Maintenance Box Status With Windows
2. Replace or reinstall the ink cartridge or maintenance box as indicated on the screen. Note: If any of the ink cartridges installed in the product are broken, incompatible with the product model, or improperly installed, Epson Status Monitor will not display an accurate ink status. Parent topic:... -
Page 264: Checking Cartridge And Maintenance Box Status - Mac
1. In the Apple menu or the Dock, select System Preferences. Select Print & Fax, Print & Scan, or Printers & Scanners, select your product, and select Options & Supplies. Select Utility and select Open Printer Utility. 2. Select EPSON Status Monitor. You see this window: 3. Do the following as necessary:... -
Page 265: Purchase Epson Ink Cartridges And Maintenance Box
Epson sales office. Note: This product is designed to work with genuine Epson inks. Non-Epson ink or any other ink not specified for this printer could cause damage not covered by Epson's warranties. Ink Cartridge and Maintenance Box Part Numbers... -
Page 266: Removing And Installing Ink Cartridges
T50SF20 T50LF20 Parent topic: Purchase Epson Ink Cartridges and Maintenance Box Removing and Installing Ink Cartridges Make sure you have your replacement cartridges handy before you begin. You must install new cartridges immediately after removing the old ones. Replace all expended ink cartridges. You cannot print if any of the ink cartridges are expended or any ink slots are empty. - Page 267 2. Open the ink cartridge cover. 3. Place your finger in the groove at the top of the ink cartridge and pull it out. Note: Used ink cartridges may have ink around the ink supply port, so be careful not to get any ink on the surrounding area when removing the cartridges.
- Page 268 Caution: Do not touch the areas on the ink cartridge shown below. 5. Gently shake the cartridge about 4 inches (10 cm) for 10 seconds, or about 30 times. 6. Insert the new cartridge into the corresponding ink slot and push it in firmly.
- Page 269 Parent topic: Replacing Ink Cartridges and Maintenance Boxes Related concepts Purchase Epson Ink Cartridges and Maintenance Box Purchase Epson Ink Cartridges and Maintenance Box Related references Optional Equipment and Replacement Parts (U.S./Canada)
-
Page 270: Replacing The Maintenance Box
Replacing the Maintenance Box The maintenance box stores ink that gets flushed from the system during maintenance operations such as head cleaning. Replace the maintenance box when you see a message on the LCD screen. Note: Do not replace the maintenance box while printing, otherwise ink may leak. Do not reuse maintenance boxes you have removed from the printer and exposed to air for a long period of time. - Page 271 3. Open the maintenance box cover. 4. Use the handle on the maintenance box to carefully pull it out of the product without tilting the box. Warning: If ink gets on your skin, wash it thoroughly with soap and water. If ink gets into your eyes, flush them immediately with water.
- Page 272 Note: Dispose of the used maintenance box carefully. Parent topic: Replacing Ink Cartridges and Maintenance Boxes Related concepts Purchase Epson Ink Cartridges and Maintenance Box Related references Optional Equipment and Replacement Parts (U.S./Canada) Optional Equipment and Replacement Parts (Latin America)
-
Page 273: Replacing The Borderless Maintenance Boxes
Replacing the Borderless Maintenance Boxes The borderless maintenance boxes absorb ink during borderless printing. When you see a message on the LCD screen, replace the borderless maintenance box indicated. Note: Do not replace borderless maintenance boxes while printing, otherwise ink may leak. 1. - Page 274 3. Lift up to release the paper output tray, then gently pull the tray open and place it into position A (the lowest position) as shown. 4. Extend the paper output flap as shown.
- Page 275 5. With the paper output flap extended, lift up the paper output tray and move it into position C (the highest position) as shown. 6. Pull out the borderless maintenance box carefully without tilting it. 7. Place the used borderless maintenance box in the bag supplied with the new box and seal the bag. Note: Do not tilt the borderless maintenance box until the bag is firmly sealed, otherwise ink may leak.
- Page 276 8. Carefully insert the new borderless maintenance box and push it in firmly. 9. Lift up the paper output tray and move it back down into position A as shown. 10. Close the paper output flap. Note: Dispose of the used borderless maintenance box carefully.
- Page 277 Parent topic: Replacing Ink Cartridges and Maintenance Boxes Related concepts Purchase Epson Ink Cartridges and Maintenance Box Related references Optional Equipment and Replacement Parts (U.S./Canada) Optional Equipment and Replacement Parts (Latin America)
-
Page 278: Adjusting Print Quality
Adjusting Print Quality If your print quality declines, you may need to run a utility to clean or align the print head. If running these utilities does not solve the problem, you may need to replace the ink cartridges, clean the roll paper feeder, or run a Power Cleaning. -
Page 279: Checking The Nozzles Using The Product Control Panel
Checking the Nozzles Using the Product Control Panel You can check the print head nozzles using the control panel on your product. 1. Make sure roll paper or cut sheet paper is loaded in the printer. 2. Make sure the correct paper type is selected. 3. -
Page 280: Checking The Nozzles Using A Computer Utility
Related tasks Checking the Nozzles Using a Computer Utility Cleaning the Print Head Using the Product Control Panel Running a Power Cleaning Using the Product Control Panel Checking the Nozzles Using a Computer Utility You can check the print head nozzles using a utility on your Windows or Mac computer. 1. - Page 281 You see a window like this: 5. Click Print. The nozzle pattern prints.
-
Page 282: Print Head Cleaning
6. Check the printed pattern to see if there are gaps in the lines. Print head is clean Print head needs cleaning 7. If there are no gaps, click Finish. If there are gaps or the pattern is faint, clean the print head. Parent topic: Print Head Nozzle Check Related references... -
Page 283: Cleaning The Print Head Using The Product Control Panel
• Prepare a new maintenance box if the current maintenance box is low on space. Because ink used during cleaning does not evaporate quickly, repeated head cleanings can fill the maintenance box. • You cannot clean the print head if the temperature conditions are not within specifications. See the link below. -
Page 284: Cleaning The Print Head Using A Computer Utility
7. Check the printed pattern to see if there are gaps in the lines. Print head is clean Print head needs cleaning 8. Follow the instructions on the screen to clean the print head, check the nozzles, and repeat the process as necessary. - Page 285 3. Do one of the following: • Windows: Access the Windows Desktop and right-click the icon for your product in the right side of the Windows taskbar, or click the up arrow and right-click • In the Apple menu or the Dock, select System Preferences. Select Print & Fax, Print & Scan, or Printers &...
- Page 286 The power light begins flashing. When the cleaning cycle is finished, the power light stops flashing and a confirmation screen appears. Caution: Never turn off the product during a cleaning cycle or you may damage it. 7. Click Print Head Nozzle Check. 8.
-
Page 287: Running A Power Cleaning Using The Product Control Panel
6. Check the printed pattern to see if there are gaps in the lines. Print head is clean Print head needs cleaning If nozzles are still clogged, turn off the printer and leave it off overnight. If nozzles are still clogged, contact Epson for support. -
Page 288: Print Head Alignment
Note: You must manually align the print head when you are using any transparent or colored paper or on these paper types: Plain paper, Epson Enhanced Matte Posterboard. 1. Load roll paper or cut sheet paper in the printer. -
Page 289: Aligning The Print Head Manually Using The Product Control Panel
2. Make sure the correct paper type is selected. Note: If you are using commercially available paper, make sure you create the custom paper settings in advance. 3. Select > paper source > Paper Setting > Print Adjustments > Automatic Adjustment. 4. - Page 290 2. Make sure the correct paper type is selected. Note: If you are using commercially available paper, make sure you create the custom paper settings in advance. 3. Select > Paper Setting > Print Adjustments > Ruled Line Alignment. 4. Select one of the following: •...
-
Page 291: Adjusting The Paper Feed Using The Product Control Panel
> Paper Setting > paper source > Print Adjustments > Paper Feed Adjust. 4. Select one of the following: • Auto: automatically adjusts the paper feed setting (takes 9 to 35 minutes to complete); Epson recommends running this option first. -
Page 292: Cleaning The Roll Paper Feeder
Parent topic: Adjusting Print Quality Cleaning the Roll Paper Feeder If ink smears when printing on roll paper or cut sheets, you can clean the roll paper feeder using plain paper to remove excess ink. 1. Load the widest available roll paper in the printer. 2. -
Page 293: Maintenance And Transportation
Maintenance and Transportation See the instructions in these sections to maintain your printer for optimum results, or to move or transport your printer. Replacing the Cutter Cleaning Your Product Cleaning the Platen and Borderless Pad Edges Wiping Around the Print Head Cleaning the Print Head Cap Area Moving or Transporting Your Product Replacing the Cutter... - Page 294 4. Open the cutter cover.
- Page 295 5. Use a Phillips-head screwdriver to loosen the screw holding the cutter in place and carefully remove the cutter. Place the cutter in a plastic bag and dispose of it properly. Warning: Keep the cutter out of the reach of children. The blade is sharp and can cause injury.
- Page 296 6. Install the new cutter in the product with the protective material still attached. 7. Tighten the cutter screw securely. Note: Make sure the screw is tightened securely, otherwise the cut position may be slightly shifted or skewed. 8. Select OK.
-
Page 297: Cleaning Your Product
The cutter moves into position and cuts off the protective piece. Remove the protective piece from the printer. 9. Close the cutter cover. Parent topic: Maintenance and Transportation Related references Optional Equipment and Replacement Parts (U.S./Canada) Optional Equipment and Replacement Parts (Latin America) Cleaning Your Product You should clean the exterior of your printer about once a month to keep the product in optimum condition. -
Page 298: Cleaning The Platen And Borderless Pad Edges
3. Using a soft, clean cloth, wipe off any dust or dirt from the exterior of the product. To prevent dust from accumulating, make sure to clean the area shown here. Note: For stubborn dirt, dampen the cloth with water mixed with a small amount of neutral detergent. Wring it out before using it to wipe the product's surface. - Page 299 4. Use a soft, lint-free cloth to thoroughly remove dust and dirt from the platen as shown here. Wipe from the top to the bottom of the platen and do not touch the rollers or ink tubes.
- Page 300 Make sure to thoroughly clean the area shown here. Note: For stubborn dirt, dampen a soft cloth with neutral detergent. Wring it out and clean the platen as shown above. Dry the platen with a soft, dry, lint-free cloth when you are finished.
- Page 301 5. If any paper particles have accumulated in the holes shown here, use a pointed object such as a toothpick to push the material into the holes.
-
Page 302: Wiping Around The Print Head
6. Use cotton swabs to remove any paper particles or dust around the outer edges of the borderless pads as shown. 7. Close the front covers, plug in the power cord, and turn the product back on. Parent topic: Maintenance and Transportation Wiping Around the Print Head If the print head is clogged and automatic cleaning does not fix the issue, you can clean the print head and the area around the caps using the optional cleaning sticks (part number C13S090013). - Page 303 2. Open the maintenance cover. 3. Use a cleaning stick to wipe around the print head as shown to remove any ink, lint, or dirt.
- Page 304 4. Close the maintenance cover. 5. Open the port cover at the back of the printer.
- Page 305 6. Open the rear maintenance cover. 7. Use a cleaning stick to wipe around the print head as shown to remove any ink, lint, or dirt.
- Page 306 8. Close the rear maintenance cover.
-
Page 307: Cleaning The Print Head Cap Area
9. Close the port cover. 10. Select Done to return the print head to its home position. Parent topic: Maintenance and Transportation Related tasks Removing Roll 1 Removing Roll 2 Cleaning the Print Head Cap Area If the print head is clogged and automatic cleaning does not fix the issue, you can clean the print head and the area around the caps using the optional cleaning sticks (part number C13S090013) Caution: Before beginning the cleaning process, note the following: •... - Page 308 • Do not touch the tip of the cleaning stick. This may reduce the cleaning effect. • Touch a metal object before cleaning to discharge any static electricity. • Do not use an organic solvent such as alcohol to wipe the caps, as it may damage the print head. •...
- Page 309 3. Remove the protective piece as shown. 4. Use a new cleaning stick to clean the drying prevention caps area as shown.
- Page 310 Note: Do not press too hard on the area surrounding the caps. Doing so could damage the caps and may prevent them from functioning properly.
- Page 311 5. Hold the cleaning stick in a vertical position and wipe the inner areas of the drying prevention caps as shown. 6. Hold the cleaning stick in a vertical position and wipe the outer areas of the drying prevention caps as shown.
- Page 312 7. Hold the cleaning stick in a horizontal position and wipe the edges of the drying prevention caps with the flat surface as shown.
- Page 313 8. Hold the cleaning stick in a vertical position and wipe the guides as shown.
- Page 314 9. If there is any lint or dust in the drying prevention caps, remove it with the tip of the cleaning stick or a pair of tweezers.
- Page 315 10. Use a new cleaning stick to wipe any dirt off of the wiper.
- Page 316 11. Wipe around the front of the wiper as shown. 12. Wipe around the back of the wiper as shown.
- Page 317 13. Wipe the edges of the wiper as shown. 14. Use a new cleaning stick to wipe any dirt off of the suction caps.
- Page 318 15. Hold the cleaning stick in a vertical position and wipe the outer areas of the suction caps as shown. 16. Hold the cleaning stick in a horizontal position and wipe the edges of the suction caps with the flat surface as shown.
- Page 319 17. Hold the cleaning stick in a vertical position and wipe the guides shown here.
- Page 320 18. If there is any lint or dust in the suction caps, remove it with a cleaning stick or a pair of tweezers. 19. Replace the protective piece as shown.
-
Page 321: Moving Or Transporting Your Product
If you need to move or transport your product, prepare it as described here. Moving the product assumes that you are moving it to another location on the same floor, without using elevators, ramps, or stairs. If you are moving the product between floors or to another building, contact Epson for support. - Page 322 Warning: The product is heavy and requires four or more people to move it. Use only the indicated locations to lift the product. Otherwise, the product may be damaged or you may be injured.
- Page 323 Caution: During transportation and storage, follow these guidelines: • Avoid tilting the product more than 10° forward or backward while moving it. • Leave the ink cartridges installed. Removing the cartridges can dry out the print head and may prevent the product from printing, or ink may leak.
- Page 324 8. Turn the adjustable feet on the back of the product until they no longer tough the floor, then move the product to the new location. 9. After transporting the product, connect the power cable and turn on the product. 10.
-
Page 325: Discharging Ink
12. Turn the adjustable feet until they touch the floor. Once the feet touch the floor, do not turn them more than half a turn (180 degrees) or print quality may decline. Discharging Ink Parent topic: Maintenance and Transportation Related concepts Print Head Nozzle Check Print Head Cleaning Related tasks... - Page 326 Note: The maintenance box needs enough capacity to discharge the ink. If the remaining capacity is low, replace the maintenance box first. 1. Turn on the printer. 2. Remove all of the paper from the printer. 3. Select > Maintenance > Keeping Preparation > Start. The ink begins to discharge.
-
Page 327: Solving Problems
Uninstall Your Product Software Where to Get Help (U.S. and Canada) Where to Get Help (Latin America) Checking for Software Updates Periodically, it's a good idea to check Epson's support website for free updates to your product software. Visit epson.com/support (U.S.), epson.ca/support... -
Page 328: Product Status Messages
Installer, load the paper and then use the control panel. Paper setting in the printer driver is different from paper You can also use Epson Media Installer to change paper information information registered in the for paper that has not been loaded. -
Page 329: Resetting Control Panel Defaults
Turn the printer on and off several times. If the same error message is displayed on the LCD screen, contact Epson for support and provide them with the displayed service code. Parent topic:... -
Page 330: Solving Printer Problems
3. Select Yes to reset the selected settings. (Select No if you want to cancel the operation.) Parent topic: Solving Problems Solving Printer Problems Check these sections if you have problems operating your product. Product Does Not Turn On or Turns Off Unexpectedly LCD Screen Shuts Off Media Does Not Cut Cleanly Red Light Shines Inside the Printer... -
Page 331: Red Light Shines Inside The Printer
We recommend that you change the preset password as soon as possible to prevent unauthorized access. If you forgot the administrator password you created during network setup, contact Epson for support. Parent topic:... -
Page 332: Solving Network Problems
Check these solutions if you have problems setting up or using your product on a network. Note: Breakdown or repair of this product may cause loss of network data and settings. Epson is not responsible for backing up or recovering data and settings during or after the warranty period. We recommend that you make your own backup or print out your network data and settings. - Page 333 • Verify that your router or access point is operating correctly by connecting to it from your computer or another device. • Print a network connection report and check the codes and messages on the report to help determine the cause of the problem. •...
-
Page 334: Network Software Cannot Find Product On A Network
Network Software Cannot Find Product on a Network If EpsonNet Setup cannot find your product on a network, try these solutions: • Make sure your product is turned on and connected to your network. Verify the connection using your product control panel. •... -
Page 335: Wired Network Connection Becomes Unstable
• If you are connecting the product via Wi-Fi Protected Setup (WPS) and the Wi-Fi icon on your product's LCD screen is not lit, make sure you select one of the WPS options from the product control panel within 2 minutes of pressing the WPS button on your router. •... -
Page 336: Solving Printing Problems
• Print a network status sheet and verify that the network settings are correct. If the network status is Disconnected, check any cable connections and turn your product off and then on again. • If you are using TCP/IP, make sure the product's IP address is set correctly for your network. If your network does not assign IP addresses using DHCP, set the IP address manually. -
Page 337: Nothing Prints
Nothing Prints If you have sent a print job and nothing prints, try these solutions: • Make sure your printer is turned on. • Make sure there are no error messages on the product's LCD screen. • Make sure any interface cables are connected securely at both ends. If you have a spare cable, try connecting with the spare cable. -
Page 338: Solving Paper Problems
Solving Paper Problems Check these sections if you have problems using paper with your product. Paper Feeding Problems Roll Paper Jam Problems Cut Sheet Paper Jam Problems Paper Does Not Collect in the Basket or is Creased Parent topic: Solving Problems Paper Feeding Problems If you have problems feeding paper, try these solutions: •... - Page 339 • If poster board does not feed, make sure you are loading it straight into the product, not at an angle. Guide the poster board as shown to keep it horizontal. • If paper feeds at an angle, make sure Detect Paper Skew is set to On in the Printer Settings menu. •...
- Page 340 Related tasks Selecting Basic Print Settings - Windows Selecting Basic Print Settings - Mac Related topics Roll Paper Handling Cut Sheet Handling...
-
Page 341: Roll Paper Jam Problems
Roll Paper Jam Problems If roll paper has jammed in the printer, follow the steps here to clear the jam. 1. Cut the paper at the area shown for each roll. - Page 342 2. Open the printer covers. 3. Carefully slide the print head away from the paper jam as shown. Caution: Do not touch the print head unless you are removing a paper jam. Touching the print head or the surrounding cables may cause a static shock and damage the printer.
- Page 343 4. Remove the jammed paper. Caution: Do not touch the rollers, ink absorbing areas, or ink tubes shown here or you may damage the printer.
- Page 344 5. Close the printer covers.
- Page 345 6. If there is any paper left inside the printer, open the rear cover and remove the paper. 7. Turn the printer off and back on again. 8. Cut the edge of the roll paper straight horizontally, then reload the roll paper. Note: Make sure to cut off any jagged or folded sections of paper.
-
Page 346: Cut Sheet Paper Jam Problems
Cut Sheet Paper Jam Problems If cut sheet paper has jammed in the printer, follow the steps here to clear the jam. 1. Open the printer covers. 2. Carefully slide the print head away from the paper jam as shown. - Page 347 Caution: Do not touch the print head unless you are removing a paper jam. Touching the print head or the surrounding cables may cause a static shock and damage the printer. 3. Remove the jammed paper. Caution: Do not touch the rollers, ink absorbing areas, or ink tubes shown here or you may damage the printer.
-
Page 348: Paper Does Not Collect In The Basket Or Is Creased
4. Close the printer covers. 5. Turn the printer off and back on again. 6. Reload the paper, making sure it is not skewed. Parent topic: Solving Paper Problems Related topics Cut Sheet Handling Paper Does Not Collect in the Basket or is Creased If paper does not collect correctly in the paper basket, try these solutions: •... -
Page 349: Solving Print Quality Problems
• If nozzles are still clogged after head cleaning at the strongest level, leave the product turned off overnight and check the nozzles again. If you still cannot clear the nozzles, contact Epson support. • If the printer has not been used for a long time, nozzles may be dried and clogged. Turn the printer on at least once every few weeks and print a nozzle check pattern to prevent the nozzles from clogging. -
Page 350: Overall Print Quality Is Poor
• Enable color management in the software application or in the printer driver. • If you are using non-Epson media, make sure you create a custom paper configuration for the media. • Check the quality setting that you selected in the printer driver. Using a faster printing method may decrease the overall print quality. -
Page 351: Lines Are Misaligned
• If you are using non-Epson media, make sure you create a custom paper configuration for the media. • Make sure the Paper Size Check setting is set to On, or the printer may print outside the edges of the... -
Page 352: Prints Are Wrinkled
• Make sure you are operating the printer at normal room temperature. The normal operating range for Epson special media is 59 to 77 °F (15 to 25˚C), 40 to 60% humidity. For information about other paper types, see the documentation supplied with the paper. -
Page 353: Margins Appear In Borderless Prints
• If you are using non-Epson media, make sure you create a custom paper configuration for the media. Parent topic: Solving Print Quality Problems Margins Appear in Borderless Prints If borderless prints still have margins, try these solutions: • Check the print settings selected in your print application you are using, as well as the printer driver. -
Page 354: Uninstalling Product Software - Windows
In the next window, select your product and click OK. Then follow any on-screen instructions. 4. Restart your computer, then re-install your software. Note: If re-installing your product software does not solve a problem, contact Epson support. Parent topic: Uninstall Your Product Software... -
Page 355: Uninstalling Product Software - Mac
Uninstalling Product Software - Mac In most cases, you do not need to uninstall your product software before re-installing it. However, you can download the Uninstaller utility from the Epson support website to uninstall your product software as described here. -
Page 356: Where To Get Help (Latin America)
(U.S.) or proimaging.epson.ca (Canada), select your product series and product, and click the Where to Buy button. Or call 800-GO-EPSON (800-463- 7766) in the U.S. or 800-807-7766 in Canada. Parent topic: Solving Problems Where to Get Help (Latin America) If you need additional help with your Epson product, contact Epson. - Page 357 If your country does not appear in the list, contact the sales office in the nearest country. Toll or long distance charges may apply. Purchase Supplies and Accessories You can purchase genuine Epson ink, paper, and accessories from an Epson authorized reseller. To find the nearest reseller, visit latin.epson.com...
- Page 358 Parent topic: Solving Problems...
-
Page 359: Technical Specifications
Technical Specifications These sections list the technical specifications for your product. Note: Epson offers a recycling program for end of life Epson products. Please go to this site (U.S.) or this site (Canada) for information on how to return your Epson products for proper disposal. -
Page 360: Mac System Requirements
Note: For the latest product software available for your operating system, visit the Epson support site at epson.com/support (U.S.), epson.ca/support (Canada), or latin.epson.com/support (Caribbean), select your product, and select Downloads. Parent topic: Technical Specifications Mac System Requirements To use your product and its software, your Mac should meet these requirements. -
Page 361: Paper Specifications
Note: Since the quality of any particular brand or type of paper may be changed by the manufacturer at any time, Epson cannot guarantee the quality of any non-Epson brand or type of paper. Always test a sample of paper stock before purchasing large quantities or printing large jobs. -
Page 362: Printable Area Specifications
Printable Area Specifications In the illustration below, the gray area represents the printable area; the white arrow indicates the direction in which the paper is ejected. Note: When printing borderless, quality may decline in the expanded printable area. Roll paper Note: Margins may change depending on the Top Margin setting that you select. - Page 363 Matte Paper in CAD/Line Drawing mode, the default top and bottom margins are 0.12 inch (3 mm). ** The maximum printable length using the Epson driver on Windows is 298 feet (91 m). To print longer images, you need to use third-party banner printing software and select Roll Paper (Banner) as the Source setting in the printer driver.
-
Page 364: Ink Cartridge Specifications
Parent topic: Technical Specifications Ink Cartridge Specifications Note: This product is designed to work with genuine Epson inks. Non-Epson ink or any other ink not specified for this printer could cause damage not covered by Epson's warranties. Type Dedicated Epson ink cartridges... -
Page 365: Dimension Specifications
Cartridge capacity 110 ml, 350 ml, 700 ml Initial charging cartridges: 240 ml Parent topic: Technical Specifications Related references Ink Cartridge and Maintenance Box Part Numbers Dimension Specifications Height 38.38 inches (975 mm) Width 72.75 inches (1848 mm) Depth Printing: 32.63 inches (829 mm) with paper basket open Storage: 19.64 inches (499 mm) Weight Approximately 341.7 lb (155 kg) (includes maintenance boxes and... -
Page 366: Environmental Specifications
Environmental Specifications Temperature Operating: 50 to 95 °F (10 to 35 °C) Operating (recommended): 59 to 77 °F (15 to 25 °C) Storage (before unpacking): –4 to 140 °F (–20 to 60 °C) • 120 hours at 140 °F (60 °C) •... -
Page 367: Interface Specifications
Temperature and humidity Operating: (diagonal lines represent recommended range) range Parent topic: Technical Specifications Interface Specifications USB Interface High-Speed USB port compatible with USB 2.0 specification (for connection of non-encrypted USB drive for printing) SuperSpeed USB port compatible with USB 3.0 specification (USB port for computer) Network Interface 100BASE-TX /1000BASE-T/IEEE802.11b/g/n/ac... -
Page 368: Network Interface Specifications
Network Interface Specifications Wi-Fi Standards IEEE802.11b/g/n; IEEE802.11n (2 GHz, HT20 only) IEEE802.11a/n/ac (5 GHz) [W52 (CH36 to CH48) and W53 (CH52 to CH64) are for indoor use only] Securities WEP (64/128bit) WPA-PSK (TKIP) WPA2-PSK (AES) (complies with WPA2 standards with support for WPA/WPA2 Personal) WPA3-SAE WPA2-Enterprise (AES) (EAP-TLS/PEAPTLS/PEAPMSCHAPv2/EAP-... -
Page 369: Safety And Approvals Specifications
Technical Specifications Safety and Approvals Specifications United States Safety: UL62368-1 EMC: FCC part 15 Subpart B class B Canada Safety: CAN/CSA C22.2 No. 62368-1 EMC: ICES-003 Class B This equipment contains the following wireless module: • Manufacturer: Epson • Type: J26H005... - Page 370 This product conforms to Part 15 of FCC Rules and RSS-210 of the IC Rules. Epson cannot accept responsibility for any failure to satisfy the protection requirements resulting from a non-recommended modification of the product. Operation is subject to the following two conditions: (1) this device may not cause harmful interference, and (2) this device must accept any interference received, including interference that may cause undesired operation of the device.
-
Page 371: Notices
Notices Check these sections for important notices about your product. Note: Epson offers a recycling program for end of life Epson products. Please go to this site (U.S.) or this site (Canada) for information on how to return your Epson products for proper disposal. - Page 372 • Make sure the plug is fully inserted into the outlet. • Do not let the power cord become damaged or frayed. Place it to avoid abrasions, cuts, fraying, crimping, and kinking. Do not place objects on top of it and do not allow it to be stepped on or run over. Be careful to keep the cord straight at each end.
- Page 373 • When moving the product, make sure it is turned off, the power cables are unplugged from the outlets, and all connecting cables have been removed. Avoid steps and uneven surfaces. • Avoid locations that are subject to rapid changes in heat or humidity, shocks or vibrations, or dust. •...
-
Page 374: Lcd Screen Safety Instructions
• If the LCD screen is damaged, contact Epson. If the liquid crystal solution gets on your hands, wash them thoroughly using large volumes of soapy water. If the liquid crystal solution gets into your eyes, flush them with clean water for at least 15 minutes. -
Page 375: Wireless Connection Safety Instructions
• If the LCD screen chips or cracks, do not touch or attempt to remove the broken pieces; contact Epson for support. • Do not subject your product to sudden changes in temperature or humidity; this may cause condensation to develop inside the LCD screen and degrade its performance. -
Page 376: Binding Arbitration And Class Waiver
1.3 Pre-Arbitration Steps and Notice. Before submitting a claim for arbitration, you and Epson agree to try, for sixty (60) days, to resolve any Dispute informally. If Epson and you do not reach an agreement to resolve the Dispute within the sixty (60) days), you or Epson may commence an arbitration. Notice to Epson must be addressed to: Epson America, Inc., ATTN: Legal Department, 3131 Katella Ave., Los... - Page 377 EAILegal@ea.epson.com or writing us at the Epson Address above. Notice of the Dispute shall include the sender's name, address and contact information, the facts giving rise to the Dispute, and the relief requested (the "Dispute Notice"). Following receipt of the Dispute Notice, Epson and you agree to act in good faith to resolve the Dispute before commencing arbitration.
- Page 378 Epson's last written offer, if any, to settle the Dispute, Epson will: (i) pay you $1,000 or the amount of the award, whichever is greater; (ii) pay you twice the amount of your reasonable attorney's fees, if any;...
-
Page 379: Trademarks
1.8 Amendments to Section 1. Notwithstanding any provision in this Agreement to the contrary, you and Epson agree that if Epson makes any future amendments to the dispute resolution procedure and class action waiver provisions (other than a change to Epson's address) in this Agreement, Epson will obtain your affirmative assent to the applicable amendment. -
Page 380: Copyright Notice
Seiko Epson Corporation. The information contained herein is designed only for use with this Epson product. Epson is not responsible for any use of this information as applied to other products. - Page 381 Parent topic: Copyright Notice Copyright Attribution © 2022 Epson America, Inc. 6/22 CPD-61762 Parent topic: Copyright Notice.
Need help?
Do you have a question about the SureColor P8570D Series and is the answer not in the manual?
Questions and answers