Epson SureColor P Series Quick Reference
Hide thumbs
Also See for SureColor P Series:
- Setup manual (34 pages) ,
- Setup and maintenance (33 pages)
Table of Contents
Advertisement
Advertisement
Table of Contents

Related Manuals for Epson SureColor P Series


Summary of Contents for Epson SureColor P Series
- Page 1 Epson SureColor P-Series ® ® P6000/P7000/P8000/P9000 Quick Reference...
-
Page 2: Table Of Contents
Contents Contents Printer parts ............................2 Front ............................2 Back ............................2 Control panel ..........................3 LCD screen ..........................3 Selecting media for your printer ......................4 Using roll paper ..........................5 Setting up automatic media tracking and identification .............. 5 Loading paper in the printer ....................... -
Page 3: Printer Parts
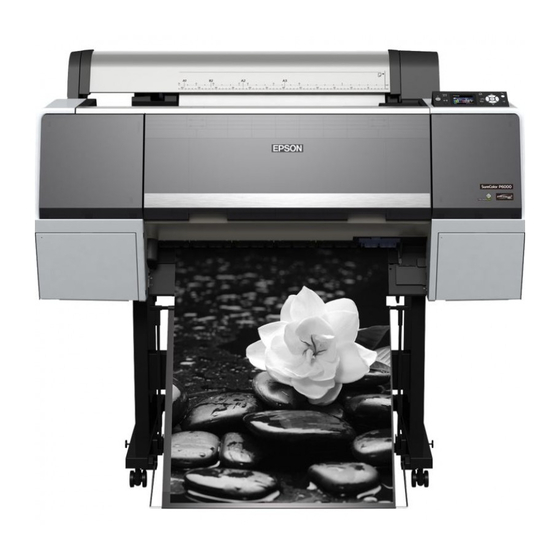
Printer parts Printer parts Note: Unless otherwise indicated, the illustrations in this guide show the SureColor ® P8000/P9000, but the instructions apply to all models. Front Roll paper Roll paper cover holder Roll paper holder Front cover Control panel Left ink bay Right ink bay Paper basket Casters... -
Page 4: Control Panel
Control panel Control panel Paper feed up button Paper release light and Paper Black ink change button button light light Power light and OK button button Menu button Paper cut button Ink open button Paper feed down button Pause/reset Left arrow or paper light and button screen source button... -
Page 5: Selecting Media For Your Printer
One of the key elements for achieving professional quality prints is selecting paper that is specifically optimized for your printer. Epson offers a variety of canvas, fine art, photo and proofing papers, as well as other media, for your printer. Most Epson professional media are available in sizes from small cut sheets to wide-format rolls. -
Page 6: Using Roll Paper
Using roll paper Using roll paper You can use roll paper with a 2- or 3-inch core and a width of up to 24 inches (61 cm) for the SC-P6000/P7000, or 44 inches (112 cm) for the SC-P8000/SC-P9000. Manually switching rolls is a simple process. -
Page 7: Loading Paper In The Printer
Loading paper in the printer Loading paper in the printer See the Setup guide for instructions on placing and loading roll paper in the printer. Cutting paper manually with the built-in cutter When Auto Cut is set to Off, you can cut roll paper manually after your print job is finished by pressing button. -
Page 8: Removing Paper From The Printer
Removing paper from the printer Press the d button to select , then press the r button. Page Line Press the d or u buttons to select Press the button to save the setting. A check mark appears next to On. Press the button to exit the menu. - Page 9 Removing paper from the printer Press the button to release the paper. If automatic media tracking is on, the barcode and paper information is printed. • If you are not using the optional Auto Take-Up Reel, the paper is rewound automatically. •...
- Page 10 Removing paper from the printer Roll the paper forward so that it rests on top of the printer. Pull up the tension levers, then remove the adapters from the paper roll. Rewind the paper carefully and place it in its original package. Note: Roll paper should be stored on end or horizontally (if the packaging end-caps are installed).
-
Page 11: Using Cut Sheets
Using cut sheets Using cut sheets You can print on many types of cut sheet paper and other media. The printer accepts sheets in widths from 7.2 inches (18 cm) to 24 inches (61 cm) for the SC-P6000/P7000 or 44 inches (112 cm) for the SC-P8000/SC-P9000. -
Page 12: Loading Heavy Sheets
Loading heavy sheets Feed the sheet into the paper slot until it meets resistance. Make sure the right edge of the paper is straight and aligned with the vertical line on the roll paper cover. Press the d button. The sheet feeds into printing position automatically. On the screen that appears on the LCD screen, select if the settings are correct, Keep Settings Above... - Page 13 Loading heavy sheets Press the l button, then select from the Paper Source menu. Cut Sheet Press the button. Feed the sheet into the paper slot. Make sure the right and top edges of the paper are straight and aligned with the horizontal and vertical lines on the printer. Note: You may need to increase the suction by pressing the button.
- Page 14 When you switch media, don’t forget to change the setting back to Standard. If you’re printing on non-Epson media and not using the Epson driver, you may also need to create a paper configuration to optimize your results. See the online User’s Guide for more information.
-
Page 15: Using The Paper Basket
Using the paper basket Using the paper basket The paper basket attaches to your printer and catches your printouts as they come out. The basket keeps your printouts from getting dirty or scratched. You can set it up either to catch the paper under the printer or in front of the printer. -
Page 16: Catching Printouts In Front Of The Printer
Catching printouts in front of the printer For the SC-P8000/SC-P9000, adjust the basket based on your print size. 23.4 33.1 inches (594 841 mm, A1) or smaller • × × Larger than 23.4 × 33.1 inches (594 841 mm, A1) •... - Page 17 Catching printouts in front of the printer For the SC-P8000/SC-P9000, raise the back of the basket all the way up. Open the tabs at the front of the basket and tilt it down. Then raise the paper guides. Raise the front of the basket so that the surface is taut. Then lower the paper guides so that your prints slide smoothly onto the cloth.
-
Page 18: Storing The Paper Basket
Storing the paper basket Storing the paper basket If you are not using the paper basket, you can fold it out of the way. For the SC-P8000/SC-P9000, raise the back of the basket. Raise the paper guides, then adjust the tabs and raise the front of the basket. Lower the paper guides. Using the optional Auto Take-Up Reel (SC-P8000/SC-P9000 only) If you want to print images continuously on roll paper and have the printouts rolled up automatically, you... - Page 19 Using the optional Auto Take-Up Reel (SC-P8000/SC-P9000 only) Note: Epson Doubleweight or Singleweight Matte paper should be wound forward. Winding forward Winding backward The Sensor light shows the status of the Auto Take-Up Reel. Sensor light Sensor light status Description...
-
Page 20: Loading Roll Paper Onto The Auto Take-Up Reel
Loading roll paper onto the Auto Take-Up Reel Loading roll paper onto the Auto Take-Up Reel Before you load roll paper onto the take-up reel core, check the following: • Turn off the Auto Take-Up Reel to avoid injury. • Make sure that the leading edge of the roll paper is straight. -
Page 21: Winding Prints Forward
Winding prints forward Winding prints forward Tape the leading edge of the paper to the take-up reel core in the center first, then at the left and right ends. Press the d button to feed the paper forward and create some slack. - Page 22 Winding prints forward Set the Manual switch on the Auto Take-Up Reel to and hold it long enough to feed at least Forward three turns of paper onto the reel. Make sure adequate slack remains between the roll paper and the take-up reel.
-
Page 23: Winding Prints Backward
Winding prints backward Winding prints backward Wind the bottom of the roll paper around the back of the reel as shown below. Tape the leading edge of the paper to the take-up reel core in the center first, then at the left and right ends. Press the d button to feed the paper forward and create some slack. -
Page 24: Printing Using The Auto Take-Up Reel
Printing using the Auto Take-Up Reel Set the Manual switch on the Auto Take-Up Reel to to take up at least three turns of paper Backward onto the reel. Make sure adequate slack remains between the roll paper and the take-up reel. Printing using the Auto Take-Up Reel Once the Auto Take-Up Reel is installed and paper is attached to it, you can use it to take up your prints. - Page 25 Printing using the Auto Take-Up Reel When you are ready to remove your prints, set the Auto switch to Off. Press the button to cut the paper. To remove your prints, turn the lever to unlock the reel, and then slide it left. Support the reel with one hand to keep it from falling.
-
Page 26: Printing
Printing with OS X Open a photo or document in a printing program, then select the print command in your application. Select your product as the Printer setting. Select your Epson product Click Show Details Select the Paper Size setting for the paper size and source you are using. - Page 27 Select a Print Mode that matches the content that you are printing. Select one of the Color Mode options. Note: For color management instructions, see www.epson.com/proimaging/iccprofiles.html. For more information about print settings, click Help or see your online User’s Guide.
-
Page 28: Printing In Windows
Select an Output Resolution setting (available settings depend on selected media type). Click Print Printing in Windows Open a photo or document in a printing program, and select the print option. Select your Epson product Click here to open your printer software Select your product, then click the button. - Page 29 Quality Options Choose the paper Source in which you loaded your paper. Select one of the Mode settings. Note: For color management instructions, see epson.com/proimaging/iccprofiles.html. For information about print settings, click Help or see your online User’s Guide. Select the paper setting for the paper you loaded.
-
Page 30: Maintaining Your Printer
Maintaining your printer To reduce or enlarge your printout or print double-sided, click the tab and select Page Layout settings as necessary. (Click or see your online User’s Guide for details.) Help Click to save your settings. Click to start printing. Print Maintaining your printer Follow the instructions in this section to perform basic maintenance on your printer. - Page 31 T824600 T804600 Note: We recommend that you use genuine Epson cartridges and do not refill them. The use of other products may affect your print quality and could result in printer damage. Yields vary considerably based on images printed, print settings, paper type, frequency of use, and temperature.
- Page 32 To prevent ink reporting errors, never replace the ink cartridges with the printer turned off. You can purchase genuine Epson ink and paper from an Epson Professional Imaging Authorized Reseller. To find the nearest reseller, visit www.proimaging.epson.com (U.S. sales), www.epson.ca (Canadian sales), or call 800-GO-EPSON (800-463-7766).
- Page 33 Replacing ink cartridges Press in the cartridge you want to replace. The cartridge pops out. Remove the expended ink cartridge from the printer. Save your first set of expended cartridges so you can use them for transporting the printer, if necessary. WARNING: Do not shake the expended cartridge, or ink may leak.
- Page 34 Replacing ink cartridges Make sure the replacement cartridge is the correct color and remove it from its package. Gently shake the cartridge for about 5 seconds before installing it, but be careful not to touch the chip on the cartridge. Hold the cartridge with the arrow pointing toward the printer.
-
Page 35: Printing Status Information
Printing status information Close the ink cover. Wait for the printer to check the ink cartridges and charge the ink delivery system, if necessary. Caution: Never turn off the printer while ink is charging or you’ll waste ink. Printing status information The status check sheet shows some of the current default settings, the page count, and the status of the maintenance tank. -
Page 36: Checking Printer Status From The Printer Driver
Checking printer status from the printer driver The Epson Status Monitor utility installed with your printer driver lets you check the levels of ink in the printer and the level of the maintenance tank(s). Follow the steps below to use the utility to check the status. - Page 37 Checking and cleaning the print head Automatically checking and cleaning the print head The printer automatically checks the nozzles and cleans them if necessary. You can specify how often you want this to happen or turn this feature off. You can also have a nozzle check pattern printed on a regular basis, so you can check it yourself.
- Page 38 Checking and cleaning the print head Caution: Don’t run a cleaning cycle while thick media is loaded in the printer. If the pattern looks good, as shown below, the print head is clean. • If any dots or segments are missing or deflected, as shown below, run a cleaning cycle as described •...
- Page 39 Checking and cleaning the print head You see a menu like this: Select the icon and follow the instructions on the screen. Nozzle Check × After the pattern is printed, use at least a 10 magnification eye loupe to examine it. If the pattern does not have any gaps, the print head is clean.
- Page 40 Checking and cleaning the print head Running cleaning cycles You can run several types of cleaning cycles from the control panel (or from the Epson LFP Remote Panel2): normal cleaning, heavy cleaning, and powerful cleaning. Note: Run the heavy and powerful cleaning cycles only if multiple normal cleaning cycles are not sufficient to clear the nozzles.
-
Page 41: Aligning The Print Head
If you haven’t already done so, run a nozzle check before aligning the print head (page 39). Make sure the printer is turned on, and that the printer is loaded with Epson Doubleweight Matte paper, Epson Enhanced Matte paper, or Epson Ultra Premium Photo Paper Luster. -
Page 42: Ordering Supplies And Optional Accessories
Additional two-year Epson Preferred Plus service plan EPP900B2 You can purchase optional equipment and genuine Epson ink and media from an Epson Professional Imaging Authorized Reseller. To find the nearest reseller, visit www.proimaging.epson.com (U.S. sales), www.epson.ca (Canadian sales), or call 800-GO-EPSON (800-463-7766). Or you can purchase online at... -
Page 43: Where To Get Help
FAQs and troubleshooting advice, or e-mail Epson with your questions. EPSON, UltraChrome, SpectroProofer, and SureColor are registered trademarks, UltraChrome HDX is a trademark, and EPSON Exceed Your Vision is a registered logomark, of Seiko Epson Corporation. Epson Preferred is a service mark of Epson America, Inc. - Page 46 CPD-50157 Printed in USA...
Need help?
Do you have a question about the SureColor P Series and is the answer not in the manual?
Questions and answers