Advertisement
Quick Links
Advertisement

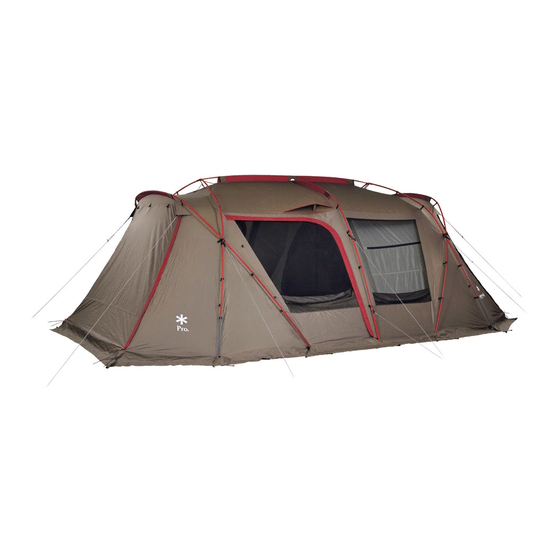
Summary of Contents for Snow Peak FES-091
- Page 1 Ver 1.00 FES 091 Pro. RED FRAME EDITION...
- Page 2 ×1 ×1 ×2 × ×2 ×2 (21cm×31) (7m×2,3.5m×6,2.5m×4,1.5m×2) ×1 ×1 ×2 ×1 ×1 ×1 ×1 ×1 ■ ×6...
- Page 3 ·...
- Page 4 ■ 【 】...
- Page 5 .(4 ) 빨간색 테이프 센터 프레임 슬리브 조금씩 마디를 체결할 때는 끝까지 연결되었는지 확인 하고 슬리브에 밀어 넣어주세요.
- Page 6 (TP-080) 2.5m 3.5m 1.5m 2.5m 3.5m...
- Page 7 ■ 이너텐트의 전후를 확인하여 랜드록의 실내에 펼칩니다. (이너텐트는 바닥에 로고 프린터가 있는쪽이 실내쪽입니다.)
- Page 8 · .(11...
- Page 9 ■ (5m~6m)
- Page 10 ■...
- Page 12 Y, I ・...
- Page 13 . PU...
- Page 14 FES-091 Pro. RED FRAME EDITION (×2), C (×2), (21cm × 31), 7m×2, 3.5m×6, 2.5m×4, 1.5m×2), (×2) 385cm 240cm / 210D 3,000mm · UV · / 210D 1,800mm · UV / 210D · PU / 68D / 210D · PU 1,800mm / A6061 (ø19mm + ø22mm)
- Page 15 Instruction Manual Ver 1.00 FES-091 Land Lock Pro. Red Frame Edition...
- Page 16 Thank you very much for purchasing a Snow Peak product. This product is a shelter/tent hybrid designed for camping. To use this product safely and correctly, read these instructions carefully. Keep this manual in a safe place for future reference. If you find anything in the instruction manual difficult to understand, or find the product to be defective, stop using it immediately.
- Page 17 Misuse could result in a potentially hazardous situation that can result in serious injury or death to the user. ●Before using the product, check each part for abnormalities. If there are abnormalities, take the product to your reseller or Snow Peak’s Customer Service Team for inspection and repair.
- Page 18 WARNING: Before using the product, check each part for abnormalities. If there are abnormalities, take the product to a dealer or Snow Peak Customer Service for inspection or repair. Make sure that two or more people take part in the setup.
- Page 19 ③Hold the ring pin with the dark blue peg down loop on the hem of the body and insert it into the A pole. (4 places) Adjust the tension of the tape by pulling the belt with center rings on both sides. At this time, please hook the plastic hook in the upper part of the A pole beforehand.
- Page 20 ⑥Please hook the plastic hooks from top to bottom to the A pole / C pole / center pole. Fix the crossing part of poles with tape with Velcro through the o-ring. * Crossing part pole A pole Plastic hook C pole Pole O-ring...
- Page 21 ⑧If necessary, unbuckle the building tape and store Center building tape the tape in the pocket. If you remove the building tape after setting up, be sure to peg down inside Y-Shaped building tape and apply tension. Building tape pocket Y-Shaped building tape ■Setting up the inner tent * Please hang the inner tent in the room on the side of the Land Lock without the side door.
- Page 22 ②Hook the hooks and rubber loops on each bottom corner of the inner tent to the O-rings and pegs on the main body (fly). Peg tape Tip of A pole (dark blue) Dark blue tape with hook Inner bottom Peg down loop O-ring on (dark blue) The peg-down tape at the rear two...
- Page 23 ■Use of safety rings This product has a safety ring that maintains stability during strong winds. Set up your rope inside the center pole, as shown below. WARNING The safety ring is only a supplementary measure and cannot withstand all bad weather. Please use this product only when there is a temporary strong win or when it is difficult to disassemble immediately.
- Page 24 ■How to store the shelter in the carry bag (When storing, be sure to remove the inner tent from the main body before removing the main body.) ①Fold the main body in half with the center sleeve as centered on top. ②Fold the sides inward to form a rectangle.
- Page 25 ③Fold the rectangular main body (fly) to a width that ④Leave the zipper at the bottom of the inner room fits into the carry bag. door panel open to allow air to escape easily. ⑤As with the main body (fly), please fold it to fit into ⑥After reaching the width of the carrying bag, roll up the carry bag.
- Page 26 Precautions for disassembly /storage ● Before storage, the product should be cleaned and dried sufficiently. ● If you remove the building tape after setting up, connect the Y-shaped and I-shaped buckles of the building tape before taking it down. This will make it easier to position the pegs for the next time you set up. *If you peg down the Y or I-shaped part from the outside of the main body, the main body will expand, and it will be difficult to re-set the pegs when you take it down.
- Page 27 ● When using a product that has not been used for a long time, check the product and its contents careful- ly. If you have any questions, please contact Snow Peak Customer Service. ● A combination of polyester fabric is used for this product. Taking the material characteristics into consid- eration, we adopted processing and color patterns that will result in less color migration.
- Page 28 Spec FES-091 Land Lock Pro. Red Frame Edition ●Main body(fly), Inner room, A pole (x 2), C pole (x 2), Center pole, Ridge pole, Upright pole (190 cm x 2), Duralumin peg (21 cm(8.3”) x 31), Rope with rope tensioner(Forked 7m (23') x 2, 3.5m(11’5”)x 6, 2.5m(8' 385cm (12’6”)


Need help?
Do you have a question about the FES-091 and is the answer not in the manual?
Questions and answers