Table of Contents
Advertisement
PRODUCT OVERVIEW....................................................... 3
PRODUCT STRUCTURE .................................................... 4
HOST CONFIGURATION .................................................. 5
PRINTER CONFIGURATION (OPTIONAL) .................... 6
POWER ON/OFF ................................................................ 6
1)
2)
VEHICLE DIAGNOSTIC PREPARATION ......................... 7
INTRODUCTION OF EACH FUNCTION MENU ......... 10
DIAGNOSTIC FUNCTION ............................................... 12
DPF REGENERATION ...................................................... 17
SERVICE RESET ............................................................. 18
PIN DETECT ................................................................... 18
DATA MANAGEMENT ................................................ 19
DIAGNOSTIC SOFTWARE UPGRADE ...................... 20
SETTINGS ....................................................................... 21
14.1 Wi-Fi Connection ............................................................... 21
14.2 Brightness ............................................................................. 21
14.3 Volumes ................................................................................. 22
14.4 User Information and Activation ................................... 22
1)
2)
CONTENTS
.......................................................................... 6
.......................................................................... 7
....................................................................... 22
........................................................................ 23
1
HD Series
Advertisement
Table of Contents

Related Manuals for ANCEL HD Series


Summary of Contents for ANCEL HD Series
-
Page 1: Table Of Contents
HD Series CONTENTS PRODUCT OVERVIEW............3 PRODUCT STRUCTURE ............ 4 HOST CONFIGURATION ..........5 PRINTER CONFIGURATION (OPTIONAL) ....6 POWER ON/OFF ..............6 ................6 Power on ................7 Power off VEHICLE DIAGNOSTIC PREPARATION ......7 INTRODUCTION OF EACH FUNCTION MENU ..10 DIAGNOSTIC FUNCTION .......... - Page 2 HD Series 14.5 Storage ................... 24 14.6 General ................... 24 ..............24 Language ................... 25 Unit ..............25 Date&Time ................26 About ................26 Reset PRINTER INTRODUCTION ......... 27 ......... 27 Printer combination and split ....27 Printer loading and changing paper ..........
-
Page 3: Product Overview
HD Series Product Overview ANCEL HD series products are commercial vehicle diagnostic tools based on special Android tablet. This product integrates commercial vehicle OBD standard diagnostic protocols, including SAE J1939, SAE J1708, SAE J1850 PWM, SAE J1850 VPW, ISO 14230-4, ISO 9141-2, ISO 15765-4 and ISO 27145-4. -
Page 4: Product Structure
HD Series Product Structure... -
Page 5: Host Configuration
HD Series Serial No. Name Function Description Connection interface connects Main Testing vehicle communication cable during ① Cable vehicle diagnosis Used to connect to an external USB Port ② computer Used to print diagnostic reports and Print ③ results Paper bin After opening, you can install and ④... -
Page 6: Printer Configuration (Optional)
HD Series Capacitive screen TP touch screen WIFI 802.11b/g/n 2.4GHz Horn Support USB interface Type C interface Diagnose DB15 interface interface Operating DC 10V~24V/3A voltage Operating -20℃~ 60℃ temperature Storage -30℃~ 70℃ temperature Printer Configuration (Optional) Printer 80mm thermal printer... -
Page 7: Power Off
HD Series automatically start up. If it doesn’t start up, it may be that there is no power supply for the vehicle diagnostic seat, and the device can be powered by the cigarette lighter or battery clamp. Power on the power adapter: plug one end of the main... - Page 8 HD Series performed: 1) Turn off the ignition; 2) Find the diagnostic interface of the vehicle: it is usually located on the driver side; If the diagnostic interface is not found, please refer to the vehicle maintenance manual. 3) Insert one end of the diagnostic main test line into the device DB-15 connector and tighten the retaining screws.
- Page 9 HD Series 2) Connection of non OBD-II interface Vehicles with non OBD-II interface need to connect the main test line with the corresponding special connector, as shown in the figure:...
-
Page 10: Introduction Of Each Function Menu
HD Series Note: at this time, the equipment is powered by the vehicle diagnosis seat, and the equipment starts automatically. If not, it may be that the vehicle diagnosis seat has no power supply, and the equipment can be powered by the cigarette lighter or battery clip. - Page 11 HD Series Function Icon Function description name Used to report the problem to the company's service system (need to Feedback connect to the network) when the system cannot be accessed during the diagnosis process Used to print test results or test reports.
-
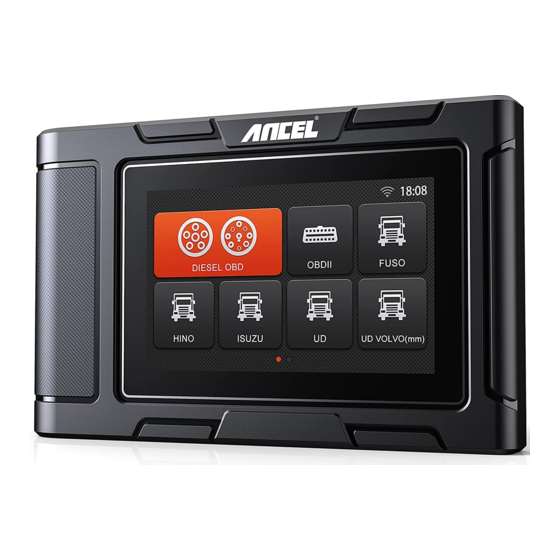
Page 12: Diagnostic Function
HD Series Used to set device language, unit and General time, view device information and restore factory settings Table 2: Function main menu Function Icon Function description name Diagnostic procedure: Diesel OBD, Diesel OBD see section 5 for details Diagnostic procedure: OBD-II, see... - Page 13 HD Series Click【DIESEL OBD】menu enter the diagnosis interface. 2) Select connector according to the specific situation, such as 【Diesel6&9PIN】; 3) Select the required diagnostic method, such as 【Standard protocol(Fast Scan)】;...
- Page 14 HD Series 4) Click 【Start test】 5) Select【(J1939) Engine】;...
- Page 15 HD Series 6) Enter【Diagnosis home page】; The main diagnostic interface usually includes the following options: ECU Information: Read and display the control system module information detected from ECU.
- Page 16 HD Series Read Fault Code: Read the fault code information retrieved from the vehicle system module. Erase Fault Code: Clear the fault code and freeze frame data retrieved from the vehicle system module Live Data: Read and display the real-time operation...
-
Page 17: Dpf Regeneration
HD Series DPF Regeneration Select【DPF】 in main menu, the screen will display the vehicle model list and then operate according to the screen prompt. -
Page 18: Service Reset
HD Series Service Reset Select 【Service Reset】to reset the service lamps on the instrument cluster. The service system is designed to alert the driver when the vehicle is due for a service. Pin Detect This function mainly measures the voltage of 16 PIN of OBD diagnostic interface, and judges the pin position of K- line and CAN line. -
Page 19: Data Management
HD Series After connecting the OBD interface of vehicle, click the main interface 【Tools】 to select pin detection. The program automatically measures the 16pin voltage of OBD diagnosis interface, and judges the pin position of K-line and can line, as... -
Page 20: Diagnostic Software Upgrade
HD Series Diagnostic Software Upgrade By connecting the device to the wireless network, the diagnostic software can be upgraded and the product function can be improved in time. Open 【Update】 in the function main menu, and the system will automatically search for the latest update program, as shown in the figure below. -
Page 21: Settings
HD Series Settings Select 【Settings】 from the main menu to open the setting interface, where you can adjust the following system settings. 14.1 Wi-Fi Connection The device supports wireless network connection for diagnosis software upgrade and problem feedback. 14.2 Brightness The device supports screen brightness setting, please adjust it according to your adaptive brightness. -
Page 22: Volumes
HD Series 14.3 Volumes The device supports volume adjustment. 14.4 User Information and Activation Activation The products are not activated when they leave the factory. Connect the network to enter the setting, and click 【Activation】 to activate the machine. -
Page 23: User Info
HD Series Note: Please ensure that the device is connected to an effective Wi-Fi network before performing the activation operation. User Info Set your personal information: name, telephone, email, address, etc. -
Page 24: Storage
HD Series 14.5 Storage Cleaning up useless data with one click, freeing up more space and cleaning up regularly will help the system run more stably. 14.6 General Language Please select settings based on the language you support for the model you purchased. -
Page 25: Unit
HD Series Unit This option can set the data flow unit in the diagnostic equipment software. Please select metric system or English system as required. Date&Time This option can set the date / time of the device. The default is automatic network synchronization update, or it can be set manually. -
Page 26: About
HD Series About This option is used to look up the device model, version, serial number, etc. Reset This option can restore the original settings of the device, which will delete all the data stored in the device, including the activation information and model data. -
Page 27: Printer Introduction
HD Series Printer Introduction Printer combination and split Hold the printer in your hand, aim at the lead-in slot on the back of the main unit, push it in slightly, and you will hear a “click” voice, which means the main unit and the printer has already connected together. -
Page 28: Printer Self-Test Function
HD Series Hold the position of the printer paper bin cover with your fingers and open the cover up; Put the printing paper into the paper bin according to the diagram. Pay attention to the direction of the paper. If the installation is reversed, the printing will be blank;... -
Page 29: Faq (Frequently Asked Questions)
HD Series When the machine is turned on, press the printer test key briefly, and the printer will automatically print out a piece of blank paper. In the case of power on, long press the printer test key for three seconds, the printer will automatically print a section of self-test content, indicating that the printer function is normal. - Page 30 HD Series Answer: There is no need to register the machine. If your activation was failed, please kindly check your network. Question: What does the Simulate and DEMO menus mean? Answer: Simulate and DEMO are both DEMO menus, not diagnosis function menus. The information in these...
- Page 31 HD Series Statement This equipment has been tested and found to comply with the limits for a Class B digital device, pursuant to Part 15 of the FCC Rules. These limits are designed to provide reasonable protection against harmful interference in a residential installation.
- Page 32 HD Series...
Need help?
Do you have a question about the HD Series and is the answer not in the manual?
Questions and answers