
Related Manuals for Midea VCP7


Summary of Contents for Midea VCP7
- Page 1 使用說明書 無線旋風式 吸塵機 型號:VCP7 充電電壓:33V 額定電壓:29.6V 功率:450W 本說明書的所有內容均已仔細 核對。如有印刷錯誤或誤解, 可向美的客戶服務中心查詢。 產品若有技術改進,會 編進新版說明書中,恕不另 行通知。產品外觀、顏色如 有改動,請以實物為準。 VCP7...
- Page 2 - 使用本產品前,請仔細閱讀使用說明書內所提及的操作規則和說明。 - 八歲或以上的小孩/感官與感知能力受限/缺乏相關知識或經驗 人仕,均須在適當人員監督下安全使用。未滿八歲的小孩均不建議 獨自使用本產品。 - 除非有適當人員監督下或給予如何安全使用本機的指示並讓其了 解涉及的風險,本機並非設計給運動、感官與感知能力受限或缺乏 相關知識或使用經驗的人(包括孩童)來使用。 - 應監督兒童以避免將本產品當成玩具,電器及電源線亦應存放在 兒童無法接觸的地方。 - 如發現適配器的電源線損壞或機件有任何異常,請即停止使用及 聯繫本公司的售後服務團隊,以作安排本公司授權之合資格的技術 員作檢查及維修。 - 嚴禁擅自拆卸、重組、改裝本產品,以免發生危險,如發現產品出 現任何問題,請即聯繫本公司售後服務團隊。如發現產品曾作出以 上行為,本公司有權收回保養服務。 - 本電器僅供家庭使用,請勿在戶外使用。 - 嚴禁吸入以下物件: 1. 水、溶劑等所有液體; 2. 建築粉末和垃圾,如石灰和水泥粉塵。 3. 熱源,如未熄滅的煙頭及煙頭。 4. 尖銳的碎片,如玻璃。 5. 易燃易爆物品,如汽油和酒精製品。 - 請勿將電器的任何部份(包括主機、電池、電源適配器)浸入水中 或其他液體中,亦請遠離熱源或不應放置在陽光下。另外,請抹乾 雙手再接觸電源線、插座或電源適配器。 - 請先清潔集塵杯再開始使用本產品。...
- Page 3 - 請先關閉電源及拔下插頭,再進行清潔、維護、重新放置或儲藏電 器。 - 只能使用原裝電源適配器作充電用途,如使用其他適配器則可能導 致產品損壞。 - 請先關閉電源再取出電池。如丟棄本產品時,請妥善處理電池。 - 請勿讓極片或插孔接觸導體,以免短路。 - 請勿拉扯電源線,如需拔下插頭,請用手緊握住插頭而非電源線。 如需移動本產品時,請將手扶主機或座地支架,而非利用電源線作 移動產品。 - 請勿將吸塵器的電源線穿過尖銳物件,以免電源線損壞。 - 請確保電壓與吸塵機的充電電壓相同。 - 如吸塵口堵塞時,請及時清理再使用本產品,以免摩打損壞及吸塵 機受熱變形。 小貼士 1. 在以下情況下,可能需要較長的充電時間。 a. 在室內溫度超過30℃的地方充電時; b. 停止運行後立即充電時。 2. 無論使用多長時間,請在使用後進行充電 3. 如未使用或充電時,建議及時拔掉電源插頭。 4. 若長時間(超過2個月)不使用本吸塵機,亦請每兩個月充電一次, 確保電池壽命。 5. 充電過程中,本電器或電源適配器可能會發熱,屬正常現象。請放 心使用。...
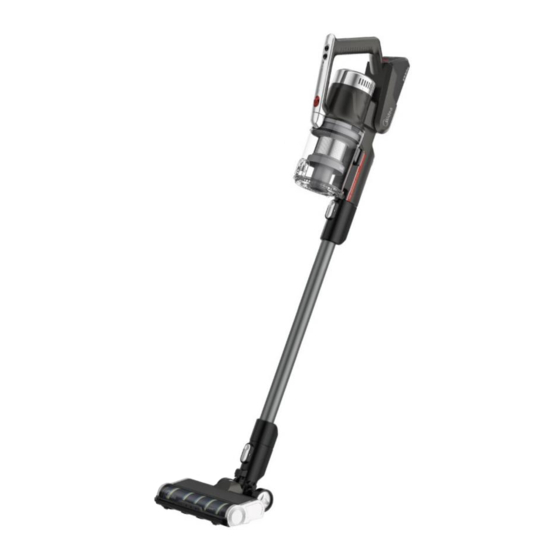
- Page 4 延伸管 電動地刷 使用手冊 電動床刷 2合1刷 扁吸 座地支 座地支 電源適配器 說明書 電池 架直桿 架地座...
- Page 5 5°C 40°C 請聯繫本公司的售後服務團隊, 以作安排檢查及維修。 座地支架 使用時間...
- Page 6 使用簡介 吸塵口 體積較大的 5°C 40°C 主機 主機 BP28825A 使用簡介 1 2 3...
- Page 7 清潔與維護 無論將吸塵機放在座地支架或單獨放置時,請確保放置在平隱的地面上,以免掉 落而造成損毀。 無論吸塵機是在運作中或非使用期間,均應小心使用或放置,以免損壞電器。 安裝座地支架 如圖所示,安裝座地支架組件以及底座,然後將座地支架垂直放置在水準地面上, 如右圖所示。 將吸塵機存在放座地支架前,請先確認已關閉電源及座地支架已放在平隱的地面上, 再將吸塵機按如下圖所示的位置輕輕放在座地支架上,確保吸塵機已平穩放置便可。...
- Page 8 清潔與維護 如圖所示,將吸塵機平放後,按下鎖定按鈕,再取出集塵杯及傾倒灰塵。 塵滿位置 按下 從集塵杯中取出過濾網 吸塵機...
- Page 9 清潔與維護...
- Page 10 清潔與維護 以上提示扭下 完成 吸塵口...
- Page 11 清潔與維護 HEPA HEPA 正確 HEPA HEPA 吸塵機 再 HEPA HEPA 使用 順方向安裝電池,直至「咔」一聲 為安裝完成。...
- Page 12 故障檢查 捲入了體積較大的垃圾 (包裝膜等) 本公司售後服務團隊 充電未完成 進行 (5°C-40°C) 產品規格 型號 額定電壓 功率 塵杯容量 產品尺寸 (闊 x 高 x 深) 淨重 3.3 公斤 VCP7 29.6V 450W 0.7L 255x1085x232mm...
- Page 13 All the content in the manual have been checked carefully. If there are any errors in printing or misunderstanding in the content, please contact Midea customer service center. Note: Where there is a technical improvement on the product, it will be included in the new edition of the manual.
-
Page 14: Safety Instructions
- Please contact with Midea customer service team ofr - To avoid dangerous, this is NOT allow to reassemble the product by self, please contact Midea customer service team if find out the quality issue. Midea have the rights to terminated the warranty service if findings the holder reassemble the product. - Page 15 - Please ensure the appliacen power off before take out the battery. For avoid the injury, please do not disassemble the battery by self. Please contact to Midea customer service team to reserve the checking and repair service if find any quality issue on the battery.
-
Page 16: Product Introduction
Product Introduction Installation and Parts ON/ OFF Mode selection Dust container release button Battery Dust cleaning button Tube release button Extension Tube Power brush release button Power Brush List of accessories Manual user Mini Power 2-in-1 brush Crevice tool Docking Docking Power Battery... -
Page 17: Battery Charge
3. The indicator will flash if the battery power is low in the running process. 4. Please contact with Midea customer service team if find the battery using time shorten obviously and the charging time to be longer as normal. To avoid injury, this is not allowed to disassemble the battery and the appliance by self. - Page 18 Introduction of Use Operate Introduction Note 1. To prevent blockage of the air passage large objects like large paper and packing materials should be removed from the area before start cleaning. 3. Please properly dispose the battery when wasting the appliance; 4.
-
Page 19: Cleaning And Maintenance
Cleaning and Maintenance Storage and Usage Note 1. To avoid the appliance damage, please ensure to place the appliance on the docking station at the surface level, even the docking station placed independently. 2. Please pay attention to use on the appliance, no matter this is operating or storage on the docking station. - Page 20 Cleaning and Maintenance Dust container Disassemble and Cleaning Note Please clean the dust container regularly to maintain the suction power if vacuum cleaner. Place the appliance laid flat on the surface level, press the lock button, open the dust cup and dump the dust. Push Dust full Push the button...
- Page 21 Cleaning and Maintenance Cyclone Cone Disassembling and Cleaning Remove the cyclone cone after take out HEPA filter. Ensure all of the components is completely dried before assemble to the cyclone cone parts. Close Close Power Brush Disassembling and Cleaning Note Please clean the power brush in regularly, to maintain the cleaning performance.
- Page 22 Cleaning and Maintenance Power brush Disassembling and Cleaning 2. Remove the cover from the power brush, and start to clean up the brushroll. Assemble back to the power brush after cleaning, refer to the step as following instructions. Press Pull out the brushroll. Remove the cover of power brush Mini power brush Disassembling and Cleaning...
-
Page 23: Battery Installation
Cleaning and Maintenance HEPA filter Disassembling and Cleaning Note 2. The parts must be completely dry before installing. 3. Do not scrub the filter cotton or apply brute force to it. 4. Please ensure that the filter cotton has been installed before assembly. 5. -
Page 24: Troubleshooting
5-40°C ) -The battery is not used for Battery leaks -Replacement battery a long times Product specification Dust cup Model Rated Voltage Power Product size (WxHxD) Net Weight capacity VCP7 29.6V 450W 0.7L 255x1085x232mm...
Need help?
Do you have a question about the VCP7 and is the answer not in the manual?
Questions and answers