Table of Contents
Advertisement
Quick Links
Advertisement
Chapters
Table of Contents

Related Manuals for Midea VCWX10


Summary of Contents for Midea VCWX10
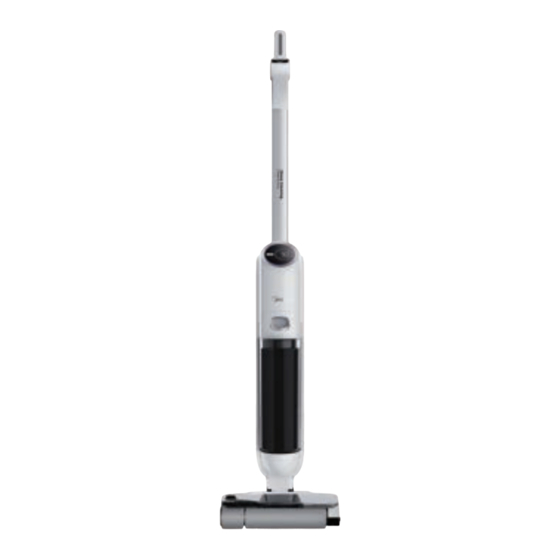
- Page 1 拖地吸塵機 使用說明書 VCWX10...
-
Page 2: Table Of Contents
感謝選用Midea產品!為確保客戶清楚安全使用方式及了解本產品的功能和特性,請於使用 本產品前詳細閱讀本使用說明書。 目錄 目錄 重要安全說明 產品規格 產品介紹 安裝方法 使用方法 清潔及維護 故障處理 商標、版權及法律聲明... -
Page 3: 重要安全說明
重要安全說明 預防措施 為免因不安全或不當使用本產品而造成不可預見的風險或人身傷害,請在使用本產品前細心閱讀 本使用手冊。另請在收貨時,仔細檢查包裝及產品,確保一切完好並操作無異常。若有任何損 壞,請於購買產品七天內聯絡本公司售後服務團隊或零售商/經銷商。 警告:為確保使用者人身安全,絕不允許擅自對本產品進行任何改裝,如發現用於其他用途而造 成危險,本公司有權不作維修保養。(有關保養條款細則可參閱保修卡或Midea HK官網。) 符號解釋 危險 該標誌表示由於極度易燃,因此對人命及健康有危險。 電壓警告 該標誌表示由於電壓因素,因此對人命及健康有危險。 警告 該標誌表示具有中等程度的危險,如果不加以避免,可能導致死亡或嚴重傷害。 注意 該標誌表示具有輕微程度的危險,如果不加以避免,可能導致輕微至中度傷害。 注意 該標誌表示重要資訊,並非危險。 遵守指示 該標誌表明,維修技術人員應只按照操作說明操作及維修本電器。 在使用之前,請認真仔細閱讀有關使用說明,並將其儲存在安裝地點或裝置的附近,以備日後使 用!... - Page 4 安全說明 • • • 本產品適用於室內硬地面,包括打蠟地面、石材地面、橡膠地面、大理石地面 、花崗岩地面、水磨石地面、實木地面、複合地面、竹木地面,以及釉面磚、 瓷面磚等平地。如果在不平坦的地面上使用,可能無法達到最佳效果。 • 請勿在易燃易爆物品附近或表面使用本產品,否則可能引起火災和爆炸。 • 請勿在燃燒的壁爐或運作中的加熱器或暖爐附近使用本產品,以防止機殼變形。 • 請勿用於清洗高温物質(未熄滅的煙頭、火柴或熱灰等)、超細物質(石灰、 水泥、木屑、石膏粉、灰燼、木炭等)、危險物質(溶劑、除垢劑等)、化學 物質(酸性物質、洗滌劑等)和其他物理性質不明的物質。 • 請勿使用本產品吸入洗滌劑、煤油、汽油、酒精、油漆或香水,否則可能導致 短路、火災或爆炸。 • 請勿使用本產品吸入激光打印機和複印機用墨粉,否則可能導致火災或爆炸。 • 請勿使用本產品吸入尖鋭或體積大的物件,如玻璃碎片、小玩具、扣針、萬字 夾、石頭、石膏和紙片,否則可能會堵塞並損壞機器。 • 請勿使用本產品吸入任何燃燒或冒煙的物體,如未熄滅熱源的煙灰、燃燒的煙 頭或火柴。 • 本產品不能用於清潔強油脂、強粘度或強染色性質污漬,如鞋油、油漆和顏 料。 • 以免發生觸電危險,觸摸插頭或產品任何部份前,保持雙手乾燥。 • 如果插頭損壞,請停止使用,並聯繫本公司售後服務團隊,以作預約檢查及維 修。 • 請保持本產品的吸入管道及任何運作中的零件遠離長髮、寬鬆衣物、手指等身 體部位。請勿將滾刷吸入口、配件及其尖銳部份對準眼睛或耳朵,或將其放入 口中。 • 請使用本公司及本公司認可廠家生產的清潔劑。 •...
- Page 5 安全說明 • 8歲及以上兒童,肢體殘疾、意識或精神不良者,或缺乏經驗和知識者,在有 人監督或指導如何安全使用本設備並瞭解相關危險的情況下,可以使用本電 器。 • 請勿讓兒童在無人看管的情況下清潔和維護本電器。 • 兒童不得玩耍本電器。 • 電器運作時,禁止升降或搬運電器,禁止將機器側放,以防止污水進入電機。 • 使用後將機器靠牆放置,以防止傾翻。 • 請確保已完成安裝清水箱及污水箱,再開始使用本拖地吸塵機。 • 不要在排出口內放置任何小物件或堵塞排出口。清除任何可能干擾氣流通過排 出口的小物件,以防止機器過熱。 • 請勿弄濕機體,否則可能因短路而造成損壞和火災。 • 只能將產品直接放於「充電底座」上為電池進行充電。 • 清潔或維護電器之前,必須將插頭拔出插座。 • 本説明書中的所有技術及其它數據均由本公司或指定的第三方檢測公司獲得, 本公司保留最終解釋權。 清潔劑使用及注意事項 • 按照説明進行混合和清潔。建議使用本公司或本公司認可廠家生產的清潔劑, 該清潔劑不含酸、鹼溶液或對環境有害的物質。 • 如果加入大量清潔劑,使用時會產生較多泡沫,而泡沫可能滲入電機,造成危 險。 • 清潔劑應放在兒童接觸不到的地方。如果清潔劑不慎進入眼睛,應用清水徹底 沖洗;如果不慎攝入,請立即就醫。處理污水和清潔劑時,請遵守當地的環境 保護法規。 請仔細閱讀並保存以備日後參考...
-
Page 6: 產品規格
產品規格 VCWX10 產品型號 220-240V~ 50Hz 150W 充電額定輸入 充電輸出 220W 額定功率 22.2V 电压 4.6kg 淨重 270x235x1160mm 產品尺寸... -
Page 7: 產品介紹
產品介紹 產品簡介 模式切換 「強力模式」 快捷鍵 電源開關 *產品實物面板以英語 顯示–“TURBO” 按下靜音 顯示屏 語音功能 污水箱釋 放按鈕 清水箱釋放按鈕 清水箱 污水箱 滾刷前蓋 滾刷前蓋 彈簧鎖 地板刷 電動滾刷 配件清單 充電底座 配件收納座 清洗液 滾刷 過濾器 清潔刷 使用說明書... - Page 8 產品簡介 電解水開關 強力模式 *產品實物面板以 英語顯示–“TURBO” 電源開關 模式切換 1. 模式切換按鈕 2. 強力模式 快捷键 ● Auto(自動模式):機器出水量足 ● Turbo(強力模式):增加滾刷速度 夠潤濕滾刷,以清潔地面; 和水量,足以清潔地板上的嚴重污漬; 電解水除菌功能 ● Quick(快速吸入模式):機器停 ● 將自來水轉化成無毒無害及強氧化性 止出水,用於吸入乾性垃圾及殘餘 的電解水,有效殺菌清潔地板。 水份;...
- Page 9 充電底座 充電位接觸點 電源線 充電底座 底座踏板 熱風排氣口 熱風排氣口 ● 使用完畢後,將機器放入充電底座內進行充電、自清潔、乾燥。...
- Page 10 清潔刷 ● 刷頭是用於清除附着在廢水箱和風道下方管道上的頑固污垢; 刷子 ● 手柄位置內藏旋轉葉片,用於清潔纏繞在滾刷上的毛髮。 旋轉葉片 配件支架 ● 將配件支架的突出部分插入空氣乾燥底座的凹槽中; ● 用於存放滾刷、清潔刷和過濾網。 清潔刷 滾刷 過濾網 凸出部分 凹槽 清潔劑 ● 注意添加的清潔劑比例; ● 使用隨機附贈之清潔劑。 清潔刷 清潔劑 滾刷 過濾器 凸出部分 凹槽部分...
- Page 11 安裝方法 手柄的安裝方法 安裝: 將手柄末端沿垂直方向插入裝置主體端 口,如聽到聲響,則表示安裝成功。 拆卸: 手柄 從背面的孔中取出橡膠,用螺絲刀或其他 工具插入孔中,向上拉出手柄。 插入 拆卸孔 清洗液 充電 注意 請先將產品充電再進行首次使用。 1. 將電源插頭接入220-240V~電源。 2. 將機器直立放於充電底座並確保機底已完全平放於底座中。 如成功進行充電,機器會有語音提示"開始充電 (Start Charging), 並於屏幕顯示當前電量。 3. 完成充電需要4小時,當電池充滿時,屏幕熄滅並會停止繼續充電。...
- Page 12 清水箱 注意 只需向清水箱加水。 用拇指按下清水箱按鈕,向外拉, 打開清水箱頂蓋,向水箱內加入自來 即可取下清水箱; 水; 如需強力清潔,按照瓶身上的 合上清水箱蓋; 説明將清洗液倒入水箱; 將清水箱按原樣裝回機身,聽到聲 清水箱缺水時,會有語音提示;此時自 響即安裝成功; 動模式下無水噴出,但快速模式可以正 常使用。 請向清水箱加水 *產品語音導航預設英語。...
-
Page 13: 使用方法
使用方法 開機與清洗 腳踏滾刷前蓋,向後拉動手柄,吸塵機將進入「待機模式」; 按下電源鍵,以開機或關機; 開機後預設進入自動模式, 可按下 Mode (模式鍵)切換到快吸模式; Mode 短按 Turbo(「強力模式」快捷鍵), 电解水除菌功能 開啓或關閉該功能。 此功能只能在自动和强力模式下使用。 Anti-bacteria Turbo function 注意 使用機器後,建議將其垂直放置在專門設計的充電底座上。... - Page 14 直立暫停功能 如將運作中的機器,腳踏滾刷前蓋並將機身直立,機器將停止運作、進入待機狀態;待機 3 分鐘後自動關機。 滾刷自清潔及熱風烘乾 將機器放入充電底座,確保機器處於充電狀態,踩住充電底座前方踏板,開始進行「滾 刷自清潔」功能;在此過程中,如需停止自清潔 或 烘乾功能,踩下踏板 3 秒鐘或按下 開關按鈕;自清潔結束後,及時清理污水箱;如底座上有殘留污漬,應及時清理。 自清潔:機器自動清潔滾刷和機身管道(約 2 分鐘); 乾燥:繼續向充電底座吹入暖風,並適當烘乾滾刷(約50 分鐘);...
- Page 15 清潔及維護 清潔污水箱 注意 1. 清潔後,建議將機器直立放置在充電底座上;請勿將機器放置在陽光直射或潮濕處; 2. 為了不影響機器性能,建議定期維護零件; 3. 清潔前,請斷開電源,以關閉機器; 4. 用水或中性清潔劑擦洗,擦洗前務必擰乾清潔布,不要讓水滲入電氣部件。 用拇指按壓廢水箱按鈕,向外拉, 一隻手托住水箱,一手拉出水箱頂蓋。 即可將污水箱取出。 污水箱頂蓋 向外拉 向上 污水箱 如圖所示, 將污水從水箱一側倒出。 從污水箱頂蓋中取出過濾網,檢查蓋上 如果水箱內壁有頑固污垢,請直接 是否有異物卡住。 用清潔刷進行清潔。 過濾網 污水箱頂蓋...
- Page 16 5. 取出後,用清水沖洗,徹底乾燥,並按原樣放回原處。 清洗 乾燥 6. 在兩側按下彈性卡扣,取下風道, 7. 將污水箱裝回機器,直到聽到聲響; 用水沖洗, 沖洗後照原樣安裝。 (安裝污水箱時,建議用另一隻手 托住機身,避免傾翻) 。 乾燥 風道 按下拆卸...
- Page 17 清潔滾刷和蓋子 注意 1. 建議每次使用後,應及時清洗、烘乾滾刷和蓋子; 2. 若發現地板刷吸入面有殘留污漬,可用濕布擦拭。請勿用水沖洗。 1. 如圖所示,按壓鎖釦,取下蓋子和 2. 取下蓋子和滾刷,打開清潔刷的旋轉葉 滾刷。 片,清除滾刷上的毛髮等纏繞物。 3. 按圖示方向拆下小滾刷和大滾刷, 4. 清潔後, 按圖示方向依次安裝大小滾刷。 用清水沖洗滾刷和蓋子。 聽到咔噠聲,則表示安裝成功。 大滾刷 小滾刷 手柄...
- Page 18 5. 如地板刷吸入口(滾刷拆卸後外露部分)有殘留污漬,應擦拭乾淨;不得用水沖洗。 地板刷吸入口 6. 清潔後,將滾刷蓋和滾刷的一端對準地板刷電機的從動輪,然後將滾刷蓋彈簧鎖與 滾刷蓋插銷槽對齊。聽到聲響,則表示安裝成功。 滾輪...
- Page 19 故障處理 使用本產品時,如發現異常情況,請先查閱以下列表。如仍未能解決故障問題,請與本公司售後服 務部聯絡以作預約檢查及維修。 問題 可能原因 解決方案 滾刷被頭髮纏住或被異物卡住 拆下滾刷進行清潔並重新安裝 ● 污水箱已滿 清潔污水箱 ● 清水箱缺水 於清水箱加水 機器未能運作 ● 管內有垃圾堵塞 清理污水箱下方管道 ● 電池電壓低 充電 ● 滾刷、滾刷蓋或污水箱未正確安裝 拆下所有配件並重新安裝 ● 滾刷被頭髮纏住 清潔滾刷 ● 輥軸上有毛髮堆積 拆下滾刷,清潔滾軸 ● 吸力減弱 擦拭地板刷吸入口,清潔風道下方 地板刷吸入口或管道堵塞 ● 管道 污水箱過濾網變髒 安裝前清潔過濾網並徹底乾燥 ● 未安裝污水箱過濾網 安裝過濾網...
-
Page 20: 商標、版權及法律聲明
商標、版權及法律聲明 標誌、文字商標、商品名稱、商業外觀及其所有版本均為美的集團及/或其附屬公司(「美的」) 的有價資產;當中美的擁有商標、版權及其他知識產權,以及使用美的商標任何部分所產生的所有商譽。 未經美的事先書面同意,將美的商標用於商業目的,可能構成商標侵權或違反相關法律的不公平競爭。 本手冊由美的製作,美的保留其所有版權。未經美的事先書面同意,任何實體或個人概不得使用、複製、 修改、分發本手冊的全部或部分內容,或與其他產品組合銷售。 所有描述的功能及說明在本手冊印刷時屬最新資料。然而,由於功能及設計的改進,實際產品可能有所 不同。... - Page 21 All the contents of this Guide have been checked carefully. If there are any printing errors OR misunderstanding, please contact with Midea Customer service team. NOTE: It will be compiled into the new version of the guide without any notice if involve the technical...
- Page 22 Thank you for choosing Midea! Please read this user manual be carefully before start use this new appliance. To ensure that you know the operate knowledge and understand more about the product features and functions in a safe way. CONTENTS...
-
Page 23: Safety Instructions
SAFETY INSTRUCTIONS Intended Use The following safety guidelines are intended to prevent unforeseen risks or damage from unsafe or incorrect operation of the appliance. Please check the packaging and appliance on arrival to make sure everything is intact to ensure safe operation. If you find any damage, please contact the retailer or dealer. - Page 24 Safety Instructions • This product is suitable for hard floors in the indoor environment, including waxed floors, stone floors, rubber floors, marble floors, granite floors, terrazzo floors, solid wood floors, composite floors, bamboo floors, as well as glazed tiles, ceramic facing tiles and other flat ground. It may not achieve the best results if the product is used on uneven ground surface.
- Page 25 Safety Instructions • This appliance can be used by children aged from 8 years and above and persons with reduced physical, sensory or mental capabilities or lack of experience and knowledge if they have been given supervision or instruction concerning use of the appliance in a safe way and understand the hazards involved.
- Page 26 Use and Precautions of Washer Detergent • Mix and clean according to instructions. It is recommended to use cleaning liquid produced by our company or manufacturers approved by our company, which do not contain acid, alkali solutions or substances harmful to the environment.
-
Page 27: Specifications
SPECIFICATIONS Product Model VCWX10 Charging rated input 220-240V~ 50Hz 150W Charging output Power 220W Voltage 22.2V Net Weight 4.6kg Product Size 270x235x1160mm... -
Page 28: Product Introduction
Product Introduction Product introduction Switch Power Turbo Mode Power ON/OFF Press to mute Display Wastewater tank Voice navigation release button Clean tank release Clean water tank Dirty Water Tank Brush-roll cover Brush-roll cover latch Floor brush Brush-roll List of Accessories Docking station Accessory holder Floor Washer... - Page 29 Parts Electrolyzed water Turbo button On/O button Mode switch button Mode switch button Turbo button • Auto mode: the water from the • Turbo mode: the speed of the machine wets the brush-roll to brush-roll and the amount of water clean the floor;...
- Page 30 Docking Station Charging contacts Power Cord Charging base Base pedal Hot-wind outlet Hot-wind outlet • After use, put the machine into the charging base for charging, self-cleaning and drying.
- Page 31 Cleaning brush • One end is a brush to clean the stubborn dirt attached to the wastewater tank and the pipe under the ventilation pipe; Brush • The other end is a rotating blade to clean the hair wrapped on the roller brush. Rotating blade Accessory holder...
-
Page 32: Installation
Installation Handle Installation and Removal Installation Insert the end of the handle into the port of the main unit along the vertical direction until there is a click, which indicates the installation Handle is successful; Removal Remove the rubber from the hole Insert in the back, insert a screwdriver Disassembly... - Page 33 Filling clean water tank Attention Fill water only to the clean water tank. Press the clean water tank Open the top cover of the clean button with the thumb and pull water tank and fill tap water to outward to remove the clean the tank;...
-
Page 34: Operating Instruction
Operating Instruction Turning on and Cleaning Step on the floor brush and pull the handle, and the machine enters standby state. Press the On/O button to It enters auto mode after turning turn on/o the machine. on; you can press the Mode button to switch to quick suction mode. - Page 35 Upright Pause Function In working state, you can step on the floor brush to erect the body, the machine will stop working and enter standby state; it will automatically turn o after 3 minutes of standby. Self-cleaning + Drying Function Put the machine into the charging base, ensure that it is in the charging state, step on the pedal of the charging base with your foot, and start self-cleaning;...
-
Page 36: Cleaning And Maintenance 1
Cleaning and Maintenance Waste water detect alarm Attention After cleaning, it is recommended to place the machine upright in the charging base; do not place the machine in places with direct sunlight or moisture; In order not to a ect the performance of the machine, it is recommended that you regularly maintain its parts;... - Page 37 Wash with clean water after taking it out, dry it thoroughly and put it back as it was. Wash Press the following elastic Install the wastewater tank back to buckles on both sides to the machine until there is a click remove the air duct and rinse it sound;...
- Page 38 Brush-roll and Cover cleaning Attention It is recommended that after each use, the roller brush and cover should be cleaned and dried in time; If residual stains are found on the suction surface of the floor brush, wipe it with a wet cloth. Do not rinse it with water. Press the latch as shown, and Remove the cover and the roller remove the cover and the roller...
- Page 39 If residual stains are found in the suction port of the floor brush (exposed part after the roller brush is removed), wipe it; do not rinse with water; Suction port of floor brush After cleaning, align the cover of the roller brush and one end of the roller brush with the driven wheel of the floor brush motor, and then align the latch of the cover of the roller brush with the latch slot of the cover of the roller brush.
-
Page 40: Troubleshooting 1
Troubleshooting Please check the following table in case of any abnormal conditions when using the product. Problem Possible cause Solution The roller brush is entangled Remove the roller brush to ● by hair or stuck by foreign clean and reinstall objects Wastewater tank is full Clean the wastewater tank... - Page 41 Problem Possible cause Solution Water shortage in clean water Add water to the clean water ● Floor brush tank tank doesn’t spray water Clean water tank is not Reinstall the clean water ● installed properly tank Too much water in the Clean the wastewater tank ●...
-
Page 42: Trademarks, Copyrights And Legal Statement
Midea may constitute trademark infringement or unfair competition in violation of relevant laws. This manual is created by Midea and Midea reserves all copyrights thereof. No entity or individual may use, duplicate, modify, distribute in whole or in part this manual, or bundle or sell with other products without the prior written consent of Midea. - Page 44 mideahk.com MideaHK...
Need help?
Do you have a question about the VCWX10 and is the answer not in the manual?
Questions and answers