Table of Contents
Advertisement
Quick Links
Advertisement
Table of Contents

Related Manuals for Midea VCW40


Summary of Contents for Midea VCW40
- Page 1 VCW40 21.6V 220W VCW40...
- Page 2 使用本產品前,請仔細閱讀使用說明書內所提及的操作規則和說明。 八歲或以上的小孩/感官與感知能力受限/缺乏相關知識或經驗人仕,均 須在適當人員監督下安全使用。未滿八歲的小孩均不建議獨自使用本產品。 除非有適當人員監督下或給予如何安全使用本機的指示並讓其了解涉及的 風險,本機並非設計給運動、感官與感知能力受限或缺乏相關知識或使用經 驗的人(包括孩童)來使用。 應監督兒童以避免將本產品當成玩具,電器及電源線亦應存放在兒童無法 接觸的地方。 如發現適配器的電源線損壞或機件有任何異常,請即停止使用及聯繫本公 司的售後服務團隊,以作安排本公司授權之合資格的技術員作檢查及維修。 本電器僅供家庭使用,請勿在戶外使用。 本產品適用於室內家居環境中的硬地板,包括打蠟過的地板、石材、橡膠、 雲石、花崗岩、水磨石、實木、層壓板、竹地板以及各種鏡面磚、瓷質磚 等平面。本產品在不平整的表面上可能無法達到最佳效能。 請勿在易燃或易爆物件附近或表面使用本產品,否則可能會引致火災和爆 炸危險。 請勿在工作中的壁爐或加熱器附近使用本產品,以防外殼變形。 請勿吸入高溫物質(未熄滅的香煙、火柴或熱灰等);超細物質(如石灰、 水泥、木屑、石膏粉、灰燼、木炭粉等);有害物質(如溶劑、除垢劑 等);化學物質(如酸、清潔劑等),以及其他物理性質不確定的物質。 請勿使用本電器吸除清潔劑、煤油、汽油、酒精、油漆、香水等。這些 液體可能會引致短路、起火或爆炸。 請勿使用本電器吸取激光打印機和影印機中使用的碳粉,否則可能會引起火 災或爆炸。 請勿使用本電器吸除尖銳或較大的物件,如玻璃碎片、小玩具、扣針、 萬字夾、石頭、石膏、紙團,否則可能會卡住及損壞本電器。 請勿使用本電器吸除任何燃燒或冒煙的物件,如未熄滅的熱源所產生的 灰燼、燃燒的煙頭或火柴等。不得使用本電器清潔鞋油、油漆和顏料等較 油膩、黏稠或染色的污漬。 請勿將電器的任何部份(包括主機、電池、電源適配器)浸入水中或其他液 體中,亦請遠離熱源或不應放置在陽光下。另外,請抹乾雙手再接觸電源線 、插座或電源適配器。...
- Page 3 如出現以下任何一種情況,請即停止使用本電器並聯繫本公司的售後服務團 隊,安排本公司授權之合資料維修人員作出檢查及維修: 1. 清潔機從高處墜落,造成明顯損壞或操作故障。 2. 電源線損壞。 3. 摩打出現漏電、過熱或噪音情況。 4. 主機過熱、噪音、異味或吸力減弱。 如發現電線、插頭損壞,摩打出現漏電、過溫或噪音情況,主機過熱、噪音 、異味或吸力減弱等異常情況,請即停止使用及聯繫本公司售後服務團隊, 安排本公司授權之合資格維修人員作出檢查及維修。請勿自行維修,以免發 生危險。 本產品的氣流通道及活動零件應遠離長頭髮、寬鬆衣物、手指等身體部位。 請勿用真空軟管、連接桿或其他刷頭對準眼睛、耳朵或將其放入口中。 除清水外,請勿加入其他溶液,以免產生有毒有害氣體。 使用本電器後,請及時清理污水箱,以免產生異味。 使用本電器後,請將其存放於乾燥處。室內濕度會影響本電器的絕緣和使用 壽命。本洗地機機體和地板刷具有通電設定,不能浸泡在水中或用水沖洗。 請定期檢查吸嘴及保持吸塵口暢通。如有堵塞,請及時清除,以免造成吸力 下降及摩打發熱,影響本電器效能及使用壽命。 請先將電源關閉並拔掉插頭,再進行更換刷頭。 請勿自行改造、拆卸或維修本電器,以免發生危險。如本公司授權之維修人 員發現本產品經擅自修理(或任何一種上述行為),本公司有權取消保養服 務。 請確保電壓符合產品規格,否則有可能造成產品損壞或人身傷害。 如需清潔樓梯,請特別留心,以防掉落主機造成損壞。 請勿上下搖晃或猛烈撞擊本電器,以防污水倒流進入摩打。 當本電器運作時,請勿上下移動、側放、平放,以免污水倒流進入摩打。 使用後,應將本電器靠牆放置或擺放於座地支架上,以防絆倒造成人體傷害 ,或產品倒地造成損壞。 使用本電器前,請確保清水箱及污水箱已正確安裝。 為免本電器過熱,請勿擺放任何小物件於排氣口,以免造成堵塞。 請勿弄濕機身,否則會造成電器短路而引起火災。...
- Page 4 開/關 污水箱釋放按鈕 污水箱手柄 電動地刷面蓋 電動地刷 配件介紹 配件收藏托架 電源適配器 HEPA過濾網...
- Page 5 附有刷子,用於清潔污水箱內壁的 • • 附著頑固污垢。 手柄位置附有小刀片,輕力拉出,可 • • 用於清潔滾刷上纏結的毛髮。 配件收藏托架 可用於存放滾刷、清潔刷及 HEPA • 過濾網; 充電底座兩側設有固定托架的凹槽, • 將托架的凸出部份安裝至槽位便可。...
- Page 6 主機頂部設有手柄專用安裝口, 將手柄垂直安裝至底部,直至 傳出「咔」聲響為安裝完成。 主機充電 出廠時,主機電池並未進行充電,請務必在使用前將電池充滿。 • 將電源適配器的充電端插入充電底座背後 端口,並將插頭連接電源。 將主機直立放在充電底座上開始充電, 此時會有語音提示「Start charging (開 始充電)」,同時螢幕顯示充電量。 *主機語音預設為英語。 充電時間約4-6小時,充電完成後,螢幕 關閉及主機會自動關機。...
- Page 7 手握機身並抓住清水箱扭蓋,向 逆時針方向打開扭蓋並將水箱 上拉即可將清水箱取出。 注滿清水。 順時針方向將扭蓋扭緊。 面向印有「此為正面」的提示, 並將清水箱裝回主機,直至傳出 「咔」的聲響為安裝完成。 扭 當清水箱水量不足,將會有語音 提示。 *主機語音預設為英語。...
- Page 8 開啟主機 完成充電後,從充電底座取出主機,用腳踩在電動地刷的面蓋上,向後斜拉主機直至 傳出「咔」的聲響,將進入待機狀態; 按「開/關」鍵即開始運作,重覆 預設為「自動模式」,如按下「模式」 按下「開/關」鍵便可停止運作。 鍵,即切換成「快速模式」,重覆按下 「模式」鍵即切換回自動模式。 自動模式:內置水泵會自動運作,將滾刷棉絨沾水再進行清潔; • 快速抽吸模式:內置水泵停止運作,可作乾燥或快速吸乾地板上殘餘的水份; • 使用後,建議將本電器穩妥地存放在充電地座。 •...
- Page 9 直立開關模式 在待機模式下,將主機向後斜拉即可隨時重新開啟。如直立擺放後,將停止運作並處於待 機模式。如待機一分鐘後,仍未有任何操作,即自動關機。如需使用,需重新按下 「開/關」鍵。 自動清潔功能 將本電器擺放在充電底座後,確保產品已進入充電模式。 用腳踩踏底座前方的踏板2秒,即啟動自動清潔功能。完成自動清潔功能後,請即清潔污水 箱及底座位置。...
- Page 10 使用後,建議將本電器直立放置在充電底座上,避免陽光直射或受潮; • 為了不影響本電器的效能,應定期保養電器中所涉及的所有配件; • 請先關閉產品及切斷電源,再進行清潔。 • 可用水或中性清潔劑進行清潔,但切記將布/毛巾撤底扭乾再進行清洗, • 以免將濕氣傳到配件中。 手握主機,再按實污水箱按鈕並向 手握污水箱再將密封蓋子向上拉; 後拉,即可將污水箱取出; 密封蓋子 污水箱 如圖所示,將污水從水箱側面倒出。若水箱內存在固液混合廢物,建議取下污水箱背部 的清潔勺,對顆粒物及毛髮進行過濾。若污水箱內仍殘留固體廢物,請反覆沖洗過濾水 箱,或使用已延伸的清潔勺清潔污水箱內部;...
- Page 11 如圖所示,將污水從水箱側面倒出。 從污水箱頂部取出 HEPA過濾網。 若發現水箱內壁有頑固污垢,請使 用清潔刷清潔; HEPA過濾網 將 HEPA 過濾網從水箱中取出後,用 完成清潔後,將污水箱重新安裝於主 清水清潔乾淨,徹底晾乾後再裝回污 機,直至傳出「咔」聲響即為完成。 水箱。 推入...
- Page 12 清潔地刷面蓋 使用後,定期清洗地刷面蓋,保持電器乾淨整潔。 • 如圖所示,先按下面蓋上方的釋放按 鈕,再向後拉出,便可取出地刷面蓋 清潔完成後,面蓋左右兩邊的卡扣對準安裝回地刷的槽位,順方向將面蓋蓋好,直至 傳來「咔」聲響,即為安裝完成。...
- Page 13 如發現吸風口有殘留污漬,可用濕布擦拭,切勿直接用水沖洗; • • 清潔後,先將 (a)部份對準右邊刷蓋, 再將 (b)部份放進左邊刷蓋的槽位, 即安裝完成。...
- Page 14 檢查 主機未能運作 水量不足 進行充電 面 減弱 吸風口或管道堵塞 清除吸風口或管道內的障礙物 吸風口堵塞 吸風口 摩打運轉噪音 清除污水 污水已到「滿水位」 淨 VCW40 21.6V 220W 710ml 600ml 260x1200x290mm...
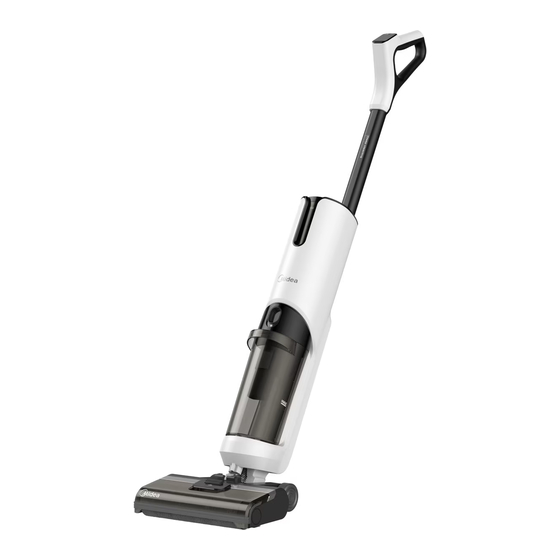
- Page 15 INSTRUCTION MANUAL 2-in-1 Mopping Vacuum cleaner Model: VCW40 Charging Voltage: 25V Voltage: 21.6V Power:220W VCW40...
-
Page 16: Safety Instructions
Keep the appliance and its cord out of reach of children, ensure that they do not play with the appliance. Please contact with Midea customer service team for reserve checking and repair service if this is damage on the socket or power cord. - Page 17 Safety Instructions Do not touch the plug or any live part of the product with wet hands to avoid electric shock. In case of any of the following conditions, please don't use the machine and send it to the customer service centre: 1.
-
Page 18: Product Introduction
Product Introduction Mode button 'Power' button Handle Display Clear water tank cover Fresh water tank Sewage tank release button Sewage Voice navigation control tank handle Sewage tank Power brush cover Power brush List of accessories Docking Accessory holder Adapter Brushroll station base Manual Hepa Filter... -
Page 19: Accessories Introduction
Product Introduction Accessories Introduction Cleaning brush Cleaning shovel Use the cleaning brush to clean the Unfold the extended handle when necessary stubborn dirt what attached on the to use, it is folded at the handle part. sewage tank inner. The extended handle use for filter the solid The cleaning brush with a blade hidden wastes such as particulate matters and hair. -
Page 20: Product Instructions
Product Instructions Handle Installation Vertically to hand held the handle and insert to the port on the main body. It is success to install once hear a "click" sounds. * Ensure this is firmly inserted to the Insert main body, pull it and confirm this is not easy to removed. -
Page 21: Fill Clear Water Tank
Product Instructions Fill Clear water tank Hold the main body and grab the fresh water Remove the fresh water cover and fill in tank cover to take out the water tank in the clear water. vertically. Unscrewed Pull up Screw the water tank cover to tighten it. Install Fresh water tank to main body, the direction indicated with the remind wordings "Face forward", this is success install once... -
Page 22: Product Operation
Product Instructions Product Operation After the product fully charged, take out the product from docking station. Step on the power brush cover and pull it to backward once hear a 'click' sounds out. The product state in standby mode. Operating: Press 'Power' button to turn on Cleaning mode selections: The product start the product, if press it once again to turn off with 'Automatic' mode by default. -
Page 23: Self-Cleaning Function
Product Instructions Vertical switch Press 'Power' button to turn on the product and stand it alone, it will be state in 'Standby' mode. Pull the product to backward until to hear a 'click' sounds out, the product is start operating. The product return back to stand in vertically, change to 'standby' mode. - Page 24 Product Instructions Cleaning sewage tank Notes Recommended to stable storage the product at docking station in a dry place without direct sunlight. To avoid the affective of product performance, be sure to cleaning and maintenance the accessories in regularly; Turn off and disconnect the power supply before cleaning the product; Use clear water or neutral detergent to clean the product with a dry cloth.
- Page 25 Product Instructions Pour out the sewage and use the cleaning Remove the Hepa filter from top of the brush to clean the stubborn dirt at inside. sewage tank. HEPA filter Take out HEPA filter and clean it with clear Install the sewage tank to main body until water.
- Page 26 Product Instructions Cleaning Power brush cover Notes Clean power brush cover regularly and keep the product clean. Press the release button at the power brush Use clear water to wash the cover; cover and pull it to backward for remove the cover.
-
Page 27: Cleaning Brushroll
Product Instructions Cleaning brushroll Notes If the suction nozzle get residual stains left, use a damp rag to wipe it. DO NOT use water to rinse it. After use the product every time, ensure to clean the brushroll and keep it dry. Pull the left side of brushroll handle to Unflow the cleaning brush handle to open the remove it. -
Page 28: Troubleshooting
- Install the sewage tank and its filter installed ground brush Product specification Rated Clean water Dirty water Product size Model Power Net Weight Voltage tank capacity tank capacity (WxHxD) VCW40 21.6V 220W 710ml 600ml 260x1200x290mm...
Need help?
Do you have a question about the VCW40 and is the answer not in the manual?
Questions and answers