BRAND macro Operating Manual
Hide thumbs
Also See for macro:
- Operating manual (84 pages) ,
- Operating manual (172 pages) ,
- Operating manual (137 pages)
Table of Contents
Advertisement
Available languages
Available languages
Quick Links
Advertisement
Chapters
Table of Contents

Related Manuals for BRAND macro


Summary of Contents for BRAND macro
- Page 1 Manual de operação · Operating Manual...
-
Page 3: Table Of Contents
Índice Página Instruções de Segurança Funções e Limitações de Uso Elementos de Operação Pipetagem Limpeza · Autoclavação Substituição do Filtro e Limpeza do Adaptador 10 Substituição do Sistema de Válvulas Teste de Vazamento Informações para pedido · Peças de Reposição 14 Resolução de Problemas Marcando no dispositivo Reparo... -
Page 4: Instruções De Segurança
Instruções de Segurança Eventualmente, este instrumento pode ser utilizado com materiais, ope- rações e equipamentos perigosos. Está além do escopo deste manual abordar todos os riscos de segurança potenciais associados com seu uso nestas aplicações. É responsabilidade do usuário da pipeta consultar e estabelecer práticas de segurança e saúde, além de determinar a aplicabi- lidade de limitações legais antes da utilização. -
Page 5: Funções E Limitações De Uso
Funções e Limitações de Uso O instrumento foi projetado para auxiliar a aspiração e dispensação em pipetas graduadas e volumétricas de vidro ou plástico na faixa de volume de 0.1ml a 200ml com um tubo de sucção de diâmetro externo < 9,2mm para medição de líquidos. -
Page 6: Elementos De Operação
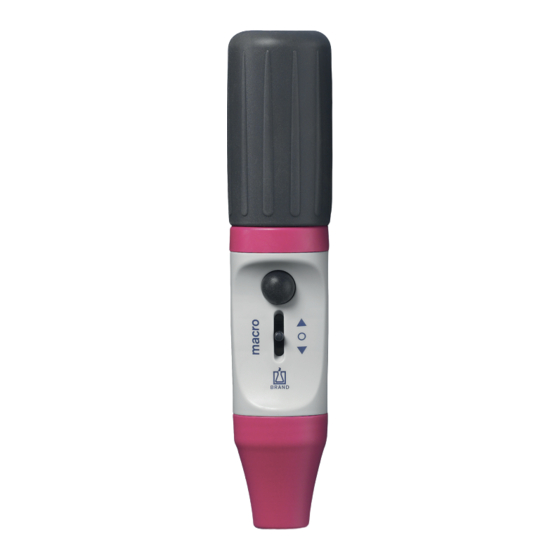
Operação e Elementos de Controle Pera de sucção (SI) Sistema de Anel de trava (PP) válvulas (PP, SI, PTFE) Botão de sopro (SI) Carcaça (PP) Comando de pipetagem Carcaça (PP) Filtro membrana (PP/PTFE) Adaptador (SI) Suporte do adaptador (PP) Polipropileno PTFE: Politetrafluoretileno Borracha de silicone... -
Page 7: Pipetagem
Pipetagem Comprima a pera de sucção Antes de conectar a pipeta, aperte a pera de sucção. Conecte a pipeta Segure a pipeta o mais próximo possível da abertura (extremidade) superior, e cuidado- samente insira no adaptador até que esteja firmemente presa. Após prender a pipeta com segurança, sem- pre segure o instrumento na posição vertical, com a ponta para baixo. - Page 8 Pipetagem Observação: Quanto mais para cima o comando for pressionado, mais for- te será a aspiração e mais rápido o líquido atinge o menisco. No caso de pipetas grandes > 50ml, o vácuo da pera sucção não é suficiente para aspirar de uma só vez todo o líquido. Então, pressione novamente a pera de sucção e continue a aspirar o líquido.
- Page 9 Pipetagem No caso de pipetas de sopro ‘blow-out’ (Marca – 'blow out'): – Assim que o menisco na pipeta ficar em uma posição estável, aperte o botão (pe- quena pera de borracha blow-out uma vez). – Arraste a ponta da pipeta alguns milímetros para cima na parede do recipiente para retirar a gota remanescente.
-
Page 10: Limpeza · Autoclavação
Limpeza · Autoclavação Quando utilizado corretamente, o instrumento não necessita de manuten- ção. Antes de autoclavar, o instrumento deve ser limpo cuidadosamente. Limpe a carcaça com um lenço úmido . O instrumento é autoclavável a 121 °C (250 °F), 2 bar absoluto (30 psi) com um tempo de espera de no mínimo 15 minutos de acordo com a DIN EN 285. - Page 11 Limpeza · Autoclavação Monte um novo filtro membrana com a abertura mais larga para baixo no adapta- dor (com o lado cônico menor para cima). Rosqueie o adaptador do suporte firme- mente. O instrumento inteiro é autoclavável a 121 °C (250 °F), 2 bar, de acordo com a DIN EN 285.
-
Page 12: Substituição Do Sistema De Válvulas
Limpeza · Autoclavação Substituição do Sistema de Válvulas Desrosqueie a pera de sucção e o supor- te do adaptador. Retire a parte superior da carcaça. Puxe com cuidado o sistema de valvulas e substitua-o. Monte o equipamento na ordem reversa e proceda um teste de vazamento. -
Page 13: Teste De Vazamento
Limpeza · Autoclavação Teste de vazamento Quando o menisco estiver ajustado, o líquido não pode gotejar antes que as válvulas sejam ativadas. Se ocorrer gotejamento, veja ‘Resolução de Problemas’ (pág. 15). -
Page 14: Informações Para Pedido · Peças De Reposição
Informações para Pedido · Peças de Reposição Macro controlador de pipetagem, Com filtro membrana 3 μm sobressalente e manual de operações Ref. Cinza 262 00 Verde 262 01 Azul 262 02 Magenta 262 03 * As cores se referem as cores no suporte adaptador do instrumento e no anel de trava. -
Page 15: Resolução De Problemas
Resolução de problemas Problema Possível causa Ação a ser tomada Capacidade de suc- Filtro sujo ou sistema de Substitua o filtro, veja ção prejudicada válvulas danificado pág. 10-11 Pipeta goteja Filtro conectado incor- Insira o filtro corretamen- retamente ou sistema te ou substitua o sistema de válvulas danificado de válvulas, veja pág. -
Page 16: Reparo
O modelo também se encontra na página www. brand.de para download. Nos EUA e Canada: – Contate a Brand Tech Scientific, Inc. e obtenha a autorização para retorno antes de enviar o instrumento para serviço. – Retorne somente instrumentos limpos e descontaminados, com o Número de Autorização para Retorno permanentemente visível do lado... -
Page 17: Endereços De Contato
Endereços de contato BRAND GMBH + CO KG Otto-Schott-Straße 25 97877 Wertheim (Germany) Tel.: +49 9342 808-0 Fax: +49 9342 808-98000 E-Mail: info@brand.de www.brand.de EUA e Canadá: BrandTech Scientific, Inc. ® 11 Bokum Road Essex, CT 06426-1506 (USA) Tel.: +1-860-767 2562 Fax: +1-860-767 2563 www.brandtech.com... -
Page 18: Informações De Garantia
Garantia Não nos responsabilizamos por consequências causadas pelo uso impró- prio, uso, manutenção, operação e reparos não autorizados do instru- mento ou consequências do desgaste normal, especialmente de peças suscetíveis a desgaste como pistões, selos, válvulas e quebra de vidro, assim como do descumprimento das instruções contidas neste manual. - Page 19 Table of Contents Page Safety Instructions Function and Limitations of Use Operating Elements Pipetting Cleaning · Autoclaving Replacing the Filter and Cleaning the Adapter Replacing the Valve System Leak Test Ordering Data · Spare Parts Troubleshooting Repairs Markings on the product Contact addresses Warranty Information...
-
Page 20: Safety Instructions
Safety Instructions This instrument may sometimes be used with hazardous materials, opera- tions, and equipment. It is beyond the scope of this manual to address all of the potential safety risks associated with its use in such applications. It is the responsibility of the user of this instrument to consult and establish appropriate safety and health practices and determine the applicability of regulatory limitations prior to use. -
Page 21: Function And Limitations Of Use
Function and Limitations of Use The instrument is designed to assist the filling and dispensing of gradu- ated and volumetric pipettes of glass or plastic in the volume range of 0.1 ml to 200 ml with a suction tube outer diameter < 9.2 mm for measuring liquids. -
Page 22: Operating Elements
Operating Elements suction bellows (SI) locking ring (PP) valve system (PP, SI, PTFE) blow out bellows (SI) housing (PP) pipetting lever housing (PP) membrane filter (PP/PTFE) adapter (SI) adapter support (PP) Polypropylene PTFE: Polytetrafluorethylene Silicone rubber... -
Page 23: Pipetting
Pipetting Compress the suction bellows Before attaching the pipette, squeeze the suction bellows. Attach the pipette Hold the pipette as near to its upper end as possible, and carefully insert it into the adapter until it fits tightly. Once the pipette has been securely attached, always hold the instrument in a vertical posi- tion, tip down. - Page 24 Pipetting Note: The further up the lever is pressed, the stronger the suction becomes and the quicker the meniscus rises. In the case of large pipettes > 50 ml the vacuum contained in the suction bellows is not sufficient to draw in all the liquid at once.
- Page 25 Pipetting In the case of blow-out pipettes (Imprint 'ausblasen – blow out'): – As soon as the meniscus in the pipette tip comes to a standstill, press the small blow- out bellows once. – Wipe the pipette tip a few millimeters upward along the wall of the vessel.
-
Page 26: Cleaning · Autoclaving
Cleaning · Autoclaving When properly used, the instrument is maintenance-free. Before auto- claving, the instrument must be cleaned carefully. Wipe the housing with a damp cloth. The instrument is autoclavable at 121 °C (250 °F), 2 bar absolute (30 psi) with a holding time of at least 15 minutes according to DIN EN 285. - Page 27 Cleaning · Autoclaving Place the new membrane filter with the thicker end facing downwards into the adapter (with the smaller conical side up). Screw in the adapter support hand tight. The entire instrument incl. membrane filter is autoclavable at 121 °C (2 bar) according to DIN EN 285.
-
Page 28: Replacing The Valve System
Cleaning · Autoclaving Replace the Valve System Unscrew the suction bellows and the adapter support. Take off the upper part of the housing. Carefully pull out the valve system and replace it. Reassemble the instrument in reverse order and carry out leak test. -
Page 29: Leak Test
Cleaning · Autoclaving Leak Test When the meniscus has been set, liquid should not drip out of the pipette until the valves are activated. Should the pipette drip, see chapter 'Troubleshooting' (see page 31). -
Page 30: Ordering Data · Spare Parts
Ordering Data · Spare Parts macro pipette controller, with spare membrane filter 3 µm and operating manual. Color Cat. No. grey 262 00 green 262 01 blue 262 02 magenta 262 03 * Colors refer to accent colors on instrument adapter support and locking ring. -
Page 31: Troubleshooting
Troubleshooting Trouble Possible Cause Action to be taken Suction capacity Filter dirty or valve Replace filter, impaired system damaged see pages 26-27 Pipette drips Filter not properly posi- Insert filter properly or tioned or valve system replace valve system, damaged see page 28 Pipette not held Silicone adapter... -
Page 32: Repairs
– Complete the “Declaration on Absence of Health Hazards” and send the instrument to the manufacturer or supplier. Ask your supplier or manufac- turer for the form. The form can also be downloaded from www.brand.de. In the U.S. and Canada: –... -
Page 33: Contact Addresses
Contact addresses BRAND GMBH + CO KG Otto-Schott-Straße 25 97877 Wertheim (Germany) Tel.: +49 9342 808-0 Fax: +49 9342 808-98000 E-Mail: info@brand.de www.brand.de USA and Canada: BrandTech Scientific, Inc. ® 11 Bokum Road Essex, CT 06426-1506 (USA) Tel.: +1-860-767 2562 Fax: +1-860-767 2563 www.brandtech.com... -
Page 34: Warranty Information
Warranty We shall not be liable for the consequences of improper handling, use, servicing, operating or unauthorized repairs of the instrument or the consequences of normal wear and tear especially of wearing parts such as pistons, seals, valves and the breakage of glass as well as the failure to follow the instructions of the operating manual. - Page 36 9976 40 · Printed in Germany · 21/0620/7...
Need help?
Do you have a question about the macro and is the answer not in the manual?
Questions and answers