Advertisement
Quick Links
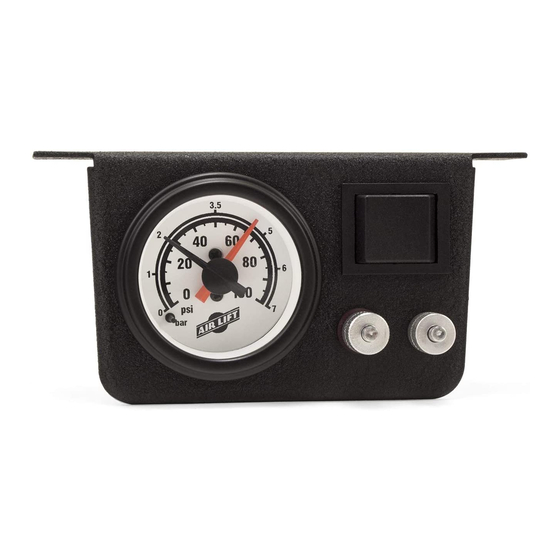
Single Gauge P/N 25655
This installation should be done after the Air Spring kit has been installed.
All preassembled gauge panels have been 100% leak and function tested. Do not attempt to tighten,
loosen, or adjust any fittings or connections. This will likely cause a leak or malfunction and void the
warranty.
If you have any questions, please call our Technical Support: 1-800-248-0892 ext. 2.
Ground
Inflation
Valve
(Already
installed)
Compressor
Connector
Bellows
(Already
installed)
Technical Support
1-800-248-0892
Air Inlet
Filter
Female
Push on
Connectors
Butt
Dash Panel
Inflation
Valve
(Already
installed)
Figure 1
Ext. 2
by
To A Keyed Power Source
Female
Push on
Connector
Fuse/Fuse
Holder
Butt
Connector
(white) +
(black) ground
Adapter #1
Adapter
Adapter #2
*
Adapter #3
* Uses 3/16 (smaller) Female Push On Connector
Inset A
MN-342
(02606)
ECR 5713
Fuse
1
Advertisement

Summary of Contents for Air Lift Load Controller I
- Page 1 MN-342 (02606) ECR 5713 Single Gauge P/N 25655 This installation should be done after the Air Spring kit has been installed. All preassembled gauge panels have been 100% leak and function tested. Do not attempt to tighten, loosen, or adjust any fittings or connections. This will likely cause a leak or malfunction and void the warranty.
-
Page 2: Mounting The Compressor
I. Mounting the Compressor 1. Select a rigid convenient mounting location on the frame or in a storage area. The location selected should shield the compressor from the elements. IMPORTANT: Be careful to shield the compressor from heat sources. Do not mount the compressor in the engine compartment. - Page 3 in the fuse block. Use a test light to determine which open terminal, (accessory, etc.) works only when the ignition is in the “on” or accessory position. NOTE: Connect the adapter to the ”Hot” side of the fuse (use a test light to determine). Connection to the fuse terminal will depend on what type of fuse your vehicle uses.
-
Page 4: Troubleshooting
CAUTION: Do not exceed the recommended duty cycle of 15% (3 minutes on, 20 minutes off). Not complying with the recommended duty cycle may cause premature failure of the compressor. CAUTION: Do not exceed the vehicle manufacturers maximum gross vehicle weight rating (GVWR). Thank you for purchasing Air Lift Products Mailing Address: Street Address:... -
Page 5: Product Use Information
No. Adding air springs will not change the weight ratings (GAWR, GCWR and/or GVWR) of a vehicle. Exceeding the GVWR is dangerous and voids the Air Lift warranty. Q. Is it necessary to keep air in the air springs at all time and how much pressure will they need? The minimum air pressure should be maintained at all times. -
Page 6: Guidelines For Adding Air
The consumer is responsible for installation/reinstallation (labor charges) of the product. Air Lift Company reserves the right to change the design of any product without assuming any obligation to modify any product previously manufactured.


