
Subscribe to Our Youtube Channel
Related Manuals for Dahua Technology DH-IPC-HDEW8441R-Z


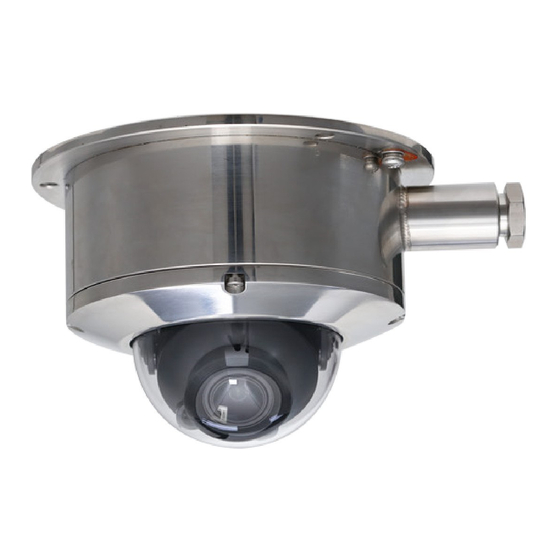
Summary of Contents for Dahua Technology DH-IPC-HDEW8441R-Z
- Page 1 Explosion-Proof Camera Installation Manual No. DH - IPC - HDEW-Um-01-2021 Explosion-Proof Camera Quick Start Guide ZHEJIANG DAHUA VISION TECHNOLOGY CO., LTD. V1.0.2...
-
Page 2: Foreword
Quick Start Guide Foreword General This manual introduces the installation and operations of explosion-proof camera (hereinafter referred to as "the Camera"). Model: DH-IPC-HDEW series. Safety Instructions The following categorized signal words with defined meaning might appear in the manual. Signal Words Meaning Indicates a high potential hazard which, if not avoided, will result WARNING... - Page 3 Quick Start Guide There still might be deviation in technical data, functions and operations description, or errors in print. If there is any doubt or dispute, please refer to our final explanation. Upgrade the reader software or try other mainstream reader software if the manual (in PDF ...
-
Page 4: Important Safeguards And Warnings
Quick Start Guide Important Safeguards and Warnings The manual will help you to use the Camera properly. Read the manual carefully before using the Camera, and keep it well for future reference. Avoid heavy stress, violent vibration, and water splash during transportation, storage, and ... - Page 5 Quick Start Guide Use the power adapter recommended by the manufacturer. For the Camera that supports laser, do not aim the laser directly at eyes. And keep a proper distance from the flammable to avoid fire. Do not connect several cameras to one power adapter; otherwise it might result in overheat or ...
- Page 6 Quick Start Guide Do not ship the Camera with corrosive, inflammable and explosive materials. ...
-
Page 7: Table Of Contents
Quick Start Guide Table of Contents Foreword ................................I Important Safeguards and Warnings ......................III 1 Overview ................................ 1 Introduction ....................................1 Naming Rule....................................1 Application ....................................2 Mechanical Structure ................................3 1.4.1 Mechanical Specification ............................3 1.4.2 Explosion-proof Structure ............................3 Electric Specification ................................. - Page 8 Quick Start Guide Appendix 2.3 FAQ on RS-485 Cable ............................29 Appendix 3 Wire Gauge Reference Sheet ..................... 30 Appendix 4 Cybersecurity Recommendations ..................... 31...
-
Page 9: Overview
60079-31:2014. The enclosure is rated IP68. The Camera can be widely used in oil, chemical engineering, wharf, port, mine, aerospace, food processing, and other sites. Naming Rule Figure 1-1 Naming rule Model Description DH-IPC-HDEW8441R-Z Dahua 4MP Camera IPC-HDEW8441R-Z General 4MP Camera DH-IPC-HDEW8441RP-Z Dahua 4MP Camera (PAL standard) IPC-HDEW8441RP-Z... -
Page 10: Application
Quick Start Guide Model Description IPC-HDEW8841R-Z General 8MP Camera DH-IPC-HDEW8841RP-Z Dahua 8MP Camera (PAL standard) IPC-HDEW8841RP-Z General 8MP Camera (PAL standard) DH-IPC-HDEW8841RN-Z Dahua 8MP Camera (NTSC standard) IPC-HDEW8841RN-Z General 8MP Camera (NTSC standard) IPC-HDEW8441R-Z-27135-316 General 4MP Camera (Model for Eastern Europe) IPC-HDEW8441R-Z-27135-316- General 4MP Camera (Model for Eastern Europe with certification sign) -
Page 11: Mechanical Structure
Quick Start Guide Suitable for area 1&2 with explosive gas (IIA, IIB, IIC), and area 21 & 22 with explosive dust (IIIA, IIIB, IIIC). Do not open the camera when power is on or under the environment with explosive gas. Mechanical Structure 1.4.1 Mechanical Specification Table 1-1 Mechanical specification... -
Page 12: Electric Specification
Quick Start Guide Electric Specification Table 1-2 Electric specification Parameter Description Input voltage 12 VDC Maximum current ≤ 0.7 A Power consumption ≤ 8.4 W Electrical connection Power, Ethernet, audio ports, alarm and RS-485 port on the control cable by default. Power Standard Make sure that the power supply is correct before operating the device. - Page 13 Quick Start Guide Other Notes: Special temperature range: T5/T100°C: –40 °C≤ Tamb≤ +60 °C, T6/T80°C: –40 °C≤ Tamb≤ +55 °C. You can use a soft damp cloth to wipe the body of the device. While using the device, do not touch metal objects to prevent electrostatic discharge.
-
Page 14: Repair And Maintenance
Quick Start Guide Repair and Maintenance 1.7.1 Notes to Maintenance ● Equipment maintenance units or individuals must have relevant explosion-proof qualifications and should understand the requirements of national regulations and standards related to maintenance work. ● You should understand whether the repair unit meets related conditions, especially the conditions of the processing equipment and personnel directly related to the repair work. -
Page 15: Installation Preparation
Quick Start Guide Installation Preparation Packing List After unpacking, check whether there is obvious damage to the appearance, and check whether the accessories are complete against the packing list. If everything is fine, you can start to install the Camera. Figure 2-1 Packing list Do not drag or pull the cables to lift the Camera when carrying it. -
Page 16: Dimensions
Quick Start Guide Dimensions The following figure is for reference only, and the actual product shall prevail. Figure 2-3 Dimensions (mm [inch]) Cable Connection 2.3.1 Cable Description When delivered out of factory, the Camera is connected with a composite cable. The cable threads out from the outlet hole at the Camera rear, and it is 8 m by default. - Page 17 Quick Start Guide Figure 2-4 Cables Table 2-1 Cable description Description Description Power port. Ethernet port. Red: 12 VDC+ Black: 12 VDC– Alarm I/O port. Brown: Alarm output 1 Green: Alarm output 1 ground Audio port. Blue: Alarm input 1 White-Red: Audio input+ ...
-
Page 18: Connecting The Alarm Cable
Quick Start Guide Port name Description Inputs 12 VDC power. Be sure to supply power as instructed in the manual. 12 VDC power input Device abnormity or damage might occur if power is not supplied correctly. Connects to sound pickups to receive audio signal, or connect to speaker to output audio signal Audio input/output Audio input/output is available on select models. -
Page 19: Connecting The Explosion-Proof Flexible Tube
Quick Start Guide Figure 2-5 Alarm input Step 2 Connect alarm output device to the alarm output end of the I/O port. The alarm output is open-drain output, which works in the following modes. Mode A: Level application. Alarm outputs high and low level, and the alarm outlet is OD, ... -
Page 20: Grounding Description
Quick Start Guide Figure 2-7 Installation of explosion-proof flexible tube (1) Table 2-4 Flexible tube installation (1) Description Explosion-proof flexible tube Ex certified compression nut Outlet hole Step 2 Tighten the thread connector and then the explosion flexible tube. Figure 2-8 Installation of explosion-proof flexible tube (2) Table 2-5 Flexible tube installation (2) Description... -
Page 21: Cable Preparation
Quick Start Guide Figure 2-9 External grounding mark For internal grounding mark, see Figure 2-10. Figure 2-10 Internal grounding mark Cable Preparation Select the cables depending on the transmission distance. RS-485 cable requirement: When using the 0.56 mm (24 AWG) twisted-pair line, depending on different baud rates, the theoretical maximum transmission distance are different. - Page 22 Quick Start Guide Table 2-6 Theoretical maximum transmission distance Baud Rate Maximum Transmission Distance 2400 bps 1800 m 4800 bps 1200 m 9600 bps 800 m The maximum transmission distance will be reduced in the following conditions: When thinner communication cables are used; the Camera is used in places with intense electromagnetic interference;...
-
Page 23: Device Installation
Quick Start Guide Device Installation Installation Conditions 3.1.1 Installation Accessories and Tools For the installation accessories and tools, see Figure 3-1. For the wall mount bracket, see Figure 3-2. Figure 3-1 Accessories and tools Figure 3-2 Wall mount bracket (mm [inch]) 3.1.2 Precautions before Installation Use the power supply specified in "1.5 Electric Specification". -
Page 24: Installation Method
Quick Start Guide Keep the original packing material well because you might need it to pack the Camera and send it back for repair if any problem arise. Make sure that the place where the Camera is installed has enough space to hold the Camera ... -
Page 25: Installation Procedure
Quick Start Guide Figure 3-4 Installing SD card Installation Procedure 3.4.1 Wall Mount Step 1 Fix the wall mount bracket on the wall through 4 expansion screws. - Page 26 Quick Start Guide Figure 3-5 Install the wall mount bracket Step 2 Use 3 M6×14 inner hexagon screws and nuts to fix the universal joint on the bracket. Figure 3-6 Install the universal joint Step 3 Connect the cables among the Camera, bracket, flexible tube, and control cabinet.
- Page 27 Quick Start Guide Figure 3-7 Cable layout For the details of connecting explosion-proof flexible tube, see "2.3.3 Connecting the Explosion-Proof Flexible Tube". For the cable connection, see "2.3.1 Cable Description." Make sure that the installation surface can withstand at least three times the combined weight of the bracket and the device to be installed.
-
Page 28: Ceiling Mount
Quick Start Guide Description Explosion-proof flexible tube 4 screws used to fix the bracket on the wall Explosion-proof flexible box Explosion-proof flexible tube Galvanized steel pipe connected to the terminal 3.4.2 Ceiling Mount Step 1 Fix the explosion-proof camera on the wall through 3 expansion screws. Figure 3-8 Install the camera Step 2... -
Page 29: Adjusting Lens Angle
Quick Start Guide Use the wet cloth to clean the transparent cover. The transparent cover has a potential electrostatic charge hazard. 3.4.3 Adjusting Lens Angle Figure 3-10 Adjusting Lens Angle... -
Page 30: Network Configuration
Quick Start Guide Network Configuration Device initialization and IP setting can be finished with the "ConfigTool" or on web interface. For more information, see the Web Operation Manual. Device initialization is available on select models, and it is required at first-time use and after ... -
Page 31: Modifying Device Ip Address
Quick Start Guide Figure 4-2 Password setting Step 7 Set and confirm the password of the devices, then enter a valid email address, and then click Next. The final setting interface is displayed. Password can be modified or reset in System Settings. Step 8 Select the options according to your needs, and then click OK. -
Page 32: Logging In To Web Interface
Quick Start Guide After clicking Search setting, enter the username and password, and make sure that they are the same as what you set during initialization; otherwise there will be wrong password notice. Select the devices whose IP addresses need to be modified, and then click Modify IP. Step 2 Figure 4-3 Modify IP address... -
Page 33: Troubleshooting
Quick Start Guide Troubleshooting For the malfunctions, possible reasons and solutions, see Table 5-1. Table 5-1 Troubleshooting Malfunction Possible Reason Solution If the red LED light on power board is off: Check whether the power supply is The power supply is not connected, and make sure that the connected to the socket of the socket body is in good contact. -
Page 34: Appendix 1 Thunder-Poof And Surge Protection
Quick Start Guide Appendix 1 Thunder-Poof and Surge Protection Transient voltage suppressor (TVS) is applied to protect the Camera against voltage spikes and overvoltage below 2 KV (cable to ground) and 1 KV (cable to cable). However, it is still necessary to do operations to protect the Camera depending on local electrical safety regulations. - Page 35 Quick Start Guide Appendix Table 1-1 Installing lightning protection devices outdoors Description Video lightning conductor. Communication lightning conductor. Power supply lightning conductor. Steel tube. Explosion-proof camera: Must be installed in the arc formed by the 60-m circle, the lightning conductor top and the ground. Impedance of the cable connected to the grounding wire should be less than 4Ω.
-
Page 36: Appendix 2 Rs-485 Cable
Quick Start Guide Appendix 2 RS-485 Cable Appendix 2.1 Basic Features RS-485 industrial buses are half-duplex communication buses whose characteristic impedance is 120Ω. Its maximum load is 32 payloads (including controller devices and controlled devices). Appendix 2.2 Common Issues in Use Users tend to connect devices in the way displayed in Appendix Figure 2-1. - Page 37 Quick Start Guide Appendix 2.3 FAQ on RS-485 Cable Appendix Table 2-1 Malfunction, possible reason and solution Malfunction Possible Reason Solution Baud rate/address of the host Modify the baud rate/address of the host or and Camera are not matched. Camera to be matched. The Camera Positive electrode and negative can perform...
- Page 38 Quick Start Guide Appendix 3 Wire Gauge Reference Sheet Appendix Table 3-1 Wire gauge reference sheet Metric Bare Wire Diameter Bare Wire Cross Section Area (mm2) (mm) 0.050 0.00196 0.060 0.00283 0.070 0.00385 0.080 0.00503 0.090 0.00636 0.100 0.00785 0.110 0.00950 0.130 0.01327...
- Page 39 Quick Start Guide Appendix 4 Cybersecurity Recommendations Cybersecurity is more than just a buzzword: it’s something that pertains to every device that is connected to the internet. IP video surveillance is not immune to cyber risks, but taking basic steps toward protecting and strengthening networks and networked appliances will make them less susceptible to attacks.
- Page 40 Quick Start Guide We suggest you to change default HTTP and other service ports into any set of numbers between 1024~65535, reducing the risk of outsiders being able to guess which ports you are using. Enable HTTPS We suggest you to enable HTTPS, so that you visit Web service through a secure communication channel.
- Page 41 Quick Start Guide Enable IP/MAC address filtering function to limit the range of hosts allowed to access the device.
Need help?
Do you have a question about the DH-IPC-HDEW8441R-Z and is the answer not in the manual?
Questions and answers