
Subscribe to Our Youtube Channel
Related Manuals for Duramaxx Angkor


Summary of Contents for Duramaxx Angkor
- Page 1 Angkor Metalldetektor Metal Detector Detector de metales Détecteur de métaux Metal detector 10029917...
-
Page 3: Table Of Contents
Sehr geehrter Kunde, wir gratulieren Ihnen zum Erwerb Ihres Gerätes. Lesen Sie die folgenden Hinweise sorgfältig durch und befolgen Sie diese, um möglichen Schäden vorzubeugen. Für Schäden, die durch Missachtung der Hinweise und unsachgemäßen Gebrauch entstehen, übernehmen wir keine Haftung. Scannen Sie den folgenden QR-Code, um Zugriff auf die aktuellste Bedienungsanleitung und weitere Informationen rund um das Produkt zu erhalten: INHALTSVERZEICHNIS... -
Page 4: Teile Und Bedienelemente
TEILE UND BEDIENELEMENTE Bezeichnung Stk. Bezeichnung Stk. Obere Kopfhörerabdeckung O-Ring Obere Batterieabdeckung / Kopfhörerabdeckung O-Ring Ohrpolster Batterieabdeckung Untere Dreieckige Kopfhörerabdeckung Stellschraube Schlüssel Platte Batterieabdeckung Kopfband Gurt Träger Oberer Bügel Kopfstütze Armstütze... -
Page 5: Geräteübersicht
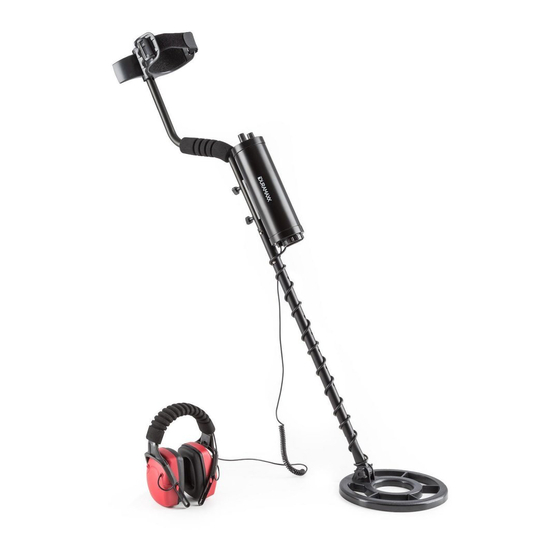
Bezeichnung Stk. Bezeichnung Stk. Metallabdeckung Oberrohr LED-Lampenschirm V-förmige Feder LED-Lampe Rohrabdeckug Regler Unterer Bügel Frontblende Mittelrohr O-Ring Unterrohr Metallgehäuse Suchspule Platine Schraube Metallstütze Mutter Bolzen Gummidichtung Rückblende Mantel Dreieckige Platine Stellschraube GERÄTEÜBERSICHT Suchspule Unterrohr Mittelrohr Schlüssel Kontrolleinheit Armstütze Oberrohr Kopfhörer Einstellschraube... -
Page 6: Zusammenbau
ZUSAMMENBAU Unterrohr Gummidichtung Schraube Mutter Nehmen Sie die Suchspule und das Nehmen Sie das Oberrohr und die Unterrohr dem Karton. Lösen Sie die Kontrolleinheit aus dem Karton. Schraube am Unterrohr und nehmen Lösen Sie die zwei dreieckigen Sie den Bolzen ab. Schieben Sie das Stellschrauben an der Unterseite der Unterrohr auf die Suchspule und Kontrolleinheit und nehmen Sie die... - Page 7 Drücken Sie erneut auf den silbernen Die Armstütze hat 3 Positionen. Bei Knopf (Pfeil) und passen Sie die der Lieferung ist die Armstütze auf Länge des Rohrs entsprechend Ihrer die längste Position gestellt. Wenn Größe an. Winden Sie das Kabel der Ihre Arme kürzer sind (Frauen oder Suchspule lose um das Rohr, damit Kinder) können Sie die Armstütze...
-
Page 8: Bedienfeld Und Bedienung
BEDIENFELD UND BEDIENUNG SENS-Regler (Empfindlichkeit) DISC-Regler (Metalltyp) LED-Leuchte Empfindlichkeit einstellen (SENS) Der SENS-Regler ist gleichzeitig der Ein/Ausschalter. Drehen Sie ihn gegen den Uhrzeigersinn auf OFF, um das Gerät auszuschalten. Drehen Sie ihn im Uhrzeigersinn, um das Gerät einzuschalten und die Empfindlichkeit zu erhöhen. -
Page 9: Schnellstart
Hinweis: Silber kann nicht ausgeschlossen werden, da die Leitfähigkeit ähnlich der von Aluminium ist und daher nicht zwischen beiden Stoffen unterschieden werden kann. Stellen Sie den Regler entsprechend Ihren Bedürfnissen ein. Wenn Sie Eisenobjekte zurückweisen kann i der Nähe von Eisenobjekte ein kurzer Piepton auftreten während die LED schwach leuchtet. - Page 10 3. Drehen Sie den SENS-Regler im Uhrzeigersinn, um das Gerät einzuschalten. Das LED- Licht leuchtet einmal auf und der Summer ertönt kurz. Drehen Sie den SENS-Regler auf die mittlere Position. 4. Testen Sie den ALL METALL Modus. Drehen Sie den SENS-Regler dazu auf A-M.
- Page 11 6. Drehen Sie den SENS-Regler auf die mittlere Position und drehen Sie den DISC-Regler langsam im Uhrzeigersinn auf die maximale Position. Bewegen Sie die Metallproben über den Rand der Suchspule. Bei der Silbermünze schlägt das Gerät an. Die LED blinkt und der Signalton ertönt. Wenn Sie den Eisennagel und den Dosenverschluss über die Suchspule bewegen, ertönt lediglich ein zweimal hintereinander kurzer Ton, der signalisiert, dass Nagel und Dosenverschluss zurückgewiesen werden.
-
Page 12: Das Gerät Im Außeneinsatz
Nun haben Sie sich mit der grundlegende Bedienung vertraut gemacht. Die Suchergebnisse können durch verschiedene Faktoren beeinflusst werden, wie den Zustand der Metalls im Erdboden, die Tiefe, die Größe, die Bodenfeuchtigkeit, magnetische und elektrische Felder in der Umgebung, andere Metalldetektoren in der Nähe und andere Faktoren. Das gleiche gilt für das Sondieren unter Wasser. - Page 13 Da die Unterscheidung von Metallen im Boden und in Salzwasser manchmal schwer fällt, empfehlen wir Ihnen bestimmte Metallproben, wie Eisennägel oder Münzen, zum Vergleich mit sich zu führen. Legen Sie die entsprechende Probe auf den Boden und bewegen Sie die Spule darüber und merken Sie sich die DISC-Position, bei der das Metall ausgeschlossen wird.
-
Page 14: Wartung Und Pflege
WARTUNG UND PFLEGE Der Detektor wurde speziell zur Benutzung unter Wasser entworfen. Halten Sie sich an die folgenden Pflegehinweise, damit Sie lange Freude an Ihrem Gerät haben. • Öffnen Sie nicht die vordere und hintere Abdeckung der Kontrolleinheit, andernfalls wird das Gerät undicht. Das Gerät darf nur mit speziellen Werkzeugen von einem Fachbetrieb geöffnet werden. -
Page 15: Fehlerbehebung
FEHLERBEHEBUNG Problem Mögliche Ursache und Lösung Kein Strom, kein Versichern Sie sich dass die Batterie korrekt Piepton beim eingebaut ist. Einschalten. Ersetzen Sie die Batterie. Durchgängiger kurzer Versichern Sie sich, dass sich kein anderer Signalton. Metalldetektor in unmittelbarer Umgebung befindet. Die Batterie ist leer. -
Page 16: Spezielle Entsorgungshinweise Für Verbraucher In Deutschland
SPEZIELLE ENTSORGUNGSHINWEISE FÜR VERBRAUCHER IN DEUTSCHLAND Entsorgen Sie Ihre Altgeräte fachgerecht. Dadurch wird gewährleistet, dass die Altgeräte umweltgerecht verwertet und negative Auswirkungen auf die Umwelt und menschliche Gesundheit vermieden werden. Bei der Entsorgung sind folgende Regeln zu beachten: • Jeder Verbraucher ist gesetzlich verpflichtet, Elektro- und Elektronikaltgeräte (Altgeräte) sowie Batterien und Akkus getrennt vom Hausmüll zu entsorgen. - Page 17 • Bei einem Vertrieb unter Verwendung von Fernkommunikationsmitteln ist die unentgeltliche Abholung am Ort der Abgabe auf Elektro- und Elektronikgeräte der Kategorien 1, 2 und 4 gemäß § 2 Abs. 1 ElektroG, nämlich „Wärmeüberträger“, „Bildschirmgeräte“ (Oberfläche von mehr als 100 cm²) oder „Großgeräte“ (letztere mit mindestens einer äußeren Abmessung über 50 Zentimeter) beschränkt.
-
Page 18: Hinweise Zur Entsorgung
HINWEISE ZUR ENTSORGUNG Wenn es in Ihrem Land eine gesetzliche Regelung zur Entsorgung von elektrischen und elektronischen Geräten gibt, weist dieses Symbol auf dem Produkt oder auf der Verpackung darauf hin, dass dieses Produkt nicht im Hausmüll entsorgt werden darf. Stattdessen muss es zu einer Sammelstelle für das Recycling von elektrischen und elektronischen Geräten gebracht werden. - Page 19 Dear customer, Congratulations on the purchase of your device. Please read the following instructions carefully and follow them to prevent potential damage. We accept no liability for damage caused by disregarding the instructions or improper use. Please scan the QR code to access the latest operating instructions and for further information about the product.
-
Page 20: Parts And Controls
PARTS AND CONTROLS Designation Designation Upper headphone O-ring cover A Top headphone cover Battery cover / O-Ring Ear cushions Battery cover Lower headphone Triangular adjusting cover screw Plate Key Battery cover Headband Belt Support Upper bracket Headrest Armrest... -
Page 21: Device Overview
Designation Designation Metal cover Top tube LED lampshade V-shaped spring LED lamp Pipe cover Controller Lower bracket Front panel Central tube O-ring Down tube Metal housing Search coil Board Screw Metal support Bolt Rubber seal Flashback Coat Triangular adjusting Board screw DEVICE OVERVIEW Search coil... -
Page 22: Assembly
ASSEMBLY Down tube Rubber seal Screw Take the search coil and the down Take the top tube and the control tube out of the box. Loosen the unit out of the box. Loosen the two screw on the down tube and remove triangular set screws on the bottom the bolt. - Page 23 Press the silver button (arrow) again The armrest has 3 positions. On and adjust the length of the tube delivery, the armrest is set to the according to your size. Wind the longest position. If your arms are search coil cable loosely around the shorter (women or children) you can tube so that it does not hang down.
-
Page 24: Control Panel And Operation
CONTROL PANEL AND OPERATION SENS control (sensitivity) DISC controller (metal type) LED light Set sensitivity (SENS) The SENS control is also the on/off switch. Turn it counter-clockwise to OFF to switch off the appliance. Turn it clockwise to switch on the unit and increase the sensitivity. -
Page 25: Quick Start
Note: Silver cannot be excluded because its conductivity is similar to that of aluminium and therefore it is not possible to distinguish between the two substances. Adjust the controller according to your needs. When rejecting ferrous objects, a short beep may occur in the vicinity of ferrous objects while the LED is dimly lit. - Page 26 3. Turn the SENS control clockwise to turn on the appliance. The LED light lights up once and the buzzer sounds briefly. Set the SENS control to the middle position. 4. Test the ALL METAL mode. To do this, set the SENS control to A-M. Move the three metal samples over the edge of the search coil.
- Page 27 6. Turn the SENS control to the middle position and slowly turn the DISC control clockwise to the maximum position. Move the metal samples over the edge of the search coil. The appliance strikes at the silver coin. The LED flashes and the signal tone sounds. When you move the iron nail and the can end over the search coil, only a short tone sounds twice in succession, signalling that the nail and can end are rejected.
-
Page 28: The Unit In Outdoor Use
Now you have familiarised yourself with the basic operation. The search results can be influenced by various factors such as the condition of the metal in the ground, depth, size, soil moisture, magnetic and electric fields in the environment, other metal detectors in the vicinity and other factors. The same applies to probing under water. - Page 29 As it is sometimes difficult to distinguish between metals in soil and in salt water, we recommend that you carry certain metal samples, such as iron nails or coins, for comparison. Place the appropriate sample on the ground and move the coil over it, noting the DISC position at which the metal is excluded.
-
Page 30: Disposal Considerations
DISPOSAL CONSIDERATIONS If there is a legal regulation in your country regarding the disposal of electrical and electronic equipment, this symbol on the product or on the packaging indicates that this product must not be disposed of with household waste. Instead, it must be taken to a collection point for the recycling of electrical and electronic equipment. - Page 31 Cher client, chère cliente, Toutes nos félicitations pour l’acquisition de ce nouvel appareil. Lisez attentivement les indications suivantes et suivez-les pour éviter d'éventuels dommages. Nous ne saurions être tenus pour responsables des dommages dus au non-respect des consignes et à la mauvaise utilisation de l’appareil.
-
Page 32: Pièces Et Éléments De Commande
PIÈCES ET ÉLÉMENTS DE COMMANDE N° Description Qté N° Description Qté Cache supérieur du Joint torique casque A Cache supérieur du Couvercle de batterie casque B / joint torique Couvercle du Coussinets d'oreille compartiment à pile / joint torique Cache inférieur du Vis de réglage casque triangulaire... -
Page 33: Aperçu De L'appareil
N° Description Qté N° Description Qté Cache métallique Tube supérieur Abat-jour LED Ressort en forme de V Lampe LED Cache des tubes Bouton de réglage Arceau inférieur Panneau avant Tube central Joint torique Tube inférieur Boîtier métallique Bobine de recherche Circuit imprimé... -
Page 34: Assemblage
ASSEMBLAGE Tube inférieur Joint en caoutchouc Écrou Retirez la bobine de recherche et Retirez le tube supérieur et le tube inférieur de l'emballage. l'unité de contrôle de l'emballage. Desserrez la vis du tube inférieur Desserrez les deux vis de réglage et retirez le boulon. - Page 35 Appuyez à nouveau sur le bouton L'accoudoir a 3 positions. A la argenté (flèche) et ajustez la livraison, l'accoudoir est réglé sur longueur du tube en fonction de la position la plus longue. Si vos votre taille. Enroulez le câble de la bras sont plus courts (femmes bobine de recherche autour du tube ou enfants), vous pouvez ajuster...
-
Page 36: Panneau De Commande Et Utilisation
PANNEAU DE COMMANDE ET UTILISATION Régulateur SENS (sensibilité) Régulateur DISC (type métal) Lampe LED Réglage de la sensibilité (SENS) Le bouton SENS sert également d'interrupteur marche/arrêt. Tournez-le dans le sens antihoraire sur OFF pour éteindre l'appareil. Tournez-le dans le sens des aiguilles d'une montre pour allumer l'appareil et augmenter la sensibilité. -
Page 37: Démarrage Rapide
Remarque : l'argent ne peut pas être exclu, car sa conductivité est similaire à celle de l'aluminium et il est donc impossible de faire la distinction entre les deux matériaux. Réglez le bouton en fonction de vos besoins. Si vous excluez des objets en fer, l'appareil peut émettre un bref bip à... - Page 38 3. Tournez le bouton de réglage SENS dans le sens des aiguilles d'une montre pour allumer l'appareil. La LED s'allume une fois et le buzzer retentit brièvement. Mettez le bouton SENS sur la position centrale. 4. Testez le mode ALL METALL. Pour ce faire, tournez le bouton de réglage SENS sur A-M.
- Page 39 6. Tournez le bouton SENS en position centrale et tournez lentement le bouton DISC dans le sens des aiguilles d'une montre jusqu'à la position maximale. Déplacez les échantillons métalliques au-dessus du bord de la bobine de recherche. L'appareil réagit avec la pièce d'argent. La LED clignote et le signal sonore retentit.
-
Page 40: Utilisation De L'appareil En Extérieur
Vous êtes maintenant familiarisé avec le fonctionnement de base. Les résultats de la recherche peuvent être influencés par différents facteurs, comme l'état du métal dans le sol, la profondeur, la taille, l'humidité du sol, les champs magnétiques et électriques environnants, la présence d'autres détecteurs de métaux à... - Page 41 Comme il est parfois difficile de distinguer les métaux dans le sol, nous vous recommandons d'emporter quelques échantillons de métal, tels que des clous en fer ou des pièces de monnaie pour faire des comparaisons. Placez l'échantillon approprié sur le sol, déplacez la bobine sur celui-ci et notez la position DISC à...
-
Page 42: Informations Sur Le Recyclage
INFORMATIONS SUR LE RECYCLAGE Si la mise en rebut des appareils électriques et électroniques est réglementée dans votre pays, ce symbole sur le produit ou sur l'emballage indique qu'il ne doit pas être éliminé avec les ordures ménagères. Vous devez l'acheminer vers un point de collecte pour le recyclage des appareils électriques et électroniques. - Page 43 Estimado cliente: Le felicitamos por la adquisición de este producto. Lea atentamente el siguiente manual y siga cuidadosamente las instrucciones de uso con el fin de evitar posibles daños. La empresa no se responsabiliza de los daños ocasionados por un uso indebido del producto o por haber desatendido las indicaciones de seguridad.
- Page 44 PIEZAS Y CONTROLES Núm. Descripción Uds. Núm. Descripción Uds. Cubierta superior A Junta tórica de los auriculares Cubierta superior B Cubierta de la pila/ de los auriculares junta tórica Almohadillas para las Cubierta de la pila orejas Cubierta inferior de Tornillo de ajuste los auriculares triangular...
-
Page 45: Vista General Del Aparato
Núm. Descripción Uds. Núm. Descripción Uds. Cubierta metálica Tubo superior Pantalla de la Muelle en forma lámpara led de V Lámpara led Cubierta del tubo Regulador Asa inferior Panel frontal Tubo central Junta tórica Tubo inferior Carcasa metálica Bobina de búsqueda Placa Tornillo Soporte metálico... -
Page 46: Montaje
MONTAJE Tubo inferior Junta de goma Tornillo Tuerca Extraiga la bobina de búsqueda y Extraiga el tubo superior y la unidad el tubo inferior de la caja. Afloje el de control de la caja de cartón. tornillo del tubo inferior y retire Afloje los dos tornillos de ajuste los pernos. - Page 47 Presione de nuevo el botón plateado El reposabrazos tiene 3 posiciones. (flecha) y ajuste la longitud del Cuando se entrega, el reposabrazos tubo conforme a su altura. Enrolle está ajustado por defecto en la el cable de la bobina de búsqueda posición más larga.
-
Page 48: Panel De Control Y Funcionamiento
PANEL DE CONTROL Y FUNCIONAMIENTO Regulador SENS (sensibilidad) Regulador DISC (tipo de metal) Luz led Ajustar la sensibilidad (SENS) El regulador SENS actúa simultáneamente como interruptor ON/OFF. Gírelo en el sentido contrario de las agujas del reloj hasta la posición OFF para apagar el aparato. -
Page 49: Inicio Rápido
Nota: No se puede excluir la plata porque su conductividad es similar a la del aluminio y, por lo tanto, no se puede determinar una diferencia entre ambos materiales. Ajuste el regulador conforme a sus necesidades. Si se rechazan objetos de hierro, el detector puede emitir un pitido corto y el led se iluminará... - Page 50 3. No pruebe el aparato cerca de una televisión, ordenador o teléfono móvil para evitar averías. La luz led se ilumina una vez y el zumbador suena brevemente. Ajuste el regulador SENS hasta la posición intermedia. 4. Pruebe el modo ALL METAL. Gire el regulador SENS hasta A-M. Mueva las tres pruebas de metal sobre el borde de la bobina de búsqueda El aparato reacciona a todas las pruebas.
- Page 51 6. Ajuste el regulador SENS hasta la posición intermedia y gire el regulador DISC lentamente en el sentido de las agujas del reloj hasta la posición máxima. Mueva las pruebas de metal sobre el borde de la bobina de búsqueda. En el caso de las monedas de plata, el aparato reacciona. El led parpadea y suena un tono acústico.
-
Page 52: Uso Del Aparato En El Exterior
Ahora ya está familiarizado con el manejo básico. Los resultados de búsqueda pueden verse afectados por distintos factores, como el estado de los metales en el suelo, la profundidad, el tamaño, la humedad del suelo, campos magnéticos y eléctricos en el entorno, otros detectores de metales cerca y otros factores. - Page 53 Como a veces es difícil distinguir los metales en el suelo y agua salada, le recomendamos que lleve algunas muestras de metal, como clavos de hierro o monedas, para compararlas. Coloque la prueba correspondiente en el suelo y mueva el disco sobre ella y anote la posición DISC en la que se rechace el metal.
-
Page 54: Indicaciones Sobre La Retirada Del Aparato
INDICACIONES SOBRE LA RETIRADA DEL APARATO Si en su país existe una disposición legal relativa a la eliminación de aparatos eléctricos y electrónicos, este símbolo estampado en el producto o en el embalaje advierte de que no debe eliminarse como residuo doméstico. - Page 55 Gentile cliente, La ringraziamo per l'acquisto del dispositivo. La preghiamo di leggere attentamente le seguenti indicazioni e di seguirle per prevenire eventuali danni. Non ci assumiamo alcuna responsabilità per danni scaturiti da una mancata osservanza delle indicazioni relative alla sicurezza e da un uso improprio del dispositivo.
- Page 56 COMPONENTI ED ELEMENTI DI CONTROLLO Denominazione Denominazione Copertura superiore O-ring delle cuffie A Copertura superiore Copertura della delle cuffie B batteria/O-ring Imbottitura per le Copertura della orecchie batteria Copertura inferiore Vite di regolazione delle cuffie triangolare Chiave della copertura Piastra della batteria Archetto Cinghia...
-
Page 57: Descrizione Del Dispositivo
Denominazione Denominazione Copertura in metallo Tubo superiore Paralume LED Molla a V Lampadina LED Copertura del tubo Manopola di Staffa inferiore regolazione Pannello frontale Tubo centrale O-ring Tubo inferiore Alloggiamento in Bobina di ricerca metallo Scheda Vite Supporto metallico Dado Bullone Guarnizione in gomma Pannello posteriore... -
Page 58: Assemblaggio
ASSEMBLAGGIO Tubo inferiore Guarnizione in gomma Vite Dado Togliere dalla scatola la bobina Togliere dalla scatola il tubo di ricerca e il tubo inferiore. superiore e l'unità di controllo. Allentare la vite sul tubo inferiore Allentare le due viti triangolari e rimuovere il bullone. - Page 59 Premere nuovamente il tasto Il supporto per il braccio ha 3 argentato (freccia) e regolare la posizioni. Alla consegna, è impostato lunghezza del tubo in base alla sulla posizione più lunga. Se le statura. Avvolgere il cavo della braccia sono più corte (ad es. nel bobina di ricerca liberamente caso di donne o bambini) è...
-
Page 60: Pannello Di Controllo E Utilizzo
PANNELLO DI CONTROLLO E UTILIZZO Controllo SENS (sensibilità) Controllo DISC (tipo in metallo) Luce LED Impostare la sensibilità (SENS) Il controllo SENS è anche l'interruttore on/off. Ruotarlo in senso antiorario su OFF per spegnere il dispositivo. Ruotarlo in senso orario per accendere il dispositivo e aumentare la sensibilità. -
Page 61: Avvio Rapido
Nota: l'argento non può essere escluso perché la sua conducibilità è simile a quella dell'alluminio e quindi non è possibile distinguere tra i due materiali. Regolare il controllo in base alle singole esigenze. Se si escludono oggetti ferrosi, un breve segnale acustico può verificarsi in prossimità di oggetti di ferro mentre il LED è... - Page 62 3. Ruotare il controllo SENS in senso orario per accendere il dispositivo. La luce LED si accende una volta e viene emesso un breve segnale acustico. Mettere il controllo SENS in posizione centrale. 4. Testare la modalità ALL METAL. A tal fine, girare il controllo SENS su A-M. Muovere i tre campioni di metallo sopra il bordo della bobina.
- Page 63 6. Ruotare il controllo SENS in posizione centrale e lentamente girare il controllo DISC in senso orario fino alla posizione massima. Muovere i campioni di metallo sopra il bordo della bobina. Il dispositivo reagisce con la moneta d'argento. Il LED lampeggia e viene emesso il segnale acustico. Se si spostano il chiodo di ferro e la linguetta della lattina sulla bobina di ricerca, si sentiranno solo due brevi segnali acustici consecutivi, a indicare che non vengono rilevati.
-
Page 64: Uso All'aperto Del Dispositivo
Ora si conoscono le funzioni di utilizzo fondamentali. I risultati della ricerca possono essere influenzati da vari fattori, come la condizione del metallo nel terreno, la profondità, le dimensioni, l'umidità del suolo, i campi magnetici ed elettrici nell'ambiente circostante, altri metal detector nelle vicinanze e altri fattori. - Page 65 Poiché a volte è difficile distinguere i metalli nel terreno e in acqua salata, si consiglia di portare con sé alcuni campioni di metallo, come chiodi di ferro o monete, per il confronto. Posizionare il campione in questione sul suolo e muovere la bobina su di esso, annotando la posizione DISC alla quale il metallo è...
-
Page 66: Avviso Di Smaltimento
AVVISO DI SMALTIMENTO Se nel tuo Paese sono vigenti regolamenti legislativi relativi allo smaltimento di dispositivi elettrici ed elettronici, questo simbolo sul prodotto o sull'imballaggio indica che non è consentito smaltire questo prodotto insieme ai rifiuti domestici. Il dispositivo deve invece essere portato in un centro di raccolta per il riciclaggio di dispositivi elettrici ed elettronici.
Need help?
Do you have a question about the Angkor and is the answer not in the manual?
Questions and answers