
Related Manuals for Duramaxx 10032724


Summary of Contents for Duramaxx 10032724
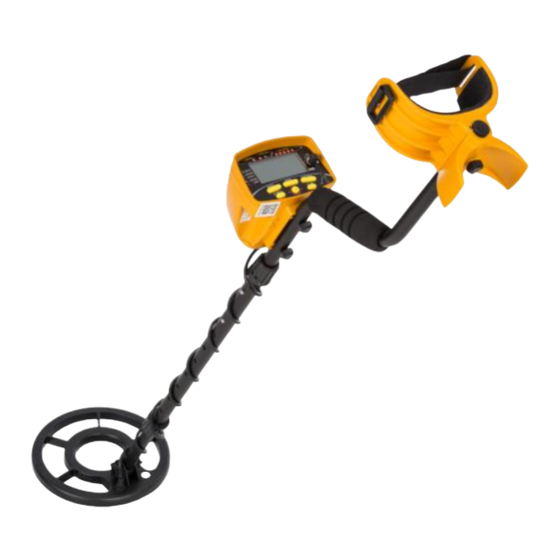
- Page 1 Metalldetektor Metal Detector Detector de metales Détecteur de métaux Metal detector 10032724...
-
Page 3: Table Of Contents
Bedienfeld-Tasten 10 Inbetriebnahme und Test 12 Bedienung im Freien 17 Fehlersuche und Fehlerbehebung 21 Hinweise zur Entsorgung 22 TECHNISCHE DATEN Artikelnummer 10032724 Stromversorgung 4 AA Batterien (nicht im Lieferumfang enthalten) Suchspule 8,5 Zoll (~21,5 cm), wasserdicht KONFORMITÄTSERKLÄRUNG Hersteller: Chal-Tec GmbH, Wallstraße 16, 10179 Berlin, Deutschland. -
Page 4: Sicherheitshinweise
SICHERHEITSHINWEISE • Tragen Sie in stark frequentierten Bereichen keine Kopfhörer. • Holen Sie immer die Erlaubnis ein, bevor Sie suchen. • Halten Sie sich fern von unterirdischen Leitungen, Kabeln und Rohrleitungen, insbesondere solchen, die brennbare Gase und Flüssigkeiten transportieren. • Das Suchen in militärische Gebiete ist nicht erlaubt und stellt eine große Gefahr da. -
Page 5: Zusammenbau
ZUSAMMENBAU Öffnen Sie die Verpackung und entnehmen Sie die Teile. Lösen Sie den Feststellknopf am unteren Schaft und nehmen Sie Unterrohr Schraube die Schraube heraus. Befestigen Sie die Suchspule am Unterrohr Gummidichtung und verriegeln sie Sie. Mutter Hinweis: Die Gummidichtung muss korrekt montiert sein (siehe Bild). - Page 6 Lösen Sie die Feststellmutter am anderen Ende des Mittelrohrs, drücken Sie dann den silbernen Knopf am Oberrohr und setzen Sie es in das Mittelrohr ein. Ziehen Sie dann die Feststellmutter wieder fest. Silberner Knopf Stellen Sie die volle Länge des Detektors so ein, dass Ihre Arme beim Suchen gerade sind.
- Page 7 So setzen Sie die Batterien ein Hinweis: Sie benötigen 4 AA-Batterien. Die Batterien sind NICHT im Lieferumfang enthalten. Die Batterien sollten ca. 40 Stunden Suchzeit bieten. Wenn der Detektor längere Zeit nicht benutzt wird, entfernen Sie bitte die Batterien, damit sie nicht auslaufen oder rosten. Batteriefach Drücken Sie die Taste Entnehmen Sie das...
-
Page 8: Bedienfeld-Anzeigen
BEDIENFELD-ANZEIGEN Alle Einstellungen und Suchergebnisse werden übersichtlich auf dem LCD- Bildschirm angezeigt. Zielmetall-Anzeige Modus-Anzeige Obere Skala (Pfeile) Untere Skala (Segmente) Symbol für die Hintergrund- Anzeige der Zieltiefe beleuchtung Pinpoint-Anzeige Batterie-Anzeige Anzeige der Empfindlichkeit Modus-Anzeige: Zeigt die ausgewählte Betriebsart der 5 Betriebsarten an. - Page 9 Anzeige der Zieltiefe: Besteht aus 4 Einstellungen: 2“ (5 cm), 4“ (10 cm), 6“ (15 cm) und 8+“ (20 cm)und zeigt die ungefähre Tiefe der Münze in Abhängigkeit von Größe, Metall und Bodenbeschaffenheit an. Im Pinpoint-Modus kann der Detektor das Ziel genauer bestimmen. Batterie-Anzeige: 4 leuchtende Segmente zeigen eine starke Leistung an;...
-
Page 10: Bedienfeld-Tasten
BEDIENFELD-TASTEN Taste Funktion MODE Drücken Sie die Taste [+] oder [-9, um den gewünschten Modus auszuwählen: ALL METAL: Alle Metallarten werden • angezeigt. • DISCRIM: Durch Drücken der [+] oder [-] Taste werden bestimmte Metalle entfernt. JEWELRY: Eliminiert Eisen und reagiert •... - Page 11 Taste Funktion PINPOINT Halten Sie die PINPOINT-Taste gedrückt, um den exakten Ort eines Ziels zu bestimmen, dass sich versteckt im Boden, hinter einer Mauer oder in einem anderen Objekt befindet. Beim Pinpointen zeigt die PINPOINT-Skala die Signalstärke an. Je näher sich der Detektor am Metallobjekt befindet, desto heller wird die Anzeigeleuchte und desto lauter wird der Signalton.
-
Page 12: Inbetriebnahme Und Test
INBETRIEBNAHME UND TEST Testen Sie das Gerät mit einer Metallprobe, bevor Sie damit draußen auf die Suche gehen, z. B. mit: • Eisennagel • 10/20/50 Eurocent-Münze (Kupfer) • 1 bzw. 2-Euro-Münze (Kupfer/Nickel) • Silbermünze Legen Sie den Detektor vorsichtig auf einen Holz- oder Plastiktisch, wobei die Suchspule mindestens 30 cm über das Ende hinausragen sollte. - Page 13 Test: ALL METAL-Modus Führen Sie jede der vier Metallproben 10 cm über die Suchspule. Der Detektor macht für jede Probe einen anderen Ton. • Der Abstand der Probe wird als 4“ angezeigt. • Der Pfeil in der oberen Skala zeigt an, um welches Metall es sich handelt.
- Page 14 Test: JEWELRY-Modus Drücken Sie die Taste MODE+, bis der Pfeil auf JEWELRY zeigt. Das erste und zweite Segment der unteren Skala gehen aus. Führen Sie jedes der vier Metallobjekte 10 cm über die Spule. • Der Detektor reagiert nicht auf den Eisennagel. •...
- Page 15 Test: COINS-Modus Drücken Sie die Taste MODE+, bis der Pfeil auf COINS zeigt. Die Segmente unter Eisennägel, Kronkorken und Dosenlasche verschwinden, wodurch die drei häufigsten Abfallmetalle beim Suchen ausgeschlossen werden. Führen Sie jedes der vier Metallobjekte 10 cm über die Spule. Hinweis: Münzen, die eines der drei Abfallmetalle enthalten, werden ebenfalls eliminiert.
- Page 16 • Sobald die Anzeigen der oberen Skala erloschen sind, bringen Sie die z. B. eine 2-Pence-Münze in Richtung Suchspule. Ab einer Entfernung von 8“ beginnen die Segmente zu leuchten und ein Signal ertönt. Je näher die Münze der Suchspule kommt, desto lauter wird der Ton. •...
-
Page 17: Bedienung Im Freien
BEDIENUNG IM FREIEN Metalldetektoren sind in erster Linie für den Einsatz im Freien vorgesehen. Verwenden Sie den Detektor nicht in der Nähe von Stromquellen und Orten mit viel Metall. Die Felddetektion kann auch aufgrund von Bodenverhältnissen, Größe, Form und Oxidation von Metallen kompliziert sein. - Page 18 (4) Das richtige Bewegungsmuster Versuchen Sie ein gleichmäßiges Schwungtempo einzuhalten. Ruckartige Bewegungen können dazu führen, dass der Detektor den Untergrund nicht schnell genug sondieren kann. Halten Sie die Suchspule parallel zum Boden, nicht schräg angewinkelt. Bewegen Sie sich in einer konstanten, langsamen Bewegung.
- Page 19 • Halten Sie die Taste PINPOINT gedrückt und die PINPOINT-Anzeige leuchtet auf. Die Anzeige für die Münztiefe zeigt [8+] an. Die Anzeigen der oberen und unteren Skala gehen alle aus. Der Detektor gibt einen tiefen, Ton ab. Wenn die Anzeigen nicht ausgehen, lassen Sie die PINPOINT-Taste los und wiederholen Sie sie den Vorgang.
- Page 20 • Wenn sowohl die Signalfrequenz als auch die Signalstärke keine offensichtliche Änderung aufweisen, ist die Ground Balance bereits eingestellt. • Wenn es eine offensichtliche Veränderung bei der Annäherung an den Boden gibt, dann müssen Sie die Ground Balance anpassen. • Heben Sie die Suchspule erneut an und drehen Sie den Ground Balance-Knopf um 15 Grad im Uhrzeigersinn.
-
Page 21: Fehlersuche Und Fehlerbehebung
• Silber wird auf der rechten Seite angezeigt und je größer das Objekt, desto weiter rechts wird es angezeigt. • Die Tiefenanzeige für münzgroße Objekte ist sehr genau, wobei größere, unregelmäßig geformte Objekte in der Ablesung variieren können. In diesem Fall kann das wiederholte Überfahren desselben Bereichs zu besseren Messergebnissen führen. -
Page 22: Hinweise Zur Entsorgung
Problem Mögliche Ursache und Lösungsansatz Instabiles Signal oder die Versuchen Sie in verschiedenen Winkeln zu Ziel-Erkennung schwankt. schwenken. Bei tief vergrabenen Objekten versuchen Sie, die Empfindlichkeit zu erhöhen oder das Suchmuster zu ändern. Vielleicht wurde mehr als ein Objekt entdeckt. Stellen Sie die Empfindlichkeit neu ein oder eliminieren Sie Metallarten. -
Page 23: English
Commissioning and Test 32 Outdoor Operation 37 Troubleshooting 41 Hints on Disposal 42 TECHNICAL DATA Item number 10032724 Power supply 4 AA batteries (not included in the scope of delivery) Search coil 8.5 inches (~ 21.5 cm), waterproof DECLARATION OF CONFORMITY Producer: Chal-Tec GmbH, Wallstraße 16, 10179 Berlin,... -
Page 24: Safety Instructions
SAFETY INSTRUCTIONS • Do not wear headphones in areas of high traffic. • Always get a permit before searching. • Keep away from underground piping, cables, and pipelines, especially those that carry flammable gases and liquids. • Searching in military areas is not allowed and poses a great danger. •... -
Page 25: Assembly
ASSEMBLY Open the packaging and remove the parts. Release the locking button on the lower tube and remove Lower tube Screw the screw. Attach the search coil to the lower tube and lock it. Rubber seal Note: The rubber seal must be correctly mounted (see picture). - Page 26 Loosen the lock nut on the other end of the center tube, then push the silver button on the top tube and insert it into the center tube. Then tighten the lock nut again. Silver button Adjust the full length of the detector so that your arms are straight when searching.
- Page 27 How to insert the batteries Note: You need 4 AA batteries. The batteries are NOT included. The batteries should provide about 40 hours of search time. If the detector is not going to be used for a long time, please remove the batteries so they do not leak or rust.
-
Page 28: Control Panel Displays
CONTROL PANEL DISPLAYS All settings and search results are clearly displayed on the LCD screen. Target metal indicator Mode display 3 Upper scale (arrows) Lower scale (segments) Backlight indicator Target depth display Pinpoint display Battery indicator Sensitivity indicator Mode display: Displays the selected mode of operation of the 5 modes. Select different modes by pressing the [+] or [-] key. - Page 29 Target depth display: Consists of 4 settings: 2 inches (5 cm), 4 inches (10 cm), 6 inches (15 cm) and 8+ inches (20 cm), showing the approximate coin depth depending on size, metal and soil texture. In pinpoint mode, the detector can more accurately determine the target.
-
Page 30: Control Panel Buttons
CONTROL PANEL BUTTONS Button Function MODE Press the [+] or [-9 button to select the desired mode: ALL METAL: All metals are displayed. • DISCRIM: Pressing the [+] or [-] key • eliminates certain metals. JEWELRY: Eliminates iron and reacts faster •... - Page 31 Button Function PINPOINT Press and hold the PINPOINT key to determine the exact location of a target that is hidden in the ground, behind a wall, or inside another object. When pinpointing, the PINPOINT scale indicates the signal strength. The closer the detector is to the metal object, the brighter the indicator light will become and the louder the beep will sound.
-
Page 32: Commissioning And Test
COMMISSIONING AND TEST Test the device with a metal sample before searching outside, e.g. with: • Iron nail • 10/20/50 Euro cent coin (copper) • 1 or 2 Euro coin (copper / nickel) • Silver coin Carefully place the detector on a wooden or plastic table with the search coil protruding at least 30 cm beyond the end. - Page 33 Test: ALL METAL mode Guide each of the four metal samples 10 cm above the search coil. The detector will make a different sound for each sample. • The distance of the sample will be displayed as 4“. • The arrow in the upper scale will indicate which metal is involved. Test: DISCRIM mode Press the MODE + button until the arrow points to DISCRIM.
- Page 34 Test: JEWELRY mode Press the MODE + button until the arrow points to JEWELRY. The first and second segments of the lower scale will go out. Guide each of the four metal objects 10 cm above the coil. • The detector will not respond to the iron nail. •...
- Page 35 Test: COINS mode Press the MODE + button until the arrow points to COINS. The segments under iron nails, bottle caps and can tabs will disappear, eliminating the three most common waste metals in the search. Guide each of the four metal objects 10 cm above the coil.
- Page 36 • As soon as the upper scale indicators have gone out, bring for example a 2-pence coin towards the search coil. At a distance of 8“, the segments will start to glow and a signal will sound. The closer the coin gets to the search coil, the louder the sound will become.
-
Page 37: Outdoor Operation
OUTDOOR OPERATION Metal detectors are primarily intended for outdoor use. Do not use the detector near sources of power or places with a lot of metal. Field detection may also be complicated due to soil conditions, size, shape and oxidation of metals. - Page 38 (4) The right pattern of motion Try to maintain a steady pace of swinging. Jerky movements may prevent the detector from being able to probe the ground quickly enough. Hold the search coil parallel to the ground, not at an angle. Move in a constant slow motion.
- Page 39 • Press and hold the PINPOINT button and the PINPOINT indicator will light up. The coin depth indicator shows [8+]. The upper and lower scale displays will all go out. The detector will emit a deep tone. If the displays do not go out, release the PINPOINT key and try again. •...
- Page 40 • If both the signal frequency and the signal strength show no obvious change, the ground balance is already set. • If there is an obvious change when approaching the ground, then you need to adjust the ground balance. • Raise the search coil again and turn the ground balance knob 15 degrees clockwise.
-
Page 41: Troubleshooting
• Smaller, thinner gold objects show a result comparable to the 10 pence coin, while larger gold pieces point to the can tab or the 1 pound coin. The largest will be displayed only if the object is at least as large as a 2-pence coin. -
Page 42: Hints On Disposal
Problem Possible cause and solution Unstable signal or target Try to pan at different angles. detection is fluctuating. For deeply buried objects, try increasing the sensitivity or changing the search pattern. Maybe more than one object has been discovered. Reset the sensitivity or eliminate metal types. - Page 43 Uso en el exterior 57 Detección y reparación de anomalías 61 Retirada del aparato 62 DATOS TÉCNICOS Número de artículo 10032724 Fuente de alimentación 4 pilas AA (no están incluidas en el envío) Bobina de búsqueda 8,5 pulgadas (~21,5 cm), resistente al agua DECLARACIÓN DE CONFORMIDAD...
-
Page 44: Indicaciones De Seguridad
INDICACIONES DE SEGURIDAD • No utilice auriculares en lugares muy transitados. • Obtenga siempre un permiso antes de realizar búsquedas. • Manténgase lejos de lugares donde hay conductos subterráneos, cables o tuberías, sobre todo, si transportan gas inflamable o líquidos. •... -
Page 45: Montaje
MONTAJE Abra el embalaje y extraiga todas las piezas. Afloje el botón de bloqueo de la barra inferior y retire Barra los tornillos. Monte la inferior Tornillo bobina de búsqueda en la barra inferior y bloquéela con el botón de bloqueo. Junta de goma Tuerca Atención: Asegúrese de... - Page 46 Afloje la tuerca de bloqueo en el otro extremo de la barra central, presione el botón plateado situado en la barra superior e inserte la barra central. A continuación, ajuste de nuevo la tuerca de bloqueo. Botón plateado Ajuste la longitud de la barra de tal manera que pueda sujetarla cómodamente con el brazo estirado.
- Page 47 Colocar las pilas Atención: Necesita 4 pilas AA. Las pilas NO están incluidas en el envío. Las pilas deberían de tener una vida útil de aprox. 40 horas de búsqueda. Retire las pilas si no va a utilizar el detector de metales durante un periodo de tiempo prolongado para evitar que se oxidan o rezuman.
-
Page 48: Panel De Control - Display
PANEL DE CONTROL - DISPLAY Todas las configuraciones y los resultados de búsqueda se muestran en el display LCD. Indicador de metal objetivo de búsqueda Indicador de modos Escala superior (flechas) Escala inferior (barras) Símbolo de la retroiluminación Indicador de profundidad Indicador Pinpoint Indicador de pila... - Page 49 Indicador de profundidad: Se compone de 4 niveles: 2“ (5 cm), 4“ (10 cm), 6“ (15 cm) y 8+“ (20 cm). Indica la profundidad de la moneda en función de su tamaño, metal y propiedades de la tierra. En modo Pinpoint, el detector de metal determina mejor el objetivo.
-
Page 50: Panel De Control - Botones
PANEL DE CONTROL - BOTONES Botón Función MODE Pulse el botón [+] o [-] para elegir el modo deseado. ALL METAL: Muestra todo tipo de metal. • DISCRIM: Pulse el botón [+] o [-] para • eliminar determinados metales. JEWELRY: Elimina hierro y reacciona de •... - Page 51 Botón Función PINPOINT Mantenga pulsado el botón PINPOINT para determinar la localización exacta de un objeto oculto en el suelo, detrás de una pared o dentro de otro objeto. En modo Pinpoint, la escala PINPOINT muestra la intensidad de la señal. Cuanto más cerca se halla el detector del objeto de metal, más clara será...
- Page 52 Realice varias pruebas de metal antes de utilizar el detector en el exterior, por ejemplo, con: • clavos de hierro • monedas de 10, 20, 50 céntimos de euro (cobre) • monedas de 1 o 2 euros (cobre/níquel) • monedas de plata Coloque el detector de metales en una mesa de plástico o madera.
- Page 53 Prueba: Modo ALL METAL Mueva cada uno de los cuatro objetos de metal a unos 10 cm de la bobina de búsqueda. El detector emitirá un sonido distinto para cada objeto. • La distancia con respecto a los objetos se visualizará como 4“. •...
- Page 54 Prueba: Modo JEWELRY Pulse varias veces el botón MODE+ hasta que la flecha señale JEWELRY. La primera y segunda barra de la escala inferior se apagarán. Mueva cada uno de los cuatro objetos de metal a unos 10 cm de la bobina de búsqueda. •...
- Page 55 Prueba: Modo COINS Pulse varias veces el botón MODE+ hasta que la flecha señale COINS. Las flechas debajo del clavo de hierro, tapón de botella y lengüeta de lata desaparecen, indicando que el aparato no reaccionará a los 3 metales más comunes.
- Page 56 • Tan pronto como se apaguen las flechas de la escala superior, mueva, por ejemplo, una moneda de 20 céntimos cerca de la bobina de búsqueda. A una distancia de 8“, las flechas empiezan a iluminarse y se emite un sonido. Cuanto más cerca está la moneda de la bobina de búsqueda, más fuerte es la señal.
-
Page 57: Uso En El Exterior
USO EN EL EXTERIOR Los detectores de metal están diseñados para usarse en el exterior. No utilice el detector de metal cerca de fuentes de alimentación y en lugares con mucho metal. La detección de campo es algo complicada, pues influyen mucho los factores como características del suelo, tamaño, forma y grado de oxidación. - Page 58 (4) Cómo mover la bobina correctamente Al mover la bobina, intente mantener un ritmo uniforme. Los movimientos bruscos impiden que el detector sondee correctamente la tierra. Mueva la bobina en posición paralela al suelo y evite balancearla a modo de péndulo. Mueva la bobina a una velocidad lenta y constante.
- Page 59 • Mantenga pulsado el botón PINPOINT. Se ilumina el indicador PinPoint. El indicador de la profundidad señala [8+]. Los indicadores de las escalas superior e inferior se apagan. El detector emite un sonido grave. Si los indicadores no se apagan, suelte el botón PINPOINT y repita el procedimiento.
- Page 60 • Si la frecuencia de la señal y la intensidad de la señal no varían, significa que Ground Balance está correctamente configurado. • Si hubo cambios, tendrá que volver a configurar Ground Balance. • Vuelva a elevar la bobina y gire el botón de Ground Balance unos 15 grados en el sentido de las agujas del reloj.
-
Page 61: Detección Y Reparación De Anomalías
• La plata se visualiza en la parte derecha y cuanto más grande sea el objeto, más a la derecha estará el indicador. • La indicación de la profundidad de los objetos de tamaño de una moneda es muy precisa, mientras que la de los objetos más grandes y de forma irregular varía en lectura. -
Page 62: Retirada Del Aparato
Problema Posible causa y solución Señal inestable o el Mueva el aparato en distintos ángulos. indicador de objeto varía. Si el objeto se encuentra muy enterrado, puede intentar aumentar la sensibilidad o cambiar el patrón de búsqueda. Es posible que en ese lugar se encuentre más de 1 objeto. - Page 63 Mise en marche et test 72 Utilisation a l‘extérieur 77 Identification et résolution des problèmes 81 Conseils pour le recyclage 82 FICHE TECHNIQUE Numéro d'article 10032724 Alimentation 4 piles AA (non fournies) Bobine de recherche 8,5 pouces (~21,5 cm), étanche DÉCLARATION DE CONFORMITÉ...
-
Page 64: Consignes De Sécurité
CONSIGNES DE SÉCURITÉ • Ne portez pas d‘écouteurs dans les zones très fréquentées. • Obtenez toujours le permis avant d‘effectuer des recherches. • Teniez-vous à l‘écart des conduites souterraines, des câbles et de la tuyauterie, en particulier ceux qui transportent des gaz et des liquides inflammables. -
Page 65: Assemblage
ASSEMBLAGE Ouvrez l‘emballage et sortez les pièces. Desserrez le bouton de blocage au bas de l‘arbre Tube et retirez la vis. Fixez inférieur la bobine de recherche sur le tube inférieur et verrouillez-la. Joint en Ecrou caoutchouc Remarque : le joint en caoutchouc doit être monté... - Page 66 Desserrez l‘écrou de blocage au bout du tube central, appuyez ensuite sur le bouton argenté sur le tube supérieur et insérez-le dans le tube central. Resserrez ensuite l‘écrou de blocage. Bouton argenté Réglez la longueur totale du détecteur pour garder vos bras droits pendant les recherches.
- Page 67 Installation des piles Remarque : Il vous faut 4 piles AA. Les piles ne sont pas incluses. Les piles doivent fournir environ 40 heures de temps de recherche. Si vous n‘utilisez pas le détecteur pendant une période prolongée, veuillez retirer les piles afin qu‘elles ne fuient pas ou ne rouillent pas.
-
Page 68: Affichages Du Panneau De Commande
AFFICHAGES DU PANNEAU DE COMMANDE Tous les paramètres et résultats de recherche sont clairement affichés sur l‘écran LCD. Affichage du métal cible Affichage du mode Echelle supérieure (flèches) Echelle inférieure (segments) Symbole de rétroéclairage Affichage de la profondeur cible Voyant pinpoint Affichage du niveau Affichage de des piles... - Page 69 Affichage de la profondeur cible : comprend 4 réglages: 2 „(5 cm), 4“ (10 cm), 6 „(15 cm) et 8+“ (20 cm), indiquant la profondeur approximative de la pièce en fonction de la taille, du métal et du sol. En mode Pinpoint, le détecteur peut déterminer plus précisément la cible. Affichage du niveau des piles : 4 segments lumineux indiquent une forte performance;...
-
Page 70: Touches Du Panneau De Commande
TOUCHES DU PANNEAU DE COMMANDE Touche Fonction MODE Appuyez sur le bouton [+] ou [-] pour sélectionner le mode désiré : ALL METAL : tous les types de métaux • seront affichés. • DISCRIM : appuyez sur le bouton [+] ou [-] pour supprimer certains métaux. - Page 71 Touche Fonction PINPOINT Maintenez le bouton PINPOINT pour déterminer l'emplacement exact d'une cible cachée dans le sol, derrière un mur ou dans un autre objet. Lors de la localisation, l'échelle PINPOINT indique la force du signal. Plus le détecteur est proche de l'objet métallique, plus le voyant s'allume et plus le signal sonore est puissant.
-
Page 72: Mise En Marche Et Test
MISE EN MARCHE ET TEST Testez l‘appareil avec un échantillon métallique avant de faire des recherches à l‘extérieur, par ex. avec : • Un clou de fer • Des pièces de monnaie de 10/20/50 centimes d‘euro (en cuivre) • Des pièces de 1 ou 2 euros (cuivre/nickel) •... - Page 73 Test : mode ALL METAL Effectuez chacun des quatre tests de recherche de métaux 10 cm au- dessus de la bobine de recherche. Le détecteur émet un son différent pour chaque recherche. • La distance de l‘échantillon affichée est de 4“. •...
- Page 74 Test : mode JEWELRY Appuyez sur le bouton MODE + jusqu‘à ce que la flèche pointe sur JEWELRY. Les premier et deuxième segments de l‘échelle inférieure s‘éteignent. Placez chacun des quatre objets métalliques 10 cm au-dessus de la bobine. • Le détecteur ne réagit pas au clou en fer.
- Page 75 Test : mode COINS Appuyez sur le bouton MODE + jusqu‘à ce que la flèche pointe sur COINS. Les segments sous les clous de fer, les bouchons de bouteilles et les languettes de canette disparaissent, éliminant ainsi les trois métaux les plus courants contenus dans les déchets.
- Page 76 • Lorsque les indicateurs de l‘échelle supérieure sont éteints, amenez par ex une pièce de 2 pence vers la bobine de recherche. À partir d‘une distance de 8“ les segments commencent à briller et un signal retentit. Plus la pièce est proche de la bobine de recherche, plus le son devient fort.
-
Page 77: Utilisation A L'extérieur
UTILISATION A L‘EXTÉRIEUR Les détecteurs de métaux sont principalement destinés à une utilisation en extérieur. N‘utilisez pas le détecteur à proximité de sources de courant et de lieux comportant beaucoup de métal. La détection sur le terrain peut également être compliquée en raison des conditions du sol, de la taille, de la forme et de l‘oxydation des métaux. - Page 78 (4) Le bon schéma de déplacement Essayez de maintenir un rythme de balancier régulier. Des mouvements saccadés peuvent empêcher le détecteur de sonder le sol assez rapidement. Tenez la bobine de recherche parallèle au sol, sans former d‘angle. Déplacez-vous dans un mouvement constant et lent. (5) Reconnaissance des métaux grâce à...
- Page 79 • Maintenez le bouton PINPOINT, le témoin PINPOINT s‘allume. L‘indicateur de profondeur de pièce indique [8+]. Les voyants de l‘échelle supérieure et inférieure s‘éteignent tous. Le détecteur émet un son grave. Si les voyants ne s‘éteignent pas, relâchez le bouton PINPOINT et réessayez.
- Page 80 • Si la fréquence du signal et la puissance du signal ne changent pas de manière évidente, alors la Ground Balance est déjà réglée. • S‘il y a un changement évident quand vous approchez du sol, vous devez ajuster Ground Balance. •...
-
Page 81: Identification Et Résolution Des Problèmes
• L‘argent est affiché sur la droite, et plus l‘objet est grand, plus il apparaît à droite. • L‘indicateur de profondeur pour les objets de la taille d‘une pièce est très précis mais la lecture des objets de forme irrégulière peut varier. Dans ce cas, traverser plusieurs fois la même zone peut conduire à... -
Page 82: Conseils Pour Le Recyclage
Problème Cause possible et solution Le signal est instable Essayez de faire un mouvement de balancier ou l'affichage de la avec différents angles. destination fluctue. Pour les objets profondément enfouis, essayez d'augmenter la sensibilité ou de changer le motif de recherche. Peut-être que plus d'un objet a été... - Page 83 Messa in funzione e test 92 Utilizzo all’aperto 97 Ricerca e correzione degli errori 101 Smaltimento 102 DATI TECNICI Numero articolo 10032724 4 batterie AA (non incluse nel volume di Alimentazione consegna) Bobina di esplorazione 8,5 pollici (~21,5 cm), impermeabile DICHIARAZIONE DI CONFORMITÀ...
-
Page 84: Avvertenze Di Sicurezza
AVVERTENZE DI SICUREZZA • Non indossare le cuffie in ambienti molto frequentati. • Prima di esplorare, procurarsi sempre il relativo permesso. • Tenersi distanti da condotti sotterranei, cavi e tubature, in particolare se trasportano gas o liquidi. • L’esplorazione in settori militari è proibito e rappresenta un grande pericolo. -
Page 85: Montaggio
MONTAGGIO Aprire l’imballaggio e togliere i componenti. Allentare il tasto di bloccaggio sull’asta Tubo inferiore e togliere la inferiore Vite vite. Fissare la bobina di esplorazione al tubo inferiore e bloccarla. Guarnizione in Dado gomma Avvertenza: la guarnizione in gomma deve essere montata correttamente (v. - Page 86 Allentare il dado di arresto all’estremità del tubo centrale, premere il tasto argentato sul tubo superiore e inserire il tubo centrale. Stringere nuovamente il dado di arresto. Silberner Knopf Tasto argentato Regolare l’intera lunghezza del metal detector in modo da avere le braccia diritte durante l’esplorazione.
- Page 87 Come inserire le batterie Avvertenza: sono necessarie 4 batterie AA. Le batterie NON sono incluse nel volume di consegna. Le batterie offrono circa 40 ore di esplorazione. Se il metal detector non viene utilizzato per tempi prolungati, togliere le batterie, in modo che non vi siano perdite e che non arrugginiscano. Vano delle batterie Premere il tasto sul Togliere il vano delle...
-
Page 88: Indicazioni Del Pannello Di Controllo
INDICAZIONI DEL PANNELLO DI CONTROLLO Tutte le impostazioni e i risultati della ricerca sono visualizzati in modo chiaro sullo schermo LCD. Indicazione del metallo che si sta cercando Indicazione della Scala superiore (frecce) modalità Scala inferiore (segmenti) Symbol für die Indicazione della Hintergrund- profondità... - Page 89 Indicazione della profondità da raggiungere: composta da 4 impostazioni: 2” (5 cm), 4” (10 cm), 6” (15 cm) e 8+” (20 cm) e indica la profondità approssimativa della moneta a seconda della dimensione, del metallo e della composizione del terreno. In modalità Pinpoint il metal detector è...
-
Page 90: Tasti Del Pannello Di Controllo
TASTI DEL PANNELLO DI CONTROLLO Tasto Funzione MODE Premere il tasto (+) o (-) per selezionare la modalità desiderata: ALL METAL: vengono mostrati tutti i tipi di • metallo. • DISCRIM: premendo (+) o (-) vengono esclusi determinati metalli. JEWELRY: elimina il ferro e reagisce più •... - Page 91 Tasto Funzione PINPOINT Tenere premuto il tasto PINPOINT per determinare con precisione il luogo esatto di un obbiettivo che è nascosto nel terreno, dietro a un muro o a un altro oggetto. In modalità Pinpoint, la scala di PINPOINT indica l’intensità del segnale.
-
Page 92: Messa In Funzione E Test
MESSA IN FUNZIONE E TEST Testare il dispositivo con un campione metallico, prima di iniziare l’esplorazione all’esterno, ad es. con: • Un ago di ferro • Monete da 10/20/50 centesimi di Euro (rame) • Monete da 1 o 2 Euro (rame/nichel) •... - Page 93 4. Test: modalità ALL METAL Portare ognuno dei quattro campioni di metallo a circa 10 cm sopra la bobina di esplorazione. Il metal detector emette un suono diverso per ogni campione. • La distanza del campione viene indicata come 4”. •...
- Page 94 Test: modalità JEWELRY Premere il tasto MODE+ fino a quando la freccia indica su JEWELRY. Il primo e il secondo segmento della scala inferiore si spengono. Portare ognuno dei quattro campioni di metallo a circa 10 cm sopra la bobina di esplorazione.
- Page 95 Test: modalità COINS Premere il tasto MODE+ fino a quando la freccia indica su COINS. I segmenti sotto a aghi di ferro, tappi di bottiglia metallici e lattine scompaiono, escludendo in tal modo i più diffusi metalli di scarto dall’esplorazione. Portare ognuno dei quattro campioni di metallo a circa 10 cm sopra la bobina di esplorazione.
- Page 96 • Non appena le indicazioni della scala superiore si sono spente, portare, ad es., una moneta da 2 pence verso la bobina di esplorazione. Da una distanza di 8”, i segmenti cominciano a illuminarsi e viene emesso un segnale acustico. Più si avvicina la moneta, maggiore sarà il volume del segnale acustico.
-
Page 97: Utilizzo All'aperto
UTILIZZO ALL’APERTO I metal detector sono destinati innanzitutto all’utilizzo all’aperto. Non utilizzare il metal detector nelle vicinanze di fonti di corrente o di luoghi con molto metallo. Il rilevamento può essere reso difficoltoso anche dal tipo di terreno, dalla grandezza, dalla forma e dall’ossidazione dei metalli. Più ci si esercita, più... - Page 98 Il corretto movimento Cercare di tenere un ritmo di ondeggiamento costante. Movimenti bruschi possono portare il metal detector a non scandagliare il terreno con sufficiente velocità. Tenere la bobina di esplorazione parallela al terreno e non inclinata. Muoversi a movimenti lenti e costanti. Riconoscimento dei metalli in base all’altezza del suono Durante il rilevamento, a volte il suono è...
- Page 99 • Tenere premuto il tasto PINPOINT e l’indicazione PINPOINT si illumina. L’indicazione per la profondità della moneta mostra (8+). Tutte le indicazioni delle scale superiore e inferiore si spengono. Il metal detector emette un segnale acustico di bassa tonalità. Se le indicazioni non si spengono, lasciare andare il tasto PINPOINT e ripetere la procedura.
- Page 100 • Se la frequenza e l’intensità del segnale non mostrano chiari cambiamenti, Ground Balance è impostato. • Se c’è un chiaro cambiamento quando ci si avvicina al terreno è necessario regolare Ground Balance. • Sollevare nuovamente la bobina e ruotare la manopola Ground Balance di 15 gradi in senso orario.
-
Page 101: Ricerca E Correzione Degli Errori
• L’argento viene indicato a destra: più grosso è l’oggetto, più a destra sarà l’indicazione. • L’indicazione della profondità per oggetti grandi come monete è molto precisa, mentre per oggetti più grandi o con forma irregolare la lettura può variare. In tal caso il passaggio ripetuto sopra allo stesso settore porta a risultati di misurazione migliori. -
Page 102: Smaltimento
Problema Possibile causa e soluzioni Segnale o rilevamento Ondeggiare a diverse angolature. dell’obbiettivo instabili. In caso di oggetti che si trovano a grande profondità, aumentare la sensibilità o modificare il movimento. Forse è stato rilevato più di un oggetto. Impostare nuovamente la sensibilità o eliminare tipi di metallo.
Need help?
Do you have a question about the 10032724 and is the answer not in the manual?
Questions and answers