
Subscribe to Our Youtube Channel
Related Manuals for Lilliput RM-503S


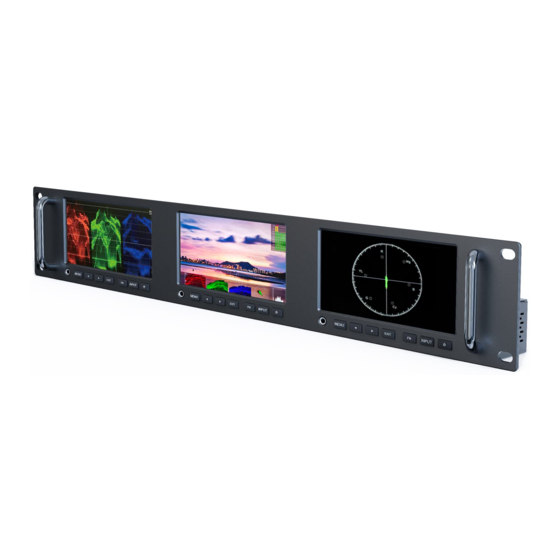
Summary of Contents for Lilliput RM-503S
- Page 1 IMPORTANT SAFETY INSTRUCTIONS: ......................2...
-
Page 2: Table Of Contents
CONTENTS 1. FEATURES: ..............................3 2. PRODUCT DESCRIPTION .......................... 4 2-1 Front Button/ Interface ........................4 2-2 Back Interface ............................ 2 3. MENU SETTING ............................3 3-1. Key Function: ............................ 3 3-1-1. The Image Menu ........................3 3-1-2. FN Function Buttons: ....................... 3 3-2. - Page 3 IMPORTANT SAFETY INSTRUCTIONS: ● Please read User Guide before using this product. ● Please keep User Guide for future reference. ● Please read the cautions to prevent possible danger and loss of property. CAUTIONS: ● Please do not place the display screen towards the ground. ●...
-
Page 4: Features
1. FEATURES: ● Support HDMI 2.0, 3G-SDI input and output. ● The output loop signal can support up to 4K. ● Support custom multiple waveform modes ● HDR function supports off/ST2084 300/ST 2084 1000/ST 2084 10000/HLG. ● Gamma range: 1.8-2.8. ●... -
Page 5: Product Description
2. PRODUCT DESCRIPTION 2-1 Front Button/ Interface 1.Earphone jack 2. Menu key: When the screen is on, press the MENU key to display the menu interface on the screen. Option key: In the menu interface, use the left and right keys to select the desired menu option or option value. -
Page 6: Back Interface
5. IN/EXIT: return button for menu,long press to switch INPUT signal. 6. FN Shortcut Key. 7. SDI/HDMI input/ output interface. 8. Power Button. 2-2 Back Interface 1. Battery plate switch. 2. DC 15V power input 3. LAN interface 4. TALLY interface 5. -
Page 7: Menu Setting
3. MENU SETTING Before setting the functions, please make sure the device is connected correctly. 3-1. Key Function: 3-1-1. The Image Menu ● Turn on the power, press the Menu button to display the menu, use the < or > button to switch between Picture, marker, function, waveform, audio, and system options in sequence. -
Page 8: Front Button/ Interface
interface. ● Users can set shortcut keys according to personal needs: center marker, Aspect marker, safety marker, Overscan, scan, Aspect, HDR, color Space, Camera, Camera Log, Check Field, H/V Delay, Freeze, Color Bar, Peaking False Color, Exposure, Histogram, Full Mode, Waveform, Vector, Time Code, Mute, Level Meter. - Page 9 ITEMS OPTIONS Brightness 0 – 100 Contrast 0 – 100 Saturation 0 – 100 Sharpness 0 – 100 RGB Range Full/Limited HDMI EDID 4K/2K Color Space Native, SMPTE-C,Rec709,EBU Camera Log Off、Default、User Def. Log SLog2ToLC-709, SLog2ToLC-709TA, SLog2ToSLog2-709, SLog2ToCine+709, SLog3ToLC-709, SLog3ToLC-709TA, SLog3ToSLog2-709, SLog3ToCine+709, ArriLogCTo709, ArriLogCToP3DCI,...
- Page 10 D780 NLogTo709, (Only when HDR Off) User Log No Data(User1~User6) Gamma Off, 1.8,2.0,2.2,2.35,2.4,2.6,2.8 (Only when HDR Off) Back Light 0~100 Off, ST 2084 300, ST 2084 1000, ST 2084 10000,HLG 6500K/7500K/9300K/User Red Gain 0 –128- 255 Note: Available only under “User” mode Green Gain 0 –128- 255 to choose the color...
- Page 11 Increase or decrease the backlight of the Monitor. It can be adjusted from [0]-[100]. ● Color Space Select the display gamut from among [Native], [SMPTE-C], [Rec709], [EBU]. ● Camera log Default Log: Defaults log got 17 Log modes, which can be switched according to the following sequence: SLog2ToLC-709,SLog2ToLC-709TA,SLog2ToSLog2-709,SLog2ToCine+709,SLog3ToLC-709,SLog3ToL C-709TA,SLog3ToSLog2-709,SLog3ToCine+709,ArriLogCTo709,ArriLogCToP3DCI,CLogTo709,VLogT...
- Page 12 Note! Gamma mode can be ONLY activated while HDR function closed. ● HDR Use this setting to choose one of the HDR presets: [Off], [ST 2084 300], [ST 2084 1000], [ST 2084 10000], [HLG]. When HDR is activated, the display reproduces a greater dynamic range of luminosity, allowing lighter and darker details to be displayed more clearly.
-
Page 13: Marker
this function to strengthen, weaken or balance the image color according requirements. The standard white light color temperature is 6500K. Color Gain/Offset is available only under “User” mode to choose the color value. - SDI (or HDMI) - Representing the source that is currently being displayed on the monitor. It is unable to choose and change the source from OSD. -
Page 14: Function
● Aspect ratio: The Aspect Marker provides various aspect ratios, as the following: [OFF], [16:9], [1.85:1], [2.35:1], [4:3], [3:2], [1.3X], [2.0X], [2.0X MAG]. ● Aspect ratio: Used to select and control the size and availability of the safety area. Available type are [OFF], [95%], [93%], [90%], [88%], [85%], [80%] preset to choose. - Page 15 (Options can be adjusted only under scan mode.) Aspect Full, 16:9, 1.85:1, 2.35:1, 4:3, 3:2, 1.3X, 1.5X, 2.0X, 2.0X MAG Overscan OFF, ON H/V Delay OFF, H, V, H/V Check Field OFF, Red, Green, Blue, Mono Zoom 10%-90% Freeze Off/On ●...
-
Page 16: Waveform
● Check Field: Use the check field modes for monitor calibration or to analyze individual color components of an image. In [Mono] mode, all color is disabled and only a grayscale image is shown. In [Blue], [Green], and [Red] check field modes, only the selected color will be shown. ●... - Page 17 ITEMS OPTIONS Full Mode OFF, Y, YCbCr, RGB, Vector, Histogram,Audio Waveform OFF, Y, YCbCr, RGB Vector On, OFF Transparency OFF, 25%, 50% Peaking Peaking Color Red, Green, Blue, White, Black Peaking Level 0 – 100 False Color OFF, ON(Default,Spectrum,ARRI,RED) False Color Table OFF, ON Exposure OFF, ON...
- Page 18 ● Transparency: Adjustment of transparency can support waveform, vector, histogram, audio vector, level meter. Transparency can be selected from among [off], [25%], and [50%]. - [Off] : The background of waveform is shown at black. - [25%]: The background of waveform is shown at 25% intensity. - [50%]: The background of waveform is shown at 50% intensity.
- Page 19 ● False Color Table: Use this item to activate or deactivate the false color table. The range of the false color table is between 0-100 IRE. ● Exposure & Exposure Level: The exposure feature helps the user achieve optimum exposure by displaying diagonal lines over areas of the image that exceed the setting exposure level.
-
Page 20: Audio
optional. - [Y]: Display Y histogram. - [RGB]: Display RGB mixed histogram. - [Color], Display RGB separated histogram. ● Time Code: Use this item to activate or deactivate the Time Code. When activated, [Off], [LTC], [VITC] are for optional. Note: Time code is only available under SDI mode. 3-2-5 Audio ITEMS OPTIONS... -
Page 21: System
● Volume To adjust the volume from [0]-[100] for the built in speaker and earphone jack audio signal. ● Level Meter Select whether to activate or deactivate level meter. Note: Default as on under [Waveform]-[Multi] function. ● Audio channel Select audio channel. 3-2-6 System ITEMS OPTIONS... - Page 22 OSD Time 10s, 20s, 30s OSD H Position Choose between 0-100, Default: 50 OSD V Position Choose between 0-100, Default: 50 Color Calibration OFF,ON Comparision En OFF,ON DHCP OFF,ON IP Address 0.0.0.0 Sub.Mask 0.0.0.0 Gateway 0.0.0.0 Reset OFF,ON Language Switch between [English] and [Chinese]. ●...
- Page 23 disk. Insert the USB flash disk to the device and save the document. This document “Rec709.cube” will be found under Color Space Option. ● Comparison Use this setting to activate or deactivate the Comparison En function. When activated, the screen displays the comparison of Original image and customized image, as shown.
-
Page 24: Parameters
Note: When [DHCP] on, Sub net Mask cannot be manually set . Gateway Manually configure Gateway: xxx.xxx.xxx.xxx Note: When [DHCP] on, Gateway cannot be manually set . If there is any problem unknown, press to confirm after selected. The monitor will return to default settings. -
Page 25: Accessories
5. ACCESSORIES Standard: 1. 15V/2A DC adapter 1 pc. 2. Tally adaptor 1 pc. 3. User Manual 1 pc. -
Page 26: Trouble Shooting
6. TROUBLE SHOOTING 1. Only black-and-white display: Check whether the color saturation is properly setup or not. 2.Power on but no pictures: Check whether the cables of 3G-SDI and HDMI are correctly connected or not. Please use the standard power adapter coming with the product package. Improper power input may cause damage. -
Page 27: D Lut Loading Demo
7. 3D LUT Loading Demo 7-1. Format Requirement ● LUT format Type: .cube 3D Size: 17x17x17 Data Order: Table Order: ● USB flash disk version USB: System: FAT32 Size: <16G ● Color calibration document: lcd.cube ● User Log: User1.cube ~User6.cube 7-2. - Page 28 One individual Product ID for one computer. Please send the ID number to Sales to get an Enter Key. Then the computer gets the permission of the Lut Tool after input the Enter Key. 7-2-2. Enter the LUT Converter interface after input the Enter Key. 7-2-3.
-
Page 29: Usb Loading
7-2-4. Click Output File, choose the file name. 7-2-5. Click Generate Lut button to finish. 7-3. USB Loading Copy the needed files to the root directory of the USB flash disk. Note! LUT files after conversion must be named "User1", "User2", “User3”, “User4”, “User5” or “User6”.
Need help?
Do you have a question about the RM-503S and is the answer not in the manual?
Questions and answers