Advertisement
Quick Links
Advertisement

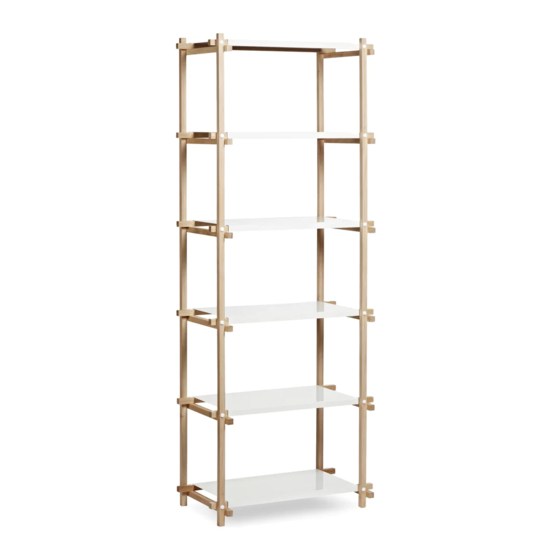
Summary of Contents for Hay WOODY
- Page 1 – INSTRUCTION MANUAL – WOODY DESIGN BY HAY...
- Page 3 – INSTRUCTION MANUAL – COLUMN LOW...
- Page 4 – PARTS – Upright x4 Ledger x6 Ledger x6 Shelf x3 Screw x36 Cap x36 Allen key x1...
- Page 5 Place the parts on the parts and tighten the screw gently. NOTICE Top distance 37,5 mm NOTICE Bottom distance 52,5 mm NOTICE Please wait to fully tighten the screws until step 3.
- Page 6 Place the parts on top of the parts and gently tighten the screw. 37,5mm 62,5mm NOTICE Please make sure to place all parts in the same direction ...
- Page 7 Place the screws to connect the part and part. Tighten the screw gently. When all screws are placed and fully tightened, place the on the screw heads. NOTICE Please make sure to tighten all screws fully before placing the part...
- Page 8 Place the parts on top of the parts.
- Page 9 Done!
- Page 10 – INSTRUCTION MANUAL – COLUMN HIGH...
- Page 11 – PARTS – Ledger x12 Ledger x12 Upright x4 Shelf x6 Screw x72 Cap x72 Allen key x1...
- Page 12 Place the parts on the parts and tighten the screw gently. NOTICE Top distance 37,5 mm NOTICE Bottom distance 52,5 mm NOTICE Please wait to fully tighten the screws until step 3.
- Page 13 Place the parts on top of the parts and gently tighten the screw. 2 persons are recommended to complete this step. 37,5mm 62,5mm NOTICE Please make sure to place all parts in the same direction ...
- Page 14 Place the screw to connect the part and part. Tighten the screw gently. When all screws are placed and fully tightened, place the on the screw heads. NOTICE Please make sure to tighten all screws fully before placing the part...
- Page 15 Place the parts on top of the parts.
- Page 16 Done!
- Page 17 – INSTRUCTION MANUAL –...
- Page 18 – PARTS – Upright x8 Ledger x12 Shelf x9 Ledger x6 Allen key x1 Screw x72 Cap x72...
- Page 19 Place the parts on the parts and tighten the screw gently. NOTICE Top distance 37,5 mm NOTICE Bottom distance 52,5 mm NOTICE Please wait to fully tighten the screws until step 3.
- Page 20 Place the parts on top of the parts and gently tighten the screw. 2 persons are recommended to complete this step. 62,5mm 37,5mm NOTICE Please make sure to place all parts in the same direction...
- Page 21 Place the screws to connect the part and part. Tighten the screw gently. When all screws are placed and fully tightened, place the on the screw heads. NOTICE Please make sure to tighten all screws fully before placing the part...
- Page 22 Place the parts on top of the parts.
- Page 23 Done!
- Page 24 – INSTRUCTION MANUAL – HIGH...
- Page 25 – PARTS – Ledger Upright x8 Shelf x18 Upright x12 Screw x144 Cap x144 Allen key x1...
- Page 26 Place the parts on the parts and tighten the screw gently. NOTICE Top distance 37,5 mm NOTICE Bottom distance 52,5 mm NOTICE Please wait to fully tighten the screws until step 3.
- Page 27 Place the parts on top of the parts and gently tighten the screw. 2 persons are recommended to complete this step. 62,5mm 37,5mm NOTICE Please make sure to place all parts in the same direction...
- Page 28 Place the screw to connect the part and part. Tighten the screw gently. When all screws are placed and fully tightened, place the on the screw heads. NOTICE Please make sure to tighten all screws fully before placing the part...
- Page 29 Place the parts on top of the parts.
- Page 30 Done!
-
Page 31: Care And Maintenance
– CARE & MAINTENANCE – Our Care & Maintenance offers guidance for optimal maintenance of your HAY product. It includes advice and instructions on cleaning and caring for specific materials to prolong the life of your furniture. Please find our Care & Maintenance... - Page 36 Havnen 1 8700 Horsens Denmark +45 4282 0282 / hay@hay.com 01/1 1/2021...


Need help?
Do you have a question about the WOODY and is the answer not in the manual?
Questions and answers