Advertisement
Quick Links
Advertisement

Summary of Contents for Hay WOODY - COLOUMN LOW
- Page 1 I NST RUCTION M A N UA L WOODY B y H AY...
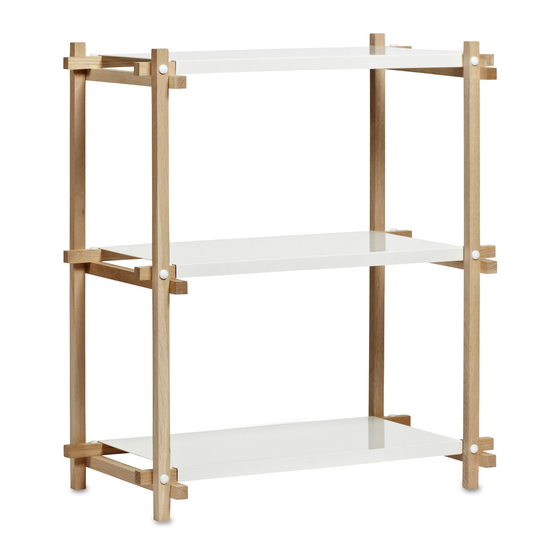
- Page 2 I N T RODUCTION Woody was originally designed for inventory use, but after much demand this ladder-inspired shelving system was soon put into commercial production. Woody’s beauty lies in its open simplicity and industrial expression that leaves construction parts and joint details exposed. Woody is available in several different sizes and can be used as a free-standing shelving system, against a wall or as a room divider.
-
Page 3: Care And Maintenance
C A R E A N D M A I N T ENA NCE C A R E A N D M A I N T ENA NCE UNTREATED WOOD POWDER COATED STEEL CAUTION With a little care you can prolong the life of your •... - Page 4 CON T EN TS CON T EN TS WOODY - COLOUMN LOW WOODY - LOW PAGE 8-15 PAGE 24-31 WOODY - COLOUMN HIGH WOODY - HIGH PAGE 16-23 PAGE 32-38...
- Page 5 PA RTS INSTRUCTION M A NUA L Woody Column low A x 4 B x 6 C x 6 D x 3 E x 3 6 F x 3 6 G x 1...
- Page 6 Place the 6 X B parts on the A parts and tighten the screw gently. Place the 6 X C parts on top of the B parts and gently tighten the screws. 37,5mm 62,5mm AT T EN T I O N TO P D I S TA N C E 3 7, 5 m m Make sure all the C parts...
- Page 7 Place the screws to connect the A part and C part. Tighten the screws gently. Place the D parts on top of the C parts. When all screws are placed and fully tightened, place the F on the screw heads. Please ensure all screws are fully tightened before placing the F parts.
- Page 9 PA RTS INSTRUCTION M A NUA L Woody Column High B x 1 2 C x 1 2 D x 6 A x 4 E x 7 2 F x 7 2 G x 1...
- Page 10 Place the 12 x B parts on the A parts and tighten the screws gently. Place the 12 x C parts on top of the B parts and gently tighten the screw. 2 persons are recommended to complete this step. 37,5mm AT TENTIO N TOP DISTANC E...
- Page 11 Insert the screws to connect the A part and C part. Tighten the screws gently. Place the D parts on top of the C parts. When all screws are placed and fully tightened, place the F parts on the screw heads. Please ensure all screws are fully tightened before placing the F parts.
- Page 13 PA RTS INSTRUCTION M A NUA L Woody A x 8 B x 1 2 D x 9 C x 6 E x 7 2 F x 7 2 G x 1...
- Page 14 Place the 12 x B parts on the A parts and tighten the screws gently. Place the 6 x C parts and gently tighten the screws. 2 persons are recommended to complete this step. 37,5mm 62,5mm AT TENTION TOP DISTA NCE 37,5mm Make sure all the C parts are facing in the same direction with the shortest distance from hole to end.
- Page 15 Place the screw to connect the A part and C part. Tighten the screw gently. Place the D parts on top of the C parts. When all screws are placed and completely tightened, place the F parts on the screw heads. Please ensure all screws are fully tightened before placing the F parts.
- Page 17 PA RTS INSTRUCTION M A NUA L Woody High A x 8 B x 24 C x 1 2 D x 1 8 E x 1 4 4 F x 1 4 4 G x 1...
- Page 18 Place the 24 x B parts on the A parts and tighten the screws gently. Insert the 12 x C parts and gently tighten the screws. 2 persons are recommended to complete the following steps. 37,5mm 62,5mm AT TENTIO N TOP DISTANC E 37,5mm Make sure all the C parts...
- Page 19 Insert the screws to connect the A parts and C parts. Tighten the screws gently. When all screws Place the D parts on top of the C parts. are placed and fully tightened, place the F parts on the screw heads. Please ensure all screws are fully tightened before placing the F parts.
- Page 21 Havnen 1 8700 Horsens Denmark +45 4282 0282 / hay@hay.dk ITEM NO. 706378 02122019...


Need help?
Do you have a question about the WOODY - COLOUMN LOW and is the answer not in the manual?
Questions and answers