
Subscribe to Our Youtube Channel
Related Manuals for Autarco MH Series


Summary of Contents for Autarco MH Series
- Page 1 Installation and Operation Manual Hybrid Solar Inverters MH series © Autarco Group B.V. IM-S2.MH-EN-V1.3...
- Page 2 This manual is an integral part of the unit. Please read the manual carefully before installation, operation or maintenance. Keep this manual for future reference. Product information is subject to change without notice. All trademarks are recognized as the property of their respective owners. © Autarco Group B.V. All rights reserved MH-series Hybrid Inverters...
-
Page 3: Table Of Contents
Installation and operation manual Table of Contents Introduction Read this first Target Audience Product versions covered by this document Preparation Safety instructions Package contents Internal DC switch Explanations of symbols on inverter Product information Overview Product identification Product overview Installation 4.1 Select a Location for the Inverter 4.2 Mounting of the inverter 4.3 PV Input Terminal Assembly... - Page 4 5.5.6 Monthly energy 5.5.7 Yearly Energy 5.5.8 Total Energy 5.5.9 Warning message 5.6 Advanced Settings 5.6.1 Select standard 5.6.2 ON/OFF 5.6.3 Calibrate energy 5.6.4 Reset password 5.6.5 Restart HMI 5.6.6 Storage Energy Set 5.6.6.1 Control parameter 5.6.6.2 Battery Select 5.6.6.3 Meter Set 5.6.6.3.1 Meter Select 5.6.6.3.2 Meter Placement 5.6.6.4 Storage Mode Select...
- Page 5 Installation and operation manual 11.1 Working Mode description 11.2 Grid standard selection guide IIM-S2-MH-EN-V1.3...
-
Page 6: Introduction
This manual contains important information for use during installation and maintenance of the MH series Autarco inverter. To reduce the risk of electrical shock, and to ensure the safe installation and operation of the MH series Autarco inverters, the following safety symbols appear throughout this document to indicate dangerous conditions and important safety instructions. -
Page 7: Product Versions Covered By This Document
1.3 Product versions covered by this document The main purpose of this user manual is to provide instructions and detailed procedures for installing, operating, maintaining, and troubleshooting the MH series of Autarco hybrid inverters which includes the following models: S2.MH3000 ●... -
Page 8: Preparation
DC isolator is disconnected. This is because photovoltaic (PV) arrays create electrical energy when exposed to light, and could cause a hazardous condition. WARNING! The MH series inverter must only be operated with PV arrays of protection class II, in accordance with IEC 61730, class A. - Page 9 Installation and operation manual IIM-S2-MH-EN-V1.3...
-
Page 10: Package Contents
2.2 Package contents MH-series Hybrid Inverters... -
Page 11: Internal Dc Switch
2.3 Internal DC switch Please verify whether your Autarco MH series inverter is equipped with internal DC switches. This switch can be found on the bottom of the inverter. If there isn’t an internal DC switch it is important to apply an external DC switch in order to completely disconnect the solar PV module strings from the inverter. -
Page 12: Product Information
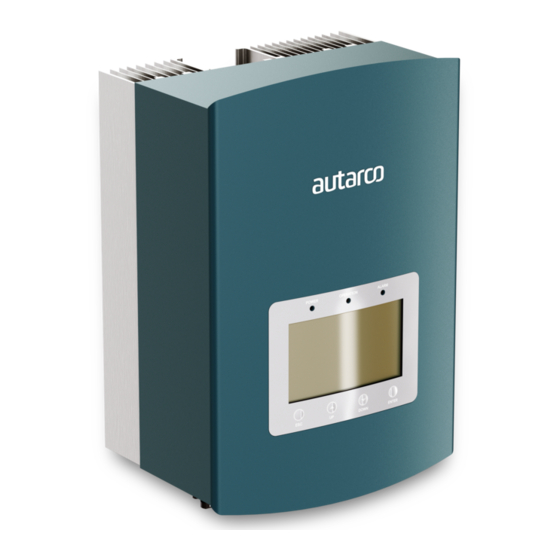
3 Product information 3.1 Overview Autarco MH series grid tied inverters are state of the art, high efficiency, robust and reliable hybrid inverters at the best price quality ratio available. They are easy to install and carry a standard 5 year product warranty. - Page 13 Installation and operation manual Autarco MH series has a 7 inch color screen, it displays the status, operating information and settings of the inverter. Keypad There are four keys in the front panel of the inverter (from left to right): ESC, UP, DOWN and ENTER keys.
-
Page 14: Installation
4 Installation 4.1 Select a Location for the Inverter To select a location for the inverter, the following criteria should be considered: Exposure to direct sunlight may cause output power derating. It is recommended to avoid installing the inverter in direct sunlight. It is recommended that the inverter is installed in a cooler ambient which doesn't exceed 104F/40C. -
Page 15: Mounting Of The Inverter
Installation and operation manual Visibility of the LEDs and LCD should be considered. Adequate ventilation must be provided. Note: Nothing should be stored on or placed against the inverter. 4.2 Mounting of the inverter Dimensions of mounting bracket: IIM-S2-MH-EN-V1.3... - Page 16 Once a suitable location has be found accordingly to 4.1 using figure 4.3 and figure 4.4 mount the wall bracket to the wall. The inverter shall be mounted vertically. The steps to mount the inverter are listed below: 1. Select the mounting height of the bracket and mark the mounting holes. For brick walls, the position of the holes should be suitable for the expansion bolts 2.
-
Page 17: Pv Input Terminal Assembly
Make sure the DC-switch, battery, AC-BACKUP, and AC-Grid are all in their off-states. Make sure the PV resistance to ground is higher than 20K ohms. The Autarco MH Series inverter uses MC4 connectors. Please follow the picture below to assemble the MC4 connectors. -
Page 18: Battery Terminal Components
MC4 connector manual, neither safety nor compliance with the technical data can be guaranteed. 4.4 Battery Terminal Components To avoid a DC Arc, Autarco recommends installing a suitable DC switch between batteries and Hybrid Inverter. Ensure the correct polarity of batteries before connecting to the inverter. -
Page 19: Assembling The Ac-Connector
Installation and operation manual Assembling the AC-connector DANGER! Never connect or disconnect the connectors under load. NOTICE! The AC connection to the electrical distribution grid must be performed only after receiving authorization from the utility that operates the grid. There are two AC terminals on this inverter and the assembly steps for both are the same. Take out the AC connector parts from the packaging. -
Page 20: Meter Installation
3. Remove a length of 40mm of the cable jacket and strip the wire insulation to a length of 8 – 15mm. 4. Each of the terminals are labeled. Ensure that the correct conductor is fastened (1.2 Nm torque) to the correct terminal. 5. -
Page 21: Single Phase Meter Installation (Europe)
Installation and operation manual Autarco MH series inverter can be connected to Acrel meters or Eastron meters to fulfill the control logic of the self-consumption mode, export power control, monitoring, etc. Acrel 1ph meter (With CT): ACR10R-D16TE Acrel 3ph meter (With CT): ACR10R-D16TE4 (Optional) -
Page 22: Single Phase Meter Installation (Italy)
4.6.2 Single phase meter installation (Italy) 4.7 Communication Cable Assembly The MH series inverter uses RS485 cable to communicate with the meter and CAN to communicate with the battery's BMS. The image below shows the assembly of the RS485/CAN communication cables. -
Page 23: External Ground Connection
For MH series inverters there is no temperature compensation , thus client need BTS (battery temperature sensor) which is connected to CAN port at one side and battery negative pole at the other side. - Page 24 Autarco will not be responsible for any damage caused by lightning. Strip the grounding cable insulation to the suitable length as shown in Figure 5.7.
-
Page 25: Logic Interface Connection
According to the standard line sequence connect the wire to the plug of RJ45, and then use a network cable crimping tool to make it tight. 3. Connect RJ45 to DRM (logic interface) . To use this function, please contact Autarco. IIM-S2-MH-EN-V1.3... -
Page 26: Inverter Monitoring Function
4.10 Inverter Monitoring Function The inverter can be monitored via Wi-Fi, GPRS or Ethernet. All Autarco communication devices are optional. For connection instructions, please refer to the Autarco Monitoring Device installation manuals. MH-series Hybrid Inverters... -
Page 27: Status Led Indicators
Installation and operation manual 4.11 Status LED indicators There are three LED status indicator lights at the front panel of MH series inverters. The left POWER light (red) indicates power status of the inverter. The middle OPERATION light (green) indicates the operation status. The right ALARM light (yellow) indicates the alarm status. Table 3.1 explains their meanings. -
Page 28: Operation
5 Operation 5.1 Initial Display When powering up the inverter for the first time, it is required to set the language. Press "ENT" to select. Set Language 2015-02-23 19 35 English English Y E S = < E N T > N O = < E S C > MH-series Hybrid Inverters... - Page 29 Installation and operation manual After setting the language, press "ESC" to access the main page. On the main page: Press "ESC" : View the yield data on monthly bar charts. Then use "UP" and "DOWN" to change the date and "ENT"...
-
Page 30: Main Menu
5.2 Main Menu There are 4 submenu’s in the Main Menu: 1. Information 2. Settings 3. Advanced Information 4. Advanced Settings MH-series Hybrid Inverters... -
Page 31: Information
Installation and operation manual 5.3 Information In the "Information" section, operating data and information can be viewed. Three pages of information can be checked by press "UP" or "DOWN". The example display is shown in the following Figure 5. Values are for reference only. IIM-S2-MH-EN-V1.3... - Page 32 Charge Power: Positive value indicates charging, negative value indicates discharging NOTE: Information for "PV Inverter Meter" is only available when two Eastron meters are used and Meter Placement is selected as "Grid+PV Meter". Details please consult Autarco service department. MH-series Hybrid Inverters...
-
Page 33: Settings
Set the time and date on the inverter. Must set this according to local time as it affects the daily yield calculation. (If Autarco monitoring system is used, you can set the correct time zone of the system, but it is necessary. MyAutarco will update the inverter time based on the time zone of the system.) Press "UP"... -
Page 34: Set Address
5.4.2 Set Address Set the slave address of the inverter. The default address is 01 5.4.3 Set Language Set system language. English is default Set Language 2015-02-23 19 35 English English Y E S = < E N T > N O = < E S C > 5.5 Advanced Information Detailed information can be viewed in this section 1. -
Page 35: Alarm Message
Installation and operation manual 5.5.1 Alarm message There are 40 pages with the latest alarm messages (5 per page). Alarm messages shows also the alarm that will lead to inverter shutdown. IIM-S2-MH-EN-V1.3... -
Page 36: Running Message
5.5.2 Running message This function is for a maintenance person to get running message such as internal temperature, Standard NO. etc. (Values are for reference only) 5.5.3 Version Inverter model and firmware version can be viewed in this section. (Values are for reference only). 5.5.4 Communication data Internal communication data can be viewed in this section. -
Page 37: Daily Energy
Installation and operation manual 5.5.5 Daily energy The screen shows the daily energy detail of the inverter IIM-S2-MH-EN-V1.3... -
Page 38: Monthly Energy
5.5.6 Monthly energy The screen shows the inverter monthly energy detail of different month. 5.5.7 Yearly Energy The screen shows the inverter yearly energy detail of consecutive years. MH-series Hybrid Inverters... -
Page 39: Total Energy
Installation and operation manual 5.5.8 Total Energy The screen shows the inverter total energy detail. 5.5.9 Warning message 10 pages of latest warning messages (5 per page). Warning message shows the warning that is abnormal but will not lead to inverter shutdown IIM-S2-MH-EN-V1.3... -
Page 40: Advanced Settings
5.6 Advanced Settings WARNING! Access to this section of the menu is for Autarco qualified and accredited technicians only. Unauthorized access will void the product warranty and any kWh Guarantee. Select Advanced Settings from main menu, the LCD screen is asking for the password. -
Page 41: Select Standard
Installation and operation manual 5.6.1 Select standard This function is used to select the correct local grid-code/standard. Please refer to the actual LCD setting for the grid standard options. A relevant list is supplied at the end of this document. Press "UP"... -
Page 42: Calibrate Energy
5.6.3 Calibrate energy Warranty or maintenance may result in resetting total generated data. This function allows maintenance personnel to amend the total generating data of replacement inverter to the original one. By using our data monitoring hardware, the data on monitoring website can automatically synchronize with the preset total generating power of inverter. -
Page 43: Reset Password
Installation and operation manual 5.6.4 Reset password Reset Password: On this page, a user can reset the inverter password. Note that the admin password remains always valid. 5.6.5 Restart HMI This function is to reboot the LCD screen. IIM-S2-MH-EN-V1.3... -
Page 44: Storage Energy Set
5.6.6 Storage Energy Set This section contains working mode setting, battery control setting etc. 5.6.6.1 Control parameter Enter the Control Parameter menu as shown below: Don't change the settings without the permission of technicians. MH-series Hybrid Inverters... -
Page 45: Battery Select
Installation and operation manual 5.6.6.2 Battery Select This product is compatible with the following battery modules: Brand Model Setting Box Pro 2.5-13.8 Select "B-BOX" LG Energy RESU 3.3/6.5/10/13 (CEI 0-21) Select "LG Chem" Solution US2000(CEI 0-21)/US3000(CEI 0-21)/ ForceL1(CEI 0-21)/ForceL2(CEI 0-21)/ Pylontech Select "Pylon"... - Page 46 Note: The MH-inverter support lead-acid battery. Select "Lead-Acid" in the "Battery Select" and configure the following parameters according to different lead-acid batteries. MH-series Hybrid Inverters...
- Page 47 Due to the inconformity between battery cells, damage due to incorrect selection may happen. Autarco is not responsible for any potential damages caused by the use of lead-acid batteries.
-
Page 48: Meter Set
5.6.6.3 Meter Set These settings are used to select the meter types and meter installed locations based on the actual configuration. 5.6.6.3.1 Meter Select Meter Model Meter Type Options “1ph meter” Acrel 1ph meter (With CT): ACR10R-D16TE “Acrel 3ph meter” Acrel 3ph meter (With CT): ACR10R-D16TE4 (Optional) “Eastron 1ph meter”... -
Page 49: Meter Placement
Installation and operation manual 5.6.6.3.2 Meter Placement Grid: Meter is installed at the grid connection point. Load: Meter is installed at the load branch circuit. Grid+PV Inverter: One meter is connected at the grid connection point, the other meter is connected at the AC output port of an extra PV inverter. -
Page 50: Export Power Set
5.6.7 Export Power Set This function is to set the export power control. 1.Backflow Power. 2. ON/OFF. 3.Failsafe ON/OFF Setting 1&3 are only valid when Setting 2 is set to "ON". 5.6.7.1 Backflow power Determine the allowed backfeed power. (System export to the grid) 5.6.7.2 ON/OFF Enable/Disable the function MH-series Hybrid Inverters... -
Page 51: Fail Safe On/Off
Installation and operation manual 5.6.7.3 Fail Safe ON/OFF When the Failsafe function is ON, the inverter will shutdown once it loses communication with the meter. This avoids backflow power exceeding the limit. 5.6.8 HMI Update This function is used to update HMI software. Values are for reference only. 5.6.9 DSP Update This function is used to update DSP software. -
Page 52: Baudrate Rs485
5.6.10 BaudRate RS485 This function is to change the internal communication Baudrate. Warning: This function is for maintenance personnel only, wrong operation will prevent the inverter from working properly. MH-series Hybrid Inverters... -
Page 53: Afci Function
Installation and operation manual 5.7 AFCI function Inverters have a built-in AFCI function which can detect arc faults on the DC circuit and shut down the inverter to prevent a fire disaster. 5.7.1 Enable the AFCI function The AFCI function can be enabled in the following menu: Note: If you find your inverters's user interface is different from what's in the fast installation guide, please contact after-sales engineer or technical support. -
Page 54: Enable The Afci Function
5.7.2 Enable the AFCI function If an DC Arc Fault is detected, during normal operation, the inverter will shut down and give out the following alarm at the LCD-screen: Installer needs to thoroughly inspect the DC circuit to ensure all the cables are correctly fastened. Once the DC circuit issue has been fixed or it is confirmed to be OK, press “ESC”... -
Page 55: Inverter Commissioning Sequence
Installation and operation manual 6 Inverter commissioning sequence 6.1 Preparation of Commissioning Ensure all the devices are accessible for operation, maintenance and service. Check and confirm that the inverter is firmly installed. Space for ventilation is sufficient for one or multiple inverters. No tools or other materials are left on the top of the inverter or battery module. -
Page 56: Maintenance
CAUTION! Never use any solvents, abrasives or corrosive materials to clean the inverter or the LCD-screen. The MH series inverters require general maintenance to be performed once per year. Impurities such as dust and dirt accumulation on the heat sink may negatively affect the inverter’s ability to dissipate heat. -
Page 57: Troubleshooting
Installation and operation manual 8 Troubleshooting The inverter has been designed in accordance with international grid tied standards for safety, and electromagnetic compatibility requirements. Before delivering to the customer the inverter has been subjected to several test to ensure its optimal operation and reliability. -
Page 58: Alarm Messages
8.1 Alarm messages MH-series Hybrid Inverters... - Page 59 Installation and operation manual IIM-S2-MH-EN-V1.3...
-
Page 60: Recycling And Disposal
Note: If the inverter displays any alarm message as listed in the table above; please turn off the inverter and wait for 5 minutes before restarting it . If the failure persists, please contact your local distributor or Autarco support. Please keep the following information ready before contacting your installer. -
Page 61: Specifications
Installation and operation manual 10 Specifications S2.MH3000 S2.MH3600 S2.MH4600 S2.MH5000* S2.MH6000** Input DC Recommended max PV power (W) 7000 8000 Max. DC voltage (V) MPPT voltage range (V) 90-520 Turn on voltage (V) Full load MPPT range (V) 141-520 169-520 215-520 234-520 280-520... - Page 62 S2.MH3000 S2.MH3600 S2.MH4600 S2.MH5000* S2.MH6000** In/output AC grid side Input voltage range (V) 184-264 Max. input current (A) 26.1 AC Grid frequency range (Hz) 45..55/55..65 (According to EN50549 VDE 0126-1-1, UL1741, G99) Rated output power (kW) Max. apparent output power (kVA) 5.5* Operation 1P/N/PE (220/230 V)
- Page 63 Installation and operation manual S2.MH3000 S2.MH3600 S2.MH4600 S2.MH5000* S2.MH6000** General data Dimensions (W x H x D) (mm) 333x505x249 Weight (kg) Type of inverter High frequency isolation (for battery) Operating temperature range (°C) -25..60 IP protection rating IP65 Noise level (dB(A)) <20 Cooling concept Natural convection...
-
Page 64: Appendix
A) Battery Terminal Assembly In order to avoid DC arcs, Autarco suggests to install a DC switch between the battery and MH inverter. Be sure the polarities of battery is correct before connecting to the inverter. - Page 65 Installation and operation manual Step 3: Follow steps to assemble IIM-S2-MH-EN-V1.3...
- Page 66 Step 4: Crimp the lug as shown. Crimping heigth is 7.5+0/-0.2 mm, crimping length is 7.5+/- 0.5 mm. Gap is 1.0 mm reference. Use die of 25 mm in the crimping tool. Step 5: Install grommet and back shell 11.1 Working Mode description In this chapter the different working modes of the hybrid inverters are described.
- Page 67 Installation and operation manual Charging from grid self use (Please check first in your country if this mode is allowed) Path: Advanced Settings->Storage Energy Set->Storage Mode Select->Self-Use Mode-> ON->Charging from grid for Self use Mode 2: Feed In Priority Mode Logic(Feed the excess PV to Grid in order to gain subsidies) PV Power Using Priority: Load>Grid>Battery Load Support Priority: PV>Battery>Grid Battery Charging Power comes from PV.
- Page 68 Charging from grid for Feed for priority (Please check first in your country if this mode is allowed) Path: Advanced Settings->Storage Energy Set->Storage Mode Select-> Feed in Priority Mode->ON- >Charging from gird for Feed for priority Mode 3: Backup Mode Logic(Keep the Battery at a certain SOC and only use it during power outage) Backup Mode Logic: Keep the Battery at a certain SOC and only use it during power outage.
- Page 69 Path: Advanced Settings->Storage Energy Set->Storage Mode Select->Off-Grid Mode-> ON->Off Grid Mode Mode 5: EPS Mode Logic (Need to work with external Autarco NPS switching Box to achieve switching function; not implemented now) When grid is available, only the Grid Port is enabled and load is supported through NPS box by the grid.
- Page 70 This following list illustrates the grid standard options in the inverter which are subject to change. More settings are available. If a customer has any doubts or uncertainty, please consult Autarco service department for confirmation. To set the correct grid code, please enter the following path: Advanced Settings -> Password-> Select Standard Detailed protection limits can be viewed when choosing the code.
- Page 71 Installation and operation manual G98 NI North Ireland For North Ireland Low Voltage Grid <16A G99 NI North Ireland For North Ireland Low Voltage Grid >16A User-define Customized Protection Limits Gen50 Generator Connected, Frequency-Derating, 50Hz Gen 60 Generator Connected, Frequency-Derating, 60Hz East Denmark For East Danish low voltage grid West Denmark...
Need help?
Do you have a question about the MH Series and is the answer not in the manual?
Questions and answers