
Related Manuals for Autarco XLX-MII Series


Summary of Contents for Autarco XLX-MII Series
- Page 1 Installation and Operation Manual Solar Inverters XLX-MII series © Autarco Group B.V. IM-S2-XLX-MII-EN-V2.3...
- Page 2 This manual is an integral part of the unit. Please read the manual carefully before installation, operation or maintenance. Keep this manual for future reference. Product information is subject to change without notice. All trademarks are recognized as the property of their respective owners. © Autarco Group B.V. All rights reserved. XLX-MII series Inverters...
-
Page 3: Table Of Contents
installation and operation manual Table of Contents 1 Introduction 1.1 Read this first 1.2 Target Audience 1.3 Product versions covered by this document 2 Preparation 2.1 Safety instructions 2.2 Package contents 2.3 Internal DC switch 2.4 Explanations of symbols on inverter 3 Product information 3.1 Summary 3.2 Product identification... - Page 4 8 Monitoring setup and system registration 9 Maintenance 10 Recycling and Disposal 11 Troubleshooting 11.1 General 11.2 Internal component fault 11.3 Grid errors 11.4 System and design fault 12 Product specifications XLX-MII series Inverters...
-
Page 5: Introduction
1.2 Target Audience This manual is intended for anyone who uses Autarco XLX-MII series inverter. Before any further action, the operators must first read all safety regulations and be aware of the potential danger to operate high-voltage devices. Operators must also have a complete understanding of this device’s features and functions. -
Page 6: Product Versions Covered By This Document
For example, S2.XLX25000S-MII.1 is the 20kW model with Dutch grid standard as default, integrated DC switch and Autarco blue cover. Please keep this user manual available at all times in case of emergency. -
Page 7: Preparation
This is because photovoltaic (PV) arrays create electrical energy when exposed to light, and could cause a hazardous condition. The XLX-MII series inverter must only be operated with PV arrays of protection class II, in accordance with IEC 61730, class A. -
Page 8: Package Contents
2.3 Internal DC switch Please verify whether your Autarco XLX-MII series inverter is equipped with an internal DC switch. If there is an internal DC switch the product code will end in an “S”. The switch can be found on the bottom of the inverter (see Error! Reference source not found.). - Page 9 installation and operation manual DANGER – HOT SURFACES The components inside the inverter will get hot during operation, DO NOT touch aluminum housing during operating. ATTENTION In case of any work to the inverter, always refer to this manual for detailed product information.
-
Page 10: Product Information
Product information 3.1 Summary Autarco XLX-MII series grid tied inverters are state of the art, high efficiency, robust and reliable grid tied inverters at the best price quality ratio available. They are easy to install and carry a standard 5 year product warranty which is extendable to 15 years. Our rigorous quality control and testing facilities guarantee Autarco inverters meet the highest quality standards possible. -
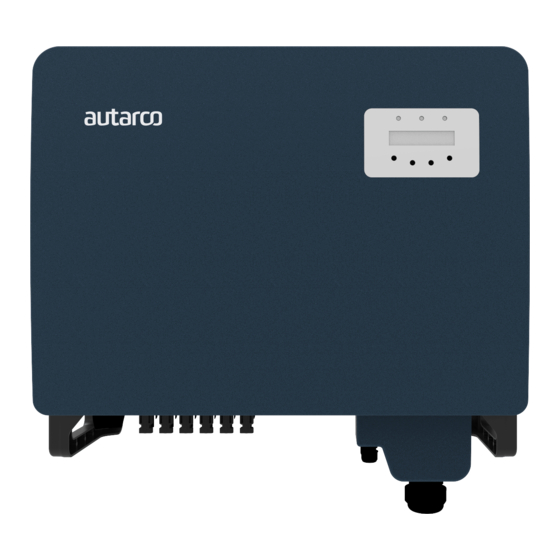
Page 11: Product Overview
installation and operation manual 3.3 Product Overview Inverter cover LED light - POWER LED light - OPERATION LED light - ALARM Display Escape key Up key Down key Enter key DC switch DC inputs Meter AC output IM-S2-XLX-MII-EN-V2.4... -
Page 12: Product Handling
1. The red circles denote cut outs on the product package. 2. Push the cut outs to form handles for moving the inverter. 3. Open the carton, then two people handle both sides of inverter through the area denoted dotted line. XLX-MII series Inverters... -
Page 13: Installation
installation and operation manual Installation 5.1 Safety DANGER! Do not install the inverter near flammable or explosive items. WARNING! The installation must be performed by qualified personnel and in compliance with national and local standards and regulations. This inverter will be connected to a high voltage DC power generator and AC grid. Inappropriate installation may also jeopardize the life span of the inverter. -
Page 14: Safety Clearance
5.3 Safety clearance Caution! Make sure heat sinks are out of reach of children. Observe the following minimum clearances to walls and other mounted equipment: A minimum clearance in front of the inverter of 1000mm is required for maintenance. XLX-MII series Inverters... -
Page 15: Mounting Procedure
installation and operation manual 5.4 Mounting procedure Step 1 — The wall bracket has the dimensions below. Please ensure the positions of the holes are suitable for fitting expansion bolts. Step 2 — Mount the wall bracket onto the mounting wall with appropriate screws plugs. IM-S2-XLX-MII-EN-V2.4... - Page 16 Lower the inverter onto the bracket. The screw holes in the wall bracket should align with the raised convex on the inverter bracket. Step 4 — Fix the bottom of the inverter to the wall bracket with the M4x9mm screws. XLX-MII series Inverters...
-
Page 17: Electrical Installation
NOTICE! Make sure to set the correct grid standard as part of system commissioning, see chapter 7.6. The Autarco inverter is equipped with an integrated Residual Current Protective Device (RCPD) and Residual Current Operated Monitor (RCOM). The RCOM will detect the volume of the leakage current and compare it with the expected value, if the leakage current exceeds the permitted range, the RCPD will disconnect the inverter from the AC load. - Page 18 Push the AC terminal along the rail to the inside of the inverter, and then tighten the 4 screws WARNING! Please do not put the insulating layer of the cable into the terminal when tightening the screw, otherwise it will cause poor contact. XLX-MII series Inverters...
-
Page 19: Rs485 Connection
installation and operation manual NOTICE! It is important that the AC wires are connected to the right terminals as indicated by the “L”, “N” and “Earthing” symbols on each AC connector. In some countries a second protective conductor is required as a matter of principle. In each case, observe the applicable regulations for the site. -
Page 20: Circuit Breaker Rating
-MII 00S-MII 0S-MII Max. AC current (A) 41.8 50.2 55.1 66.9 60.2 Recommended fuse type gL/gG or comparable automatic circuit breaker rating (A) DANGER! No consumer load should be applied between the mains circuit breaker and the inverter. XLX-MII series Inverters... -
Page 21: Dc Connections
installation and operation manual 6.4 DC connections Please always use the MC4 connectors from the inverter box to connect strings to the inverter. DANGER! Never connect or disconnect the connectors under load. XLX-series inverters have two MPP trackers. The DC characteristics of each model is shown in the table below: Max DC Max. -
Page 22: Commissioning And Decommissioning Sequence
The green LED will be on continually and the LCD displays “Current status: Generating”. NOTICE! If torn on DC input switch before grid breaker, inverter may show fault messages “No_Grid” on current status, the fault will be clear if grid voltage is normal. XLX-MII series Inverters... -
Page 23: Operation
Operation 7.1 LED indicator lights There are three LED status indicator lights in the front panel of XLX-MII series inverters. The left POWER light (red) indicates power status of the inverter. The middle OPERATION light (green) indicates the operation status. The right ALARM light (yellow) indicates the alarm status. Table 3.1 explains their meanings. -
Page 24: Information
7.3 Information The XLX-MII series inverters main menu provides access to operational data and information. The information is displayed by selecting "Information" from the main menu. By default the inverter display will scroll through the information states below. Pressing the ENTER key will lock or unlock the current display. -
Page 25: Settings
installation and operation manual Yesterday: %VALUE% kWh Total energy output of yesterday (kWh) Inverter S/N Serial ID of the inverter Export_P: %VALUE% W Shows the exported power Export_I: %VALUE% A Shows the exported current Work Mode: Demand response mode (only relevant for some markets) DRM Number: The demand response number (1-8) of the inverter I_DC01 %VALUE% A... -
Page 26: Advanced Info
7.5 Advanced info WARNING! Access to this section of the menu is for Autarco qualified and accredited technicians only. Unauthorized access will void the product and system warranty. Screen can be scrolled through with UP/DOWN keys to see the information as per the table below. - Page 27 Press UP/DOWN keys to cycle through grid ON/OFF options Grid ON/OFF Press ENTER key to save Press ESC key to return Reset the inverters total kWh output to zero. Clear Energy Using this function without previous approval from Autarco will void any existing kWh Guarantees. IM-S2-XLX-MII-EN-V2.4...
- Page 28 Press the ENTER key to execute the setting. Press the ESC key to return to the previous menu. Special settings can switch off functions temporarily for testing purposes. These tests should only be done by qualified Autarco personnel or trained installers when requested to do so. Submenu includes:...
-
Page 29: Important Settings And Operation
I/V curve scan 7.6.1 Important Settings and Operation 7.6.1.1 AFCI, I/V-Curve, External EPM Set Autarco inverters have a built-in AFCI which can detect arc faults in a DC-circuit and shut down the inverter to avoid further damage. Default it is OFF. -
Page 30: Monitoring Setup And System Registration
Maintenance The XLX-MII series inverters do not require regular maintenance. However, impurities such as dust and dirt accumulation on the heat sink may negatively affect the inverter’s ability to dissipate heat. Any dirt or dust can be removed with a cloth or soft brunch. -
Page 31: Troubleshooting
installation and operation manual 11 Troubleshooting 11.1 General Display Action message Check that all switches are in the ON position (including internal DC switch ● if present) Check AC and DC power supply. If DC power is greater than 10W and string Blank ●... -
Page 32: Grid Errors
2. If problem persists please contact your local utility as it may require monitoring and adjustment. 1. Check your AC power connections and switches. The inverter cannot No Grid NO Grid 1015 2. Restart the inverter. detect a grid. 3. Call your local grid to resolve the black out. XLX-MII series Inverters... -
Page 33: System And Design Fault
SHORT-PRO 1030 detected in the system. fault b. Check all switches for short circuit. 3. If error persists contact Autarco for replacement inverter. 1. Restart inverter (up to three times). 2. Call installer to: Current flow detected Ground GROUND-P... -
Page 34: Product Specifications
According to VDE4105, UL-1741, G59/3, AS4777 Power factor >0.99 Harmonic distortion at nominal <3% output AC connector Terminal connectors Overvoltage category OVC III (MAINS), OVC II (PV) Power consumption Nighttime power consumption < 1 Standby power consumption < 30 XLX-MII series Inverters... - Page 35 installation and operation manual Efficiencies Max. efficiency 98.6% Euro efficiency 98.3% MPPT efficiency 99.9% S2.XLX25000S- S2.XLX30000S- S2.XLX33000S- S2.XLX36000S- S2.XLX40000S- Safety protection DC reverse-polarity protection Short circuit protection Output over current protection Output over voltage protection Insulation resistant monitoring Residual current detection Surge protection Grid monitoring...
- Page 36 Cooling concept Convection Noise level (dBA) < 60 LED indicators LCD display 7” LCD color screen Communication 1xRS485 interfaces Optional interfaces Wi-Fi, GPRS, Z-Wave, LAN Standard warranty 5 years, extendable to 15 years Integrated DC switch Optional XLX-MII series Inverters...
Need help?
Do you have a question about the XLX-MII Series and is the answer not in the manual?
Questions and answers