
Subscribe to Our Youtube Channel
Related Manuals for Autarco MX Mark III Series


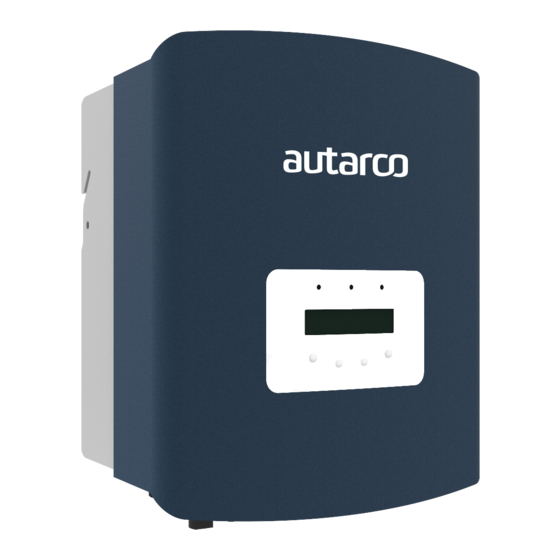
Summary of Contents for Autarco MX Mark III Series
- Page 1 Installation and Operation Manual Solar Inverters MX Mark III series © Autarco Group B.V.
- Page 2 This manual is an integral part of the unit. Please read the manual carefully before installation, operation or maintenance. Keep this manual for future reference. Product information is subject to change without notice. All trademarks are recognized as the property of their respective owners. © Autarco Group B.V. All rights reserved. MX Mark III series Inverters...
-
Page 3: Table Of Contents
installation and operation manual Table of Contents 1 Introduction 1.1 Read this first 1.2 Target Audience 1.3 Product versions covered by this document 2 Preparation 2.1 Safety instructions 2.2 Package contents 2.3 Internal DC switch 2.4 Explanations of symbols on inverter 3 Product information 3.1 Overview 3.2 Product identification... - Page 4 11.1 General 11.2 Internal component fault 11.3 Grid errors 11.4 System and design fault 12 Product specifications MX Mark III series Inverters...
-
Page 5: Introduction
HOT SURFACE! Indicates safety instructions, which if not correctly followed, could result in burns. 1.2 Target Audience This manual is intended for anyone who uses Autarco MX-MIII series inverter. Before any further action, the operators must first read all safety regulations and be aware of the potential danger to operate high-voltage devices. -
Page 6: Product Versions Covered By This Document
1.3 Product versions covered by this document The main purpose of this user manual is to provide instructions and detailed procedures for installing, operating, maintaining, and troubleshooting the MX-MIII series of Autarco inverters which includes the following models: ● ●... -
Page 7: Preparation
Please contact your dealer to get the information of authorized repair facility for any maintenance or repairmen. Any unauthorized actions including modification of product functionality of any form will affect the validation of warranty service; Autarco may deny the obligation of warranty service accordingly. M-S2.MX-MIII-EN-V0.3... -
Page 8: Package Contents
2.3 Internal DC switch Please verify whether your Autarco MX-MIII series inverter is equipped with an internal DC switch. This switch can be found on the bottom of the inverter (see 3.3). If there isn’t an internal DC switch it is important to apply an external DC disconnector in order to completely disconnect the solar PV module strings from the inverter. - Page 9 installation and operation manual CE MARK This equipment conforms to the basic requirements of the EU guideline governing low voltage and electromagnetic compatibility. M-S2.MX-MIII-EN-V0.3...
-
Page 10: Product Information
3.1 Overview Autarco MX-MIII series grid tied inverters are state of the art, high efficiency, robust and reliable grid tied inverters at the best price quality ratio available. They are easy to install and carry a standard 5 year product warranty which is extendable to 15 years. -
Page 11: Product Overview
installation and operation manual 3.3 Product overview M-S2.MX-MIII-EN-V0.3... -
Page 12: Installation
It is not recommended that the inverter is exposed to the direct sunshine. ● Make sure of ample ventilation at installation site, insufficient ventilation may reduce the performance of the electronic components inside the inverter and shorten the life span of the inverter. MX Mark III series Inverters... -
Page 13: Safety Clearance
installation and operation manual 4.3 Safety clearance Caution! Make sure heat sinks are out of reach of children. Observe the following minimum clearances to walls: M-S2.MX-MIII-EN-V0.3... -
Page 14: Mounting Procedure
4.4 Mounting procedure Step 1 — Mount the wall bracket onto the mounting wall with appropriate screws plugs Step 2 — Lower the inverter onto the bracket, and secure with the locking screws. MX Mark III series Inverters... -
Page 15: Electrical Installation
NOTICE! Make sure to set the correct grid standard as part of system commissioning, see chapeter 6.6. The Autarco inverter is equipped with an integrated Residual Current Protective Device (RCPD) and Residual Current Operated Monitor (RCOM). The RCOM will detect the volume of the leakage current and compare it with the expected value, if the leakage current exceeds the permitted range, the RCPD will disconnect the inverter from the AC load. - Page 16 Strip outer jacket 60mm and strip each cable insolation about 12±1mm. Step 3 — Insert cable strands into connector socket, and lock the screws. Make sure to fit the ground wire into the PE hole. MX Mark III series Inverters...
- Page 17 installation and operation manual Step 4 — Fit the adapter, cable gland body and cable glad cap to the connector as per below. NOTICE! It is important that the AC wires are connected to the right terminals as indicated by the “L”, “N”...
-
Page 18: Dc Connections
MC4 connectors on the roof surface. If any tools or parts are used in the MC4 connector assembly other than those listed in the MC4 connector manual, neither safety nor compliance with the technical data can be guaranteed. MX Mark III series Inverters... -
Page 19: Inverter Commissioning Sequence
installation and operation manual 5.3 Inverter commissioning sequence Turn ON Turn OFF Connect AC side (if not connected yet) Switch OFF the AC switch Connect DC side (if not connected yet) Switch OFF the DC switch Switch ON the DC switch Switch ON the AC switch NOTICE! Please ensure the correct grid standard is selected for the installation location. -
Page 20: Operation
Advanced information, described in detail in chapter 6.5. ● Advanced settings, described in details in chapter 6.6. By pressing UP or DOWN keys you can cycle through these sub menus and click ENTER to go into the submenu. MX Mark III series Inverters... -
Page 21: Information
installation and operation manual 6.3 Information The MX-MIII series inverters main menu provides access to operational data and information. The information is displayed by selecting "Information" from the main menu. By default the inverter display will scroll through the information states below. Pressing the ENTER key will lock or unlock the current display. You can also press UP or DOWN keys to manually scroll through. -
Page 22: Settings
Restore Settings Delete alarm messages that have been generated WARNING! Access to this section of the menu is for Autarco qualified and accredited technicians only. Unauthorized access will void the product and system warranty. Screen can be scrolled through with UP/DOWN keys to see the information as per the table below. Press ENTER key to enter a submenu. -
Page 23: Advanced Settings
6.5 Advanced Settings WARNING! Access to this section of the menu is for Autarco qualified and accredited technicians only. Unauthorized access will void the product and system warranty. Screen can be scrolled through with UP/DOWN keys to see the information as per the table below. Press ENTER key to enter a submenu. - Page 24 See S2.1P-PELD Manual for more details. Power export limitation settings should only be used when necessary. Restart HMI ONLY for maintenance personnel Debug Parameter ONLY for maintenance personnel DSP Updator ONLY for maintenance personnel Power Parameter ONLY for maintenance personnel MX Mark III series Inverters...
- Page 25 installation and operation manual The output power of the inverter varies with ambient temperature, as shown in the figure below. M-S2.MX-MIII-EN-V0.3...
-
Page 26: Meter Installation (Optional)
NOTICE! For further questions please see the complete meter installation manual. 7.1 Meter Electrical Connection Below is the recommended connection diagram when using the Autarco supplied meter. NOTICE! Only RJ45 connection is allowed. If supplied cable is not long enough we recommend the purchase of an RJ45 extender. -
Page 27: Required Inverter Settings
installation and operation manual 7.2 Required Inverter Settings For Consumption Monitoring Only: ● Go to Advanced settings -> Select 24h Switch -> Set to ON and press ENTER ● Select Internal EPM set -> Mode Select -> Select Consumption Monitor and press ENTER ●... -
Page 28: Monitoring Setup And System Registration
Monitoring setup and system registration The instructions about Wi-Fi setup and system registration can be found in separate manuals enclosed in the documentation that came with this Autarco system. For more information manual please contact your Autarco installer or refer to our website www.autarco.com. -
Page 29: Troubleshooting
installation and operation manual 11 Troubleshooting 11.1 General Display Action message ● Check that all switches are in the ON position (including internal DC switch if present) Blank screen ● Check AC and DC power supply. If DC power is greater than 10W and string voltage greater than 100V the inverter should start. ●... - Page 30 1. Check your AC power connections and switches. The inverter cannot detect a No Grid NO Grid 1015 2. Restart the inverter. grid. 3. Call your local grid to resolve the black out. MX Mark III series Inverters...
- Page 31 Check for pinched, crimped or otherwise damaged cables and connections. fault detected in the system. b. Check all switches for short circuit. 3. If error persists contact Autarco for replacement inverter. 1. Restart inverter (up to three times). 2. Call installer to: GROUND-PR...
- Page 32 12 Product specifications MX Mark III series Inverters...
- Page 33 installation and operation manual M-S2.MX-MIII-EN-V0.3...
- Page 34 MX Mark III series Inverters...
- Page 35 installation and operation manual M-S2.MX-MIII-EN-V0.3...
- Page 36 MX Mark III series Inverters...
- Page 37 installation and operation manual M-S2.MX-MIII-EN-V0.3...
- Page 38 MX Mark III series Inverters...
Need help?
Do you have a question about the MX Mark III Series and is the answer not in the manual?
Questions and answers