
Subscribe to Our Youtube Channel
Related Manuals for Energizer EZN1600


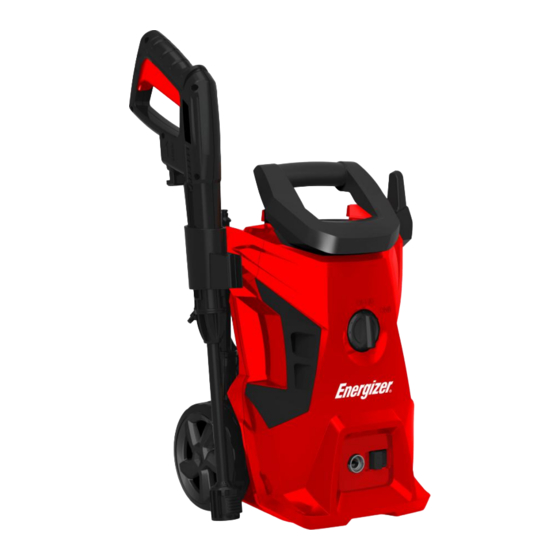
Summary of Contents for Energizer EZN1600
- Page 1 ORIGINAL INSTRUCTIONS >EN HIGH PRESSURE WASHER EZN1600 EZN1600-UK USER GUIDE CAUTION Read the instructions before using the machine!
- Page 3 Let’s get started. You’re excited to power up, so we’ll keep this brief!
-
Page 4: Table Of Contents
CONTENTS 1. SAFETY WARNINGS 2. INTENDED USE 3. SYMBOLS 4. ASSEMBLY INSTRUCTIONS 5. OPERATING INSTRUCTIONS 6. INFORMATION FOR USAGE 7. CLEAN-UP AND STORAGE 8. CLEANING TIPS 9. TECHNICAL DATA 10. TROUBLE SHOOTING TIPS 11. DISPOSAL 12. DECLARATION OF CONFORMITY 13. WARRANTY 14. -
Page 5: Safety Warnings
1. SAFETY WARNINGS • Use this unit as described in this manual. Any mishandling and any use contrary to instructions for use shall in no case be the responsibility of the manufacturer. • Failure to observe the safety and operating instructions may result in a risk of electric shock, fire and/or personal injury. - Page 6 • The voltage indicated on the rating plate of the appliance corresponds to that of your electrical installation. • Do not disassemble the device yourself. Any disassembly, repair or inspection should be carriedout exclusively by a qualified person. • Do not touch the plug with wet hands. Do not allow the plug to fall into the water.
- Page 7 • High pressure cleaners shall not be used by children or untrained personnel. WARNING! • The machine shall be disconnected from its power source during cleaning or maintenance and when replacing parts or converting the machine to another function. WARNING! •...
- Page 8 WARNING! • If an extension cord is used, the plug and cable must be watertight. WARNING! • Inadequate extension cords can be dangerous. If an extension cord is used, it shall be suitable for outdoor use, and the connection has to be kept dry and off the ground.
- Page 9 • Make sure the unit is turned off and unplugged before transporting the unit. • The connection to the power supply must be made by a qualified electrician in accordance with IEC60364-1. It is recommended that the power supply of this machine includes a residual current device that interrupts power if the earth leakage exceeds 30 mA for 30 ms or a device that will homologate the earth circuit.
- Page 10 The water that will be passed through the valve is considered to be non-potable. WARNING! • When transporting the machine, take note of its weight. Do not overestimate your efforts and get help if necessary. • The machine must be transported from one point to another and disconnected.
- Page 11 detergents) or equipment failure (such as a puncture or a component failure) please stop using the machine immediately. Check the problem. Have the machine inspected by a qualified technician. In the event of an overflow, move the machine away and clean the overflow.
-
Page 12: Intended Use
2. INTENDED USE Your high pressure washer can perform a myriad of tasks around the house and in the garden. It effectively cleans a wide variety of surfaces. Your pressure cleaner is designed to operate from a cold water supply. It operates efficiently with water whose temperature is between 5 and 40℃. -
Page 13: Symbols
3. SYMBOLS The labels on your tools and manual may show the below symbols. These represent important information about the product or instruction on its use. Indicates a potential personal injury hazard. In accordance with European directives applicable to this product. Double-insulated construction. -
Page 14: Assembly Instructions
4. ASSEMBLY INSTRUCTIONS 4.1 UNPACKING THE CARTON After opening the carton, please remove all parts and check them against the following list of components that are included: Gun holder Water inlet connector High pressure hose Accessories holder Power washer unit Adjustable nozzle Handle Wheel... - Page 15 STEP 1 Install gun holder, the power cord hook and the wheel (assembly wheel only for model B/C), Screw the accessories holder to the main body as below figure. Use the provided screws. STEP 2 Screw the handle tight to the main body as below figure. Use the provided screws. STEP 3 Attach the high-pressure hose (11) to the water outlet of the high-pressure cleaner, located at the front of the machine (Fig.3).
- Page 16 STEP 4 At the rear of the machine, remove the plastic cap, which is inserted over the male connector of the pressure washer before shipping. This plastic cap can be discarded once removed. Then screw the water inlet connector to the male connector. Then connect the garden hose. The recommended length for the water supply hose is 8 meters with a diameter less than 1/2 inch to prevent back pressure and any potential damage to your appliance.
-
Page 17: Operating Instructions
5. OPERATING INSTRUCTIONS WARNING! This unit is intended to be used with cold water only! Do not use hot water in this pressure cleaner! WARNING! High pressure hose must not loop. During operation the appliance must be positioned on a firm and stable surface. 5.1 STARTING UP WARNING! ALWAYS turn off the unit’s motor BEFORE turning off the unit’s water supply. - Page 18 5.3 CHANGING ACCESSORIES a) Release the trigger. b) Turn off the power switch (the position» OFF). (Fig.5) c) Disassemble the accessory and assemble the other one (see the chapter “ASSEMBLY INSTRUCTIONS”). WARNING! Never disconnect the high-pressure discharge hose from the machine while the system is still pressurized. To depressurize the unit, turn off the motor, turn off the water supply and squeeze the trigger 2-3 times.
-
Page 19: Information For Usage
ORIGINAL INSTRUCTIONS >EN 6. INFORMATION FOR USAGE 6.1 SAFETY VALVE AND/OR PRESSURE LIMITING VALVE WARNING! Do not tamper with or adjust the safety valve setting. The safety valve is also a pressure limiting valve. When the gun trigger is released, the valve opens, pressure switch action, the machine automatically shut down. - Page 20 ORIGINAL INSTRUCTIONS >EN 6.5 ADJUSTABLE SPRAY NOZZLE The adjustable nozzle will allow you to use any variety of spray patterns from a full fan spray (diagram 1) to a direct stream spray (diagram 2). When using the pressure cleaner to clean wood decks, siding, vehicles etc., always start using the fan spray and begin spraying from a minimum 36”...
-
Page 21: Clean-Up And Storage
ORIGINAL INSTRUCTIONS >EN 7. CLEAN-UP AND STORAGE 7.1 SHUTTING DOWN THE PRESSURE CLEANER When finished using the pressure cleaner, follow these steps to shut down the unit: • Turn the pressure cleaner to the OFF position, unplug the power cord from the wall outlet. •... -
Page 22: Cleaning Tips
ORIGINAL INSTRUCTIONS >EN 8. CLEANING TIPS WARNING! Always test the spray in an area free and clear of people and objects before you spray at the intended cleaning surface. 8.1 WOOD AND VINYL DECKS Rinse deck and surrounding area with fresh water. If using detergent, fill the detergent reservoir and apply to the area being cleaned at low pressure. -
Page 23: Technical Data
ORIGINAL INSTRUCTIONS >EN 9. TECHNICAL DATA EZN1600 Model Rated voltage AC 220-240V~ 50/60Hz Rated power 1600W Rated pressure 9 MPa Allowable pressure 13 MPa Rated flow 6,0 L/min Max. flow 7,0 L/min Max. water inlet pressure 1.2 MPa Max. water inlet temperature 50°C... -
Page 24: Trouble Shooting Tips
ORIGINAL INSTRUCTIONS >EN 10. TROUBLE SHOOTING TIPS WHEN THE SWITCH IS IN THE “I” POSITION THE MACHINE WILL NOT START PROBABLE CAUSE SOLUTION Electrical socket is faulty Check plug, socket, fuses Voltage is inadequate Check whether the voltage is adequate Power cord is not plugged in Plug in power cord THE PUMP DOES NOT REACH ADEQUATE PRESSURE OR FLUCTUATES... -
Page 25: Disposal
EU’s consistent policy. The statement will prove ineffective if the device is being modified without our approval. Type of instrument: Pressure Cleaner • EZN1600/EZN1600-UK • Serial number: 20210365879-20210369454 / 20210450872-20210451371 EU Directives: • EU Machinery Directive 2006/42/EC • EU Directive Electromagnetic Compatibility 2014/30/EC •... -
Page 26: Warranty
13. WARRANTY WARRANTY The manufacturer guarantees the product against defects in material and workmanship for a period of 2 years from the date of the original purchase. The warranty only applies if the product is for household use. The warranty does not cover breakdowns due to normal wear and tear. The manufacturer agrees to replace parts identified as defective by the designated distributor. -
Page 27: Product Failure
14. PRODUCT FAILURE WHAT TO DO IF MY MACHINE BREAKS DOWN? If you bought your product in a store: a) Empty the fuel tank. b) Make sure that your machine is complete with all accessories supplied, and clean! If this is not the case, the repairer will refuse the machine. -
Page 28: Warranty Exclusions
15. WARRANTY EXCLUSIONS THE WARRANTY DOES NOT COVER: • Start-up and setting up of the product. • Damage resulting from normal wear and tear of the product. • Damage resulting from improper use of the product. • Damage resulting from assembly or start-up not in accordance with the user manual. •... - Page 29 NOTES...
- Page 30 ORIGINAL INSTRUCTIONS >EN...
Need help?
Do you have a question about the EZN1600 and is the answer not in the manual?
Questions and answers