
Related Manuals for Mychef COOK UP 4 GN 1/1


Summary of Contents for Mychef COOK UP 4 GN 1/1
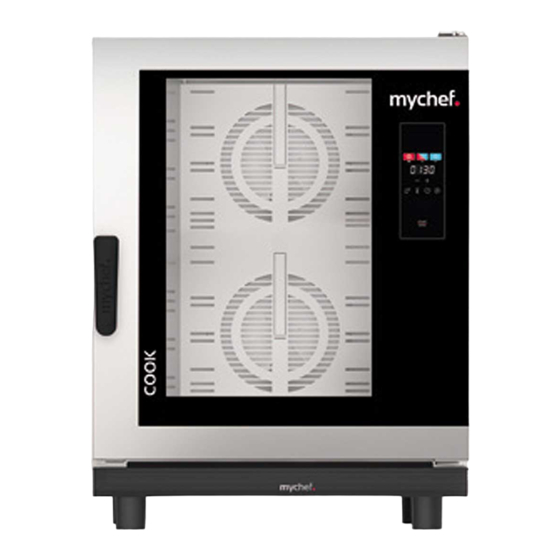
- Page 1 COOK COOK UP Product Manual Installation, use and maintenance mychefcooking.com PRODUCT MANUAL COOK UP - DT.MP.CU.2201.2...
-
Page 2: Table Of Contents
INDEX 1. INTRODUCTION ..................... 4 2. TECHNICAL CHARACTERISTICS................5 2.1. Main features Mychef COOK UP ..................5 3. GENERAL SAFETY AND ACCIDENT PREVENTION RULES ........6 3.1. Personnel in charge of the use of the equipment ............6 3.2. Electrical hazard ......................... 6 3.3. - Page 3 7.3. Support functionalities ....................48 7.3.1. Reset Wi-Fi configuration ..................48 7.3.2. Show MAC address ....................48 7.3.3. Unlink service "Mychef Control"................48 7.3.4. Desktop application for smart control ..............49 7.4. Table of states ........................50 7.5. Recipes ..........................50 8.
-
Page 4: Introduction
1. INTRODUCTION This manual has been carefully prepared and revised in order to provide reliable information and assistance for correct installation, use and maintenance that will ensure proper operation and prolong the life of the oven. This manual is divided into 3 parts, the first part dedicated to the installation of the equipment at the working point, the second part to the use and the third part focused on the cleaning and maintenance of the oven. -
Page 5: Technical Characteristics
(mm) Recommended for (n) 35-90 40-110 80-160 servings per day Table 1. Main features of Mychef COOK UP ovens The maximum recommended food load per GN 1/1 tray of 65mm is 5 kg. mychefcooking.com PRODUCT MANUAL COOK UP - DT.MP.CU.2201.2... -
Page 6: General Safety And Accident Prevention Rules
3. GENERAL SAFETY AND ACCIDENT PREVENTION RULES 3.1. Personnel in charge of the use of the equipment The use of the equipment is reserved for trained personnel. Personnel performing any action on the oven, be it use, cleaning, installation, handling, etc., must be aware of the safety regulations and operating instructions. -
Page 7: Danger Of Corrosion
The MyCare CleanDuo and DA21 cleaning products have been specially formulated for the proper cleaning and protection of Mychef ovens with automatic washing. The product contains, in addition to detergent, rinse aid for a perfect finish. The use of this detergent is mandatory for Mychef COOK ovens. -
Page 8: Reception, Transport And Location
4. RECEPTION, TRANSPORT AND LOCATION Before installation, the dimensions of the site where the equipment is to be located and the electrical and water connections must be checked to ensure that they are within the parameters detailed in section 4.3. 4.1. -
Page 9: Location
50mm at the rear o 500mm from the top The equipment must be placed on a Mychef support table or wall bracket. If there are sources of heat or steam near the equipment (cooker, grill, griddle, fryer, pasta cooker, kettle, tilting frying pan, etc.), these must be at a distance of more than 1 metre. - Page 10 Be extremely careful with the cooling zones of the oven. If it draws in fumes or hot air, this can drastically reduce the life span of the components. For the installation of stacked Mychef ovens, please follow the instructions supplied with the stacking kit.
-
Page 11: Installation
5. INSTALLATION 5.1. Electrical connection Check that the voltage at the point where the oven is to be connected coincides with the operating voltage of the equipment. The following table indicates the electrical characteristics of each of the devices: Power Current Cable cross-section Voltage... -
Page 12: Three-Phase Connection 400V 3L+N
Never connect a phase to neutral or earth. Check that the voltages of the installation correspond to those of the equipment. The following sub-chapters show the possible connection types for Mychef ovens. The voltage of each oven can be found on the oven identification sticker. -
Page 13: Single-Phase Connection 230V L+N
Copper (Cu) less than 0.05 mg/L Conductivity less than 20uS/cm Use of decalcifier and Mychef filter mandatory. The use of water with characteristics other than those indicated may cause serious problems in the oven components, such as corrosion in the cooking chamber or the glass, premature failure of the solenoid valves, etc. -
Page 14: Drainage
40 mm (DN40) through a heat- resistant, siphon-type pipe. The Mychef COOK UP does not have an odour blocking system. It can be ordered as an accessory. Figure 4. Drainage mychefcooking.com... -
Page 15: Steam Condensation Hood
For correct operation, please note that the pipe must have a constant slope of at least 5°. The drain must be a maximum of 1 metre long, have a larger diameter than the drain connection and be free of blockages. 5.3. -
Page 16: Use
6. USE 6.1. Control panel The figure below shows the control panel of the Mychef COOK UP ovens. It consists of a central screen with displays, indicators, and buttons. Figure 5. COOK UP control panel mychefcooking.com PRODUCT MANUAL COOK UP -... - Page 17 The functionality of each is explained below: Figure 6. Detail of COOK UP control panel mychefcooking.com PRODUCT MANUAL COOK UP - DT.MP.CU.2201.2...
- Page 18 Block Function Description Convection button Convection mode selection button. Convection mode Mark the chosen mode. indicator Mixed mode button Mixed mode selection button. Mixed mode indicator Mark the chosen mode. Steam button Steam mode selection button. Steam mode indicator Mark the chosen mode. Displays the selected parameter: humidity, temperature, Visualisation display time, or fan speed.
- Page 19 Figure 7. Central screen The display format of the parameters is explained below: Icon Function The humidity level is displayed with an H in the first digit. The humidity value is then displayed. The temperature of the chamber is displayed with a T in the first digit.
- Page 20 This icon indicates that a cooking or cleaning process has been completed. The DOOR message appears when the door is opened during a cooking or cleaning process. The PREHEAT message is displayed during preheating processes with the oven, alternately with the current temperature of the cooking chamber.
-
Page 21: Switching On The Equipment
The programme is shown with a P in the first digit, followed by the programme number. Table 7. Description of central display messages 6.1.1. Switching on the equipment The equipment is switched on or off by pressing the START/STOP button for two seconds. In order to protect the oven from possible overheating, some protection elements may operate even when the oven is switched off. -
Page 22: Cooking Modes
6.1.2. Cooking modes There are three cooking modes: convection, mixed and steam. To select a particular mode, click on the corresponding button. Figure 9. Cooking mode selector The convection mode acts like a forced convection oven without adding or removing moisture from the cooking chamber. - Page 23 Steam 30ºC to 130ºC 100% Table 8. Cooking modes in Mychef ovens In order to prolong the life of your oven, it is possible for the oven to automatically reduce the maximum temperature of the cooking chamber. In all cooking modes it is possible to humidify the chamber at will. To do this, press the MOIST button until the oven sprays water into the cooking chamber.
-
Page 24: Cooking Control
6.1.3. Cooking control Temperature and time-controlled cooking with temperature adjustment In this mode, the oven automatically brings the temperature in the chamber to the value selected by the user so that when the food is opened and loaded, the temperature in the chamber is equal to the selected value at the start of cooking. - Page 25 Once the oven is loaded and the door is closed, it will start to count down the cooking time until it is finished. At this point, the time indicator will display the code word "End", the oven will beep for a few seconds until the user finishes cooking by lightly pressing the START/STOP button.
-
Page 26: Cooking Phases
Cooking phases On the top of the control panel there are three buttons (Convection, Mixed, and Steam), each corresponding to the cooking phases. Associated with each button is an indicator, which shows the status of the phase. Figure 15. Buttons and indicators of cooking phases If the indicator of a particular phase is lit, it means that this phase is being displayed or that the phase is activated. -
Page 27: Start Of The Cooking Cycle
6.1.4. Start of the cooking cycle Once the cooking parameters have been selected, either in manual mode or in a specific programme, we can start the process. To do this, press the START/STOP button lightly to start the preheating process (see 6.1.3.1). If preheating is not necessary, the two central dots will flash every second, indicating that the cooking process is in progress. -
Page 28: End Of Cycle
If the door is opened during cooking, the timer stops, and the following message is shown in the central display: Figure 20. Door open indicator 6.1.5. End of cycle At the end of a cooking cycle, the appliance signals this status visually and acoustically. Specifically: A beep sounds. -
Page 29: Nightwatch
6.2. NightWatch NightWatch allows the oven to automatically continue cooking after a power failure. This functionality is particularly useful for unattended cooking. This function will only continue cooking in the event of a power failure and subsequent recovery of the power supply. This function can be disabled by your dealer. - Page 30 NO ERROR No error. GENERAL PURPOSE INPUT Reserved. Not used. ERROR ERROR OVERTEMPERATURE Reserved. Not used. Overtemperature PCB. Check that the cooling fans of ERROR OVERTEMPERATURE the electronics are working properly, that there is enough space between the back and the wall, and that the ambient temperature is not excessive.
- Page 31 ERROR PROBE6 TEMP SENSOR Reserved. Not used. NOT CONNECTED ERROR PROBE6 TEMP SENSOR Reserved. Not used. SHORTED ERROR PROBE7 TEMP SENSOR Reserved. Not used. NOT CONNECTED ERROR PROBE7 TEMP SENSOR Reserved. Not used. SHORTED ERROR PROBE8 TEMP SENSOR Chamber probe not connected. Check probe and NOT CONNECTED wiring.
-
Page 32: Remote Control Use
7. REMOTE CONTROL USE 7.1. Mychef Smart Control Configuration 7.1.1. Creating a new user The first step to configure the remote control is to create a user, with which the different ovens to be controlled will later be linked. Create a user via the following link or QR code: https://mychef-432df.firebaseapp.com/... -
Page 33: Wi-Fi Connectivity
Once the oven is connected to the power socket, it can be viewed as a Wi-Fi network from any device (mobile phone, tablet or computer). The Wi-Fi network will appear with the name "Mychef" followed by a number in brackets (the MAC address of the device). - Page 34 It is important to write down the MAC address that appears in the different points of the configuration, as this is unique for each device and will be necessary to link the equipment to the remote control. We recommend copying the number that appears after the heading "MAC Address:"...
-
Page 35: Pairing The Oven With The Device (Mobile, Tablet Or Computer)
Once the Wi-Fi network has been configured, it is important to wait a few minutes until the Wi-Fi network (Mychef + MAC address) disappears. If this does not happen, it means that the configuration data entered to authenticate on the Wi-Fi network are not correct, so you will have to start the process again. -
Page 36: Control Panel
Figure 27. Session started without any Figure 28. Form for adding a new device linked device If all the above steps have been carried out correctly, the oven control panel will appear with the different buttons and text boxes to display and change the different parameters that are configured in the linked equipment, as well as the actual values of temperature, humidity and cooking time. - Page 37 Figure 29. Detail of the manual cooking Figure 30. Close-up of the recipe cooking control control panel panel The fan speed can be selected via the drop-down menu in the P block. In the case of the COOK UP, it allows 2 speeds (High, Low). mychefcooking.com PRODUCT MANUAL COOK UP -...
- Page 38 Block Function Description In this selection box, a list of all devices linked to the user Device selection box account will be displayed. On/Off button Equipment on/off button. Start/Stop button On/Off and oven start/stop button. Door status indicator Indicates whether the door is Open or Close. Equipment status Indicates the different statuses of the equipment, see indicator...
- Page 39 Fan speed selection button, can be either Slow or Fast Fan speed button speed. "Capture image" button Allows you to capture the image to recognise a recipe. Button to add a new recipe to the user's list of recipes. See "Add recipe"...
-
Page 40: Google Home And Voice Assistant Configuration
Figure 32. Screenshots of the Google Home application At the moment Mychef Smart Voice Control is only fully available in English, so it is necessary to change the language of the mobile device with which it will be used to English in order to enjoy all the functionalities. - Page 41 2. Select the option "Work with Google" and then search for the "Mychef Control" service in the list of providers. Figure 33. Screenshots of the Google Home application 3. Finally, you will be redirected to the authentication server page to log in with the user and password created in the section "Authentication".
- Page 42 Figure 34. Authentication server screen and messages appearing while validating and synchronising information Figure 35. Authentication server screen and messages appearing while validating and synchronising information mychefcooking.com PRODUCT MANUAL COOK UP - DT.MP.CU.2201.2...
-
Page 43: Voice Commands For Oven Control
Table 11. Different voice commands supported by the smart controller In these commands, the word "Mychef" appears to refer to the oven in question, but this word can be substituted by the name you want to give to the oven once it is added to the web control. -
Page 44: Adding Automated Routines
From the home screen of the Google Home app, pressing the microphone icon, saying "OK Google" or "Hey Google" will open the Google Assistant which will listen to the voice command the user says and if it understands it correctly as a command to control the oven, it will perform the action requested or report on the parameters asked for. - Page 45 Figure 37. Screenshot of Google Assistant application 2. Then manage routines and click on the add icon (+). Figure 38. Screenshot Google Assistant Routines mychefcooking.com PRODUCT MANUAL COOK UP - DT.MP.CU.2201.2...
- Page 46 Google Assistant application In these commands, the word "Mychef" appears to refer to the oven in question, but this word can be substituted by the name you want to give to the oven once it is added to the web control.
- Page 47 Figure 40. Execution of the configured routine by voice command in the Google Assistant application mychefcooking.com PRODUCT MANUAL COOK UP - DT.MP.CU.2201.2...
-
Page 48: Support Functionalities
7.3.3. Unlink service "Mychef Control". To unlink the Google account to the "Mychef Control" service it is necessary to follow the steps in section 7.2.1 until the list of service providers appears, on this screen it will appear that we are linked to the "Mychef Control"... -
Page 49: Desktop Application For Smart Control
7.3.4. Desktop application for smart control If the web control application is accessed via the "Google Chrome" browser, it is possible to download the page as an application, either on a mobile device or on a computer. • Computer: Go to the menu at the top right of Chrome , select "More tools" and "Create shortcut...". -
Page 50: Table Of States
7.4. Table of states State Description Online The appliance is switched on while waiting to start cooking or washing. Offline The equipment is not connected or is not ready to receive and send data. Probe Probe cooking is activated. Preheating The equipment is switched on and preheating. - Page 51 Figure 44. Recipe creation form If a recipe is selected, the cooking parameter input fields will be locked with the values of the recipe in question, to change the cooking values again, select Manual cooking. mychefcooking.com PRODUCT MANUAL COOK UP - DT.MP.CU.2201.2...
-
Page 52: Maintenance
Door water drain Weekly Inner-outer door compartment Weekly Table 13. Cleaning frequencies in Mychef ovens Before starting any cleaning programme, trays, racks, grids, probes, or other accessories inside the chamber must be removed. 8.1.1. Aspiration The piece that separates the cooking chamber with the fan and the heating element can be removed to clean this area. -
Page 53: Door Gasket
Figure 45. Suction plate fastening screws for COOK UP Once the part has been removed, cleaning can proceed, either manually or automatically. Use extreme caution when cleaning this part of the oven. Leave the door ajar and wait until the chamber fan stops. When this process has been completed, the suction part of the chamber fan must be replaced in reverse order. -
Page 54: Control Panel
8.1.4. Control panel To clean the control panel, use a cloth dampened with dishwashing soap and water. Then rinse and dry. Never use agents containing alcohols or solvents, as they may attack the metals or plastics of the control panel. 8.1.5. - Page 55 Figure 46. Inner pane fastening clips It is advisable to clean the inside of the outer pane and the inside of the inner pane on the outside with window cleaning fluid and hand paper. For the inside of the inner pane, if the dirt is not excessive, you can proceed in the same way as for the other panes.
-
Page 56: Preventive Maintenance
These periodic inspections must be carried out by an authorised service technician. The following table shows the operations to be carried out on Mychef ovens in each of the revisions. The table is circular, and after 20,000h of use or 10 years of use, the time would start to count again from the left of the table. - Page 57 Regular maintenance ensures that your oven will always work as designed. Periodic maintenance must be proven for warranty validity. Before any manipulation for maintenance or repair, the equipment must be disconnected from the mains supply. If the power cord is damaged, it must be replaced by your after-sales service or similarly qualified personnel in order to avoid hazards.
Need help?
Do you have a question about the COOK UP 4 GN 1/1 and is the answer not in the manual?
Questions and answers