
Related Manuals for Mychef COMPACT EVOLUTION 6 GN 2/3


Summary of Contents for Mychef COMPACT EVOLUTION 6 GN 2/3
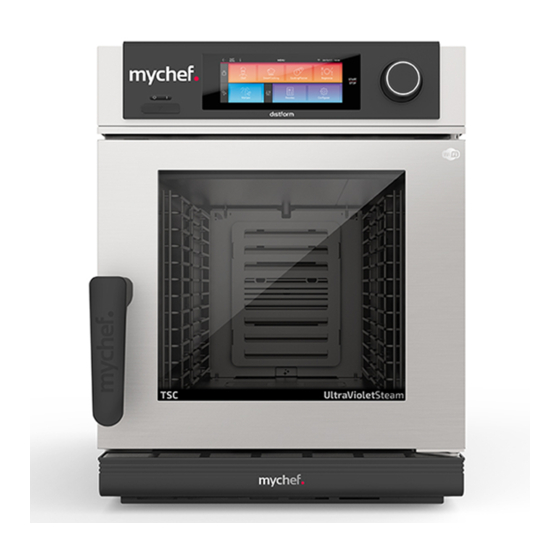
- Page 1 COMPACT COMPACT EVOLUTION Product Manual Installation, use and maintenance PRODUCT MANUAL COMPACT EVOLUTION DT.MP.CE.2103.2 mychefcooking.com...
-
Page 2: Table Of Contents
6.1. Switching on the equipment ................21 6.1.1. Rotary knob LED indicator................21 6.1.2. First use ......................22 6.1.3. Main menu ....................23 6.1.4. Mychef Evolution main functions ............... 24 6.1.5. Navigation ....................26 6.2. Chef ......................... 27 6.2.1. Cooking options ..................28 6.2.2. - Page 3 6.5. Regenerate ......................50 6.6. Recipes ........................51 6.6.1. Recipes ......................51 6.6.2. My Recipes ....................52 6.6.3. By ingredients ....................53 6.6.4. Managing recipes from Mychef Cloud ............. 53 6.7. Settings ........................54 6.7.1. Date/time...................... 54 6.7.2. Language...................... 55 6.7.3. Volume......................55 6.7.4.
-
Page 4: Introduccion
1. INTRODUCCION This manual has been carefully prepared and reviewed to provide reliable information and assistance for proper installation, use, and maintenance that will ensure proper operation and prolong the life of the oven. This manual is divided into three parts, the first part dedicated to the installation of the equipment at the working point, the second part focused on the use and the third part in the cleaning and maintenance of the oven. -
Page 5: Technical Characteristics
(mm) Meals/day 20-80 30-100 30-100 50-150 Table 1. Main characteristics of Mychef Compact Evolution oven The maximum recommended load of food per GN 1/1 40mm tray is 3.5 Kg and 2Kg for GN 2/3 40mm trays. mychefcooking.com 210208_A PRODUCT MANUAL COMPACT EVOLUTION DT.MP.CE.2103.2... -
Page 6: General Safety And Accident Prevention Regulations
2. GENERAL SAFETY AND ACCIDENT PREVENTION REGULATIONS 2.1. Personnel responsible for using the equipment The use of the equipment is reserved for trained personnel. Personnel who perform any action on the oven, such as operation, cleaning, installation, handling, etc., must be familiar with the safety regulations and the Operating Instructions. -
Page 7: Corrosion Hazard
MyCare CleanDuo and DA21 cleaning products have been specially formulated for the correct cleaning and protection of Mychef ovens with automatic and semi-automatic washing. The product contains, in addition to detergent, polish for a perfect finish. The use of this detergent is mandatory in the Mychef ovens. -
Page 8: Reception, Transport And Positioning
This minimum distance is: o 50mm on the left and right sides o 100mm from the back o 500mm from the top The equipment should be placed on a Mychef support table or wall mount. mychefcooking.com 210208_A PRODUCT MANUAL COMPACT EVOLUTION DT.MP.CE.2103.2... - Page 9 Never block the underside of the front water collector. 500m 100mm 50mm 50mm 1000m Figure 1. Example of a suitable location for installation For the installation of Mychef stacked ovens, follow the instructions supplied with the corresponding stacking kit. mychefcooking.com 210208_A PRODUCT MANUAL COMPACT EVOLUTION DT.MP.CE.2103.2...
-
Page 10: Installation
4. INSTALLATION 4.1. Electrical connection Check that the voltage reaching the point where the oven is to be switched on corresponds to the operating voltage of the equipment. The following table indicates the electrical characteristics of each oven: Power Rated current Cross-section cable Voltage (kW) - Page 11 (see rear panel). Some Mychef ovens can be connected to different voltages and configurations at the time of installation. To make the correct connection, use the terminal blocks supplied with the equipment according to the instructions in the following subchapters.
-
Page 12: Three Phase Connection 400V 3L+N
4.1.1. Three phase connection 400V 3L+N Figure 4. Three phase 400V 3L+N Figure 5. Three phase 400V 3L+N Color Cable Connector Brown ■ Black ■ Grey ■ Blue Neutral ■ Green-yellow Ground Ground ■ Table 3. Three phase cable 400V 3L+N mychefcooking.com 210208_A PRODUCT MANUAL... -
Page 13: Three Phase 230V 3L
Ground ■ Table 4. Three phase cable 230V 3L Use the connecting plates supplied with your Mychef oven to connect positions 1-2 of the terminal block. Additionally, in 9 GN ovens equipped with a three-phase resistance, it is necessary to change the connection of the resistance from star to delta. -
Page 14: Single Phase 230V L+N
Figure 9. Three-phase resistance. Delta 3L+N 230V 3L 4.1.3. Single phase 230V L+N This type of connection is only valid for ovens Mychef Compact 6 GN 2/3 and 6 GN 1/1. Figure 10. Single phase full power Figure 11. Single phase full power Color... -
Page 15: Water Connection
Use the connecting plates supplied with your Mychef oven to connect positions 1-2 and 2- 3 of the terminal block. 4.2. Water connection 4.2.1. Water input Cold water (max. 30°C) ¾ inch 150 to 400 kPa dynamic flow pressure. Drinking quality water with the following characteristics: Hardness between 3º... -
Page 16: Vapour Condensation Hood
The drain must be a maximum of 1 meter long, have a diameter greater than the drain connection and be free of bottlenecks. 4.3. Vapour condensation hood Refer to the installation manual supplied with the fume hood for installation. The vapour condensation hood is an optional extra. The hood can be installed once the oven is installed. -
Page 17: Inicial Registration
5. INICIAL REGISTRATION 5.1. Mychef Evolution start up This short instruction is intended to explain the steps to follow to start the Mychef Evolution oven for the first time. 1. Turn on the oven. Then select a language and press "Done". - Page 18 3. Choose “User Mode” to create an account and register the oven. • Make sure you enter a valid email address to receive the access credentials. • All fields must be completed. 4. If you already have a user account: enter the email address and password. The oven will sync.
- Page 19 "Settings”. 8. Access to the Mychef Cloud App With the credentials received via email, it is possible to access the Mychef Cloud application from where it will be possible to synchronize with the cloud and carry out more advanced management of the oven.
- Page 20 Remote supervision of the status of each oven (cooking, washing, programming, etc.). Control of water and energy consumption by periods. Visualization of HACCP graphics. Management of fast access programs FastMenu. Remote activation / deactivation / replication of FastMenu mode in one or more ovens.
-
Page 21: Use
This section provides an overview of the basic functions and all the information necessary for the correct use of the user interface of the Mychef Evolution combi oven. For a description of more specific functions, refer to the help available on each screen. -
Page 22: First Use
Table 6. Colour description rotary knob 6.1.2. First use Once you have connected your Mychef oven for the first time, you will need to access the Wi-Fi or Ethernet network to synchronize with the cloud. A check on available software updates and if necessary, the download and update of the system will then be executed. -
Page 23: Main Menu
6.1.3. Main menu Each time you start the oven after initial setup, you will be taken directly to the main menu shown in the picture below. Main menu display Figure 13. This menu is structured in three main sections: Cooking (Chef, SmartCooking, CookingPlanner, Regenerate) Self-cleaning (MyCare) Recipes and Settings The main functions shown in the menu are as follows:... -
Page 24: Mychef Evolution Main Functions
Cooking planner – Assistant for planned cooking Regenerate – Cooked Food Regeneration Assistant MyCare – Self-cleaning programs Recipes – Access to user and Mychef recipe books Settings – Access to oven settings 6.1.4. Mychef Evolution main functions Chef The Chef cooking mode allows cooking by manual parameter adjustment: •... - Page 25 My Recipes: With this recipe book you can create your own recipes in a simple and intuitive way, from your Mychef oven or from the mobile phone or tablet application "Mychef Cloud". Up to 400 different recipes can be cooked and administered.
-
Page 26: Navigation
Settings In this menu, all settings of the Mychef oven can be set. Help The "i" icon in the heading gives access to the help screen, it is present on all screens. -
Page 27: Chef
"My Recipes" for future use. It is also possible to add a description of the steps required for cooking. By using the "Mychef Cloud" application or the USB, it will be possible to add images of the plating procedure and suggestion. -
Page 28: Cooking Options
Header functions: Get back. To return to the previous screen. Home. Main screen. Save. Allows you to save a recipe setting in the recipe book. Info. Provides information and help on the current scree. Cooking indicator Wi-Fi/Ethernet connection indicator Display of the current date Hour Cycles indicator Add/ Delete Cycles... - Page 29 During cooking, it will also be possible to change the parameter settings. By selecting this option, the display will show again the cooking parameters and the user will be able to refine the recipe according to his needs. To continue press, START/STOP. For precise control of the cooking, the oven has the "Cook Check"...
-
Page 30: Chef Menu
Figure 15. Set up to add notification message When you press add alert, you are prompted to enter a text message and select the time when the message will be displayed. When the cooking starts and the indicated time has elapsed, the message will notify. - Page 31 The steam mode saturates the cooking chamber with moisture. -100 % <-> 100 % 100% Humidity ΔT Temperature Tª Tº Probe Time Continuous Auto Manual In order to prolong the life of your oven, it may automatically reduce the maximum cooking chamber temperature. In all cooking modes, the chamber can be humidified at will via direct steam injection using the cooking options button.
- Page 32 Example of cooking at 90ºC for 10 min: Figure 16. Example. Cooking 90ºC in steam mode for 10 minutes Figure 17. Oven temperature Automatic temperature adjustment Whenever cooking is started by pressing START/STOP, the oven automatically calculates the room temperature in the chamber and decides whether a heating or cooling process should be carried out depending on the desired value.
- Page 33 Figure 18. Temperature settings screen If the user wishes, he or she can interrupt this process and start directly with cooking. Pressing the START/STOP button omits preheating and starts cooking. Once the oven reaches the preheating temperature, the user will be told that the oven can be charged by means of an acoustic and visual warning: an animation will be shown on the screen as in the picture.
- Page 34 adjusting them. Pressing the START/STOP button will start the oven to warm up and stop when the core probe temperature is equal to the probe set point temperature. Figure 20. Temperature configuration and control by core probe If the probe is not connected, the oven will indicate this by means of the displayed message and an acoustic signal.
- Page 35 Figure 22. Cooking Check option If you wish to adjust any of the cooking parameters, press: Figure 23. Cooking parameters settings When the oven is in the process of cooking controlled by means of a core probe, the chamber temperature display shows the temperature to be reached in the chamber, and the core probe display shows the actual temperature of the food.
- Page 36 Fan speed selection In any cooking mode, the user can select the fan speed that best suits his needs. To do this, press the fan speed parameter where it will be possible to select from several options: Figure 24. Fan speed settings Auto mode: The fan speed will be adjusted automatically according to the type of cooking being carried out, optimizing the cooking result.
- Page 37 In order to be able to regulate the temperature in the chamber correctly, in certain situations (low temperature, etc.) the oven can automatically select the reduced convection speed. Editing cycles The editing of the cycles can be done directly by navigating through the cycle indicator or you can add phases to the user programs.
- Page 38 To add or remove phases in programs 1 to 400 before you must enter the program edit mode. Navigate between different cycles To navigate between the different cycles, click on the arrows of the cycle indicator <1/2>. The first number in the cycle indicator indicates the current cycle and the second number indicates the total of existing cycles.
- Page 39 If cooking is to be started, selecting "Start now" will start cooking, the LED will illuminate and the cooking indicator in the header will activate. If you want to program the start, i. e. set a time later than the current one for its start, you can program it in two modes.
-
Page 40: Smartcooking
Home: Return to the Home screen. You can also exit the displayed screen by pressing START/STOP. You can also interrupt the cooking process at any time by pressing START/STOP to stop cooking. 6.3. SmartCooking After selecting the SmartCooking cooking mode in the main menu, you access the following screen where a series of foods are displayed. - Page 41 Figure 30. Example of SmartCooking mode parameter selection Some foods allow probe cooking, this option can be selected when compatible. It will be possible to carry out cooking by probe and sous vide. The sous vide or low temperature cooking is especially suitable for meats, poultry or fish and some vegetable preparations.
- Page 42 Figure 31. Summary of the selected cooking process If cooking is to be started, selecting "Start now" will start cooking, the LED will illuminate and the cooking indicator in the header will activate. If you want to program the start of the cooking, you can program it in two modes. First, with the option "Ready at...”...
- Page 43 Go&Cook The Go&Cook cooking mode is a direct cooking method, suitable for each food category. Once the category has been selected, for example: “Meat", the Go&Cook option will show us directly the available preparations for meats: Fry, Grill, Griddle, Roast, Braise, Steam, Sous vide and MySmoker.
- Page 44 It is considered that it is previously on the Chef screen, and the cooking parameters have been adjusted or a recipe has been created from the "Mychef Cloud" application. After selecting the Save button, the following screen appears where you must enter the necessary data to correctly describe the recipe you want to save.
- Page 45 After selecting a category and entering a name with which to save the recipe, you must choose the type of tray that is recommended for cooking: Selecting the ingredients field will open a new window in which you can enter the ingredients that make up the recipe.
-
Page 46: Cookingplanner
Similarly, it will be possible to add hints of plating in the final step and add an image. Figure 37. Add suggestion to the Finish and serve section It is possible to adjust the number of diners or trays to know exactly the quantities of ingredients to be used in each case. - Page 47 To load a CookingPlanner, select Multilevel or JustInTime and press the (+) button at the desired level, then access the recipe book where the recipes compatible with this cooking mode appear. Then select a first recipe and click "Add to Multilevel" or "Add to JustInTime". Figure 39.
- Page 48 Multilevel: for cooking that starts at the same time, under a single cooking cycle and different finishing times depending on the recipe of each tray. The system will notify the user via the display and on the mobile device via a notification when each tray must be removed at the end of cooking.
-
Page 49: Save Cookingplanner
Figure 43. Total display of trays 6.4.1. Save CookingPlanner You can save a list of recipes in Multilevel or JustInTime under "My Recipes", either after loading all the recipes you want to cook, through the save option in the header, or once the process is finished, as shown below: Figure 44. -
Page 50: Regenerate
6.5. Regenerate The regenerating mode allows the regeneration of almost all types of previously cooked foods, where they are finished cooking and prepared to be served, for this purpose the foods can be already arranged in plates or containers. You can select to regenerate manually with the "Chef Mode"... -
Page 51: Recipes
When you access this recipe book, by scrolling horizontally you will be able to see all the recipes available in the Mychef cloud. This recipe book will be updated every time new recipes are made available in the cloud, as long as the oven has an Internet connection. -
Page 52: My Recipes
The names of the recipes are given as examples. Recipes can be sorted according to the drop-down menu below: Figure 50. Mode recipes display When you select a recipe, the recipe display corresponds to the structure shown in section 6.3.1.2. 6.6.2. -
Page 53: By Ingredients
The names of the recipes are given as examples. 6.6.4. Managing recipes from Mychef Cloud The Mychef Cloud app allows you to manage recipes from the "Recipes" mode. The operation is similar to that of the user interface of the combi oven, as indicated in the previous sections. -
Page 54: Settings
6.7. Settings This section describes the operations required for the correct configuration of the Mychef combi oven. Some of the functions have access rights, so it will only be possible to access them by entering a password. For more detailed information, refer to the help available on the screen. -
Page 55: Language
Figure 54. Date/time configuration 6.7.2. Language To change the language, navigate between the available languages by pressing the arrows or using the rotary control, and select the desired language. To exit, press the back arrow and the setting will be saved. Figure 55. -
Page 56: Lighting
Figure 56. Sound configuration 6.7.4. Lighting The duration of the chamber lighting can be adjusted between the options displayed on the screen. Select the desired option and press back and the configuration will be saved. Figure 57. Chamber light configuration 6.7.5. -
Page 57: Probe
In order to avoid burns or steam discomfort when opening the door, Mychef ovens can remove steam from the chamber at the end of the cooking process. Even when in convection mode, this extraction can be useful to eliminate the steam that may be released from food in the cooking chamber. -
Page 58: System Analysis
Register Name Parameter Editable Probe 1 Multipoint probe 1 Probe 2 Multipoint probe 2 Probe 3 Multipoint probe 3 Probe 4 Multipoint probe 4 Probe 5 Not used Probe 6 Chimney Probe Probe 7 Probe Chamber Probe 8 Internal electronics temperature Probe 9 Inverter temperature Probe 10... -
Page 59: System
6.7.8. System System displays the software version of the device and the IP addresses. Figure 60. System information The software can also be updated here. To do this, click on the Update button, and whenever there is an Internet connection, the system will be updated with the latest software version. -
Page 60: Usb
6.7.11. USB The equipment allows the loading and unloading of recipes and images in addition to HACCP data. Figure 62. USB file upload/download The equipment allows the recording of temperatures and events occurring during normal use. To record data, insert a memory into the USB connector in the lower right corner of the oven. -
Page 61: Consumption
6.7.12. Consumption In this section is possible to consult the data corresponding to the energy consumption of the oven and HACCP. In order to know the water and energy consumption, it is possible to delimit the desired range, be it annual, monthly, daily or hourly. Figure 64. -
Page 62: Measurement System
6.7.13. Measurement system The oven configuration allows working both in the international measurement system and in the Anglo-Saxon system. By selecting one of the two options and pressing the back button, the configuration will be saved, and the system restored. Figure 66. -
Page 63: Nightwatch
ProbeRemap Probe for temperature control in chamber No (TS) ErrorInhibit Disable error control No (TS) T_000_050 Working hours between 0ºC and 50ºC No (TS) T_050_100 Working hours between 50ºC and 100ºC No (TS) T_100_150 Working hours between 100ºC and 150ºC No (TS) T_150_200 Working hours between 150ºC and 200ºC... -
Page 64: Errors And Alarms
NightWatch functionality. Pressing the START/STOP key in this state will cancel automatic recovery. If it is not cancelled, the Mychef oven automatically checks the temperature of the cooking chamber. If the temperature is below 56°C there may be a risk of bacterial contamination. - Page 65 Communication between relay board and inverter is not responding. Check the cable connecting ERROR COMMUNICATION both components. Check inverter communication LED blinks. Communication processor and EEPROM does not ERROR EEPROM work. Check the control board. Motor error. Check motor wiring. ERROR MOTOR Overtemperature on the motor.
- Page 66 ERROR PROBE8 TEMP SENSOR Chamber probe not connected. Check probe and NOT CONNECTED wiring. ERROR PROBE8 TEMP SENSOR Short circuit chamber probe. Check probe and SHORTED wiring. ERROR PROGRAM NOT Reserved. Not used. TERMINATED The oven has been switched off by executing a ERROR CLEANING PROGRAM self-cleaning program.
-
Page 67: Maintenance
Before starting any cleaning program, any trays, grids, grates, probes or other accessories inside the chamber must be removed. 7.1.1. MyCare Using the Mychef cleaning system allows automatic cleaning of the cooking chamber. This option includes several self-cleaning profiles available, as shown below: mychefcooking.com... - Page 68 Figure 67. MyCare self-cleaning programs Rinse: Program of rinsing the chamber with water. Eco Washing: This program allows an efficient washing with optimization of resources. Short Wash: Short duration washing program. Medium Wash: Medium duration washing program. Long Wash: Long-term washing program. The time required to carry out each program and the use and usefulness of each program are listed in the table below.
- Page 69 Programa Description Duration ECO self-cleaning program 45 min Short Self-cleaning program for low dirt level 70 min Medium Self-cleaning program for medium dirt level 90 min Self-cleaning program for high dirt level Large 110 min Rinse Rinse program 5 min Table 12.
- Page 70 Figure 69. Washing progress information At the end of a washing program, the chamber may be dried. To do this, it is necessary to select the option "Dry at the end of the camera", at the beginning of the program, prior to selecting START/STOP.
- Page 71 Before starting any cleaning process, make sure that the water flow to the unit is open. If cooling is not required, you can place the MyCare detergent directly in its assigned space and start the cleaning or rinsing. MK2 self-cleaning system In this system, a single tablet must be used in each cleaning cycle.
- Page 72 MK3 self-cleaning system This system allows the use of 1 or 2 detergent tablets. It is recommended to use 1 tablet in all washing programs as a general rule, use 2 tables exceptionally if the oven is very dirty. Figure 73. Housing for MyCare detergent (MK3 system) Before starting any cleaning process other than rinsing, make sure that the detergent tablet has been placed in the oven.
- Page 73 Once you have started the automatic process do not open the door under any circumstances, as chemicals used for cleaning and steam may escape. This situation would pose a significant risk of corrosion and burns. Never open the door of the cooking chamber during an automatic cleaning process.
-
Page 74: Suction
7.1.2. Suction The piece that separates the cooking chamber with the fan and the heating element can be removed to clean that area. In order to remove this piece, it is necessary to turn 90 degrees, using a screwdriver or similar, the tabs that hold it. Figure 75. -
Page 75: Outer Housing
the oven is clean and does not have any pieces of food embedded in it so that it can seal the chamber well and heat, water, or steam cannot escape when it is in operation. To clean this rubber seal, a cloth soaked in water and a little bit of dishwasher is enough. Then the whole area is rinsed out and dried well. - Page 76 Figure 76. Inner glass clamp It is advisable to clean the inside of the outer glass and the inside glass on the outside with glass cleaning fluid and hand paper. For the inside of the inner glass, if the dirt is not excessive, you can proceed in the same way as the other glass.
-
Page 77: Preventive Maintenance
These periodic checks must be carried out by an authorized service technician. The following table shows the operations to be performed on Mychef ovens at each of the revisions. The table is circular, and from 20.000h of use or 10 years would start counting again on the left of the table. - Page 78 Depending on the hours of use, the user interface will show which maintenance plan to follow, and the technical service contact you should contact. Figure 77. Maintenance warning The next screen shows the maintenance plans, pressing the review buttons displays the required activities to be performed.
- Page 79 Check B: Temperature calibration Adjustment of the internal screws and bolts Check C: Change of encoder and rotary control Change of chimney pipes and drain pipes Change of solenoid valve for water injection Resistor contactor change Check D: Engine change Change of Resistance and seal Water injection pipe gasket replacement Regular maintenance ensures that your oven always works as designed.
Need help?
Do you have a question about the COMPACT EVOLUTION 6 GN 2/3 and is the answer not in the manual?
Questions and answers