
Related Manuals for Mychef iCOOK


Summary of Contents for Mychef iCOOK
- Page 1 | iBAKE | COOK BAKE | SNACK BAKERSHOP Technical Support Service Manual TECHNICAL SUPPORT SERVICE MANUAL iCOOK | iBAKE | COOK | BAKE | SNACK | BAKERSHOP - DT.MS.CB.2202.2 mychefcooking.com...
-
Page 2: Table Of Contents
2.3.6. The oven does not produce steam ..............23 2.3.7. The drain is clogged ..................... 24 2.4. Automatic error detection ....................26 2.4.1. Mychef COOK/ iCOOK/BAKE/iBAKE/BAKERSHOP/SNACK ......26 TECHNICAL SUPPORT SERVICE MANUAL iCOOK | iBAKE | COOK | BAKE | SNACK | BAKERSHOP - DT.MS.CB.2202.2 mychefcooking.com... - Page 3 6.2. Mychef 17 relay board ..................... 70 6.3. Mychef COOK, BAKE, BAKERSHOP, AND SNACK controls ........71 6.4. Mychef iCOOK and iBAKE controls ................71 TECHNICAL SUPPORT SERVICE MANUAL iCOOK | iBAKE | COOK | BAKE | SNACK | BAKERSHOP - DT.MS.CB.2202.2 mychefcooking.com...
-
Page 4: Disassembly For Service Access
The following picture shows how to remove the door on side-opening models. Remove the 3 screws in the picture and pull the door upwards. Removing the door (side-opening models) TECHNICAL SUPPORT SERVICE MANUAL iCOOK | iBAKE | COOK | BAKE | SNACK | BAKERSHOP - DT.MS.CB.2202.2 mychefcooking.com... -
Page 5: Front-Opening Ovens
On front-opening ovens, turn the locking tabs on the right and left hinges. Then lift the door until it is released. Removing the door (front-opening models) TECHNICAL SUPPORT SERVICE MANUAL iCOOK | iBAKE | COOK | BAKE | SNACK | BAKERSHOP - DT.MS.CB.2202.2 mychefcooking.com... -
Page 6: Removing The Top Panel
Front-opening ovens have the top panel attached to the sides. Remove the rear panel (see next chapter) and then remove all the screws from the side of the top panel. TECHNICAL SUPPORT SERVICE MANUAL iCOOK | iBAKE | COOK | BAKE | SNACK | BAKERSHOP - DT.MS.CB.2202.2 mychefcooking.com... -
Page 7: Removing The Real Panel
The following picture shows how to remove the rear panel. Remove the M5 screws circled in red and pull the rear panel downwards. Removing the rear panel TECHNICAL SUPPORT SERVICE MANUAL iCOOK | iBAKE | COOK | BAKE | SNACK | BAKERSHOP - DT.MS.CB.2202.2 mychefcooking.com... -
Page 8: Bakershop 6 And 10 600X400 Trays
1.3.2. BAKERSHOP 6 and 10 600x400 trays For the 600x400 size BAKERSHOP model, remove the screws at the rear of the oven. Removing the rear panel TECHNICAL SUPPORT SERVICE MANUAL iCOOK | iBAKE | COOK | BAKE | SNACK | BAKERSHOP - DT.MS.CB.2202.2 mychefcooking.com... -
Page 9: Bakershop And Snack Of 3 And 4 Trays
The following picture shows how to remove the side panel. Remove the 4 screws circled in red from the bottom of the left side. Lower screws on the side TECHNICAL SUPPORT SERVICE MANUAL iCOOK | iBAKE | COOK | BAKE | SNACK | BAKERSHOP - DT.MS.CB.2202.2 mychefcooking.com... -
Page 10: Removing The Convection Fan Cover Plate
On some models, the guide supports are screwed to the cooking chamber. Unscrew and proceed in the same way to remove the guides. Removing the tray supports (screw models) TECHNICAL SUPPORT SERVICE MANUAL iCOOK | iBAKE | COOK | BAKE | SNACK | BAKERSHOP - DT.MS.CB.2202.2 mychefcooking.com... - Page 11 Removing the protective plate (bolt-on models) Removing the protective plate (screw models) TECHNICAL SUPPORT SERVICE MANUAL iCOOK | iBAKE | COOK | BAKE | SNACK | BAKERSHOP - DT.MS.CB.2202.2 mychefcooking.com...
-
Page 12: Accessing The Siphon
1.6. Accessing the siphon In ovens equipped with a siphon (COOK PRO, BAKE, iCOOK, and iBAKE), the siphon can be accessed from the inside of the cooking chamber or from the bottom of the oven. To access the siphon cooling pipes or the front water tray drain, remove the side panel. - Page 13 Recirculation pipe Drain pipe Recirculation siphon TECHNICAL SUPPORT SERVICE MANUAL iCOOK | iBAKE | COOK | BAKE | SNACK | BAKERSHOP - DT.MS.CB.2202.2 mychefcooking.com...
-
Page 14: Troubleshooting
Dismantle the rear part to access the electronics (see 1.3). 2.2.1. Three-phase models Check the voltage at the power connector. Checking input voltages (three-phase models) TECHNICAL SUPPORT SERVICE MANUAL iCOOK | iBAKE | COOK | BAKE | SNACK | BAKERSHOP - DT.MS.CB.2202.2 mychefcooking.com... -
Page 15: Single-Phase Models
Depending on the model, the reset button is located on the rear or bottom of the oven. If it has tripped, press it. TECHNICAL SUPPORT SERVICE MANUAL iCOOK | iBAKE | COOK | BAKE | SNACK | BAKERSHOP - DT.MS.CB.2202.2 mychefcooking.com... -
Page 16: Safety Contactor
2.2.4. Safety contactor The contactor is controlled by the safety thermostat on three-phase ovens. With the oven switched on, press the power switch. TECHNICAL SUPPORT SERVICE MANUAL iCOOK | iBAKE | COOK | BAKE | SNACK | BAKERSHOP - DT.MS.CB.2202.2 mychefcooking.com... - Page 17 If not, check that the voltage between poles A1 and A2 is 230VAC. If not, check the condition of the safety thermostat, the ON/OFF switch and the wiring between the three elements. TECHNICAL SUPPORT SERVICE MANUAL iCOOK | iBAKE | COOK | BAKE | SNACK | BAKERSHOP - DT.MS.CB.2202.2 mychefcooking.com...
-
Page 18: Relay Board Led Status
If not, check the wiring condition between the contactor, power supply and relay board. 2.2.6. Communication cable Check that the Modbus communication cable linking the relay board and the control board is correctly inserted. TECHNICAL SUPPORT SERVICE MANUAL iCOOK | iBAKE | COOK | BAKE | SNACK | BAKERSHOP - DT.MS.CB.2202.2 mychefcooking.com... -
Page 19: Control Board
(differential, magnetothermic, etc.). Check the power supply, as specified in the chapter 2.2. TECHNICAL SUPPORT SERVICE MANUAL iCOOK | iBAKE | COOK | BAKE | SNACK | BAKERSHOP - DT.MS.CB.2202.2 mychefcooking.com... -
Page 20: The Oven Does Not Start
If an oven does not start, the door sensor may not detect that the door is properly closed. On COOK, BAKE, iCOOK and iBAKE ovens, place a magnet near the door sensor area. If the oven responds and the motor and resistor start, the problem is that the door is too far away from the strut. -
Page 21: The Oven Does Not Heat Up
If not, check that the voltage between poles A1 and A2 is 230VAC. If not, check the wiring between the relay board and the contactor. TECHNICAL SUPPORT SERVICE MANUAL iCOOK | iBAKE | COOK | BAKE | SNACK | BAKERSHOP - DT.MS.CB.2202.2 mychefcooking.com... -
Page 22: The Oven Turns Itself Off Or The Electronics Do Not Respond
Check that these temperatures are below 80°C. TECHNICAL SUPPORT SERVICE MANUAL iCOOK | iBAKE | COOK | BAKE | SNACK | BAKERSHOP - DT.MS.CB.2202.2 mychefcooking.com... -
Page 23: The Oven Burns The Food
The steam generation and drainage cooling output (in those ovens that have them) are equipped with 0.15L/min regulators. The rinsing outlet (in those ovens that have it) does not have a regulator. TECHNICAL SUPPORT SERVICE MANUAL iCOOK | iBAKE | COOK | BAKE | SNACK | BAKERSHOP - DT.MS.CB.2202.2 mychefcooking.com... -
Page 24: The Drain Is Clogged
2.3.7. The drain is clogged In COOK, BAKE, iCOOK and iBAKE ovens, if the water is not draining away it is highly likely that the drain is clogged. You will then need to use a spring drain cleaner to remove the material blocking the drain. - Page 25 Oven drain TECHNICAL SUPPORT SERVICE MANUAL iCOOK | iBAKE | COOK | BAKE | SNACK | BAKERSHOP - DT.MS.CB.2202.2 mychefcooking.com...
-
Page 26: Automatic Error Detection
BAKE, BAKERSHOP and SNACK models will show "Er", followed by the error or alarm number. Error indicator For the iCOOK and iBAKE versions the display will show an error message according to the following image, for more information about the error, it is possible to view the description by clicking on "Details":... - Page 27 External probe not connected. Check external probe NOT CONNECTED and connector. Not used. ERROR PROBE3 TEMP SENSOR External probe short-circuited. Check external probe SHORTED and connector. Not used. TECHNICAL SUPPORT SERVICE MANUAL iCOOK | iBAKE | COOK | BAKE | SNACK | BAKERSHOP - DT.MS.CB.2202.2 mychefcooking.com...
- Page 28 Due to automatic checks, the equipment may shut down to avoid a serious failure. Proceed to switch it on as normal. TECHNICAL SUPPORT SERVICE MANUAL iCOOK | iBAKE | COOK | BAKE | SNACK | BAKERSHOP - DT.MS.CB.2202.2 mychefcooking.com...
- Page 29 When you enter the settings menu, the three indicators on the top of the oven will all light up at the same time, and the display will show P0:00. TECHNICAL SUPPORT SERVICE MANUAL iCOOK | iBAKE | COOK | BAKE | SNACK | BAKERSHOP - DT.MS.CB.2202.2 mychefcooking.com...
- Page 30 These parameters provide information on huge range of different characteristics, from the type of oven to the fan configuration, etc. They can also be modified and changed in order TECHNICAL SUPPORT SERVICE MANUAL iCOOK | iBAKE | COOK | BAKE | SNACK | BAKERSHOP - DT.MS.CB.2202.2 mychefcooking.com...
- Page 31 TSC. For ovens without TSC this value must always be 0. For electric ovens with TSC this value must always be 2. TECHNICAL SUPPORT SERVICE MANUAL iCOOK | iBAKE | COOK | BAKE | SNACK | BAKERSHOP - DT.MS.CB.2202.2 mychefcooking.com...
- Page 32 The record 4 defines the configuration of the fan, which can be of different speeds or controlled by the inverter. The AIR oven ranges have 1 speed. TECHNICAL SUPPORT SERVICE MANUAL iCOOK | iBAKE | COOK | BAKE | SNACK | BAKERSHOP - DT.MS.CB.2202.2 mychefcooking.com...
- Page 33 The 230V relays are associated with a number from 1 to 15. In addition, there are 2 relays at 12V activated simultaneously with relays 1 and 3. TECHNICAL SUPPORT SERVICE MANUAL iCOOK | iBAKE | COOK | BAKE | SNACK | BAKERSHOP - DT.MS.CB.2202.2 mychefcooking.com...
- Page 34 TECHNICAL SUPPORT SERVICE MANUAL iCOOK | iBAKE | COOK | BAKE | SNACK | BAKERSHOP - DT.MS.CB.2202.2 mychefcooking.com...
- Page 35 If an overtemperature is detected in the motor and the door is open the value will be 2 , that is 33. TECHNICAL SUPPORT SERVICE MANUAL iCOOK | iBAKE | COOK | BAKE | SNACK | BAKERSHOP - DT.MS.CB.2202.2 mychefcooking.com...
- Page 36 To navigate through the parameters and to be able to view and edit values, we must first select the parameter. TECHNICAL SUPPORT SERVICE MANUAL iCOOK | iBAKE | COOK | BAKE | SNACK | BAKERSHOP - DT.MS.CB.2202.2 mychefcooking.com...
- Page 37 Oven type: 6GN 1/1, 10GN 1/1, etc. Number of TSC channels Self-cleaning All parameters are presented below: TECHNICAL SUPPORT SERVICE MANUAL iCOOK | iBAKE | COOK | BAKE | SNACK | BAKERSHOP - DT.MS.CB.2202.2 mychefcooking.com...
- Page 38 TYPE_MYCHEF_COOK_6_21 Mychef iCook 6 GN 2/1, Mychef Cook 6 GN 2/1 TYPE_MYCHEF_COOK_10_21 Mychef iCook 10 GN 2/1, Mychef Cook 10 GN 2/1 TECHNICAL SUPPORT SERVICE MANUAL iCOOK | iBAKE | COOK | BAKE | SNACK | BAKERSHOP - DT.MS.CB.2202.2 mychefcooking.com...
- Page 39 For electric ovens with TSC this value must always be 2. For gas ovens this value should be 5 or 6 (see table below). All other securities remain unused. TECHNICAL SUPPORT SERVICE MANUAL iCOOK | iBAKE | COOK | BAKE | SNACK | BAKERSHOP - DT.MS.CB.2202.2 mychefcooking.com...
- Page 40 The iBake and iCook 1/1 electric ovens have non-recirculating self-cleaning. The ovens of the iCook 6 2/1 electric ranges have recirculated self-cleaning. MAX electric and gas ovens have extended recirculated self-cleaning. The iCook 10 2/1 electric and gas ovens have extended recirculated self-cleaning.
- Page 41 Virtual relay. Speed 1 + CW/ACW *Includes functions only available in 17-relay electronics. Tabla 8. Relay test assignments To activate them, simply press to select: TECHNICAL SUPPORT SERVICE MANUAL iCOOK | iBAKE | COOK | BAKE | SNACK | BAKERSHOP - DT.MS.CB.2202.2 mychefcooking.com...
- Page 42 • If everything is closed, the different options appear inactive. • If only the door is open, the option will be active. TECHNICAL SUPPORT SERVICE MANUAL iCOOK | iBAKE | COOK | BAKE | SNACK | BAKERSHOP - DT.MS.CB.2202.2 mychefcooking.com...
- Page 43 Click Update PIC18 firmware to install the new version. BOOT" will appear on the display and the control will restart. The following display will appear during the update process: TECHNICAL SUPPORT SERVICE MANUAL iCOOK | iBAKE | COOK | BAKE | SNACK | BAKERSHOP - DT.MS.CB.2202.2 mychefcooking.com...
- Page 44 To check the updated version, disconnect the oven from the power supply and reconnect it. In the Smart Control Version section (Figure 37) the previously installed version will appear. TECHNICAL SUPPORT SERVICE MANUAL iCOOK | iBAKE | COOK | BAKE | SNACK | BAKERSHOP - DT.MS.CB.2202.2 mychefcooking.com...
- Page 45 (hinged models). Then, use two screwdrivers to press the LED light fixing, and proceed to its replacement. Inner door clips (lateral models) Inner door screws (lateral models) TECHNICAL SUPPORT SERVICE MANUAL iCOOK | iBAKE | COOK | BAKE | SNACK | BAKERSHOP - DT.MS.CB.2202.2 mychefcooking.com...
- Page 46 Replacement LED light. (COOK and BAKE) For iCOOK and iBAKE models, use a screwdriver to remove the fixing screws of the LED light assembly. TECHNICAL SUPPORT SERVICE MANUAL iCOOK | iBAKE | COOK | BAKE | SNACK | BAKERSHOP - DT.MS.CB.2202.2...
- Page 47 To replace the core probe, the rear part must be removed (see 1.3). From the inside of the oven, remove the two screws that hold the probe to the cooking chamber. TECHNICAL SUPPORT SERVICE MANUAL iCOOK | iBAKE | COOK | BAKE | SNACK | BAKERSHOP - DT.MS.CB.2202.2 mychefcooking.com...
- Page 48 Then attach the new probe terminal to the cable gland. Remember to pass the graphite gasket. Pull the cable gland, connect the terminal to the relay board and screw the two screws inside the firing chamber. TECHNICAL SUPPORT SERVICE MANUAL iCOOK | iBAKE | COOK | BAKE | SNACK | BAKERSHOP - DT.MS.CB.2202.2 mychefcooking.com...
- Page 49 Finally, remove the communications cable. Remove the six fixing brackets (blue) by pressing the tab on each bracket. Disassembly of 9-relay board TECHNICAL SUPPORT SERVICE MANUAL iCOOK | iBAKE | COOK | BAKE | SNACK | BAKERSHOP - DT.MS.CB.2202.2 mychefcooking.com...
- Page 50 Disassembly of 17 relay board Two screws holding the power supply must also be removed: Dismantling power supply TECHNICAL SUPPORT SERVICE MANUAL iCOOK | iBAKE | COOK | BAKE | SNACK | BAKERSHOP - DT.MS.CB.2202.2 mychefcooking.com...
- Page 51 Then remove the control plate towards the front, using a flat-blade screwdriver. To release the quick connectors, press the tab on the quick connectors and pull out the cable. TECHNICAL SUPPORT SERVICE MANUAL iCOOK | iBAKE | COOK | BAKE | SNACK | BAKERSHOP - DT.MS.CB.2202.2 mychefcooking.com...
- Page 52 Release connectors. (COOK, BAKE, BAKERSHOP and SNACK) (See wiring diagram Figure 73 ) TECHNICAL SUPPORT SERVICE MANUAL iCOOK | iBAKE | COOK | BAKE | SNACK | BAKERSHOP - DT.MS.CB.2202.2 mychefcooking.com...
- Page 53 Connector release. (iCOOK, iBAKE) (See wiring diagram Figure 74) TECHNICAL SUPPORT SERVICE MANUAL iCOOK | iBAKE | COOK | BAKE | SNACK | BAKERSHOP - DT.MS.CB.2202.2 mychefcooking.com...
- Page 54 The solenoid valve system is an assembly of 3 valves and 3 solenoid coils and must be treated as a single part. Solenoid valve system Remove the two retaining screws and remove the solenoid valve. Fastening screws TECHNICAL SUPPORT SERVICE MANUAL iCOOK | iBAKE | COOK | BAKE | SNACK | BAKERSHOP - DT.MS.CB.2202.2 mychefcooking.com...
- Page 55 Once the bulb has been removed, we will disassemble the thermostat body. To do this, remove the two FASTON connectors, and unscrew the fixing nut. Thermostat body TECHNICAL SUPPORT SERVICE MANUAL iCOOK | iBAKE | COOK | BAKE | SNACK | BAKERSHOP - DT.MS.CB.2202.2 mychefcooking.com...
- Page 56 Steam generation tubes. TECHNICAL SUPPORT SERVICE MANUAL iCOOK | iBAKE | COOK | BAKE | SNACK | BAKERSHOP - DT.MS.CB.2202.2 mychefcooking.com...
- Page 57 Turbine extractor Lock the shaft with a spanner and turn the release screw. Once the blade is loose, finish removing the central screw. TECHNICAL SUPPORT SERVICE MANUAL iCOOK | iBAKE | COOK | BAKE | SNACK | BAKERSHOP - DT.MS.CB.2202.2 mychefcooking.com...
- Page 58 Disconnection of the single-phase motor Then remove the four nuts and lock washers that hold the engine in place. The engine can now be removed. TECHNICAL SUPPORT SERVICE MANUAL iCOOK | iBAKE | COOK | BAKE | SNACK | BAKERSHOP - DT.MS.CB.2202.2 mychefcooking.com...
- Page 59 Disassembly of the engine TECHNICAL SUPPORT SERVICE MANUAL iCOOK | iBAKE | COOK | BAKE | SNACK | BAKERSHOP - DT.MS.CB.2202.2 mychefcooking.com...
- Page 60 Then remove the four nuts and lock washers securing the engine mounting plate. Disassembly of the engine mounting plate Then replace the oil seal. Engine oil seal TECHNICAL SUPPORT SERVICE MANUAL iCOOK | iBAKE | COOK | BAKE | SNACK | BAKERSHOP - DT.MS.CB.2202.2 mychefcooking.com...
- Page 61 Convection heater (rear) Inside the oven, remove the screws that hold the heating element to the cooking chamber. Replacement of the resistor TECHNICAL SUPPORT SERVICE MANUAL iCOOK | iBAKE | COOK | BAKE | SNACK | BAKERSHOP - DT.MS.CB.2202.2 mychefcooking.com...
- Page 62 Remove the two screws from the solenoid and remove it. Remove the rubber seal and place it on the new solenoid. Remember to splice the wires. Disassembly of the solenoid TECHNICAL SUPPORT SERVICE MANUAL iCOOK | iBAKE | COOK | BAKE | SNACK | BAKERSHOP - DT.MS.CB.2202.2 mychefcooking.com...
- Page 63 When replacing the hook with a new one, align the bottom of the hook with the door latch. Make sure that the door closes tightly and does not leak. Alignment of the locking hook TECHNICAL SUPPORT SERVICE MANUAL iCOOK | iBAKE | COOK | BAKE | SNACK | BAKERSHOP - DT.MS.CB.2202.2 mychefcooking.com...
- Page 64 Remove the drip tray from the oven by removing the 4 lower screws and the 2 upper screws. Upper drip tray screws TECHNICAL SUPPORT SERVICE MANUAL iCOOK | iBAKE | COOK | BAKE | SNACK | BAKERSHOP - DT.MS.CB.2202.2 mychefcooking.com...
- Page 65 Door sensor When reassembling the drip tray, apply silicone to the top of the drip tray. Silicone application on the drip tray TECHNICAL SUPPORT SERVICE MANUAL iCOOK | iBAKE | COOK | BAKE | SNACK | BAKERSHOP - DT.MS.CB.2202.2 mychefcooking.com...
- Page 66 Remove the front of the sensor by removing the 2 front screws. Sensor front screws Then remove the entire sensor assembly by pulling it outwards. Remove sensor assembly TECHNICAL SUPPORT SERVICE MANUAL iCOOK | iBAKE | COOK | BAKE | SNACK | BAKERSHOP - DT.MS.CB.2202.2 mychefcooking.com...
- Page 67 Then remove the rear plastic housing and replace the sensor. Replace door sensor 5.17. Replacement of the door magnet In iCOOK/iBAKE/COOK/BAKE ovens, the door magnet is located in the bottom left or right- hand corner, depending on which way the door is opened. Door magnet...
- Page 68 Then remove the two cap screws that secure the fans to the mounting plate. They must be disconnected from the motherboard and replaced. Replacement of the convection fan TECHNICAL SUPPORT SERVICE MANUAL iCOOK | iBAKE | COOK | BAKE | SNACK | BAKERSHOP - DT.MS.CB.2202.2 mychefcooking.com...
- Page 69 6. GENERAL WIRING DIAGRAM 6.1. Mychef 9 relays board Wiring diagram 9 relays Mychef TECHNICAL SUPPORT SERVICE MANUAL iCOOK | iBAKE | COOK | BAKE | SNACK | BAKERSHOP - DT.MS.CB.2202.2 mychefcooking.com...
- Page 70 6.2. Mychef 17 relay board Wiring diagram 17 Mychef relays TECHNICAL SUPPORT SERVICE MANUAL iCOOK | iBAKE | COOK | BAKE | SNACK | BAKERSHOP - DT.MS.CB.2202.2 mychefcooking.com...
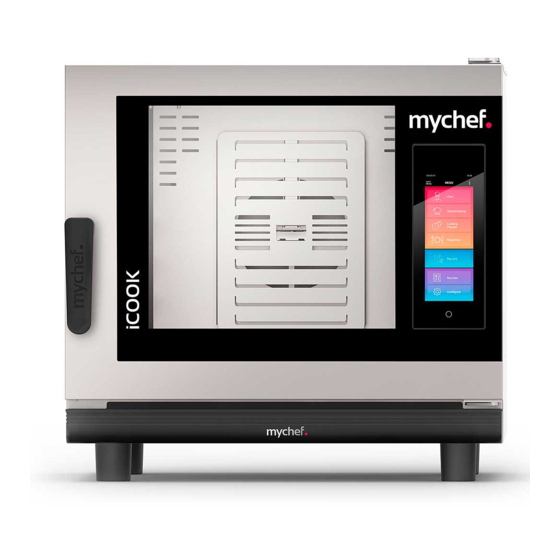
- Page 71 6.3. Mychef COOK, BAKE, BAKERSHOP, AND SNACK controls Human interface 6.4. Mychef iCOOK and iBAKE controls Human interface iCOOK / iBAKE TECHNICAL SUPPORT SERVICE MANUAL iCOOK | iBAKE | COOK | BAKE | SNACK | BAKERSHOP - DT.MS.CB.2202.2 mychefcooking.com...
Need help?
Do you have a question about the iCOOK and is the answer not in the manual?
Questions and answers