Table of Contents
Advertisement
Quick Links
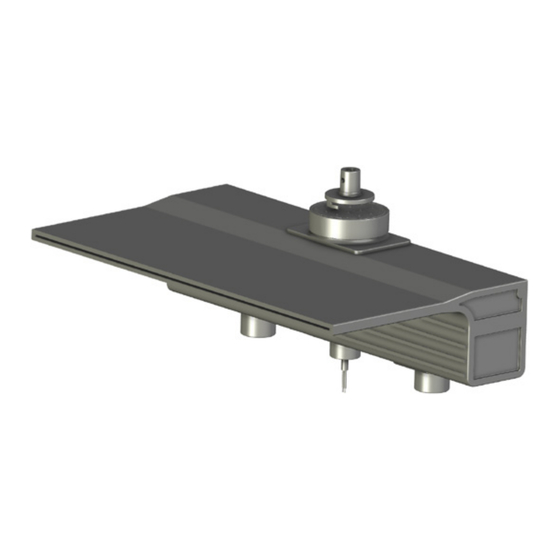
Sheer 500 (LED)
Water Feature With LED Lighting
Owner's Manual
WFS512B6LED
WFS518B6LED
WFS524B6LED
WFS536B6LED
Hayward Industries
400 Connell Drive, Suite 6100
Berkeley Heights, NJ 07922
Phone: (908) 355-7995
www.hayward.com
USE ONLY HAYWARD GENUINE REPLACEMENT PARTS
Contents
Introduction............................2
Installation.............................2
Mechanical.............................3
Plumbing................................5
ELectrical Wiring.....................6
Operation..............................10
Maintenance.........................13
Replacement Parts................13
Warranty................................14
WFS548B6LED
WFS560B6LED
WFS572B6LED
WFS584B6LED
LFCUS11100
LFCUS11150
1001811 RevA
Advertisement
Table of Contents

Summary of Contents for Hayward Sheer 500
-
Page 1: Table Of Contents
Mechanical......3 Plumbing........5 ELectrical Wiring.....6 Operation......10 Maintenance......13 Replacement Parts....13 Warranty........14 WFS512B6LED WFS548B6LED WFS518B6LED WFS560B6LED WFS524B6LED WFS572B6LED WFS536B6LED WFS584B6LED LFCUS11100 LFCUS11150 Hayward Industries 400 Connell Drive, Suite 6100 Berkeley Heights, NJ 07922 Phone: (908) 355-7995 www.hayward.com USE ONLY HAYWARD GENUINE REPLACEMENT PARTS... - Page 2 WARNING - Electrical shock hazard. Damage to wiring can cause severe injury or death. To reduce the risk of electric shock replace damaged wiring immediately. Locate conduit to prevent abuse from lawn mowers, hedge trimmers and other equipment. SAVE THESE INSTRUCTIONS USE ONLY HAYWARD GENUINE REPLACEMENT PARTS...
-
Page 3: Introduction
It is recommended to keep the unit in its original packaging until the site is prepared for installation. What's Included Refer to the table below for a list of all items included with the Hayward Sheer 500. Included Sold Separately... -
Page 4: Mechanical
Position the board 0.625" below the top of the bond beam. The edge of the Waterfall lip will rest on the top of the board. USE ONLY HAYWARD GENUINE REPLACEMENT PARTS USE ONLY HAYWARD GENUINE REPLACEMENT PARTS... - Page 5 Waterfall unit and the deck surface, allowing access to the LED light. Deck Lid Cover Ext. Deck Lid Collar 3" PVC Extension Pipe Waterfall Front View Water Line Electrical Line Water Line USE ONLY HAYWARD GENUINE REPLACEMENT PARTS USE ONLY HAYWARD GENUINE REPLACEMENT PARTS...
-
Page 6: Plumbing
It is recommended to plumb a flow control valve in the water supply line in order to control the flow of water to the Waterfall and achieve the desired water effect. If using a variable speed pump, then a flow control valve may not be needed. USE ONLY HAYWARD GENUINE REPLACEMENT PARTS... -
Page 7: Electrical Wiring
Waterfall system to prevent water from filling the transformer/junction box. Automation Control Relay Hayward LJBUY00PP1 Deck Lid Junction Box Collar & Cover LED Light Total distance of cable between LED Light and Transformer should not exceed 150 feet. USE ONLY HAYWARD GENUINE REPLACEMENT PARTS... - Page 8 A junction box is useful if multiple Waterfall LED Lights will be wired together. To make connections easier, it is recommended to use Wago 221 Series lever nuts (pictured below) but standard electrical wire nuts can also be used. To LED Light From Transformer USE ONLY HAYWARD GENUINE REPLACEMENT PARTS...
- Page 9 Step 3: Low Voltage Transformer Wiring Refer to the wiring diagram below for Hayward 300W transformers. For other transformers, refer to the instructions. Be sure to follow all NEC and local codes when wiring. Use 14V tap (blue) Ground (green) Connection L1 &...
- Page 10 When wiring to a wall switch or automation control, follow the directions in the manual provided with that product. When wiring to a Hayward Omni control relay or an Omni Smart Relay, refer to the graphics below. Be sure to follow all NEC and local codes when wiring.
-
Page 11: Operation
To activate the light, simply turn on the switch powering the transformer. To deactivate the light, turn off the switch. To advance to the next light program (fixed color or color show), turn the switch off, then back on again within 10 seconds. USE ONLY HAYWARD GENUINE REPLACEMENT PARTS... - Page 12 15 seconds for quick clear view of your pool, then go to the last fixed color or color show that was running. Note: Do not power cycle the light during the first 15 seconds of white to preclude risk of loss of synchronization with other connected lights. USE ONLY HAYWARD GENUINE REPLACEMENT PARTS...
- Page 13 White / Purple Omni Direct Once the light is blinking in the sequence corresponding to the desired light mode, turn off light for 1 minute. The light should now be in the desired mode. USE ONLY HAYWARD GENUINE REPLACEMENT PARTS...
-
Page 14: Maintenance
6. Install the new light by following the Electrical Wiring steps starting on page 7. 7. Restore power to the light and turn it on to verify operation. Replacement Parts [insert replacement parts table] [insert replacement parts diagram] USE ONLY HAYWARD GENUINE REPLACEMENT PARTS... -
Page 15: Warranty
Aqua Plus and SwimPure chlorination products to be free of defects in materials and workmanship, under normal use and service, for a period of three (3) years. Hayward also warrants its Aqua Trol chlorination products to be free of defects in materials and workmanship, under normal use and service for a period of one (1) year. - Page 16 Hayward is a registered trademark of Hayward Industries, Inc. © 2022 Hayward Industries, Inc. All other trademarks not owned by Hayward are the property of their respective owners. Hayward is not in any way affiliated with or endorsed by those third parties.


Need help?
Do you have a question about the Sheer 500 and is the answer not in the manual?
Questions and answers