Table of Contents
Advertisement
Quick Links
Advertisement
Table of Contents
Troubleshooting

Subscribe to Our Youtube Channel
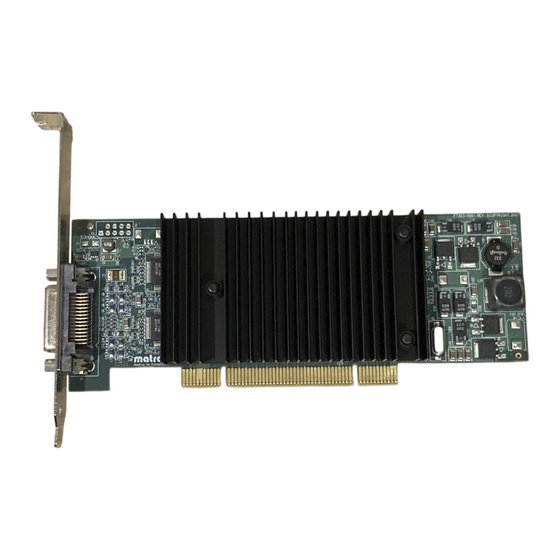
Related Manuals for Matrox RAD LPX Series


Summary of Contents for Matrox RAD LPX Series
- Page 1 Matrox RAD LPX Series User Guide 10888-301-0215 2010.07.27...
-
Page 2: Table Of Contents
Accessing PowerDesk..........................10 Monitor setup ............................11 Portrait monitor setup..........................12 Multi-display setup ..........................12 Color palette............................13 More PowerDesk information........................13 Troubleshooting......................14 Basic procedures .............................14 Main troubleshooting..........................16 Extra troubleshooting..........................19 Product information ....................27 More information ....................29 Warranty .........................30 Index ........................33 Matrox RAD LPX Series – User Guide... -
Page 3: Overview
Set up the software – see “Display setup”, page * The hardware supplied with your Matrox product may vary depending on the SKU or part number of your product. For more information, contact your Matrox representative. Matrox RAD LPX Series – User Guide... -
Page 4: Hardware Installation
Hardware installation This section describes how to install your Matrox card. If your Matrox card is already installed in your computer, skip to “Connection setup”, page 8. For information specific to your computer, like how to remove its cover, see your system manual. - Page 5 Open the computer and remove your existing graphics card (if any). (If graphics hardware is built into the motherboard of your computer, this graphics hardware should automatically disable itself after your Matrox card is installed. For more information, see your system manual.)
- Page 6 Secure the bracket of your Matrox card to the computer frame. Your Matrox card is now installed. Before restarting your computer, connect your monitor or monitors (see “Connection setup”, page 8). After connecting, restart your computer and install your Matrox software (see “Software setup”, page...
-
Page 7: Replacing Brackets On A Low-Profile Graphics Card
Replacing brackets on a low-profile graphics card Matrox low-profile graphics cards ship with standard (ATX) brackets compatible with most systems. The following explains how to change brackets on your Matrox product. Remove the current bracket from your Matrox graphics card by removing the nuts on either side of the monitor connector. -
Page 8: Connection Setup
(DVI-D: digital) (DVI-I: analog/digital) you’re using one of these monitors with your Matrox product, make sure it’s configured to use the correct type of input. For more information, see your monitor documentation. Note: Whenever you change your connection setup, make sure you’re using the correct connectors and that all connectors are properly fastened. - Page 9 Connect your second monitor to the secondary DVI connector ( ) of the dual-monitor cable. Depending on the connector type of your monitor, connect the same way as in step 2. Your Matrox card is now installed. Restart your computer and install your Matrox software (see “Software setup”, page 10).
-
Page 10: Display Setup
Display setup Windows 7/Vista/XP – Your Matrox display driver includes Matrox PowerDesk software. This software helps you get the most out of your Matrox card. This section has important information on how to configure your display settings using Matrox PowerDesk software. -
Page 11: Monitor Setup
Monitor setup Before changing your display resolution, color palette, or other Matrox PowerDesk settings, make sure correct software monitor settings are selected. If you have a Plug-and-Play (DDC) monitor, correct settings are usually automatically selected. The following explains how to make sure your monitor settings are okay. -
Page 12: Portrait Monitor Setup
Some portrait monitors are merely landscape monitors physically rotated 90 degrees. These monitors don’t rotate the monitor signal and don’t report support for portrait resolutions. In this case, use Matrox software to rotate the display to match the monitor orientation. To rotate your display with Matrox software: From the main menu of PowerDesk (see “Accessing PowerDesk”, page... -
Page 13: Color Palette
Apply computer. Note: With your Matrox RAD LPX Series product, DICOM-compliant grayscale output is intended primarily for digital monitors. For analog monitors, the accuracy and consistency of the grayscale setup is dependent on your monitor and its calibration. More PowerDesk information... -
Page 14: Troubleshooting
. (* Depending on Matrox PowerDesk-SE Matrox PowerDesk-HF Uninstall your version and configuration of Windows, this part of the step may not be necessary.) Restart your computer for the changes to take effect. 14 Matrox RAD LPX Series – User Guide... - Page 15 Updating the BIOS of your graphics hardware Windows 7/Vista/XP – For advanced users – If your primary display is usable: Download the latest BIOS update for your Matrox product. Matrox makes new BIOS updates available on the Matrox Technical Support Web site (www.matrox.com/graphics/en/support/drivers).
-
Page 16: Main Troubleshooting
Your Matrox card may not be properly installed. Solution Make sure your Matrox card is properly installed. Specifically, make sure the card is firmly inserted in its expansion slot and that all connections to it are firmly in place. For more information, see “Hardware installation”, page... - Page 17 Cause The BIOS of your Matrox card may need to be updated or restored. Solution For advanced users – If you have another VGA-compatible graphics card, you can try resetting the BIOS of your Matrox card (see “Updating the BIOS of your graphics hardware”, page 15).
- Page 18 (blank screen, rolling or overlapping screen images) Cause Analog monitors only – The Matrox display driver may be trying to use settings your monitor doesn’t support. This can happen if a monitor was never selected in the software and the display resolution was changed to one your monitor doesn’t support, or if the monitor connected to your computer was changed without changing it in the software.
-
Page 19: Extra Troubleshooting
The following are extra troubleshooting items related to graphics hardware. Problem Windows XP ‘Screen resolution’ slider is disabled Cause While using , your Matrox product supports only 8-bit display modes. With Legacy Gray these display modes, Windows XP disables the slider. Screen resolution... - Page 20 Web site. Cause Files on your system may have been deleted or corrupted. Solution Uninstall, then reinstall Matrox software (see “Uninstalling Matrox software”, page 14). 20 Matrox RAD LPX Series – User Guide...
- Page 21 VGA adapter, make sure they’re enabled. If your computer doesn’t have these options, you may be able to manually assign an IRQ to your Matrox card using the BIOS setup utility. For more information on the BIOS setup utility of your computer, see your system manual or contact your system manufacturer.
- Page 22 If you don’t need to use the graphics card that’s controlling your primary display, remove it from your computer. If your primary display is controlled by the motherboard of your computer, see your system manual for information on how to disable this graphics controller. 22 Matrox RAD LPX Series – User Guide...
- Page 23 (Software doesn’t work with a certain graphics card, or another graphics card doesn’t work at all) Cause If you have different models of graphics cards in your computer, your Matrox display driver may not support all the graphics cards in your computer. Solution Under Windows 7/Vista/XP, a display driver may support one or more graphics cards.
- Page 24 Effects Disable one or more features. Click Solution If possible, update your Matrox display driver. For more information, contact the computer or monitor vendor who provided your Matrox card. Solution Windows 7/Vista/XP – Disable Matrox hardware acceleration: Windows 7 –...
- Page 25 Right-click your Windows desktop background, then click Screen resolution Select the display you want to disable. Next to , select Multiple displays Disconnect this display Click for your changes to take effect. Apply Matrox RAD LPX Series – User Guide 25...
- Page 26 If display scaling isn’t supported, the display may use only a portion of your screen. Solution Select the highest display resolution available. This generally results in better image quality. 26 Matrox RAD LPX Series – User Guide...
-
Page 27: Product Information
Notes For a list of supported monitor and partner solutions, see www.matrox.com/graphics/med. Your Matrox card is 100% VGA compatible and supports all VESA standards: VBE 2.0 (Super VGA modes), DPMS (energy saving), DDC-2B (Plug-and-Play monitor), and DDC-CI. 3D acceleration is only available with a 16- or 32-bit color palette, or while using... - Page 28 Digital monitor information TMDS (Transition Minimized Differential Signaling) encoding DDWG (Digital Display Working Group) compliant DVI connector EDID (Extended Display Identification Data) 1.2, 1.3 (without the extended data block), and 2.0 support 28 Matrox RAD LPX Series – User Guide...
-
Page 29: More Information
Your dealer is familiar with your complete system. In the case of hardware warranty assistance, the product must be returned to the dealer, who will return it to Matrox. If your Matrox product was provided by your computer manufacturer, contact this manufacturer. For contact information, see your computer documentation or contact the vendor. -
Page 30: Warranty
(1) year from the date of purchase. This warranty applies only to the original end- user purchaser and is non-transferable. Conditions and limitations of Matrox’s warranty are stated below. 2. Matrox’s limited warranty covers only those defects which arise as a result of normal use of the hardware and does not apply to any: a. - Page 31 2. If you are still experiencing difficulties, please contact your dealer where you purchased your Matrox product. 3. If you must return a Matrox product, leave the configuration as it was when you were using it, and leave all identification stickers on the product. Pack the product in its original box and return to your Matrox dealer where the product was purchased, together with your proof of purchase.
- Page 32 Making telecommunication data transmissions of the Software. Matrox reserves the right to terminate this license if there is a violation of its term or default by the Original Purchaser. Upon termination, for any reason, all copies of the Software must be immediately returned to Matrox, and the Original Purchaser shall be liable to Matrox for any and all damages suffered as a result of the violation or default.
-
Page 33: Index
Customer support Software Low-profile bracket – Setup Display Primary – Monitor Setup – Troubleshooting – Connection setup Portrait – Settings – Setup Expansion slots VESA ExtendiGray Online documentation Grayscale setup Warning – Warranty Matrox RAD LPX Series – User Guide 33... - Page 34 FCC Compliance Statement Remark for the Matrox hardware products supported by this guide This equipment has been tested and found to comply with the limits for a Class A digital device, pursuant to Part 15 of the FCC Rules. These limits are designed to provide reasonable protection against harmful interference when the equipment is operated in a commercial environment.
- Page 35 A. (Español) Información para usuarios europeos – Declaración de conformidad Observación referente a los productos de hardware de Matrox apoyados por este manual Estos dispositivos cumplen con la directiva de la CE 89/336/EEC para dispositivos digitales de Clase A. Dichos dispositivos han sido sometidos a prueba y se ha comprobado que cumplen con las normas EN55022/CISPR22 y EN55024/CISPR24.
- Page 36 Copyright © 2010 Matrox Graphics Inc. • (English) All rights reserved. • (Français) Tous droits réservés. • (Deutsch) Alle Rechte vorbehalten. • (Italiano) Tutti i diritti riservati. • (Español) Reservados todos los derechos. Trademarks • Marques déposées • Warenzeichen • Marchi registrati •...
- Page 37 However, no responsibility is assumed by Matrox Graphics Inc. for its use, for its reproduction and/or distribution, in whole or in part;...
- Page 38 Matrox Graphics Inc. 1055 Saint Regis Boulevard Web site: www.matrox.com/graphics Dorval, Quebec, Canada H9P 2T4 Technical support: North America: 1-800-361-1408 www.matrox.com/graphics/support International: (514) 822-6000 To locate the sales office nearest you, visit Email: graphics@matrox.com www.matrox.com/graphics/contact...
Need help?
Do you have a question about the RAD LPX Series and is the answer not in the manual?
Questions and answers